Product marking template (PMT) application
The Product marking template (PMT) application is used as a tool to generate text to mark Product units (LCM) during production. The Product marking template (PMT) will automatically build a marking text for a product unit using the template, if the Product (ART) is added to the Applied products tab. The template has parameters, that if added, will include fields from the RamBase database.
The marking text created from template can be found as a Marking text in the Life cycle management (LCM) application. It can also be found in the Marking column in the Work order operation (WOO) application, here the users can view and edit Product marking text for selected product units and the whole template can be found in the Product marking specification context menu option.
The Product marking template (PMT) application can also be opened from the Product (ART) application. Select the product from the list, click the Properties tab and then the Production sub-tab. The Applies to product marking templates checkbox indicates if a template is relevant for the product. The user can also click the related View icon to open the specific product marking template.
Overview
The application is divided into:
The Product marking template list area
The Product marking template details area
Context menu options
The Product marking template list area
The Product marking template area is filter based and can list all intended templates.
The header includes a search field, the Filter builder icon and the Column settings icon.
The list includes all filtered templates and is divided into columns. The user can create new product marking templates by clicking the Create new product marking template button in the footer.
Quick search
The user can quickly search for a template. Click the Quick search icon to include or exclude the following in the search:
Product marking template name
Applied product name
Applied customer name
Applied customer first name
Filter builder
The Filter builder includes a set of predefined filters, listed below. A selected and active predefined filter will be placed underneath the search field and marked with color orange. A selected and inactive field will still be placed underneath the search field, but marked with color gray. Click the Remove icon to remove the predefined filter.
Active - This filter will list all Product marking template lists in Status 4 - Active.
New - This filter will list all Product marking template lists in Status 1 - Pending registration.
New and active - This filter will list all Product marking template lists in Status 1 - Pending registration and Status 4 - Active.
The user can also create saved filters by combining Field, Operator and Value in the Create custom filter area. Click the Save filter button to add the custom filter to the My saved filters area. A selected custom filter will be displayed underneath the search bar like a predefined filter.
Column settings icon
Click the Column settings icon to open the column settings. Here the user can add and remove columns from the Product marking template list area, Export to excel, Reset to default view and Include custom fields.
List
The list includes all included columns and filtered templates. The user can create a new product marking template by clicking the Create new product marking template button.
Column/buttons | Description |
|---|---|
ST | Displays the status of the product marking template.
|
Name | Displays the Product marking template name. |
Create new product marking template button | Create a new product marking template manually, by clicking the Create new product marking template button. This will open a popup where the user can click the Name field and type the name of the template. A newly created product marking template will be set in Status 1 - Pending registration. |
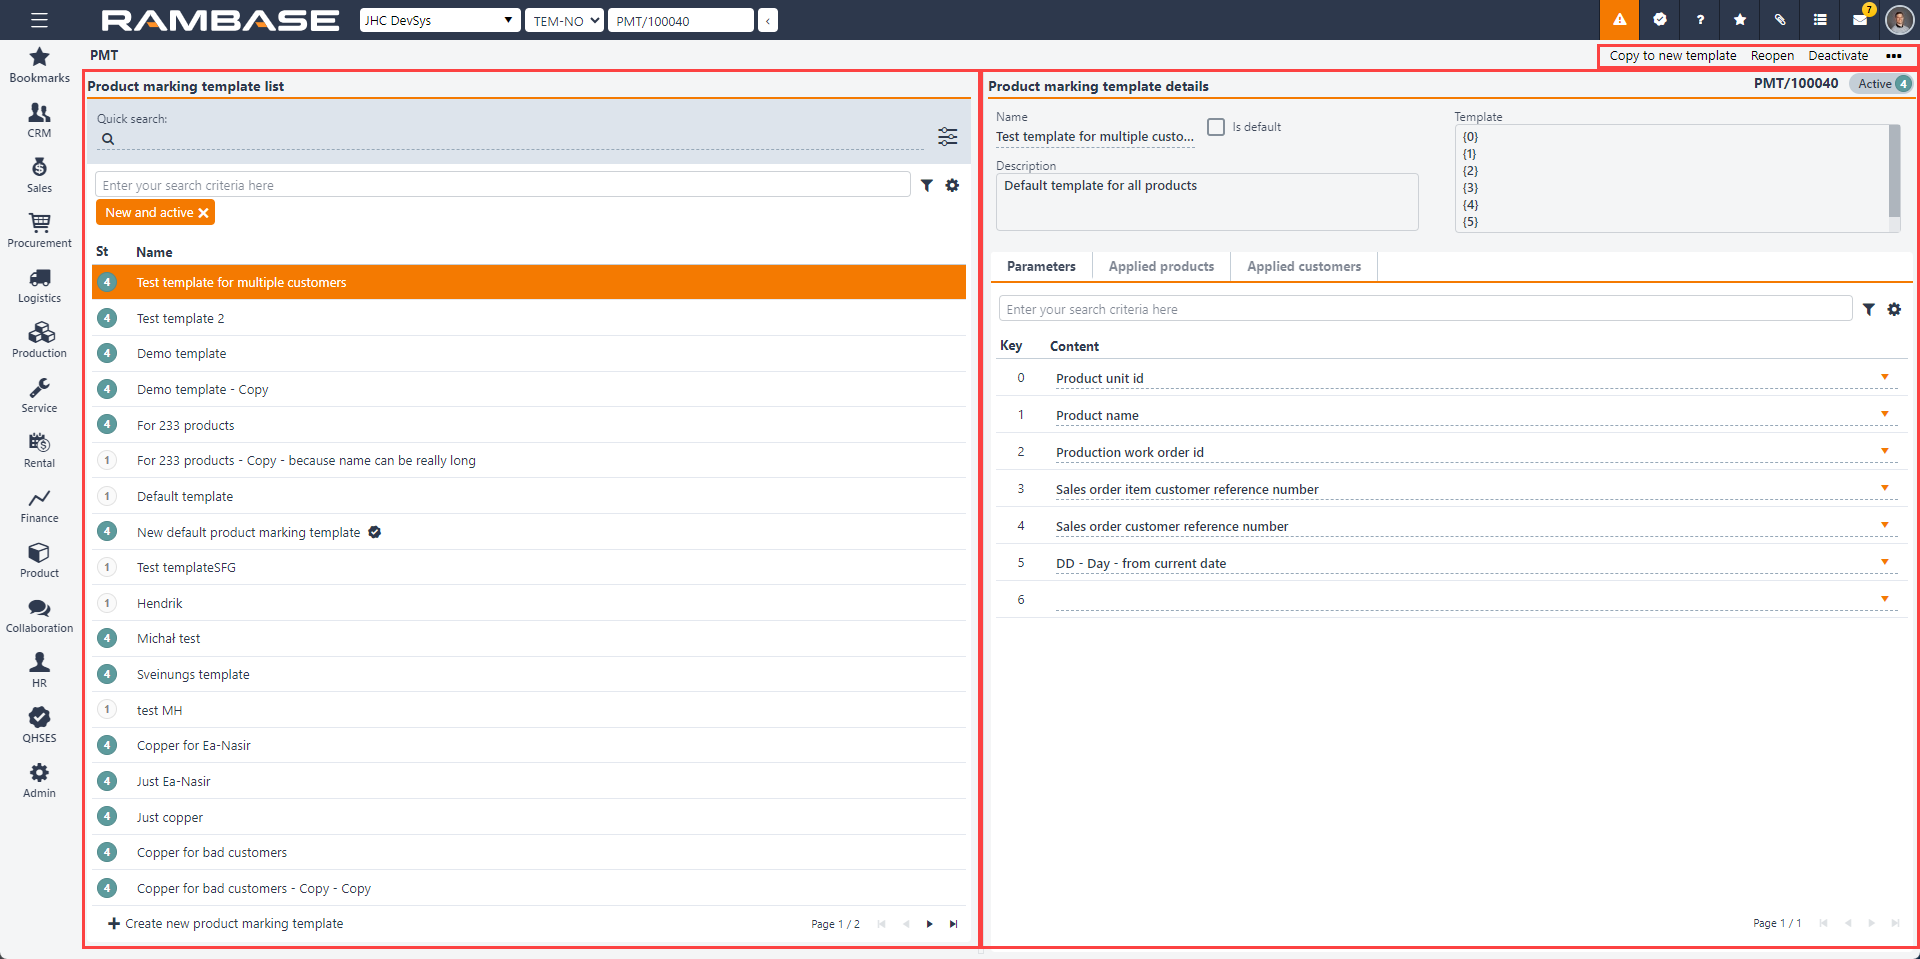
The Product marking template details area
The details area is used to handle the specific template, most notable building the template and applying products and customers to the template.
Priority - Applied customer over applied product
In situations where one template is applied to the customer and a different template is applied to the product, the Product marking template (PMT) applied to the customer will be prioritized over the Product marking template (PMT) applied to the product.
Name field - Product marking template name. This can be edited.
Is default checkbox - To set the selected product marking template as default for all products, check the Is default checkbox.
Description free text field - Product marking template description.
Template field - Product marking template text. Type a number from 0 to 80 in curly brackets (e.g. {1}) to create an empty parameter. The parameter will be given a key, and this key can be given content in the Parameter tab.
To add content to a parameter, click the Parameters tab and then select a value from the dropdown menu list.
Tabs
Parameters tab
Under the Parameters tab, the data fields in RamBase are linked.
Fields | Description |
|---|---|
Key | Product marking template parameter key. The key references the value added to the Template field. |
Content | Under Content there is a dropdown menu that lists:
|
Applied products tab
The Applied products tab allows users to Apply a product to the template manually by clicking the Add new product button.
Fields | Description |
|---|---|
Product Id | Displays the Product (ART) identifier. Click the View icon to open the Product (ART) application to view and edit details on the product. |
Product name | Displays the name of the Product (ART). |
| To remove a product from the template, click the Remove icon. Verify the choice in the popup by clicking OK or Cancel. |

Applied customers tab
The Applied customers tab allows users to apply a customer to the template manually by clicking the Add new customer button. This will open a popup where the user can select a customer from the Customer lookup dropdown menu, and click the Create button.
The template will be default for all Product units (LCM) delivered to the applied customer(s).
Column | Description |
|---|---|
Customer Id | Displays the Customer (CUS) identifier. Click the View icon to open the Customer (CUS) application to view and edit details on the customer. |
Customer name | Displays the customer's name, set in the Customer (CUS) application. |
| To remove a customer from the template, click the Remove icon. Verify the choice in the popup by clicking OK or Cancel. |
Context menu options
The context menu options are available from the header by clicking the Context menu options icon.
 - Context menu options icon. To view the context menu options, click the Context menu options icon.
Context menu options | Description |
|---|---|
Copy to new template | To copy a template to a new template in Status 1 - Pending registration, select the Copy to new template option. Available in the following statuses:
|
Delete | To delete a product marking template, select the Delete option. Available in the following status:
|
Reopen | To reopen an active product marking template and make changes, select the Reopen option. This will set the product marking template in Status 1 - Pending registration. Available in the following statuses:
|
Deactivate | To deactivate an active product marking template, select the Deactivate option. This will set the product marking template in Status 9 - Deactivated. Note that a deactivated product marking template can not be activated or reopened. Available in the following statuses:
|
Activate | To activate a product marking template in Status 1 - Pending registration, select the Activate option. This will set the product marking template in Status 4 - Active. Available in the following status:
|
Marking text in the Life cycle management (LCM) application
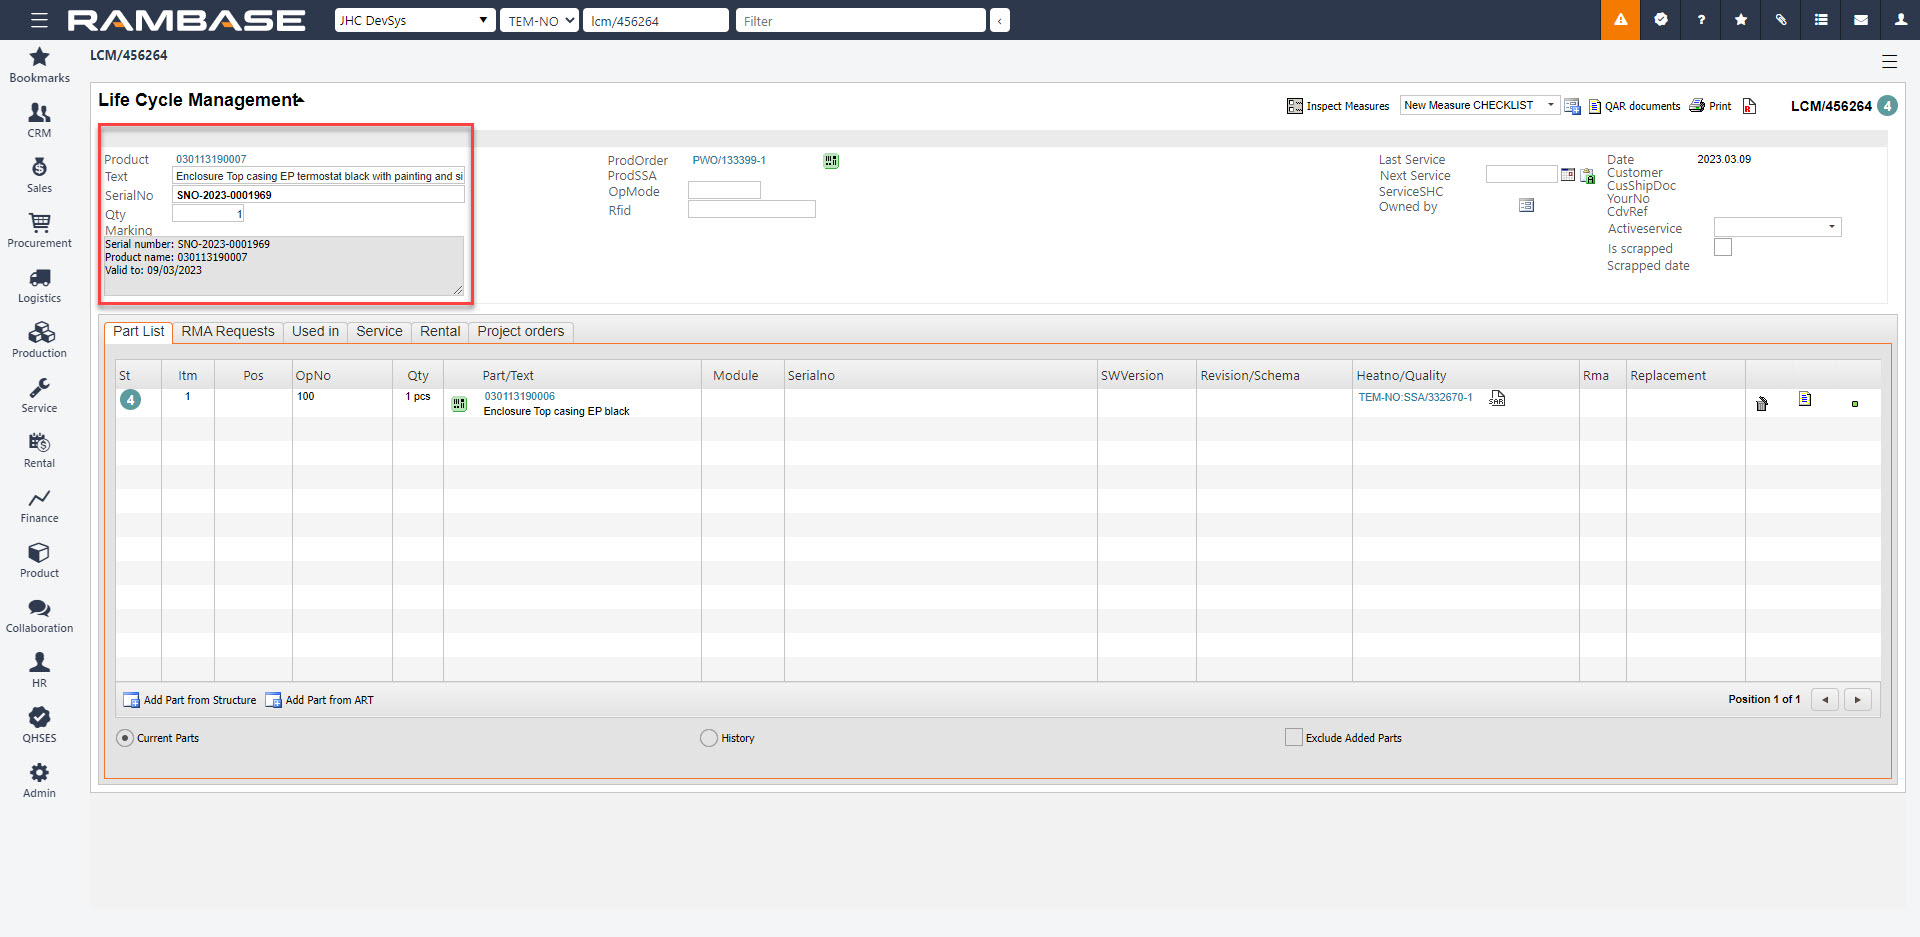
The Template is later generated into a Marking text in the Life cycle management (LCM) application, in this example LCM/456264, because product 030113190007 is applied to the Template in the Product marking template details area in the Product marking template list (PMT) application, PMT/100041 in this case.