Adding multiple periods
If a period extends over several days, it is possible to simplify the registration:
Start in the Work hours log (WHL) application.
Click the Add multiple periods button.
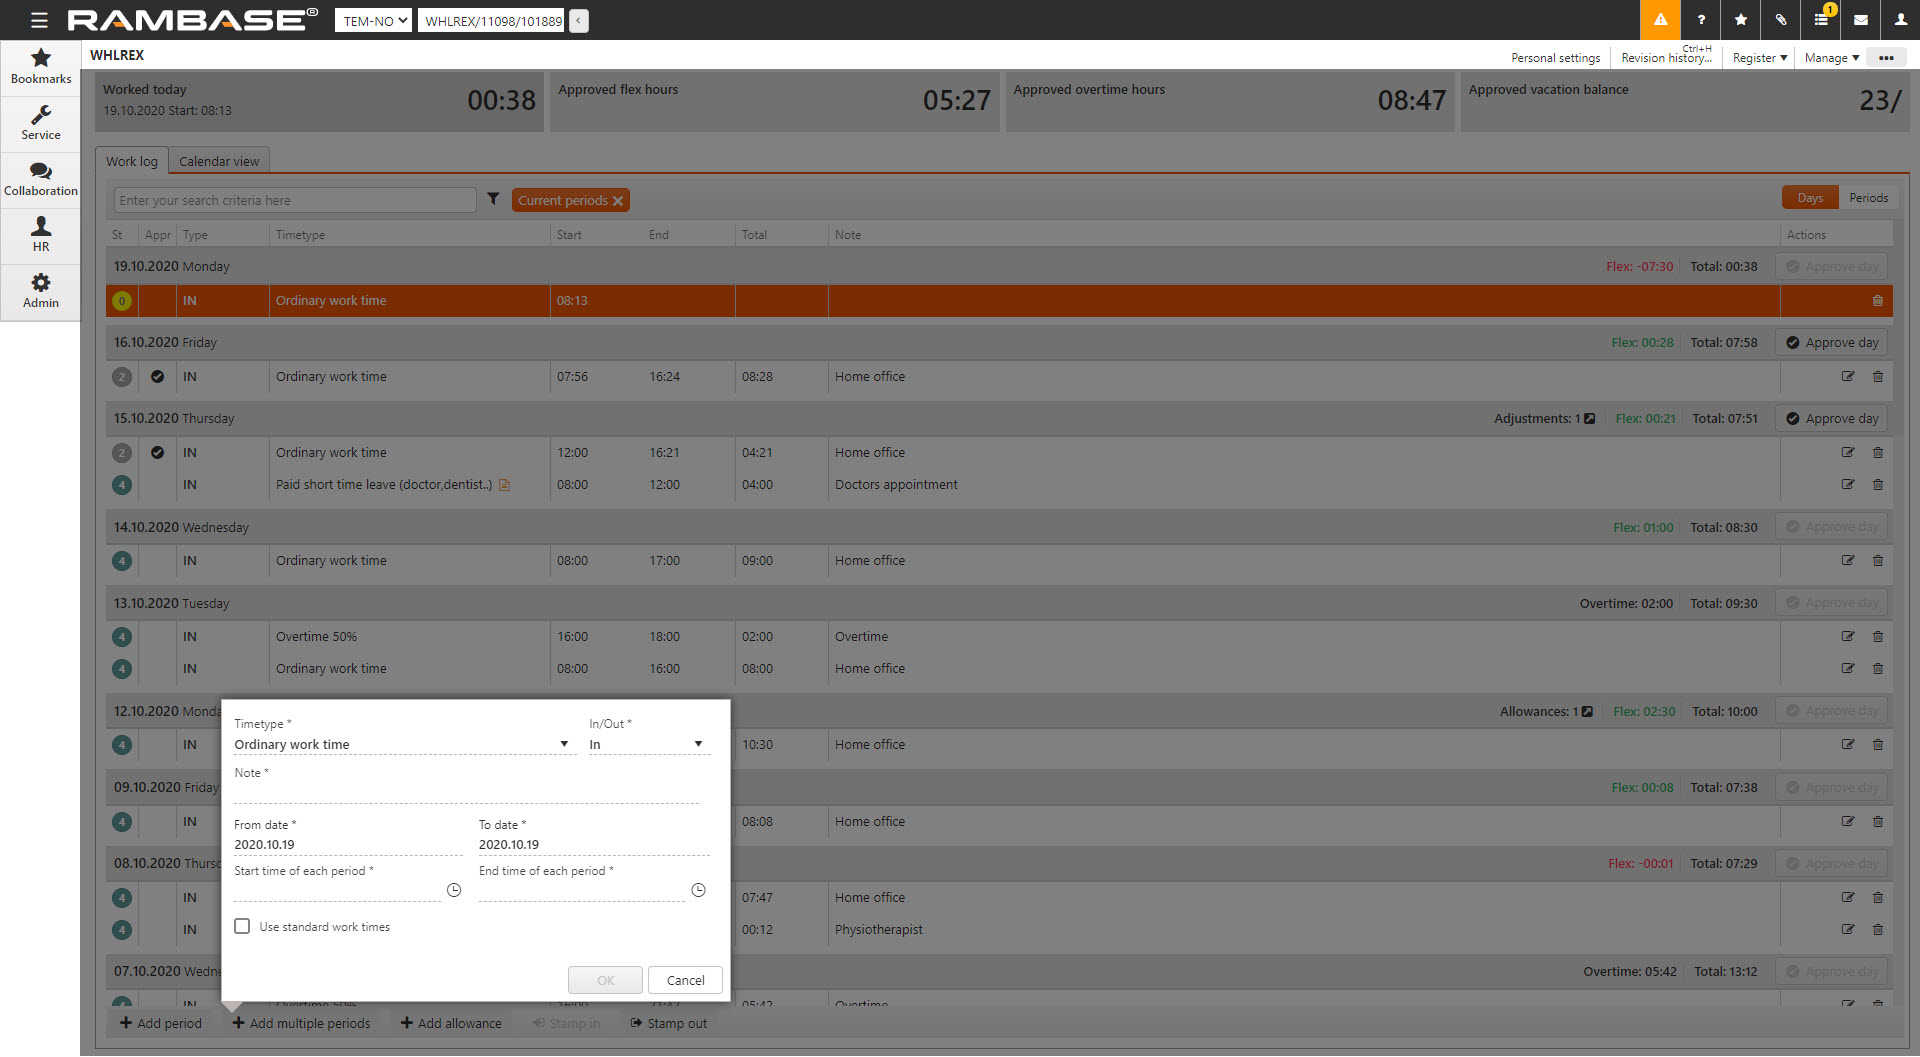
Enter data in the popup:
Select Timetype that best describes the event in the Timetype field.
Add a note in the Note field to provide additional information about the event.
Select the first date of the multiple periods in the From date field.
Select the last date of the multiple periods in the To date field.
Set the start time of each period in the Start time of each period field, or click on the Use standard work times checkbox.
Set the end time of each period in the End time of each period field, or click on the Use standard work times checkbox.
Click the OK button to enter the new periods.
Entries that are inserted by the application are set in status 2, while entries that are inserted or changed manually are set in status 3. All status 2 entries require approval by the user, while those in status 3 require approval by the manager.