Install Print Connector
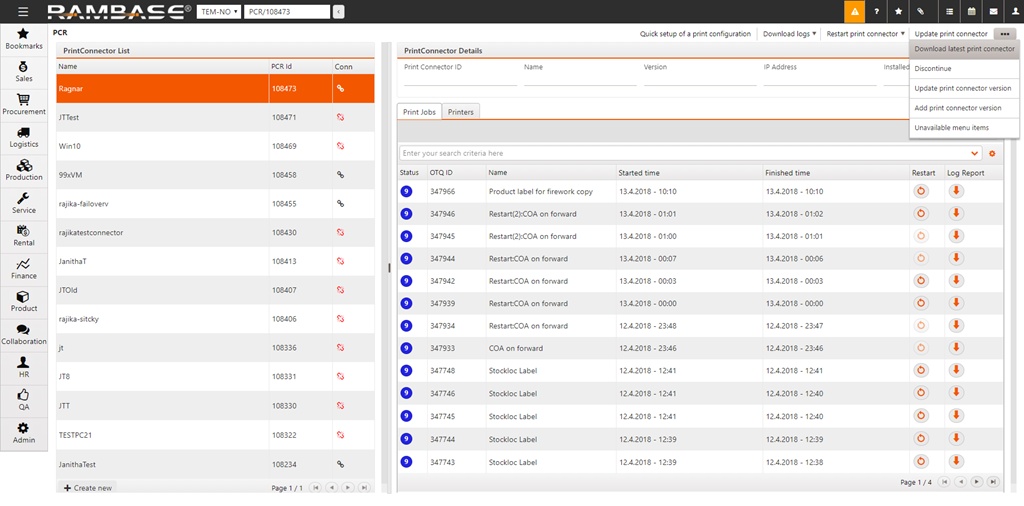
Type PCR in the program field in RamBase and press ENTER to open the Print connector (PCR) application. There are two ways to install the print connector, either download or use the Create new function.
It is recommended that the print connector is downloaded on a print server, but it can be downloaded locally on a computer. The computer must be turned on at all time.
There is a requirement for it to be installed on a Windows-based server or computer.
Install from download
Click the Download latest print connector in the context menu and download the latest version of the print connector. The download will start in the browser.

The print connector is installed using the executable file. The installation is guided with an installation wizard that will take you through the installation step by step.
Locate the installation file and double click the downloaded executable file to start the installation wizard.
Follow the steps the wizard goes through.
When prompted for username and password, enter your RamBase credentials.
When prompted to create a print connector name, choose a suitable name. Your company may have naming conventions for print connectors so the superusers can have a clear overview, so choose accordingly.
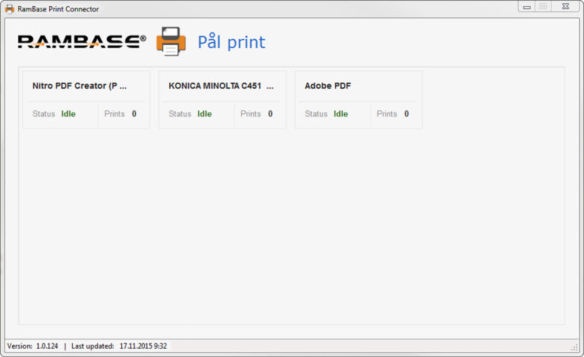
After the installation is finished, you will see an overview over all your installed printers.

Install from Email
To install the print connector from the PCR application, click the Create new button in the left hand corner.
Give the print connector a name.
Enter a valid email address. The download link and License key will be sent to this email.
Click the Download button in the email and follow the step-by-step instructions.
Unpack the downloaded zip-file and follow the steps stated in Install from download from step 2.