Measuring Tools (MET)
The application Measuring Tools (MET) contains all measuring tools, including discontinued. This application enables you to create new measuring tools, create purchase orders for measuring tools, reporting or creating a service order for measuring tool service.
Creating a new measuring tool
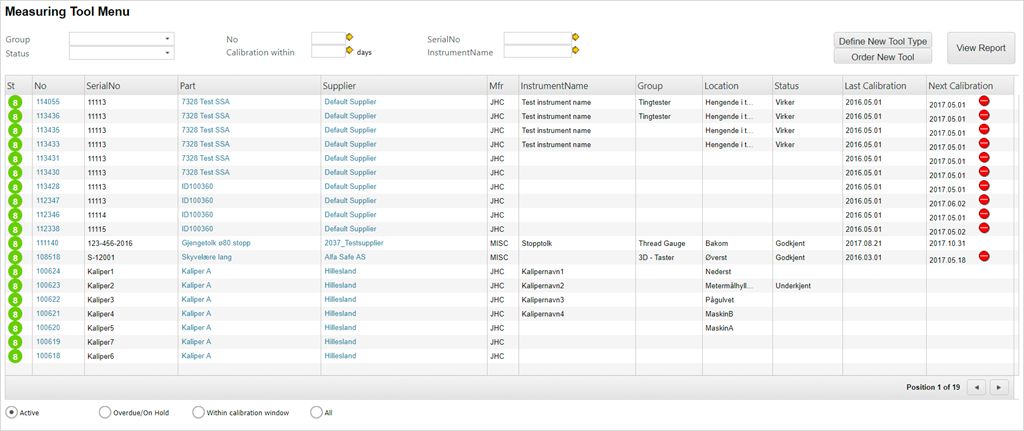
Write MET in the program field and press ENTER. This opens the Measuring Tool Menu, where all the different measuring tools are listed.

Click the Define New Tool Type button. This opens a popup where you can define your new tool. Class is pre-filled in with CLASS=WT, which is the measuring tool class. Fill in the necessary information:
Part: name of the measuring tool
Mfr: name of the manufacturer
ProdGroup: classification of the tool
Text: description of the tool (not mandatory)
Click the Submit button when finished. You will now see the measuring tool in ST:1.
When all information is registered on the tool, use the context menu item Set to ST:4 (Ordinary article).
Purchasing measuring tools
To purchase measuring tools, it needs to be registered in RamBase, with CLASS=WT and in status 4. With these criteria filled, you can start the purchasing process from the Measuring Tools application. Click the Order new tool button and create a Supplier Purchase Order (SPO) as normal.
Register a new measuring tool to stock
There are two methods of registering a measurement tool to stock. The first involves creating a goods reception on an ordered tool and the other is to create the the goods reception document manually (SSA). The document which represents the tool is a Life Cycle Management (LCM) document with DOCTYPE:MET. To create this document, it is the same procedure whether you are creating the goods reception document manually or through purchase.
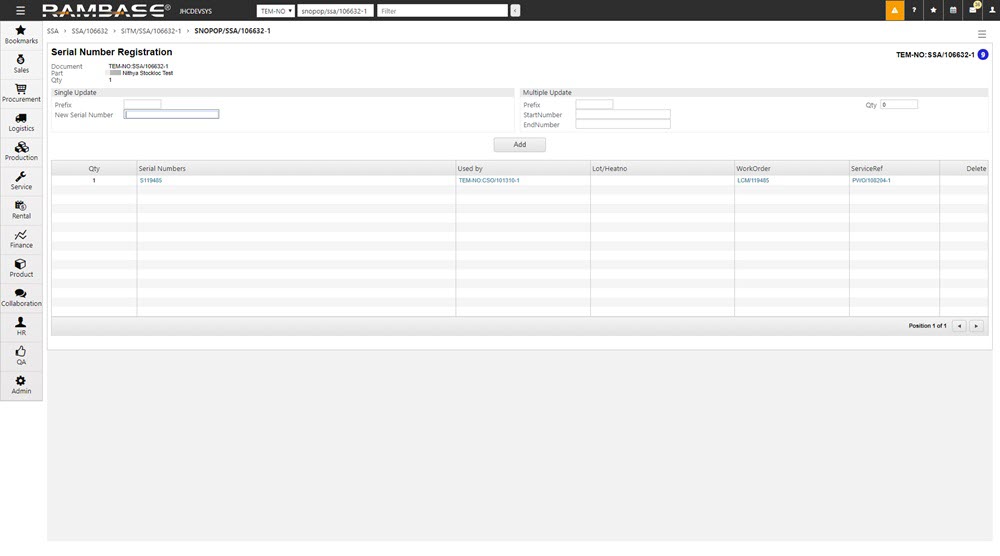
A criteria for the creation of the goods reception document is that it has a serial number registered. To check this, enter the item and use the F12 menu option View Serial Numbers. If there are no serial number, it must be registered. This can be done either as a single update, or more common, by a multiple update.
When the serial number is registerd, return to the item view and use the F12 option Create LCMs based on SNO table, which will create LCM documents for the serial numbers on this item.
All these new LCM documents will receive DOCTYPE=MET and will not be listed in the LCM menu. These LCMs will be treated as MET, and will be available in the MET menu.
Reporting
There is a button called View Report, visible in the top right corner of the Measuring Tools (MET) application. Clicking this will open the measuring tools report, with any restrictions set in the MET menu.
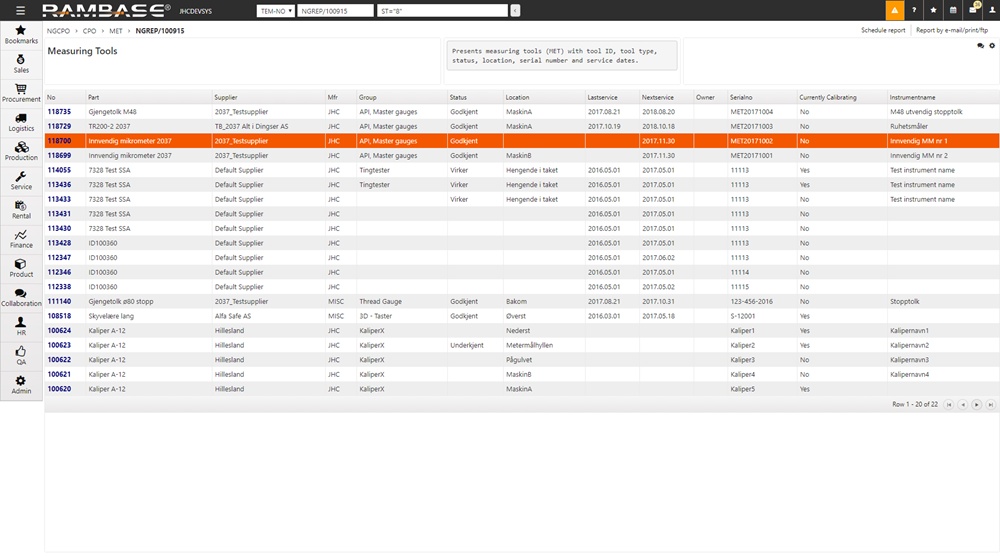
If you highlight one of the item lines and press ENTER, you will enter that specific measuring tool. This report can be scheduled to be delivered daily/weekly/monthly on either email or print.
Measuring tool
Choose a measuring tool in the menu, or report, highlight the item line and press ENTER. This will take you to the specific measuring tool.
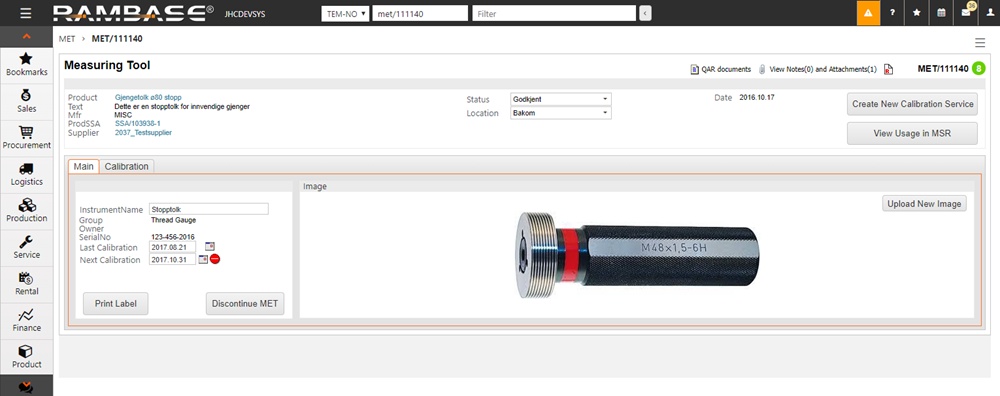
Here you can inspect or add information regarding the measuring tool:
QAR-quality document
Calibration reports/certificates (attachments in the Notes and Attachments function)
Option of creating a calibration job (CSO)
Information regarding the tool (MFR, prodgroup, etc.)
Serial number
Location
Past/next calibration date
Picture of the tool
Creating a calibration order
On the measuring tool view, you will find a button called Create New Calibration Service. Clicking this will open a new popup where you can add customer and currency. After clicking the OK button, proceed in the same way as when making a Service Order (CSO).