Create a new structure
To open the Product (ART) application, find Product in the RamBase menu and then Product management. Click Products to enter the ART application.
Click the Create ART icon to open the Create Article popup.
In the popup:
Enter part name.
Enter text (optional).
Select manufacturer (Mfr).
Choose Class K.
Choose relevant Production Data in the ProdLine field.
Choose either Batch or Unit in the LcmDoc field.
Choose the desired option in the SnowClaim field (Serial number claim). This determines any requirements for serial numbers on the reception and / or shipment of goods.
IN: the serial number table must be updated for all incoming goods (SSA items) for that material/article.
OUT: the serial number table must be updated for all shipment document items (CSA / SRT) for that material/article/product.
PWO: the article/product will be added automatically to LCM Part List for productions where the ART is included in the structure.
Click the Submit button.
Add the necessary information in the same way you would when creating a standard part. There is in addition a checkbox in the Purchase area where you can check if the Kit is an external production. Checking this will remove the Kit from Prodplan, as it is not a planned production, but in the Purchase (PUR) application as it is a procurement situation.
Right click, or press F12, to open the action menu and set the article to the desired status.
Press the KIT icon to the right of the Class field to enter KIT details and the designer.
Here you may input the version name, Revision number and upload any drawing of the structure.
Click the Designer tab.
The Designer contains two panes. The structure definition is always displayed in the left pane. The right pane is used to display parts from the ART-archive, or operations from the OPR archive. To switch archives, use the two icons in the header.
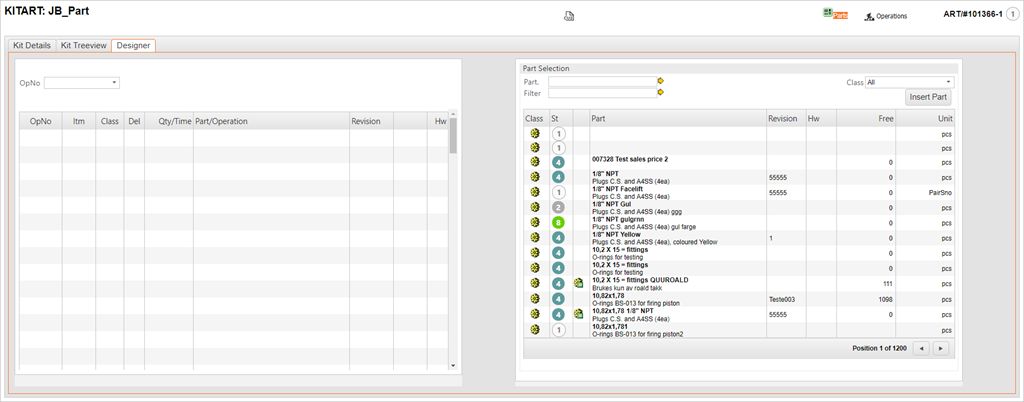
Operations are added first, to have the structure in which articles and parts are added to be included in the structure.
To add new parts to the structure, click a part icon and hold, then drag and drop it at the appropriate position in the structure definition (on the left).
Click the Kit Details folder to start the Approval process.
Click the Request Approval icon and the structure will receive ST:2.
The approval will be sent to the approver who are defined as such. After approval, the structure will receive ST:3.
To activate the structure, click the Activate Version Icon.
A popup will be opened where you are given the option to update the production plan.
Press Activate when you are done to finish the activation of the structure, and the structure will receive a valid status.