Create a new Service Order (CSO)
Service Orders (CSO) are the documents that register the details concerning scheduled service to be performed on an article.
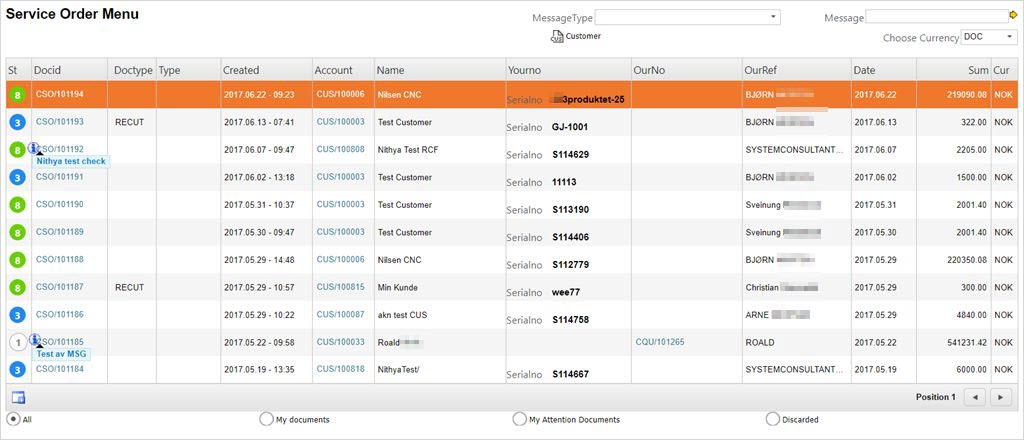
To open the Service Order (CSO) application, find Service in the RamBase menu and then Order handling. Click Service orders to enter the CSO application.
Click the Create CSO icon to open a new CSO.
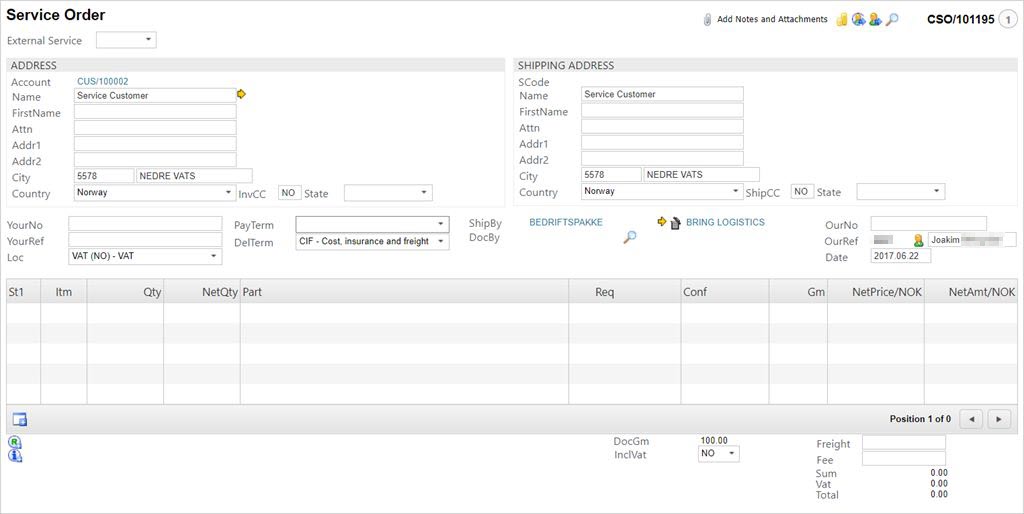
Choose the customer who have ordered the service by entering the name, or parts of it, in the Name field. This will open a popup where you can choose the customer.
Click the Create New icon to add the product which needs service. This opens a popup where you need to add information.
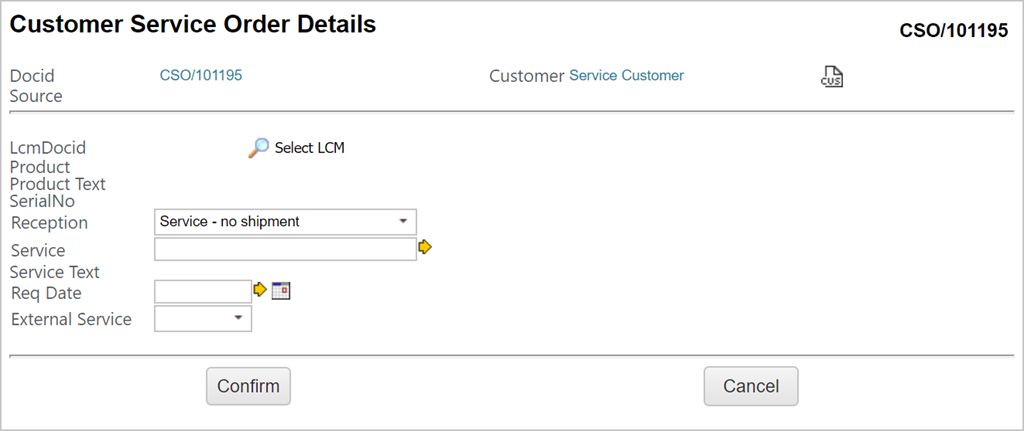
Click the magnifying glass next to the LcmDocid field to search for the desired LCM document. The part which is the object of the service order will most likely have a serial number. Find the desired LCM, highlight the item line and press ENTER.
If there is no LCM document, you can click the Create New icon while in the LCM document list to create a new LCM.
The Reception field indicates if the goods are in stock, or if they are pending stock.
Click the yellow arrow next to the Service field to add a service operation. The service operation(s) listed in the Service Parts folder are the service operations defined on the Article. You may find other service operations to add using the Parts folder, which lists all the service operations.
Add the service date in the Req Date field.
Choose if this is an external service, or an in-house service in the External Service drop down menu. If External service is chosen, the user will get the option to Receive from Supplier on the product (Service order item 2) when the external service is done. (This option will be available in the menu that appears when using the right-click on the computer mouse.)
Click Confirm when you are done.
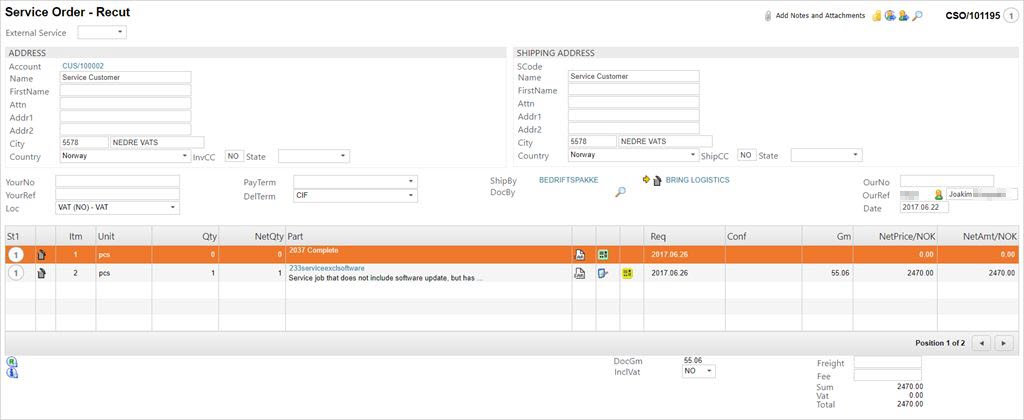
The part is now added as the first item line, with the service operation as the second line.
You can now click the Inspect Sales Calculator on the operations item line to assure the prices are correct.
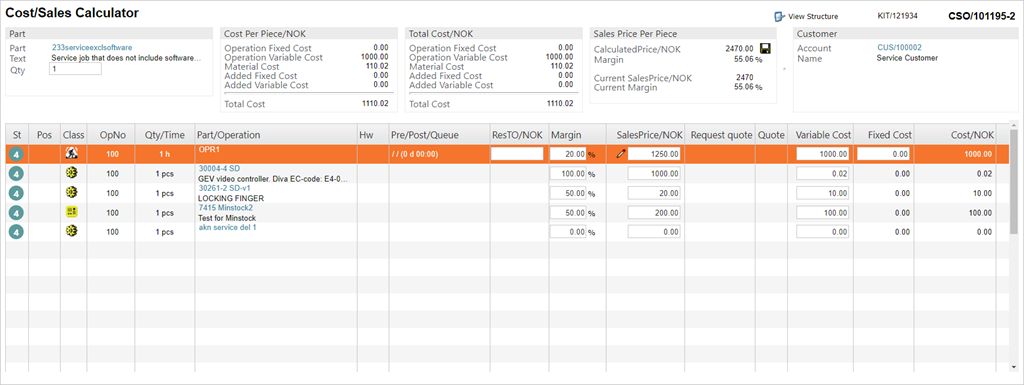
Adjust any price or margin, and then click the Save this price icon in the Sales Price Per Piece box.
Press F12 to open the action menu and choose the option Forward to Customer. This will set the CSO to ST:3 and a service Production Work Order (PWO) document will be created. If there are parts in the structure, they will appear in the third line and below.
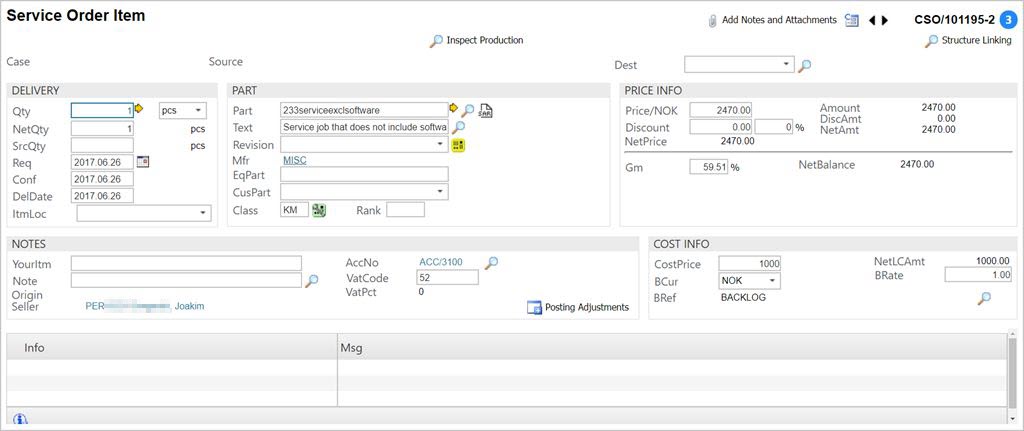
Highlight the service item line (always item line 2) and press ENTER to view the Service Order Item.
Click the Inspect Production icon in the top middle part of the screen to enter the related PWO. Press ENTER on the PWO line.
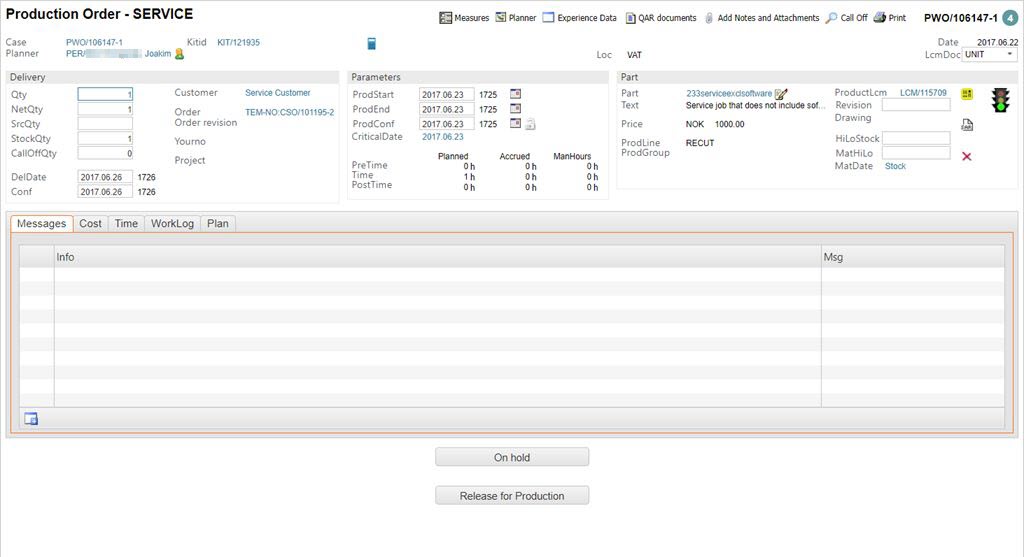
Click the Release for Production button to start the service. The Service PWO will now be set to ST:5.
If you need to change parts in the structure, click the Product LCM link next to the ProductLcm field.
Use the Change Parts icon (two overlapping sheets) to change the parts. Add a serial number if needed.
Click the Inspect links to Stock and Purchase Orders icon to confirm picking of the changed part(s).
Click the Part change complete, waiting to be picked icon in the picked column of the changed part.
Complete the production in a normal fashion.
If you have changed a part without confirming the pick, you will not be able to complete the service.
When the production is completed, click the Complete Service button in the PWO document.
Copying notes in service items
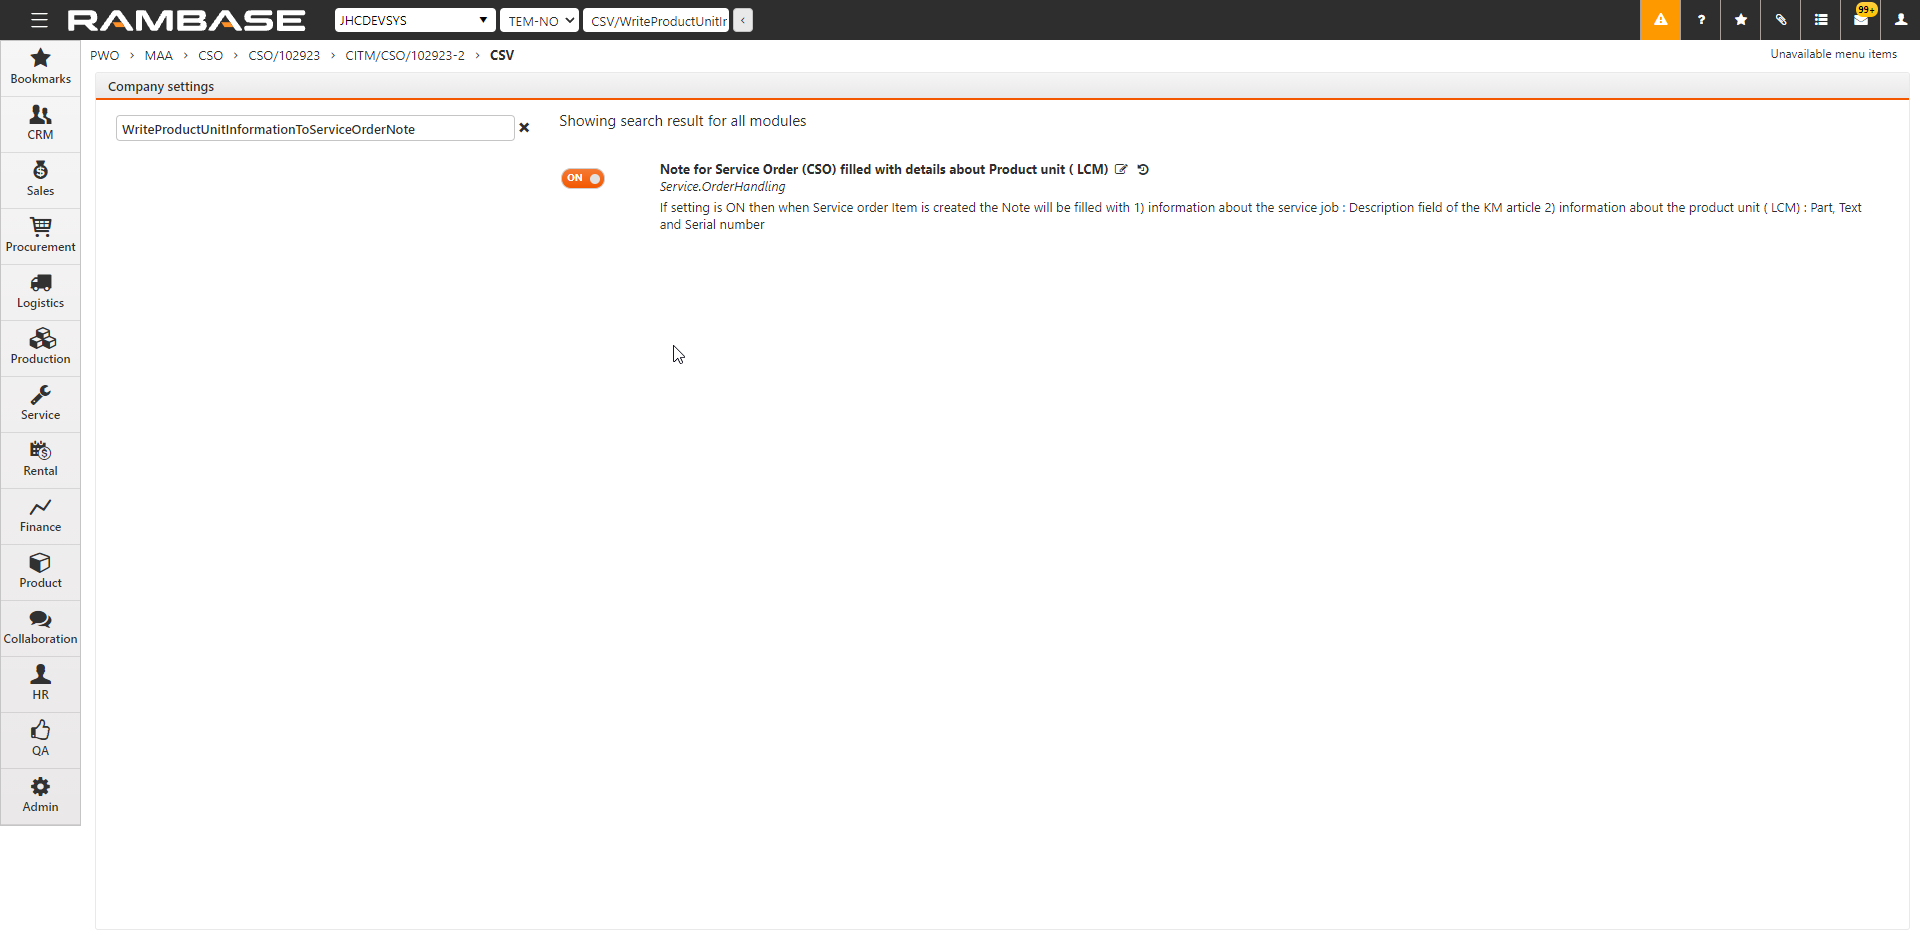
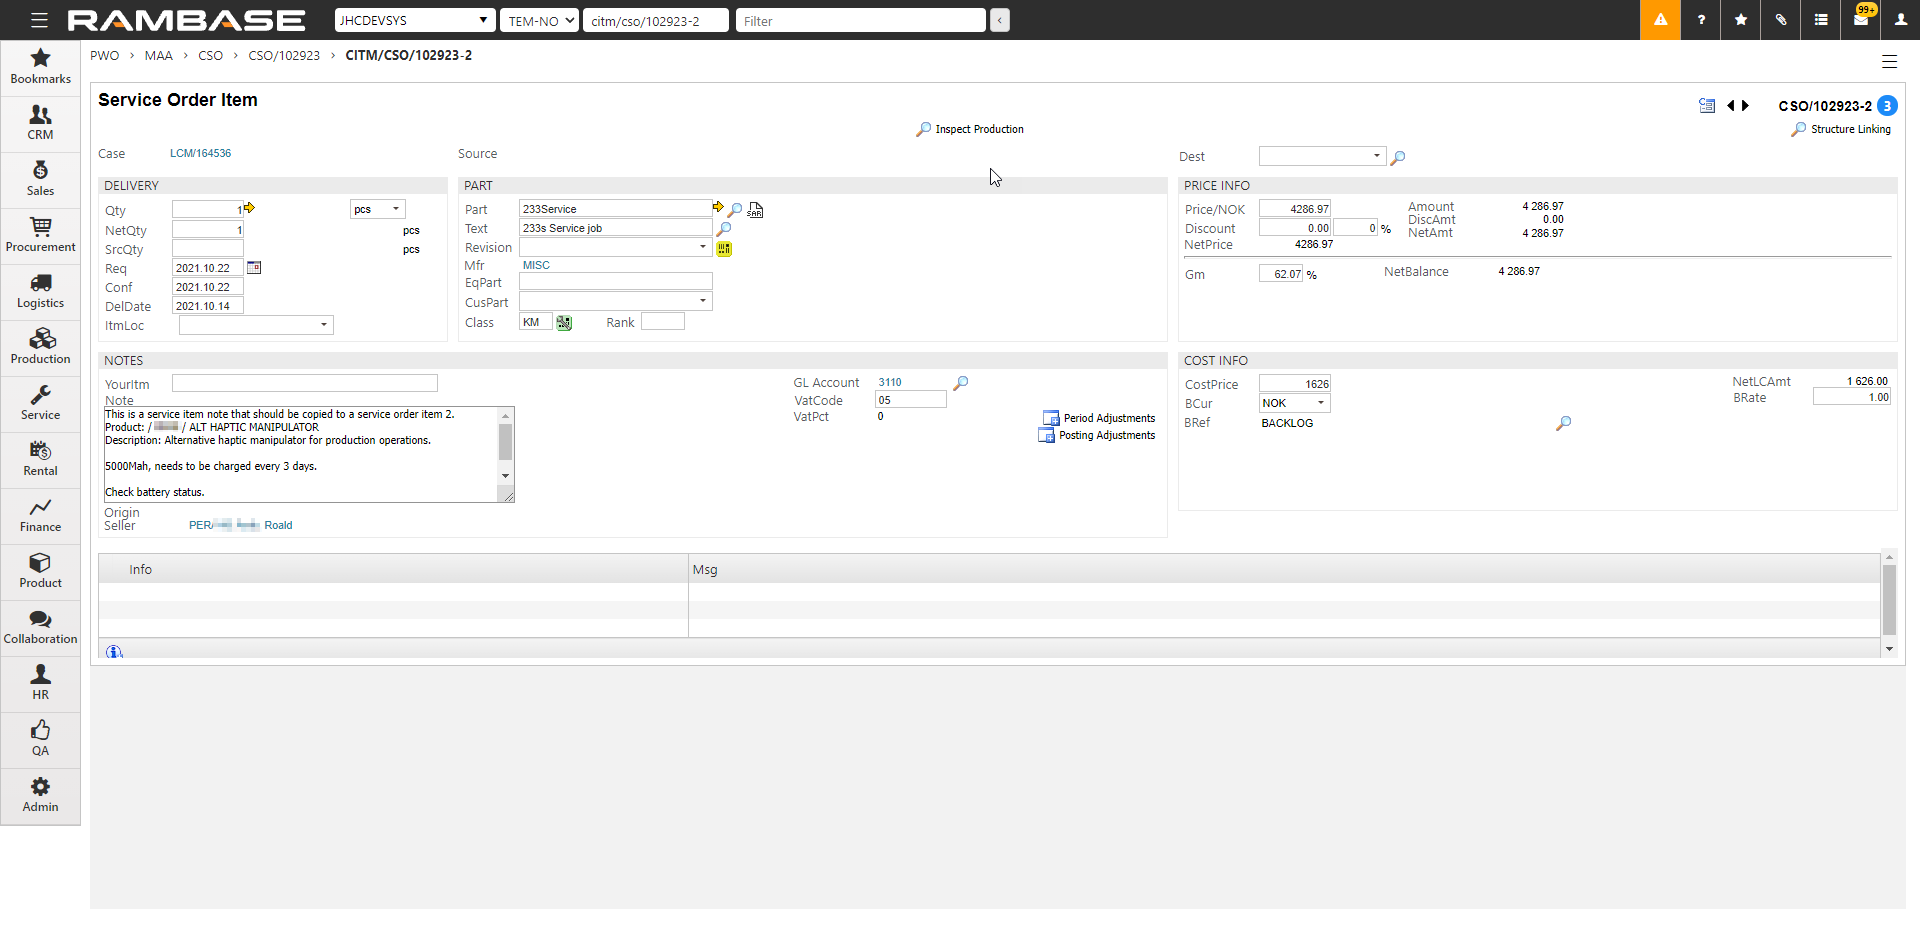
If the CSV setting WriteProductUnitInformationToServiceOrderNote is enabled, the NOTE field displays the Product and Description as text and the part information from the Article (ART), Serial number as the Serialno from the LCM (the part on which we are performing the service). This information is displayed in addition to the regular description for KM class article, which is always item 2 in CSO.
Custom fields for Service orders (CSO) and items
If the custom fields are defined for the Service order and Service order items, they can be accessed through the context menu:

The values of these fields are stored separately for the main Service order (CSO) document and each of the Service order item (CITM).