Create a new rental order
To open the Rental Workspace (RENTAL) application, find Rental in the RamBase menu and then Overview. Click Overview to enter the RENTAL application.
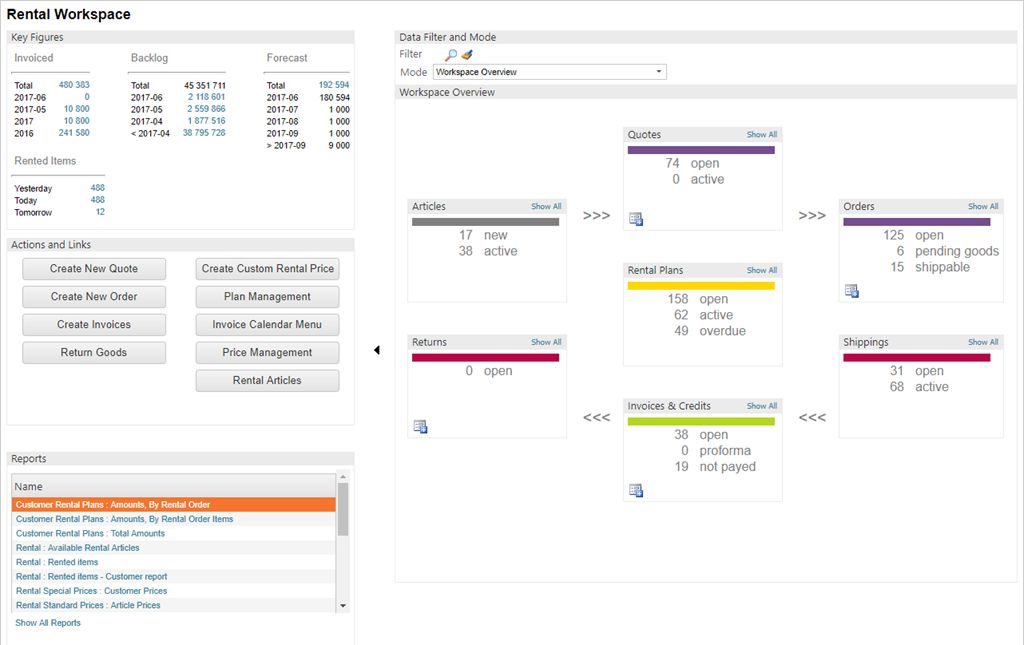
Click the button Create New Order in the Action and Links section, or click the Create New Order icon in the Orders box in the Workspace overview.
Another option is to start from the table of rental orders in the Rental Order (CRO) application and click the icon Rental COA on the lower left corner of the window.
A new window appears. Here you may add information and details to the order.
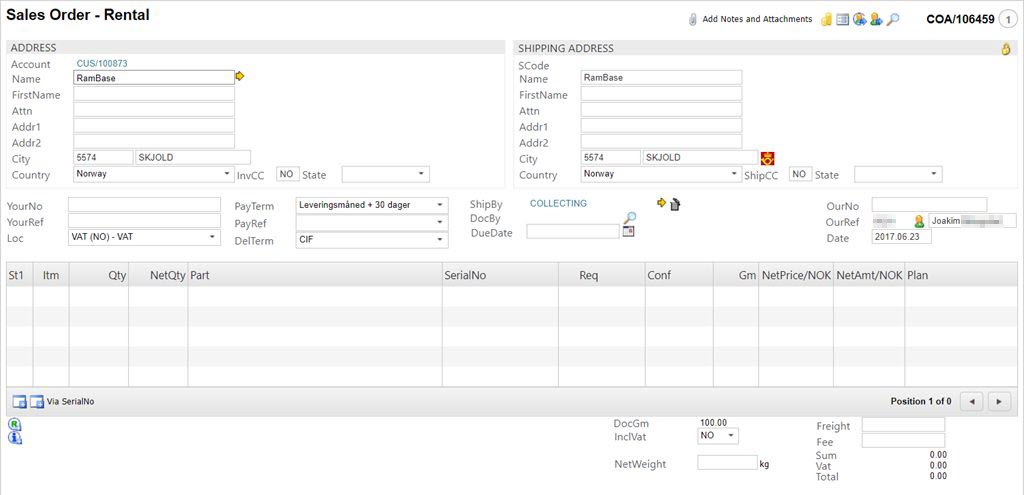
Start with choosing the customer by typing in a part of, or the full, customer name and press ENTER.
In the YourNo and the YourRef fields you have the opportunity to enter a reference to the customer or supplier.
Inspect the payment terms and shipment details. Default information is retrieved from the customer details (CUS application), but may be modified for this specific offer.
The order is still editable (St:1) and you need to add items to it. Depending on which icon in the lower left side you click on, you add items via article number/name or via serial number.
Every item on the rental order must have a link to a price agreement (PRA). Normally if a new order item is added, the system automatically creates a link to a price agreement based on the price template (PRT) for this article or the Recurring Sales Quote (CQP). A CQP is an agreement for a special price for one or more rental articles, given to a specific customer for a certain period of time.
If several order items are based on the same article, they will automatically get the same price (PRA). When adding another item based on the same article, the system will check if any of the items on this order have a unique price agreement (PRA). If so, the new item will also get a unique PRA. If not, the new item will get the same price agreement (PRA) as all the other items.