Create a new Project order (POD)
A project order can be created in three ways:
Manually (and the sales process can be stated from the Project order (POD) application, by use of Create sales quote/order in the Context menu).
Automatically from a Sales quote (CQU) or a Sales order (COA).
Copied from an existing project order to a new project order.
Create a new project order manually
To open the Project orders (POD) application, find Sales in the RamBase menu, then Project order, and select Project orders.
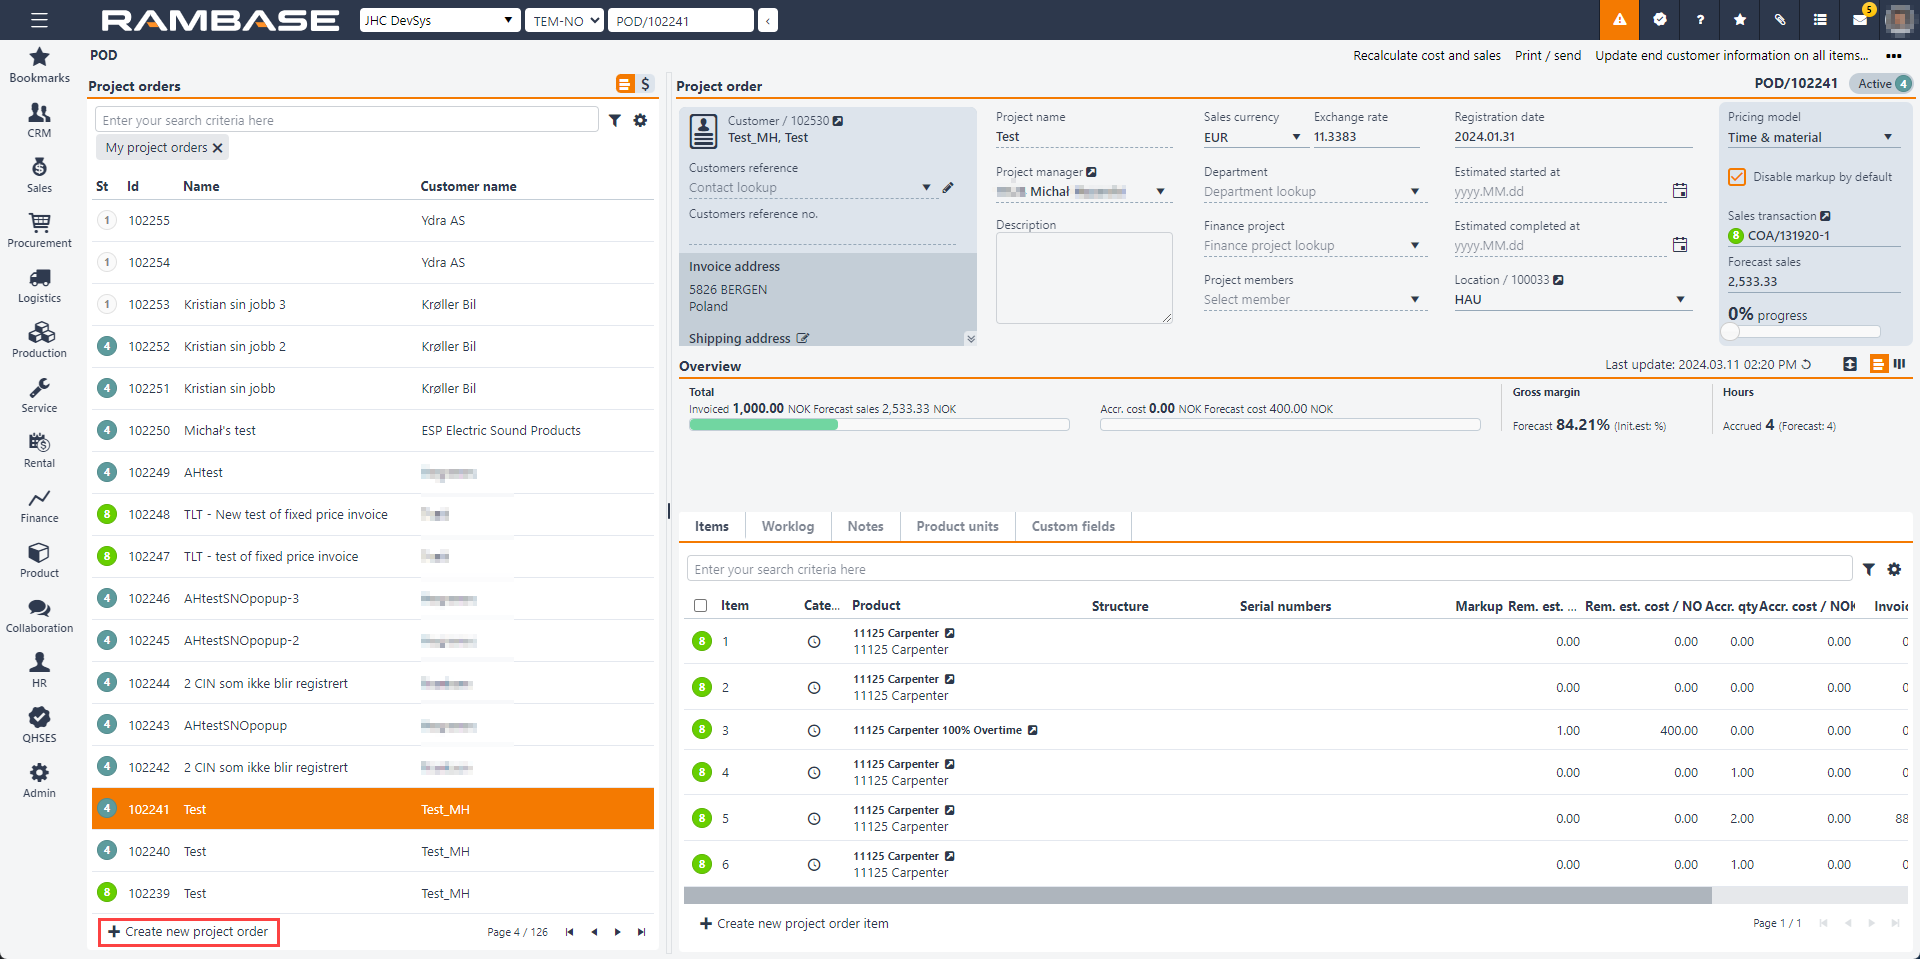
Click on the Create new project order button. All fields marked with * are mandatory.
Project order name field: A short description of the type of job to be performed, the text in this field can be entered manually.
Pricing model dropdown menu: Fixed Price/Time & material.
Location dropdown menu: Location (LOC)
Customer dropdown menu: Customer (CUS)
Disable markup as default checkbox: If checked, Project order items (PODITEM), which are automatically created, e.g. when picking material in PODPICK, will have markup disabled. Project order items (PODITEM) which are manually created in the Project order (POD) application will be suggested to have markup disabled.
Relevant Company setting (CSV) for Disable markup as default checkbox
Note that the setting listed below controls if the checkbox is checked or not. The checkbox can at any time be edited on the Project order (POD) and the Project order item (PODITEM) level.
Setting | Description |
|---|---|
Default create value for sales project order - Has markup disabled by default | When a Project order (POD) is automatically created due to that a Sales quote request (CRQ), Sales quote (CQU) or Sales order item (COAITEM) for a product of type 'Project order' (WP) has been registered, the project order will have disabled markup if this setting is turned on. The markup will also be disabled as a suggestion when a new project order is manually created. |
Internal checkbox: It is possible to define if the project order is internal. If the project order is internal, the Customer field must be empty.
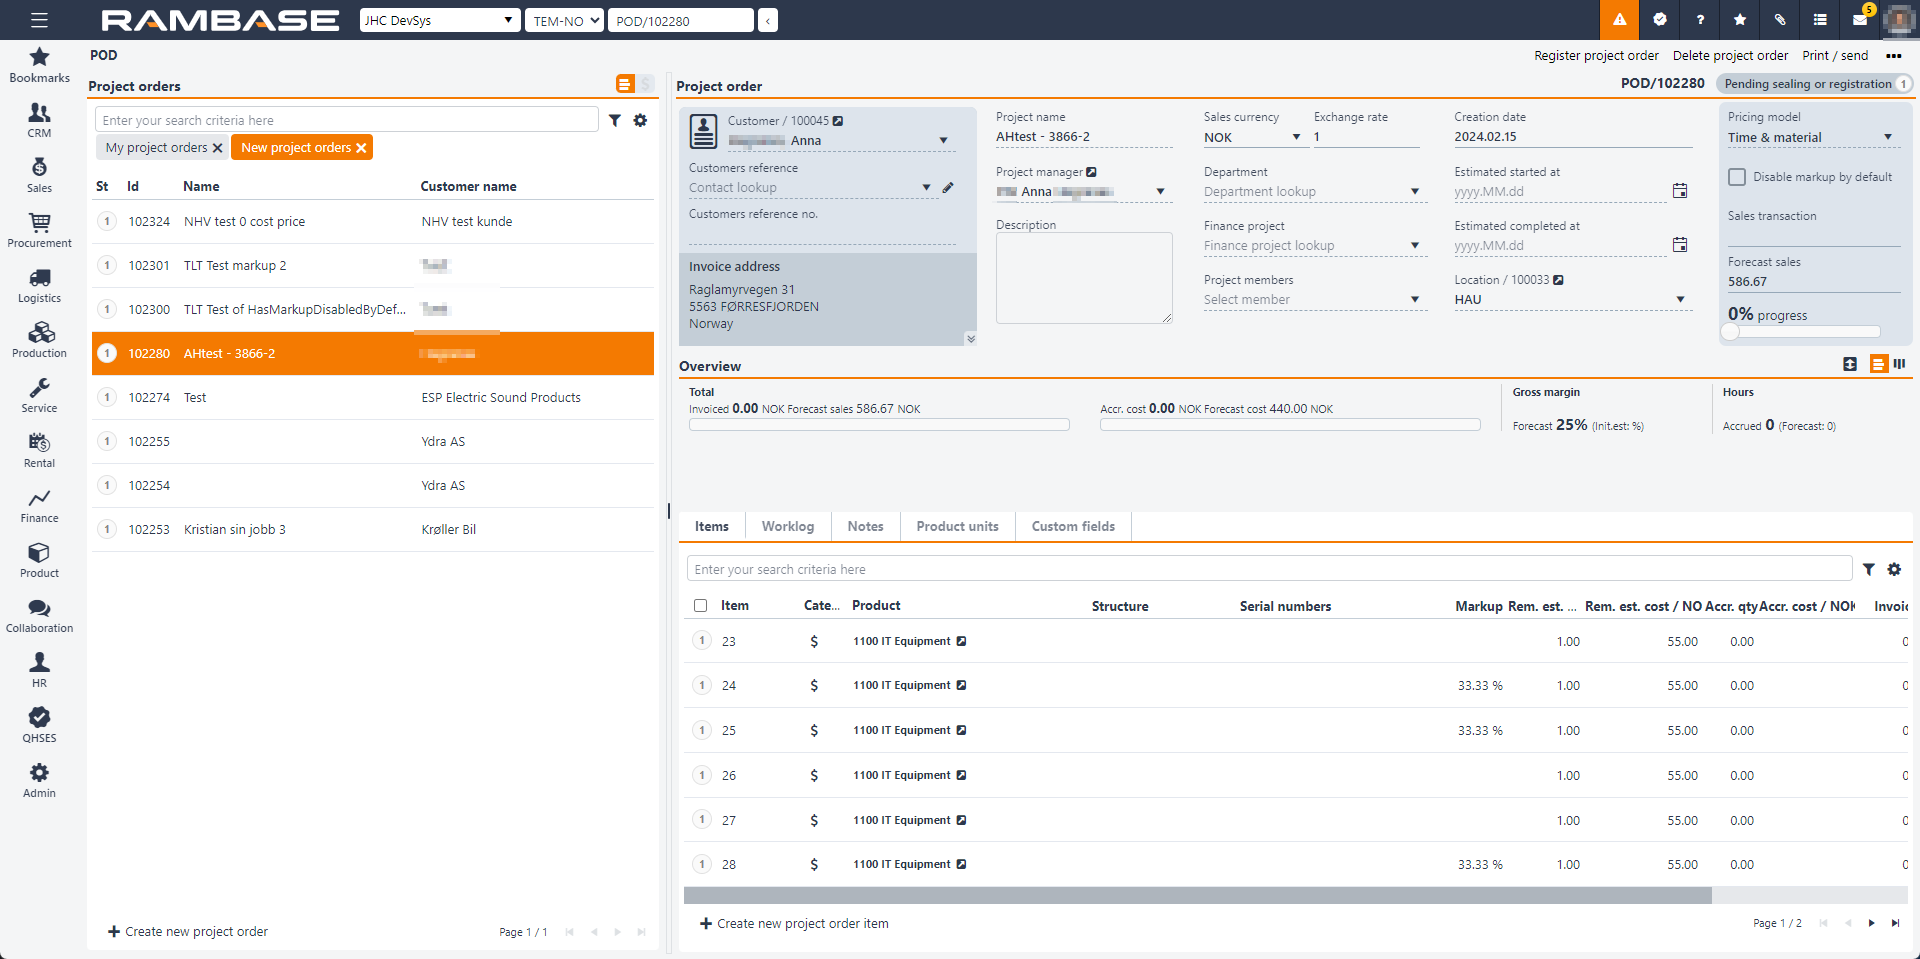
When a project order is created, it will get Status 1 - Pending sealing or registration.
Other fields in the Project order area are:
Estimated start at and Estimated completed at are dates for visual purposes only, and can only be manually updated.
The progress bar is a manual feature and is a visual progress bar that tells you how far you have come in the job. The progress is changed with a drag & drop function.
The overview area shows accrued, estimated, and invoiced cost/price. As the Project order (POD) is still in Status 1, it only shows the estimated cost/price, and no costs have incurred yet. It can be view in two different ways Bar view and Table view. Change the view in the top right corner of the Overview area.
Rearrange items in the Project order (POD) application
Before registering a project order, it is possible to rearrange items to present them in a logical order. This requires the project order to still be in Status 1. To rearrange, go to the Context menu and select Change order of the items…
Automatically create a project order
A project order is automatically created when a Sales quote (CQU) or a Sales order (COA) containing a Product with Type = WP is registered.
The project order will inherit information from these fields: Customer reference, Customer reference no, Description, Department, Finance project, Location. These can be overwritten in the project order, if required.
Copy a project order to a new project order
In the Context menu, select Copy project order. This will trigger a pop-up, where the user may:
Choose whether the new project order should be external or internal (and be copied without customer details).
Edit information before the new project order is created:
Project name
Description
Sales currency
Pricing (Copy or suggested price according to setting CSV, Priority of suggested price)
Project manager
Department
Finance project
Select what to copy to the new project order:
Item product descriptions
Internal item note
Item accounting
Project members
Finally, click the Copy button to create the project order in Status 1.
Note
On the main level of the project order, only information in the Item tab will be copied, not the information in the Worklog, Notes or Product units tabs.
Note
On the project order item level, the information in the Worklog, Product units, Billing items and End customer tabs will not be copied.
In the Notes tab, Internal note will be copied if Internal item note was selected in the pop-up.
In the Accounting tab, the information will be copied if Item accounting was selected in the pop-up. If Item accounting was not selected, the information in the Accounting tab will have information from the project order main level - if it exists. If there is no information on the main project order, the information will be from the Chart of Accounts (ACC). In other words, the fields in the Accounting tab on the item level will never be empty when copying a project order to a new project order.
Note
The quantity set in the new project order item will depend on the status of the original project order when it is copied. If the original project order is in Status 1 or 2 when copied, the RemainingEstimatedQty will be copied to RemainingEstimatedQty in the new project order item. If the original project order is in a status higher than 2 at the time of copying, the InitialEstimatedQty will be copied to RemainingEstimatedQty in the new project order item, (if InitialEstimatedQty has a value). If there is no InitialEstimatedQty, RemainingEstimatedQty in the new project order item will be set to "0" (Unless if Category=Expenses and is based on supplier transactions, then it is set to "1". Project order items which are created with RemainingQty=”0”, will get a warning notification.
Project order item (PODITEM)
There are three different categories for a project order item: Hours, Material and Expenses. A Project order (POD) can contain all categories, and there is no limit as to how many items that may be added.
Material - Products (ART) defined under this category are all Products (ART) with Type = P, M, K & KA. These can be found in the Product (ART) application.
Hours - These items will be of Type = WH and will include both selling price and cost. For each labor cost, there will be a corresponding product in the Product (ART) application.
A project order should contain one item for each price that will be invoiced to the customer.
For example: A Product (ART) for Service Technician and one for Service Apprentice. These working hours will typically have different price.
It may also be allowed for a Service Apprentice to log hours as a Service Technician. What kind of hours the different people are allowed to log is limited in the setup for each employee (user). See details under the Basic data topic about Labor groups (LAG).
Expenses - Non-stock Products (ART) of Type X or V, such as travel expenses and overtime food.
Create a new project order item
Click the Create new project order item button.
Quantity
Hours: price/cost per hour
Material: price/cost per unit
Expenses based on supplier transactions: Qty=1 (No other quantity allowed)
Expenses based on Expense logs (EXL): Any quantity allowed
Product - Search and add the Product (ART).
Disable markup: If this is checked, markup will not be calculated when the items are created.
Create another - Check here to be able to add more item.
Click the Create button to create the project order item in Status 1.
The project order is registered by selecting the Register project order option in the Context menu.
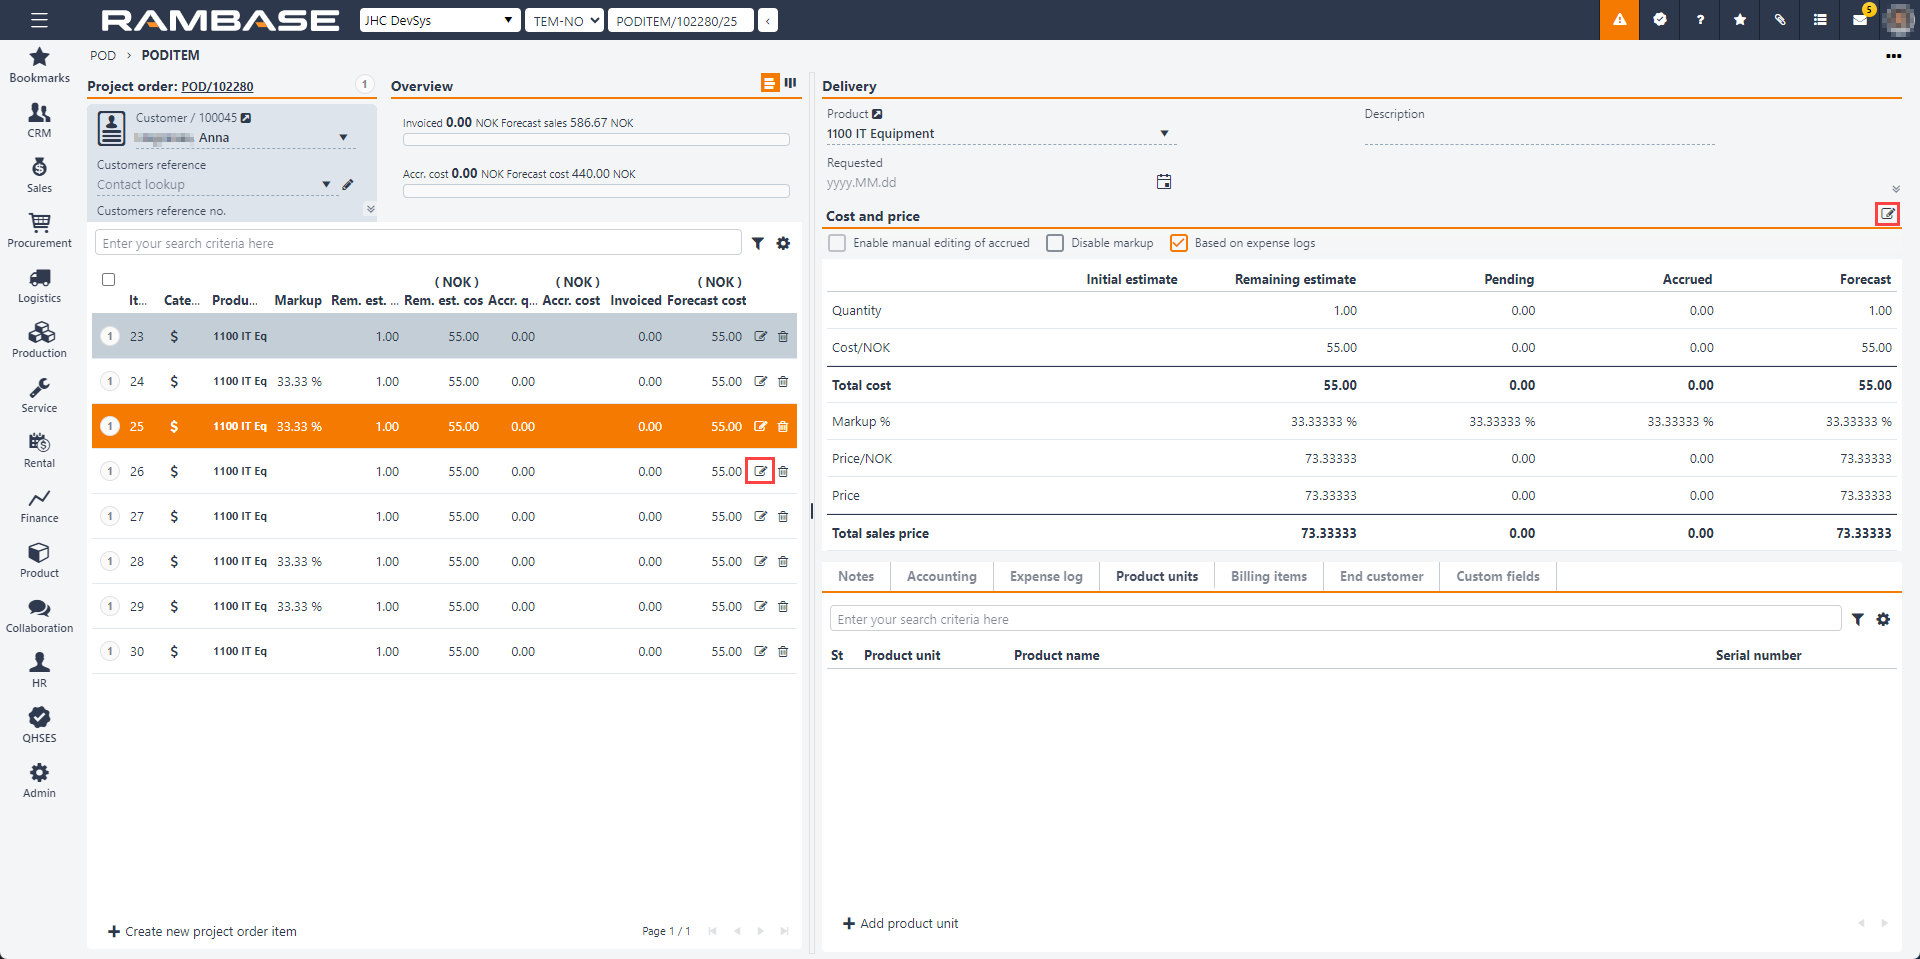
Edit a project order item
It is still possible to edit the markup and remaining estimated quantity of a project order item.
Highlight the item and press F2 to edit the project order item or click the Edit project order item icon on the item line.
Edit the Markup and/or Rem. est. qty (remaining estimated quantity) fields.
To save the changes, press CTRL + S or click the Save changes icon on the item line. If you need to discard the changes press CTRL + Z or click the Discard changes icon.
In the project order item it is possible to edit both on the item line and in the Cost & price area.
Seal temporarily or register the project order
Once a quote has been made, the user can set the project order to Status 2, Seal project orders temporary. This means that it is temporarily closed and the values cannot be changed. If the responsible part and customer end up in a negotiation situation, the project order can be changed back to Status 1 for a new calculation. (There is no limitation as to how many times one can can change the status back and forth between Status 1 and Status 2.) Once the quote is accepted, the project order should be set to Status 4 and the project order can be started at any time. The project order is registered by selecting the Register project order option in the Context menu.