Manually create a new period
Every time a user clocks in or out, log entries are added or updated automatically. However, there is also a possibility to add entries manually. You may have forgotten to clock in one day, or you may have had a valid leave of absence.
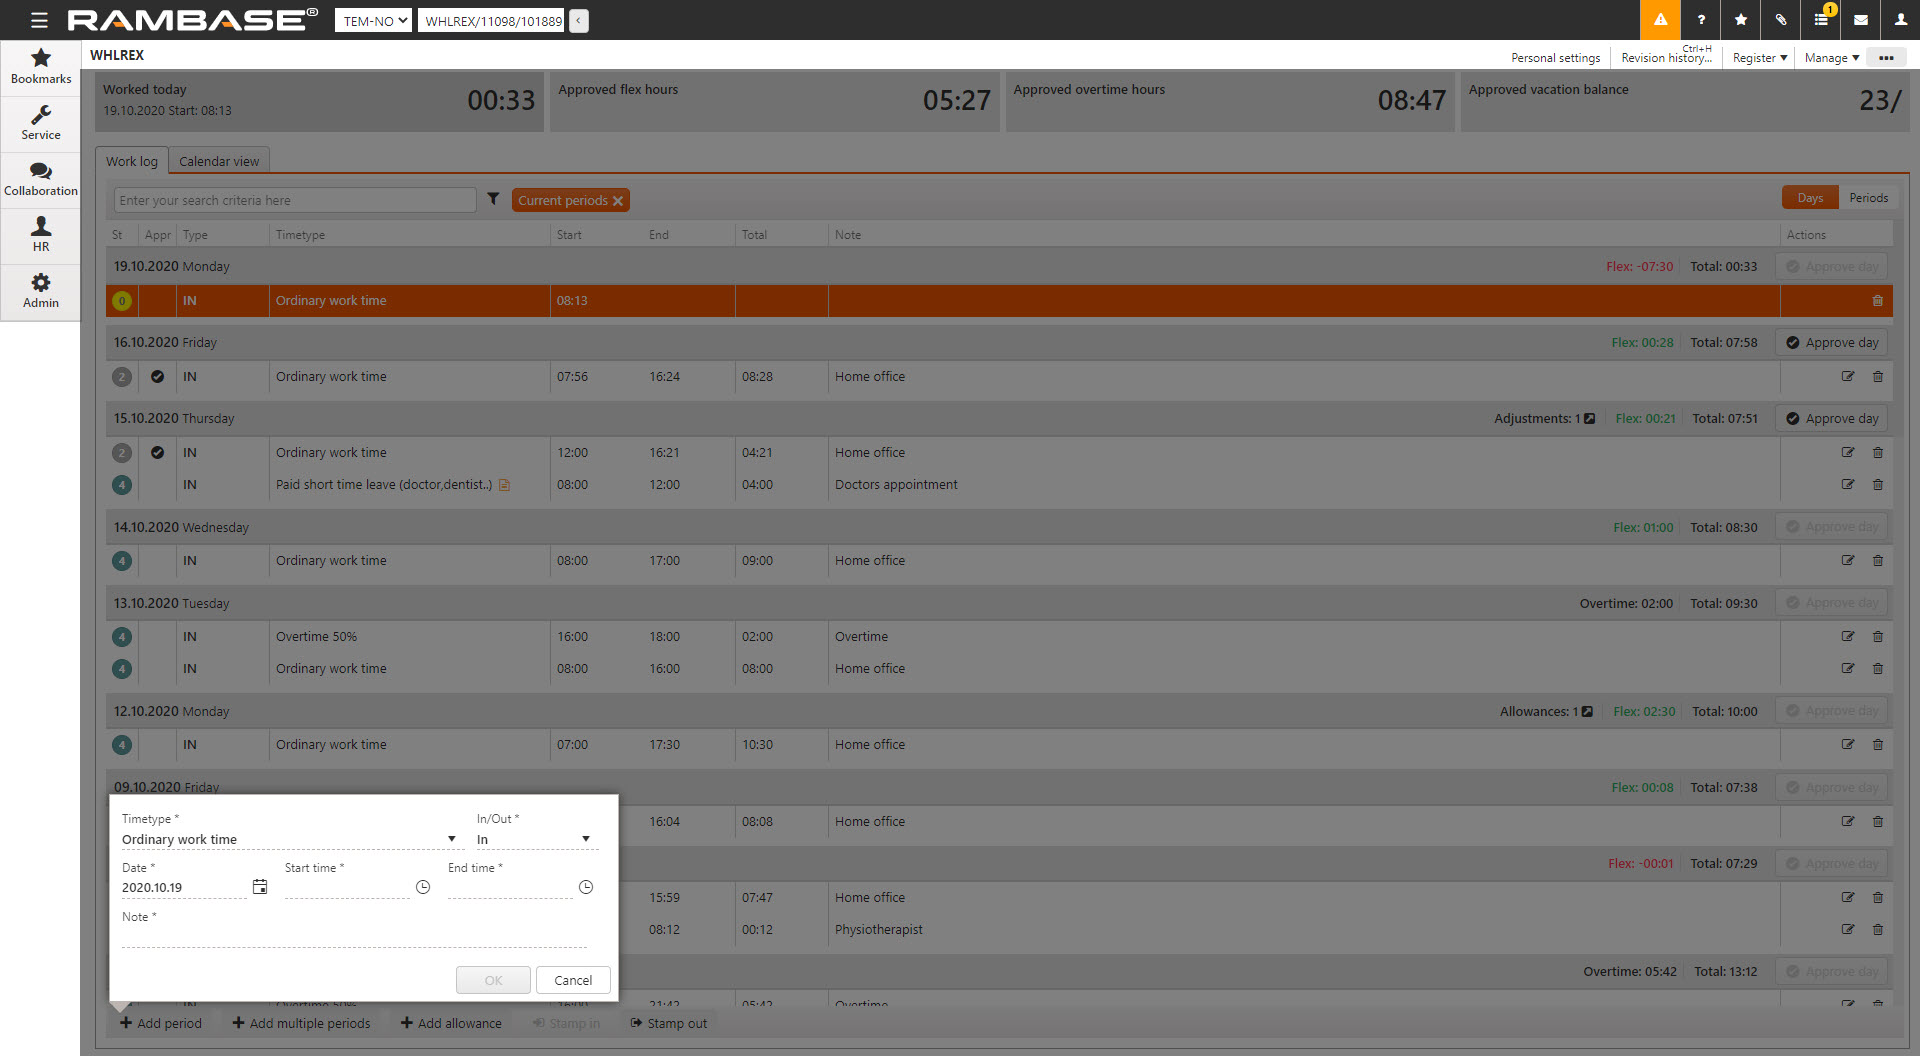
Click the Add period icon.
Enter data in the popup:
Select the Timetype that best describes the event in the Timetype field.
Todays date will be set as default, but it can be changed in the Date field.
Enter start time for the period in the Start time field, if it is not filled as default depending on the Timetype.
Enter end time for the period in the End time field, if it is not filled as default depending on the Timetype.
Add a note in the Note field to provide additional information about the event.
Click the OK button to enter the new period.
Please note that time periods that are entered manually will not undergo any kind of treatment with respect to existing work arrangements for the user. This means that entries to the log must always be made in accordance with the rules stated in the corresponding Work arrangements (WAR) document. For example, if a 13 hours period can be split into 8 ordinary work hours, 4 hours of 50 % overtime, and 1 hour of 100 % overtime, the 13 hours period should be represented by three separate log entries. One 8 hour-period with Timetype = Ordinary work time, one 4 hour-period with Timetype = Overtime 50 %, and one 1 hour-period with Timetype = Overtime 100 %.