Supplier (SUP)
A supplier is a private person or a company that supplies goods or services. The Supplier (SUP) application contains information about suppliers. For instructions on creating a new supplier, refer to Create a new supplier.
To open the Supplier (SUP) application, select Procurement > Supplier management > Suppliers.
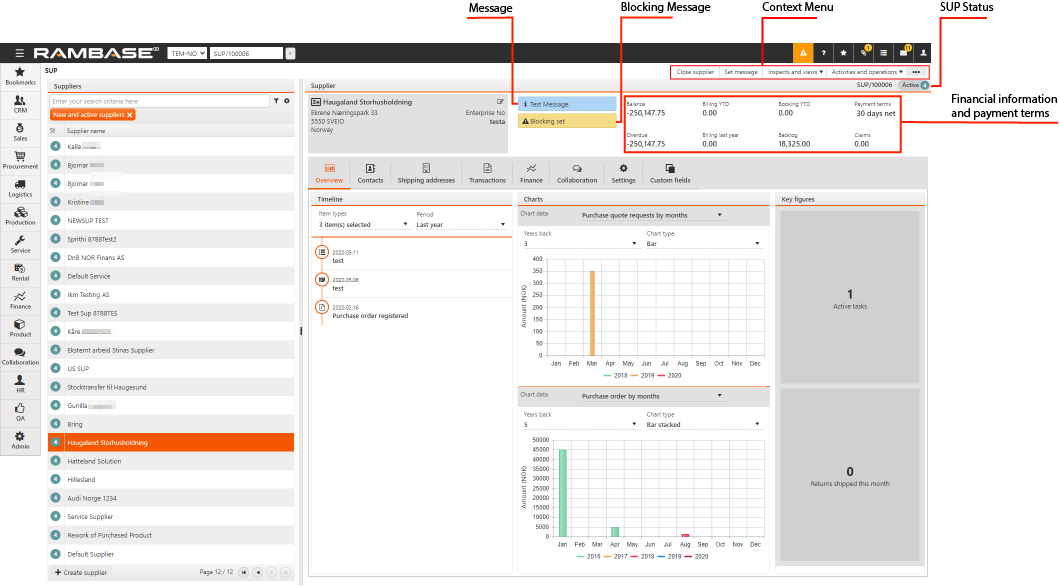
Select a supplier in the Suppliers pane to view, add and change information about the supplier by selecting the tabs and sub-tabs on the right. Select
 to use the filter. Drag the tabs and sub-tabs to rearrange them.
Select Set message in the context menu to add a note that is shown in the SUP window, and also on supplier documents such as purchase orders. Select the icon to the right of the message to clear or change the message.
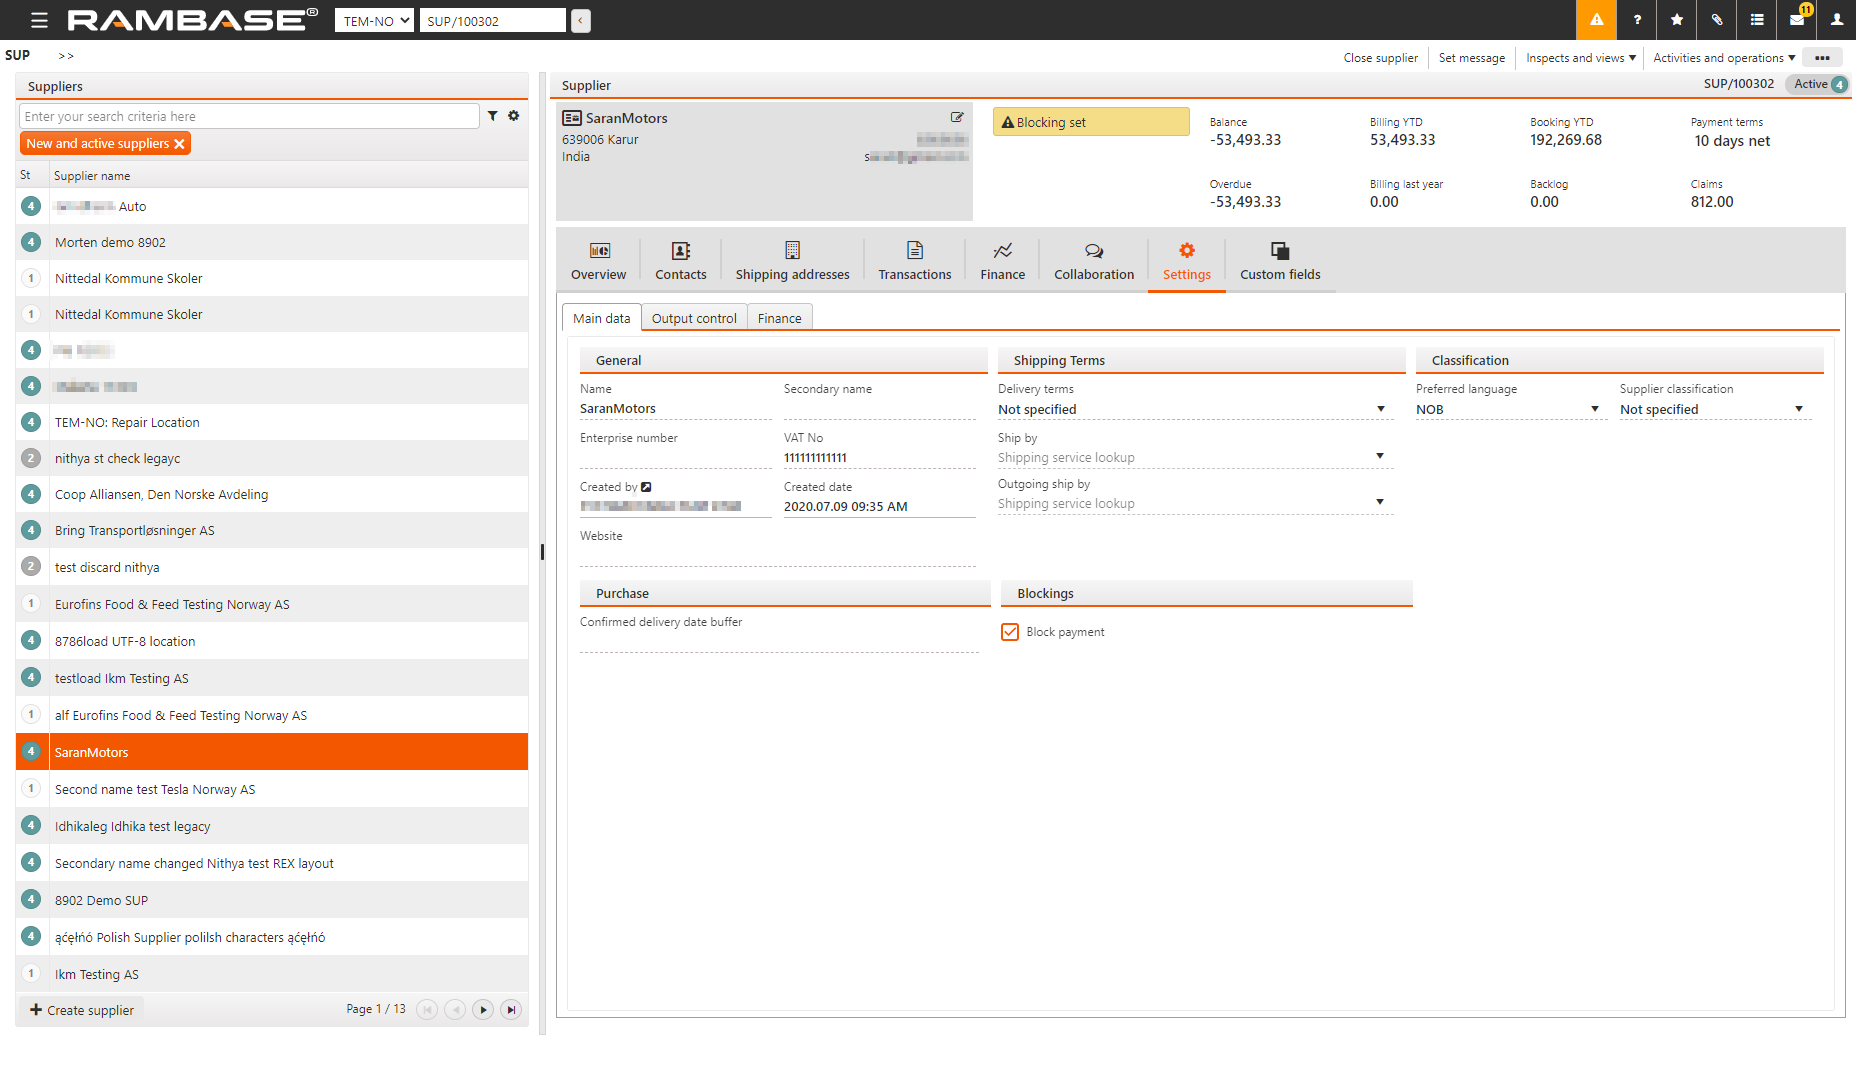
If a payment block is set on the supplier, the Blocking set message is shown. To unblock the payment, select the icon to the right of the message. Clear Block payment in the dialog box.
The following tabs and sub-tabs are available in SUP.
The Overview tab provides a quick summary of the supplier’s activity and performance. It includes:
Timeline: Displays recent interactions and transactions.
Charts: Visual representations of supplier metrics.
Key figures: Important statistics such as total purchases, number of orders, and now delivery performance
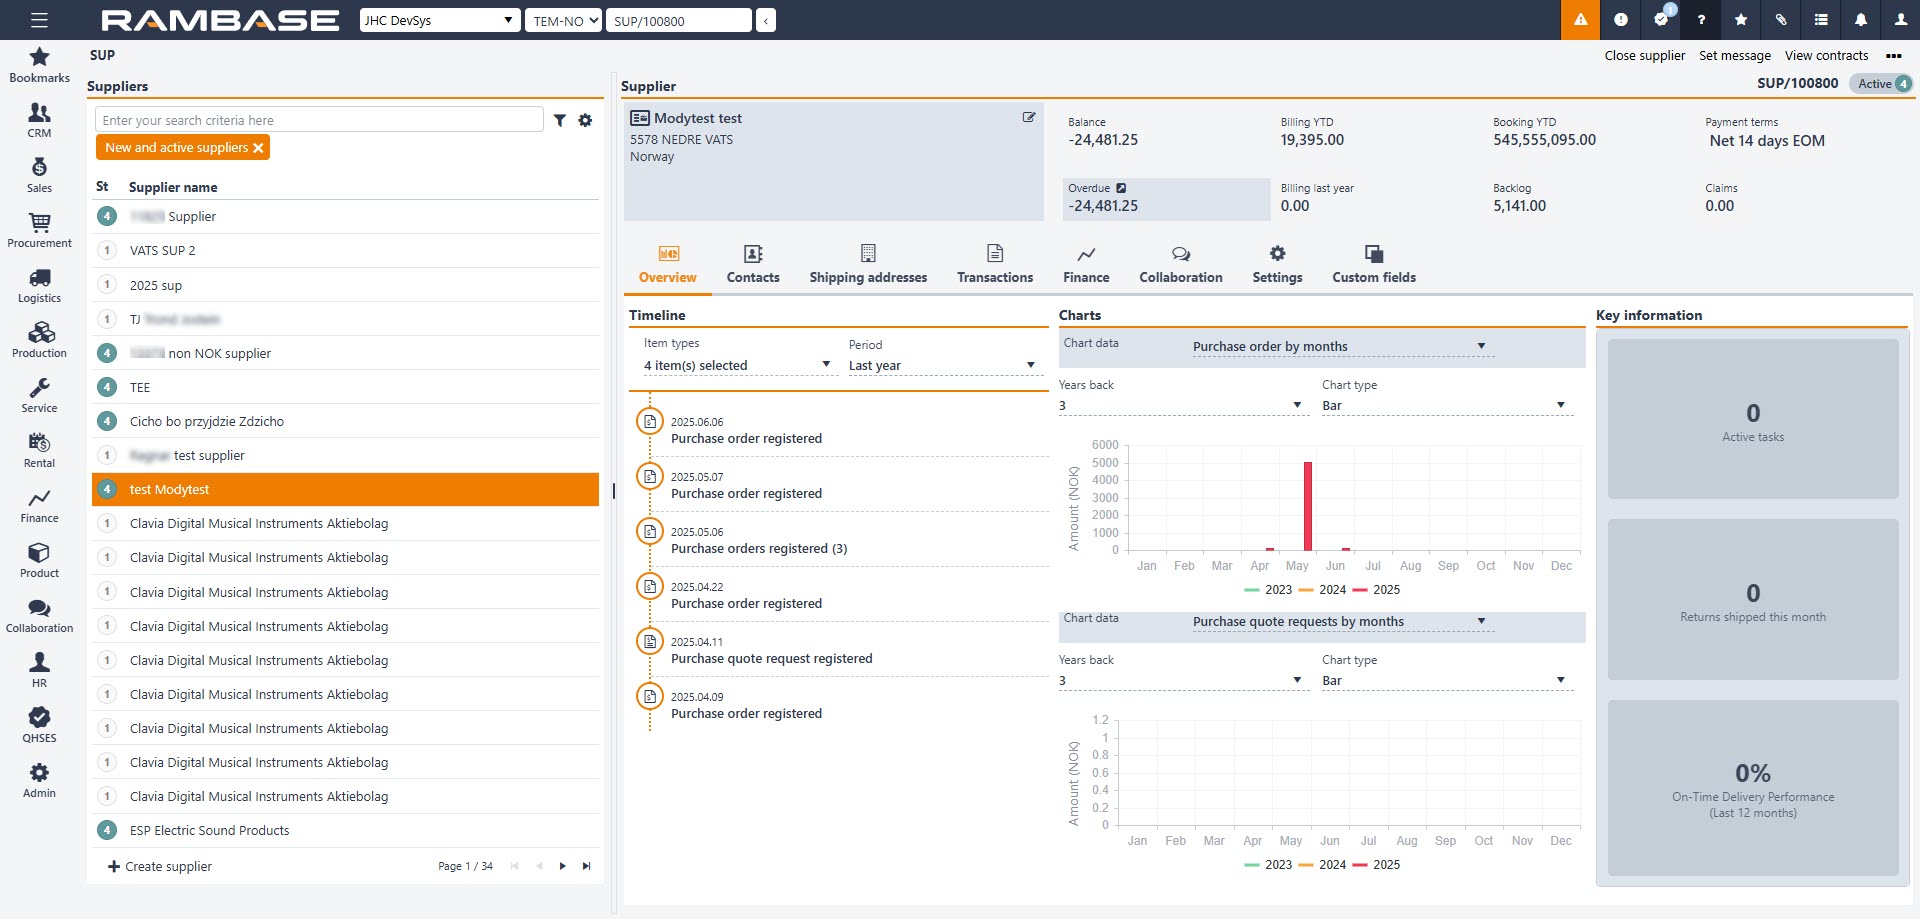
In Timeline, select the period for which you want to view the items in Period. Select the type of Items to view in Item types. You can view Notes, Tasks, SPO - Purchase Orders, SRQ - Purchase quote requests, SOA - Purchase order responses and SSA - Goods receptions. Select any item in the timeline to expand it.
You can view supplier information as charts. Select Chart data to view the Purchase order by months, Purchase quote requests by months, or Billing 5 years. The chart type can be Bar, Bar stacked, Fluctuating line or Accumulated line. Billing 5 years is shown as a pie chart. Hover over any bar in the chart to see more information about the statistic.
Key figures: Active tasks, Returns shipped this month, On-Time Delivery Performance (Last 12 months)
Active tasks - Displays the number of active TASKs. When clicked, the TASK application opens with a filter on Supplier (SUP) and active statuses.
Returns shipped this month - Displays the number of shipped Supplier returns (SRT) (Status >= 4). When clicked, the Supplier return (SRT) application opens with this filter.
On-Time Delivery Performance (Last 12 months) -This percentage is calculated based on how many Goods reception items (SSAITEMS) that are received the last months is received on the date that was confirmed from supplier in their purchase order response. If the user click on this percent, they will be re-directed to DPS (delivery performance statistics) for this supplier.
Select Contacts to view and change the contacts at the supplier. Select
 to edit the default phone and email address. Select
  to delete the contact or
  to open the CNT application where you can view and edit more contact information. Select Create contact to create a new contact, or Select contact to open the contact lookup to add an existing contact.
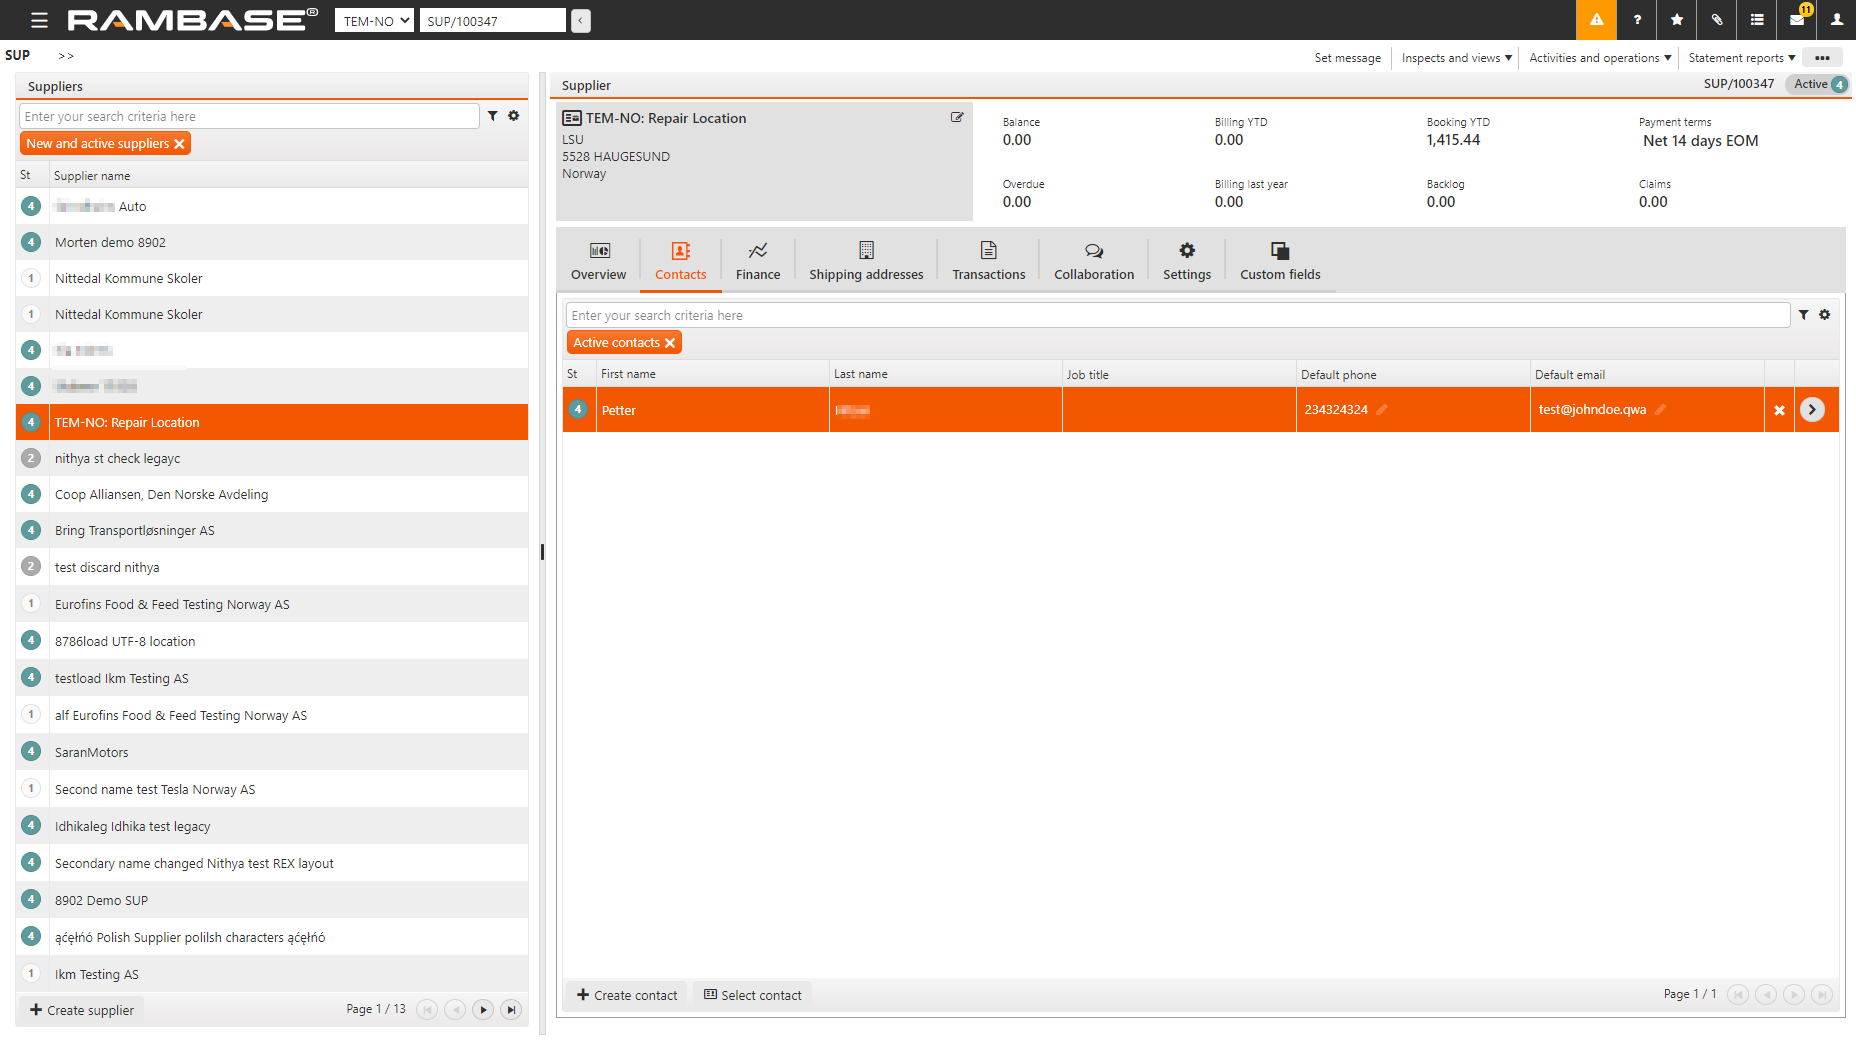
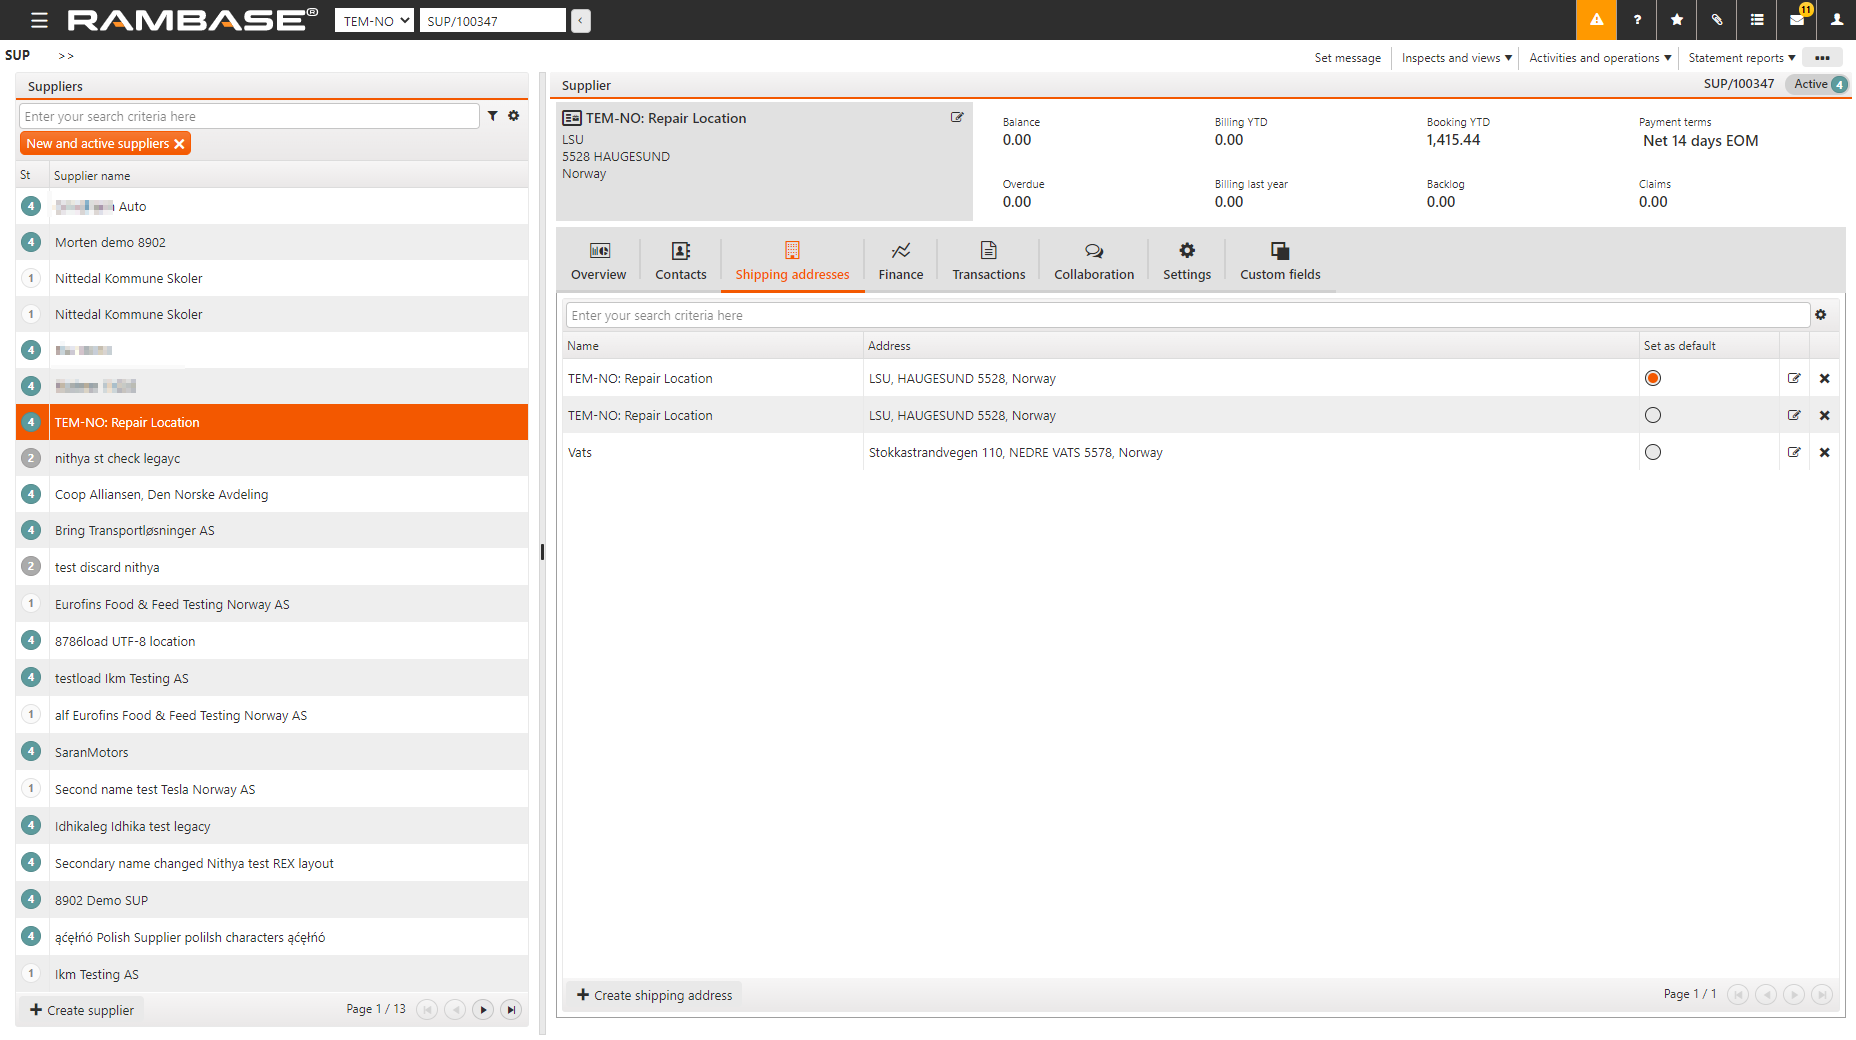
Select Shipping addresses to view and change the shipping address for the supplier. Every supplier can have one or many shipping addresses. If there are multiple addresses, you can set one as the default.
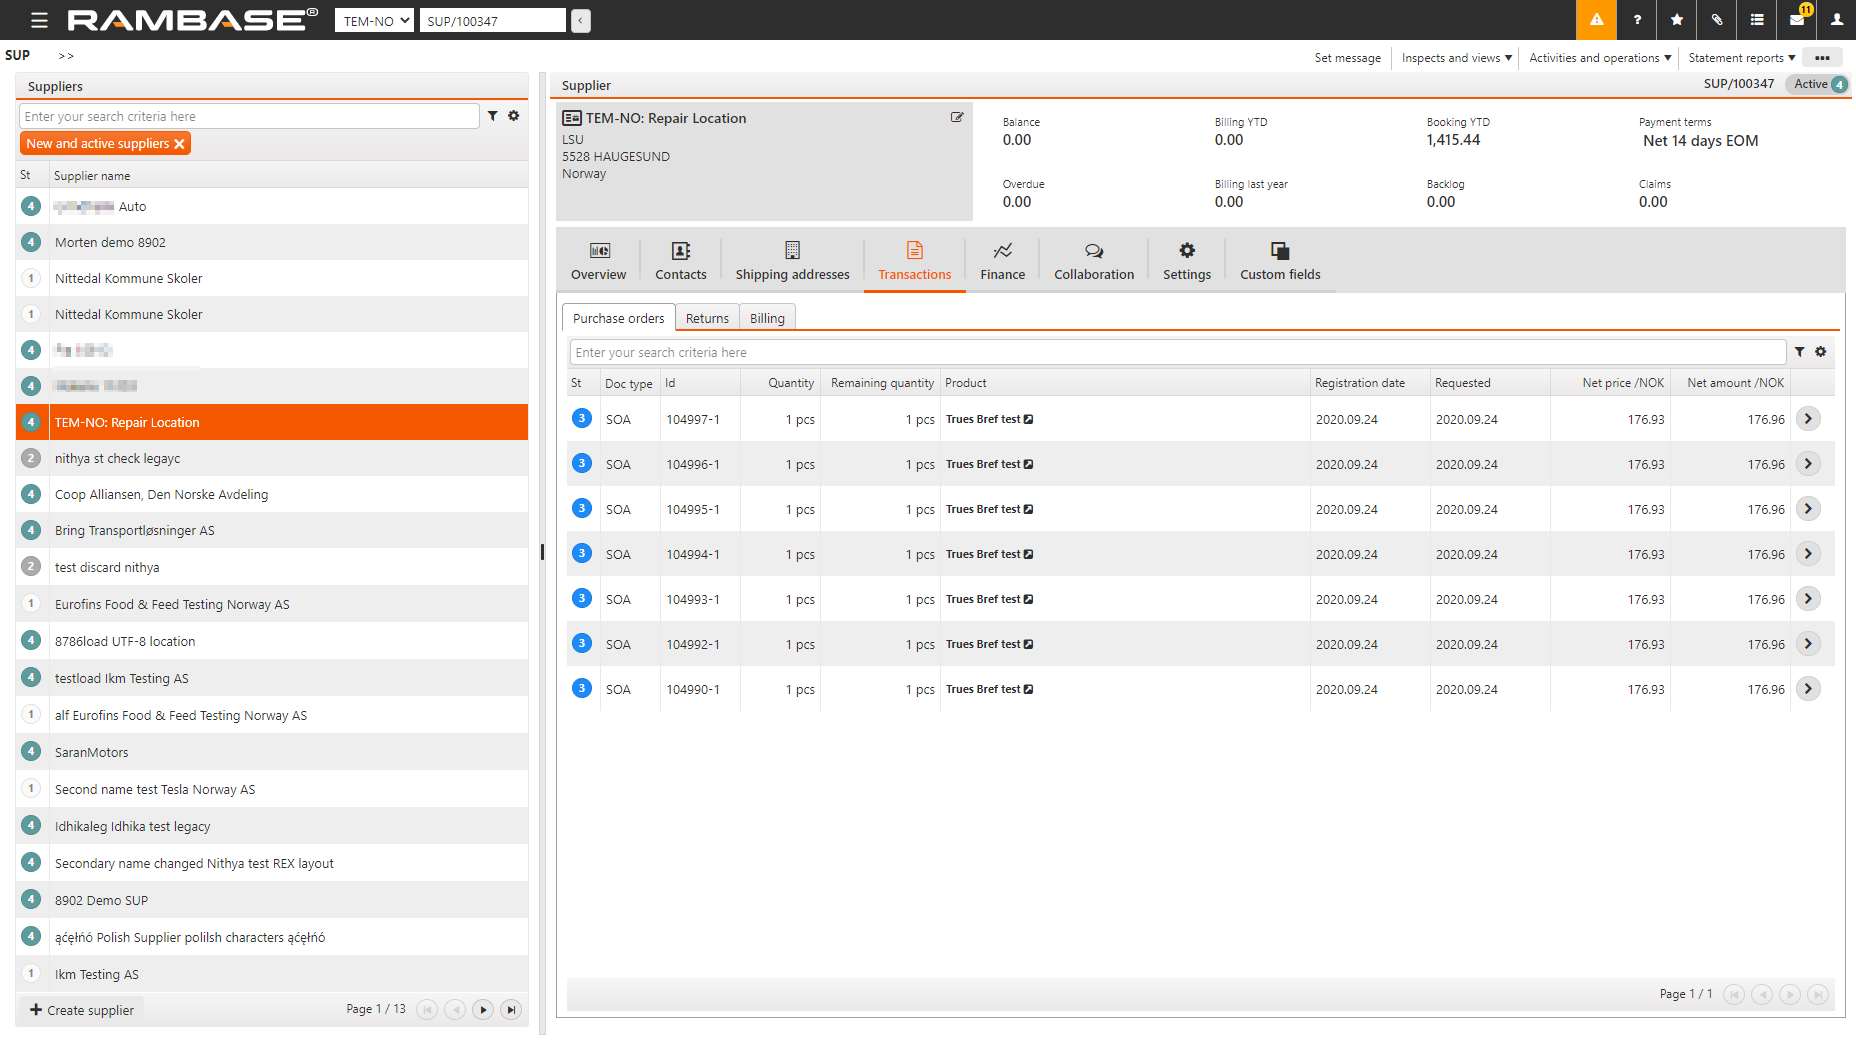
Select Transactions to view the following.
Purchase orders. Select this sub-tab to view the purchase orders issued to the supplier, and the purchase order responses.
Returns. View information on supplier returns. Select
in the item to open Supplier Return (SRTITEM).Billing. View supplier billing information here.
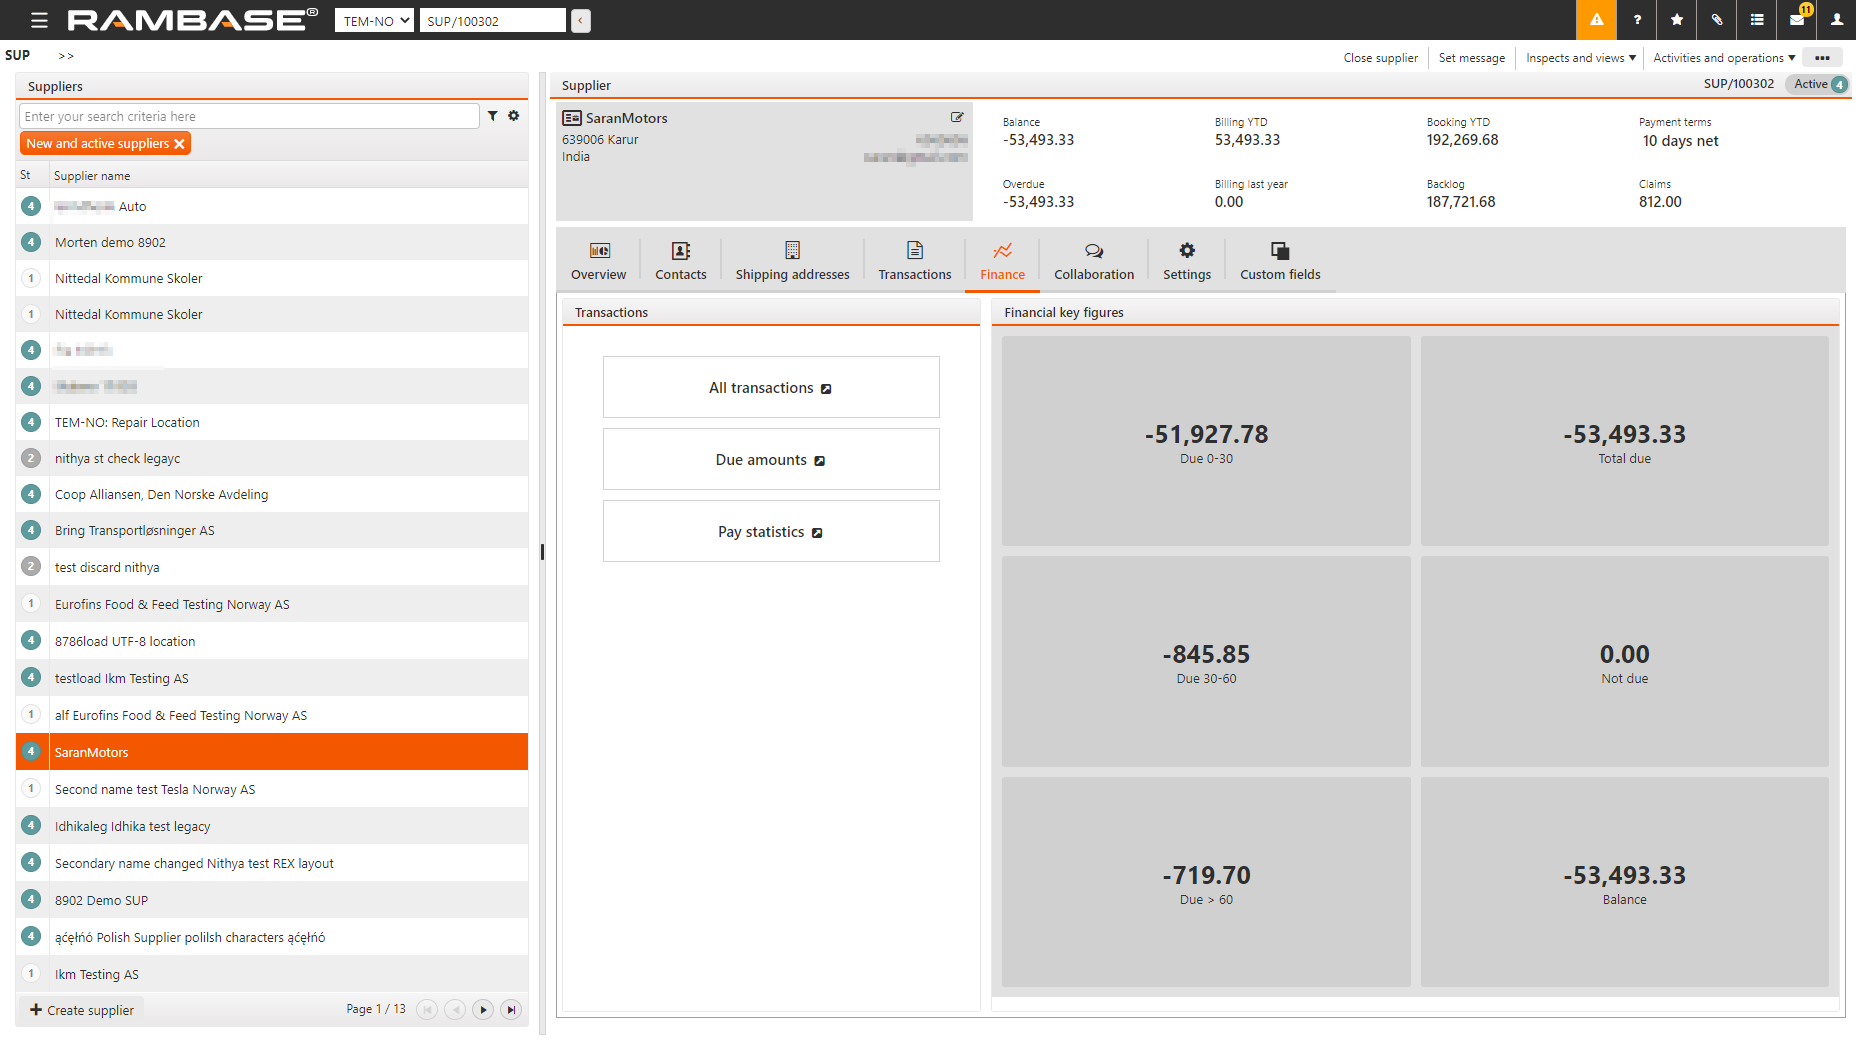
Select Finance to view important financial figures such as:
All transactions to view all the key financial information.
Due amounts to view the payments due to the supplier, by due date. Double-click any row to open SUPDUE.
Pay statistics to view the Supplier Payment Statistics by period.
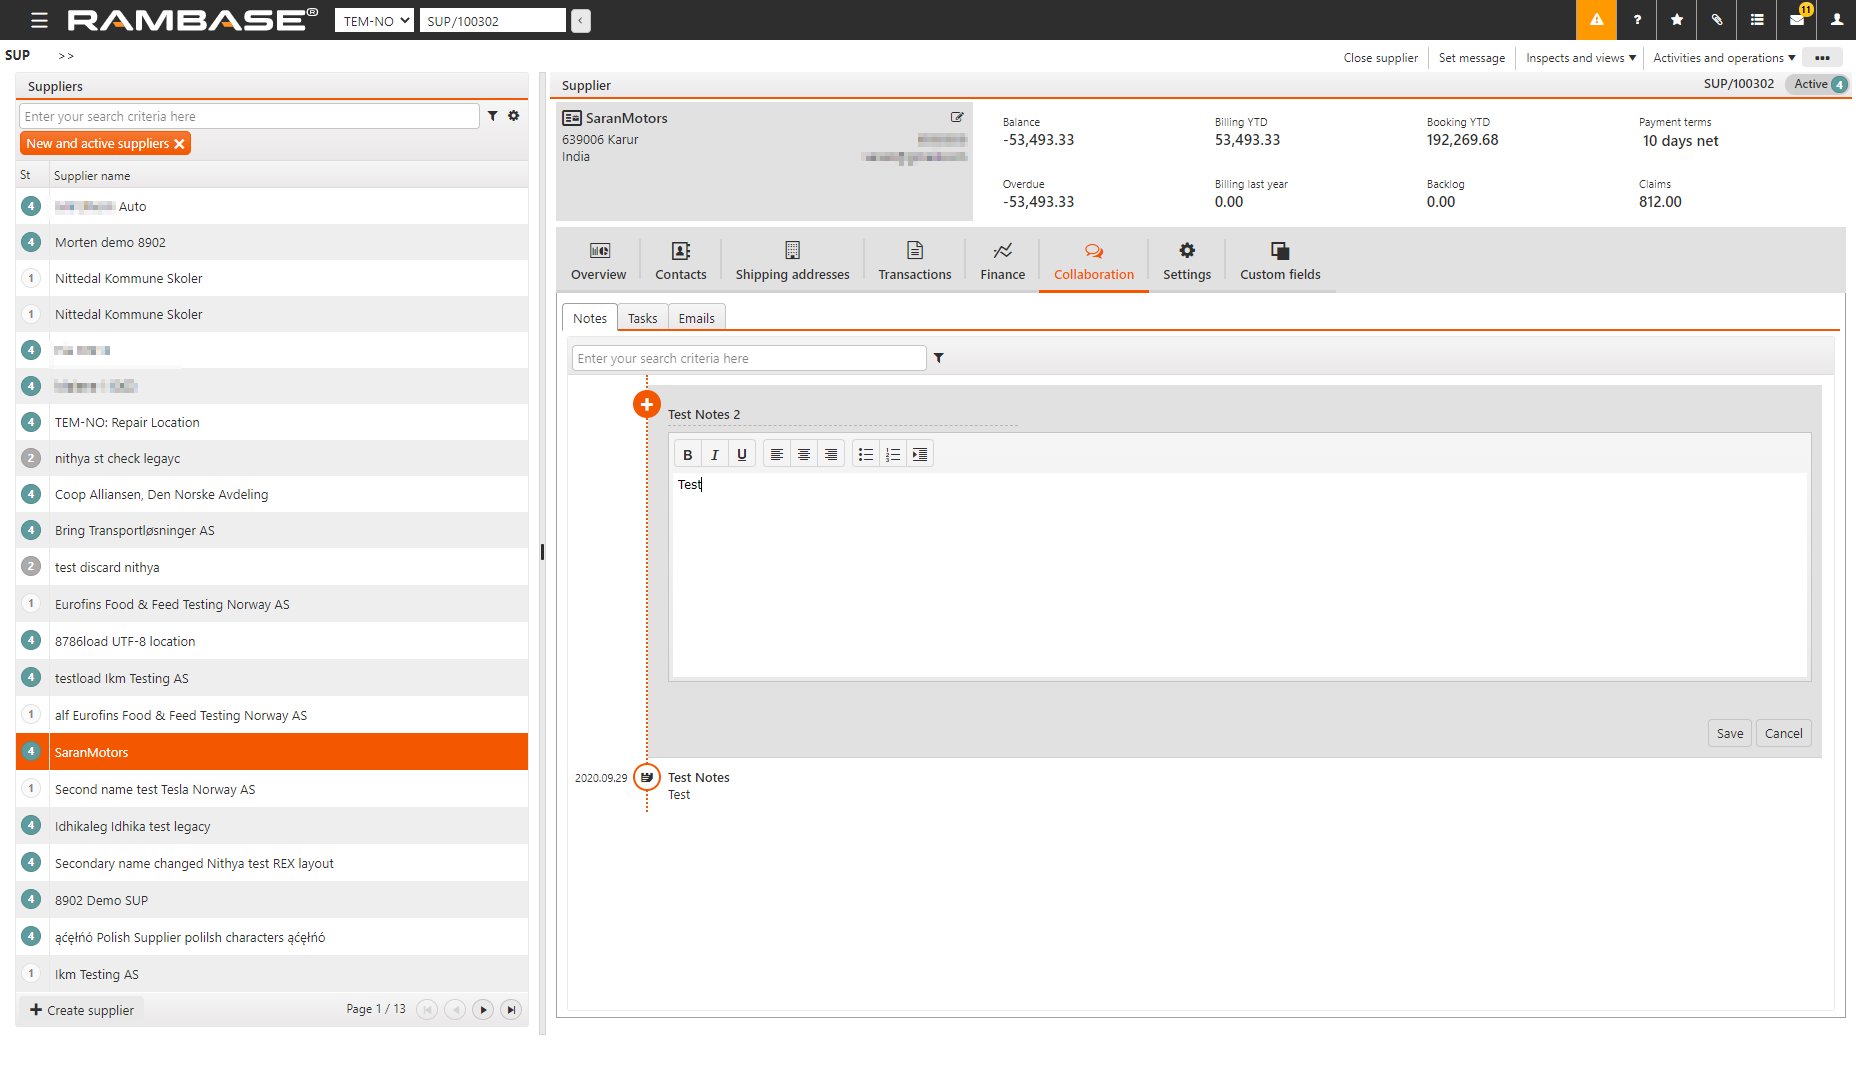
Select Collaboration to view and create Notes, Tasks and Emails attached toRam the supplier in the following sub-tabs. Emails must be added using the RamBase Office Add-in.
Notes.
Tasks.
Emails.
Select Settings to view and add data in the following sub-tabs.
Select Main data, to view and change Supplier information, Shipping Terms, Preferred language and the Supplier classification.
Select Output control to view the documents to send and the communication channels such as Email, Print or FTP/SFTP. Select Add document to send to send one or more documents to the supplier. In Send to, specify the recipient, which can be:
An existing contact.
A new contact that you create.
The main email address for the supplier.
The Recipient from a source document.
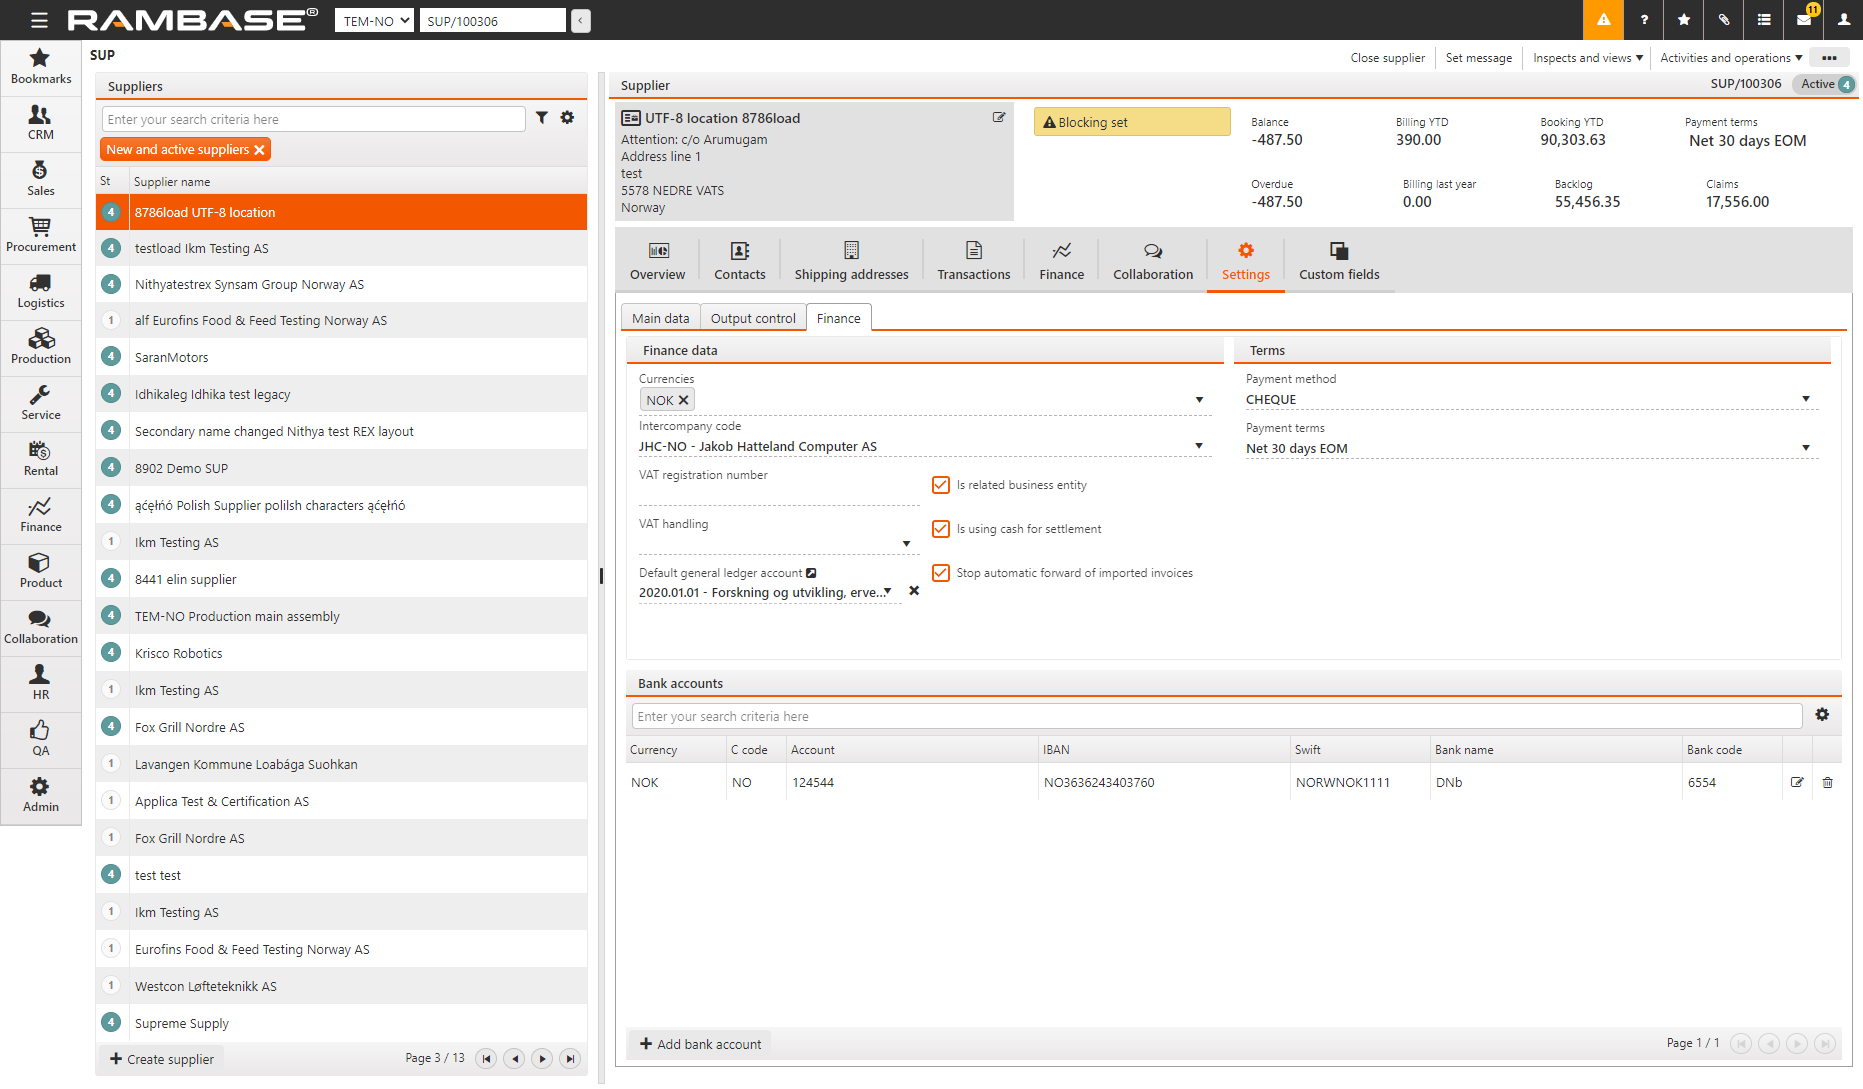
Select Finance to view and change financial information related to the supplier:
The Currencies for payments and quotations.
Select the Intercompany code from the list.
View or enter the VAT registration number.
Select the VAT handling rules.
Select the Default general ledger account.
Specify if the supplier is related business entity.
Specify if the supplier is using cash for settlement.
Specify the Payment method.
Specify the Payment terms.
View, change or add Bank accounts to pay the supplier.
Users can discontinue a supplier bank account by clicking the Discontinue supplier bank account button in the Edit bank account popup. This can be found by clicking the edit icon in the Bank accounts field. If a bank account is discontinued (Status 9), it cannot be used in the remittance process. A validation message will appear during the remittance process in the Pay management (PAM) to check if the bank account is active (Status 4).
An error message will appear if a user discontinues a bank account if it is used in an open document, such as in a Supplier invoice (SIN).
Bank accounts tabs
Description
St
Status code
Item
Item
Currency
Currency used for the bank account
C code
Two-character code (ISO 3166) identifying the country.
Account
Account number used to identify the bank account
Account type
Account type of the bank account, for example BBAN, Bankgiro and Plusgiro
IBAN
International bank account number
Swift
The SWIFT (Society for Worldwide Interbank Financial Telecommunication) Code is a standard format for Business Identifier Codes (BIC) and it's used to uniquely identify banks and financial institutions globally. These codes are used when transferring money between banks, in particular for international wire transfers or SEPA payments.
Bank name
Name of the bank
Bank code
A code assigned by a central bank, a bank supervisory body or a Bankers Association in a country to all its licensed member banks or financial institutions.
Clearing code
National clearing code of the bank account
Clearing bank identifier
National clearing bank identifier of the bank account
Select Custom Fields to view and interact with fields your sales partner created. Contact your sales partner if you want to create several custom fields.

Context menu
The context menu in SUP gives the following options:
Close supplier. Select this option to set the supplier to status ST:9, Discontinued. You cannot discontinue a supplier if there are transaction documents related to the supplier. Select Activate supplier to activate a supplier in status ST:1, New or status ST:9, Discontinued. The activated supplier is set to status ST:4, Active.
Select Supplier - All transactions to see the Supplier statement of all transactions, both present and past.
Select Inspects and Views gives the following options:
Select Show total balance to see the total balance of payments over 0 to 30 days, 30 to 60 days and beyond 60 days.
Select Delivery performance to view the delivery performance statistics categorized as Early, On time, or Late deliveries from the supplier.
Select Revision history to see the history of revisions to the SUP.
Select Quality assurance events to inspect the Quality Report Archive (QAR) filtered by supplier.
The Activities and operations menu gives the following options:
Select Discard supplier to discard the supplier and set the status to D. If you discard a supplier, all the supplier data is discarded. Select this option only when you create a supplier in error. Select Close supplier if you want the supplier data to be stored in RamBase.
Select Prepayment to supplier to make a prepayment such as an agreed advance payment.
Select Send supplier statement of account to send a statement of accounts to the supplier. You can choose to send a statement of All transactions or only Open transactions.
The Statement reports menu gives the following options:
Supplier & customer - All transactions. Select this option to see all the supplier and customer transactions. The Customer & Supplier Account Movements report (NGREP) opens.
Select Supplier - Open transactions to see the Supplier statement of presently open transactions.
Select Supplier - All transactions to see the Supplier statement of all transactions, both present and past.