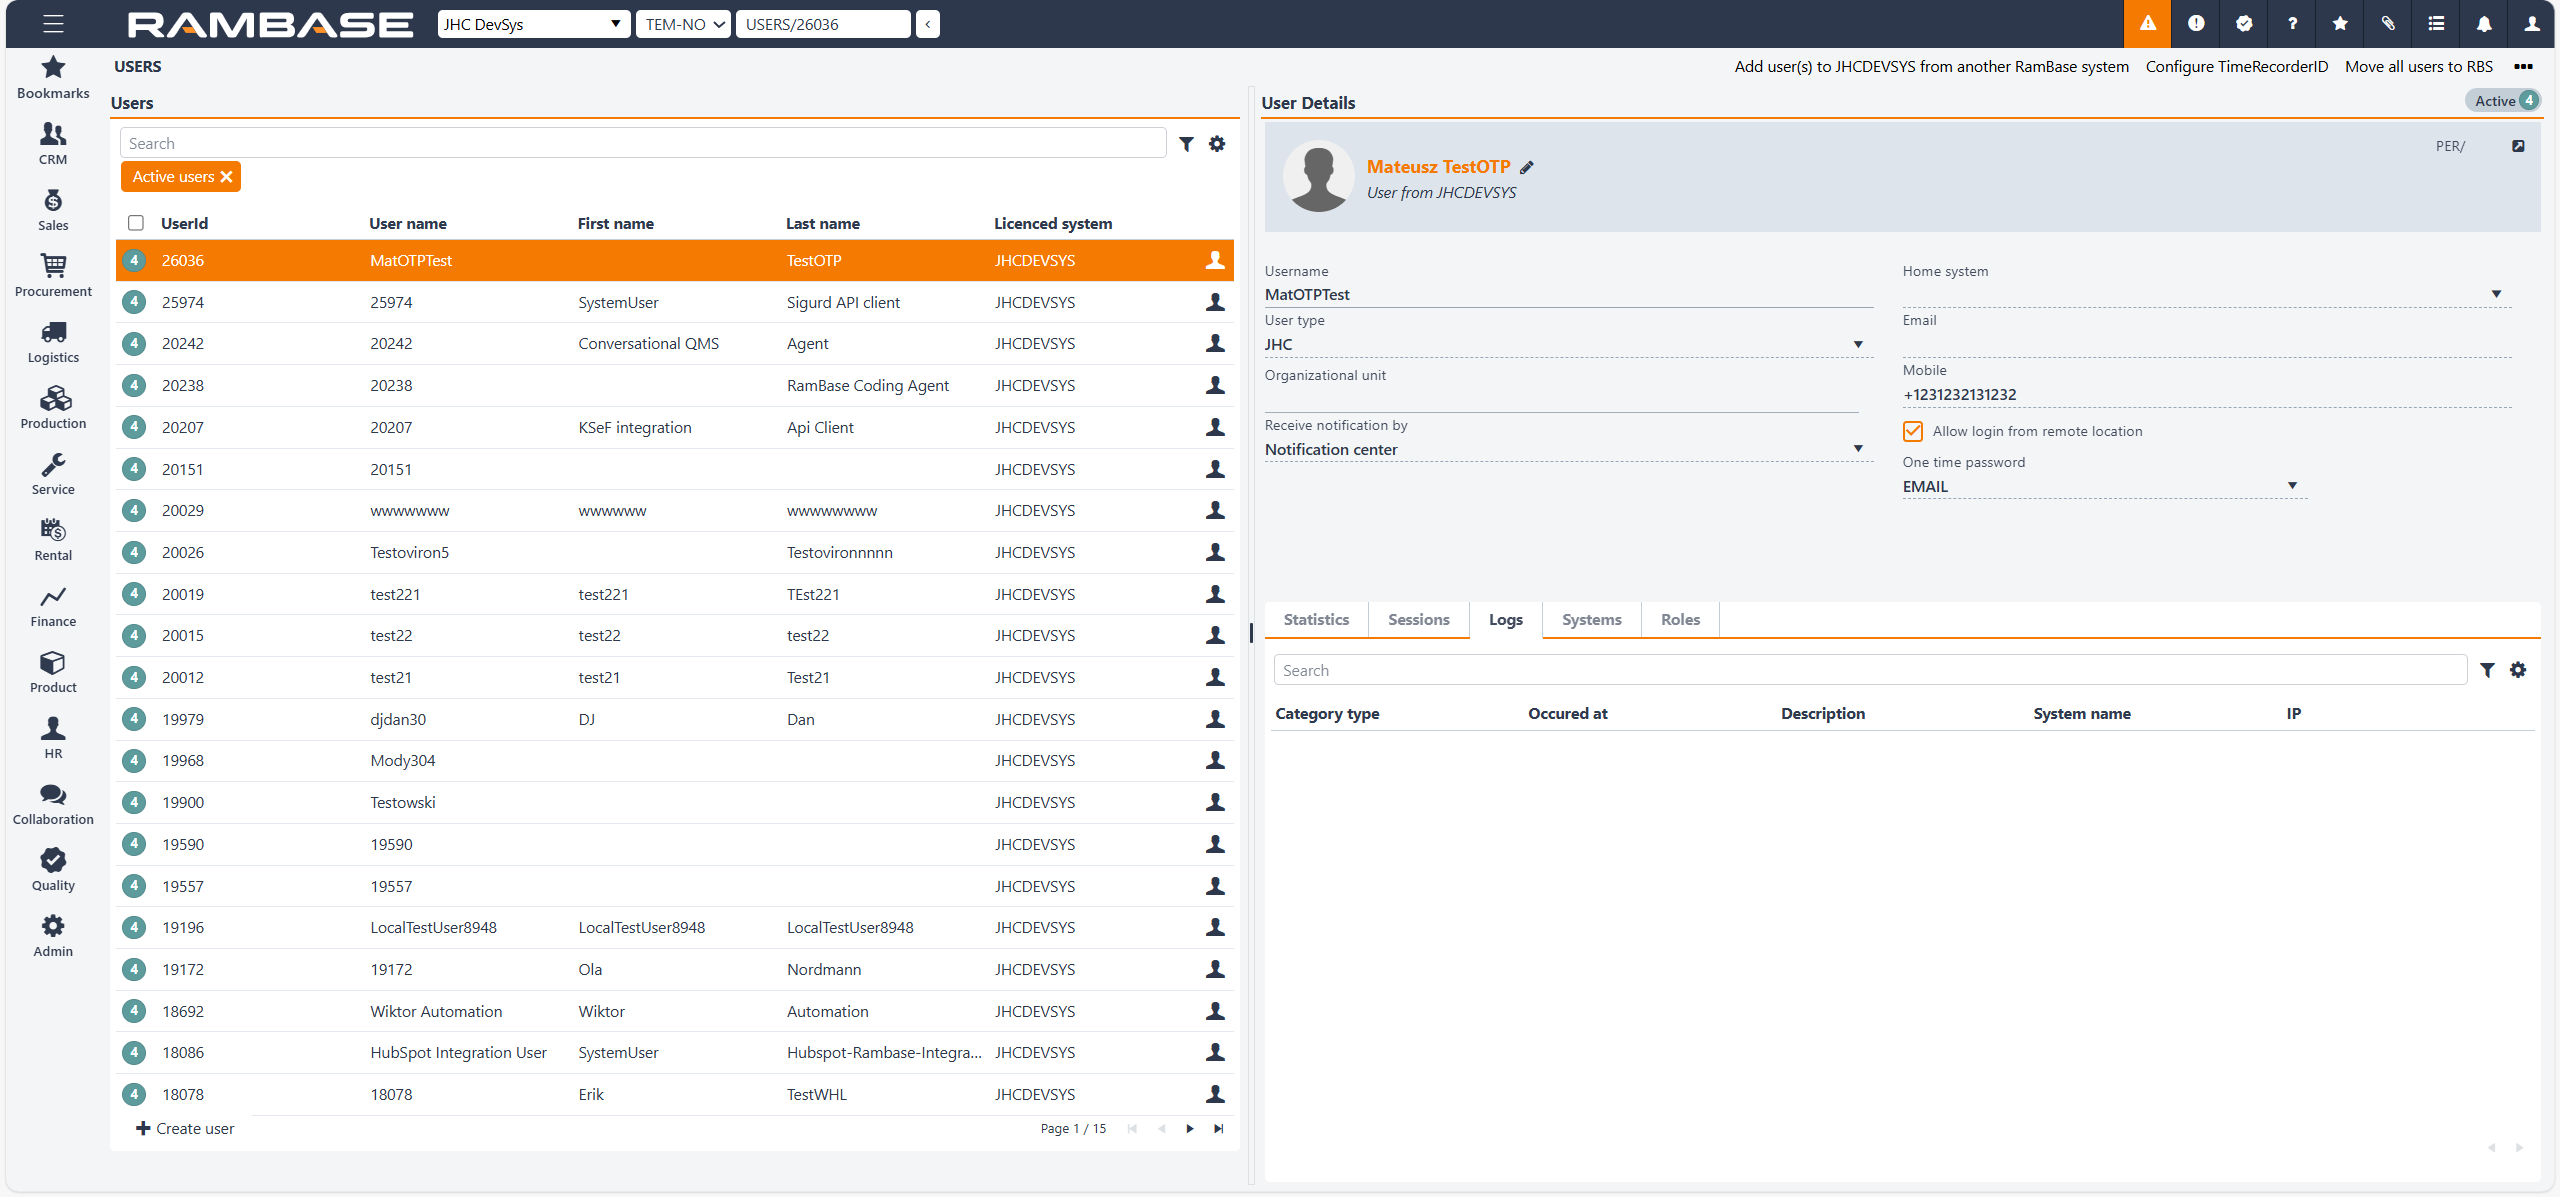
Users (USERS) application
Manage user accounts across organizational units, including internal, external, and system users. Supports user creation, role assignment, login management, and system access control.
Navigate to the application
Option 1: RamBase menu → Admin → User administration → Users
Option 2: Click the Program field and type "USERS" and press ENTER.
Click here to read more about the user interface.
Overview
Organizational units
This section allows filtering and managing users based on their assigned organizational units. Users can be dragged and dropped from the Users list to the Organizational units.
The Organizational Units section presents a comprehensive list of all units within the system, including both internal and external ones. Users can filter the list using a search field and choose to include underlying units in the results. This section helps administrators understand the structure of the organization and manage user assignments across different units.
Displays a list of all organizational units within the system.
Includes both internal and external units.
Allows filtering and searching, including an option to include underlying units.
Toggle/Icon | Name | Description |
|---|---|---|
| Include underlying toggle | By toggling it to 'ON', all users included in a selected organizational unit will be listed in the Users list. |
| 3 dots (vertical) | Opens a context menu with additional options for managing organizational units. Options
|

Users
In the Users list, you’ll find a searchable list of all users registered in the system. Each entry includes the user ID, first name, last name, and current status, such as active or invited. Administrators can create users from other RamBase systems or invite them via Microsoft Active Directory. This section also supports filtering for users who have been created but not yet invited, and includes options to reset user status or manage external consultants.
Shows a searchable list of all users in the system.
Includes user ID, first name, last name, and status (e.g., active).
Users can be added from other RamBase systems or invited via Microsoft AD.
Includes both system users and external consultants.
Search field, filter builder and column settings
The header contains multiple options to filter the list:
Standard filters are quick and ways of filtering the list on a set of requested criteria.
Active users
Invited users
Created and not invited
Users on leave
Partners
Resigned users
Column | Description |
|---|---|
| Displays a status icon indicating the status of the user. The status icon can be clicked to select individual users, or the empty checkbox in the header of the column can be clicked to select all. Selected users may be handled via the options in the Context menu. For example, Invite user to Microsoft AD login. Potential statuses are:
|
UserId | Displays the identifier of the User (USERS). |
First name | Displays the first name of the User (USERS). |
Last name | Displays the last name of the User (USERS). |
| There are various types of users which can be listed. Hover over to verify the user type. Potential user types
|


User details
The User Details section provides in-depth information about a selected user. It includes the username, user type (such as standard or consultant), and the organizational unit to which the user belongs. Notification preferences are also shown, along with indicators for whether the user is external or internal. Additional details include the user’s home system, email address, mobile number, and whether remote login is permitted.
The users name and home system is displayed in the header, along with a reference to the Personnel (PER) identifier.
Displays detailed information for a selected user, including Username, User type, Organizational unit and Notification preferences.
Indicates if the user is external or internal.
Shows contact details like email and mobile number.
Specifies whether remote login is allowed.
The User details area can potentially display various banners to inform the administrator(s). Listed below is a selection of these.
The login from unsecure zone settings has been disabled for users with SSO login. -
This user has been invited from *Name of home system* and operates as an external user or consultant user in undefined.
The login from unsecure zone settings has been disabled for users with SSO login.
User has been invited to RamBase by email Pending activation from email link.
Field/Drop-down menu/Checkbox | Description |
|---|---|
Username | Displays the user's login name. |
Organizational unit | Displays the name of the organizational unit of the User (USERS). |
Receive notification by | Displays the currently selected way of receiving notifications. Available options:
|
Home system | Displays the name of the System where the user was created. |
Displays the user's email. Used to send change notifications and one time passwords | |
Mobile | Users mobile number. Used to send one time passwords to user. Requires contry prefix. |
Allow login from remote location | Decide if the user should be allowed to login to RamBase from other locations than the main office by two factor authentication. |
One time password |
|
Tabs
Statistics
The Statistics tab displays usage metrics for the selected user, such as login frequency and activity levels. This information helps administrators monitor user engagement and identify patterns in system usage.
Error logins - Displays the number of failed login attempts for the user. This helps administrators identify potential access issues or security concerns.
Last successful login - Shows the timestamp of the user's most recent successful login. Useful for tracking user activity and verifying access patterns.
Last log entry - Indicates the most recent system log entry related to the user. This provides insight into the latest recorded action or event.
Last log message - Displays the content of the last log message associated with the user. Helps in understanding the context of the last recorded activity.
Sessions
The Sessions tab lists the user’s session history, including the date and time of each session, the IP address used, and the actions performed. This is particularly useful for tracking user activity and diagnosing potential issues.
Search field, filter builder and column settings
The header contains multiple options to filter the list:
Column | Description | |
|---|---|---|
Sessions id | Unique identifier for the user session. | |
Date | Date and time when the session occurred. | |
System name | Name of the system where the session took place. | |
Used OTP | Indicates if a one-time password was used for this session and authenticated. | |
IP | The IP address associated with the log event. It is useful for tracing the origin of the activity. | |
Actions | Available actions for the session, such as viewing details or terminating the session. |
Logs
In the Logs tab, administrators can view system logs related to the user. These logs contain technical information and error messages that can assist in troubleshooting and understanding system behavior.
Column | Description |
|---|---|
Log id | Displays a unique identifier for the log entry. |
Category type | Displays the category of the log entry. Used for grouping and sorting different kind of loggings. |
Occurred at | Displays the date and time when the log entry was created. |
Description | Displays the logged text, message or event information. |
System name | Displays the name of the RamBase system the event, text or message occured. |
IP | Displays the user's IP address. |
Systems
The Systems tab shows which systems the user has access to, including any external systems integrated with RamBase. This overview helps ensure that users have the correct access rights across platforms.
Column | Icon | Description |
|---|---|---|
St | Displays the status of the permission for RamBase access. Potential statuses:
| |
System name | The name of the RamBase system. | |
Description | Description of the RamBase system. | |
Created | The user who created it and the date and time of creation. | |
Company | User main company name in database format. | |
Is test system | A boolean that indicates if the system is a test-system. | |
Representing | The customer or supplier represented by the portal user. | |
Contact of | Contact identifier |
Roles
The Roles tab lists all roles assigned to the user. Each role defines specific access rights and permissions within RamBase, making this section essential for managing user privileges and responsibilities.
Column | Description |
|---|---|
St | Status for the user assignment. |
Role id | Role identifier. |
Role name | Name of the role. |
Description | Description of the role. |
Valid from | Valid from date. |
Valid to | Valid to date. |
Competence profiles
The Competence Profiles tab provides an overview of the competence profiles assigned to a user. Competence profiles define the documents or document collections the user is required to read and/or complete training on in order to perform their work.
Column | Description |
|---|---|
Competence profile id | Competence profile identifier |
Name | Name of competence profile |
AssignedAt | Automatically generated timestamp when creating a competence profile |
Description | Description of competence profile |
Context menu options
Option | Description |
|---|---|
Temporary leave | Use this option if the user will be on temporary leave. This will set the selected user in Status 7 - Inactive - Temporary leave, and the user's access will be inactive until the user is activated again. When the user is activated again all roles and system accesses will be activated for the user. |
Resign user | Use this option to set the selected used in Status 9 - Inactive - Disabled. This will delete all roles and system accesses. It is possible to activate the user again, but roles and system accesses must be added from scratch. |