Scheduling reports
Reports that should be run at regular intervals can be set up as scheduled reports in RamBase. This is done via the Report Queue (RPQ) application. An RPQ-document holds all the information about one scheduled report run, such as information about the report, the report format, any selected filters, when the report should be run and where and how it should be sent once finished.
Schedule a report
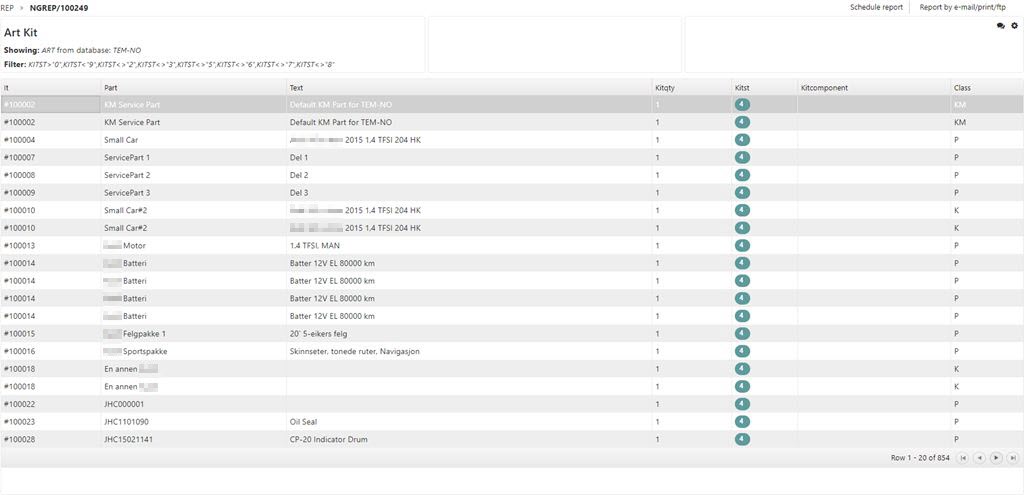
Enter the Report Menu (REP) using the RamBase navigation menu to the left (from any module) or by typing REP into the program field.
Highlight the report you wish to schedule and press ENTER.
Click the button Schedule report in the upper right corner.
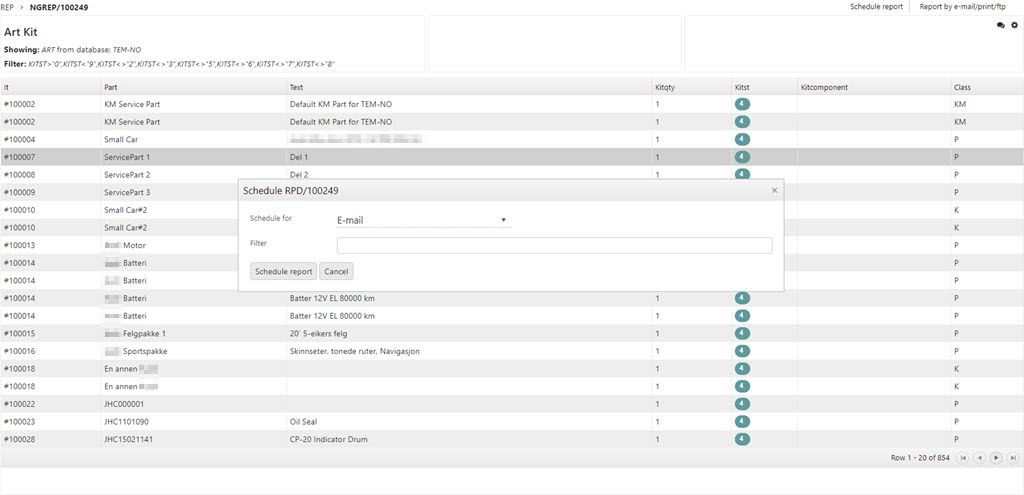
This opens a popup where you can choose the output in the Schedule for field. This option cannot be easily reversed once chosen. The choices are:
Email: The report will be sent on email.
FTP: The report will be uploaded to an FTP server.
Database: The report will be uploaded to a database.
Azure blob storage: The report will be sent to an URL.
The filter field is inherited from the filter you have used to run the chosen report. This filter may be edited or added to. Click the schedule report button when finished.
You will then enter the Report Queue Document (RPQ) where you need to add additional information.
You can get a preview of the report by clicking the View Report icon. This is useful to see if the filter you have used is correct.
The Schedule Setup box contains all the fields you will need to fill in to successfully schedule the report.
The Interval field controls which intervals the report will be scheduled to. You can choose Every Day (Monday to Sunday), Every Workday (Monday to Friday), individual weekdays, First or Last of Month and also an hourly report. It is also possible to schedule a report for a one time run sometime in the future via the Run just once-option. The SDate field will fill automatically with the first possible date.
The OutPrio-field determines when the report is allowed to run. By default this will be set to the Prio of the Report Definition (RPD).
The SDate (start date) field is determined automatically using the information entered in the interval field. This will be the next date according to the chosen interval.
The STime (start time) field can be set to the exact time you want the output.
The Format field controls the different output format you have available. You can choose between CSV-file, a flat file or an HTML file.
The TimeBy field is used to select which fields the report should set the Timing against. So for a report that should extract, for instance, documents based on their Date, one would select Date – if the report should instead be based on Confirmed Date (CONF), Requested Date (REQ) Registered Date (REGDATE) or Period (PERIOD), these should be selected accordingly.The selections in this field are.
Date
Confirmed Date
Requested Date
Registered Date
Period
The Dynamic Timing Filter can create a filter depending on the date field which extract data from a given time-interval, for instance, last week or month. The result will be visible immediately based on the information entered in the Sdate field. There are 5 different timing-intervals that can be used in the Timing field.
D – Day
W – Week
M – Month
Y – Year
P – Period
The one letter timing variables (D,W,M,Y,P) means the current interval for each one. These can then be modified by using ‘+’ or ‘-‘ to add or subtract to the interval. The Timing can be given either as a single value or as ‘to’ and ‘from’-values by separating this with a comma. For example, just choosing ‘W-1’ will give last week, with a date-interval from Monday to Sunday. Choosing ‘W-1,W’ will use the first value as the starting point (in this case the Monday of last week) and the second value as the end point (in this case the Sunday of the current week).
It is also possible to mix different Timing-variables, to for example do something like: ‘W-2,D-1’ which will give the Monday 2 weeks ago as the starting point and yesterday as the end point. The Period-interval (P) is an exception to this as this cannot be mixed with other Timing-intervals. An attempt to do so will give an error message.
The Sendby box contains information regarding the output, based on your choice between either Email, FTP, Database or Storage in the Schedule popup.
Email
Click the View/Edit receiver list to choose which receivers will receive the output.
This opens a popup where you can add receivers using the add receiver button.
Choose the Source archive in the Source dropdown menu (CNT or PER). Highlight the desired receiver(s) and click ENTER.
This will add the receiver to the receiver list in the receiver setup list. Here you also may delete or edit details represented by a magnifying glass icon.
This details allow you to edit the email name, report filename (the default is the RPD identification number. Also refer to the Dynamic filenames below), the senders address (the default is reports@rambase.net) in addition to the email subject and any messages you want to add to the email body.
FTP
Click the Add FTP receiver button. This opens a popup where you will need to enter the HostName, UserName and Password for your FTP server.
Once one or more FTP-recipients have been selected, it is possible to edit the details for each of them on the Receiver Setup-screen by selecting the magnifying glass-icon. Look at the Dynamic filenames below to create a dynamic filename to avoid overwrites for later scheduled reports.
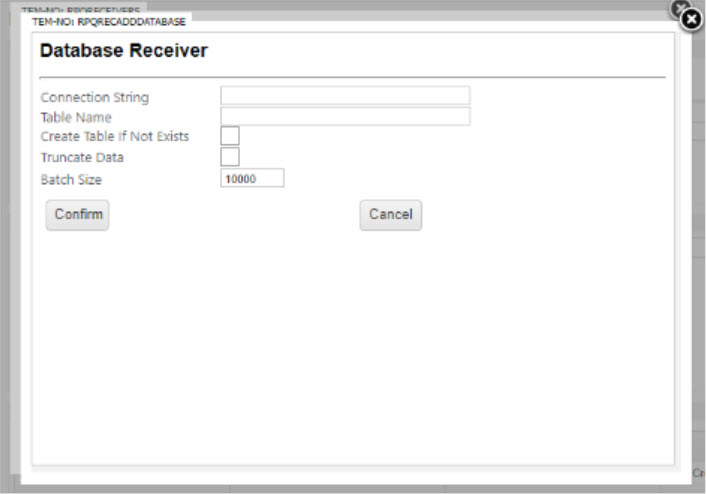
Database
Click the Add Database Receiver. This opens a popup where you could enter Connection string, Table name, Batch size and some settings such as: Create Table If Not Exists and Truncate Data.
Once one or more database-recipients have been selected, it is possible to edit the details for each of them on the Receiver Setup-screen by selecting the magnifying glass icon. Look at the Dynamic filenames below to create a dynamic filename to avoid overwrites for later scheduled reports.
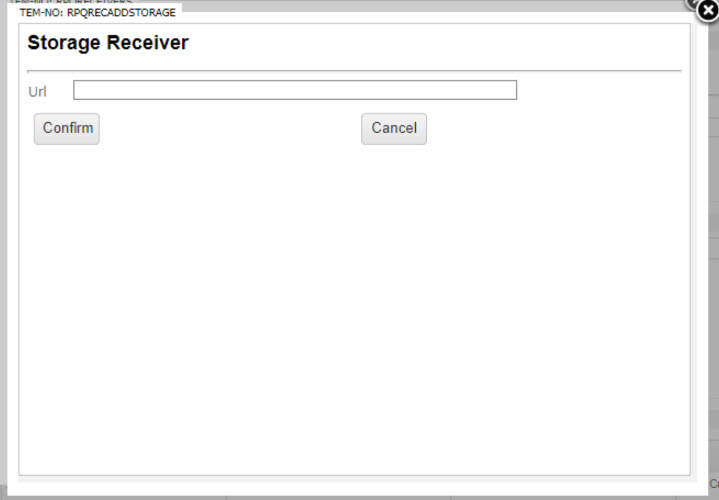
Storage
Click the add storage receiver. This opens a popup where you could enter the URL.
Export scheduled report to Azure Blob Storage
You will need a URL to an Azure Blob Storage container with a valid SAS (Shared Access Signature) token with write/create permissions.
The SAS can be generated from either the Azure Portal or Azure Storage Explorer, as detailed in Microsoft's guide on Generating SAS tokens (external links).
The complete URL will consist of:

Shared Access Signature - RamBase Requirements
When creating the SAS, the following fields, permissions and parameters must be defined or added.
Start time
Expiry time
Permissions
Add
Create
Write
Optional parameters
IP address range - For access to the current IP address range, contact RamBase Support.
Once one or more storage-recipients have been selected, it is possible to edit the details for each of them on the Receiver Setup-screen by selecting the magnifying glass icon. Look at the Dynamic filenames below to create a dynamic filename to avoid overwrites for later scheduled reports.
Press F12 to open the Action menu and choose the option Forward RPQ to Schedule Queue (ST=8) from the Action menu.
This document will receive ST:8 until it is scheduled for output. When finished it will go to ST:9 and a new identical document will be created for the next scheduled output in ST:8.
Dynamic Filenames/Subjects and Notes
For the ‘Report Filename’, ‘Email Subject’ and ‘Email Note’-fields it is possible to insert some values that will be based on the current date and/or time when creating the text. These values are: %DATE, %T, %D, %M, %Y, %W – inserting one (or more) of these values in the given text will substitute them as follows:
Value | Meaning | Example | Result |
%DATE | Current Date | ‘Report for %DATE’ | ‘Report for 2015.01.01 |
%T | Current Time | ‘Report run at %T’ | ‘Report run at 18:00’ |
%D | Day part of DATE | ‘Report for %D.%M.%Y’ | ‘Report for 01.01.2015’ |
%M | Month part of DATE | ‘Report for %D.%M.%Y’ | ‘Report for 01.01.2015’ |
%Y | Year part of DATE | ‘Report for %D.%M.%Y’ | ‘Report for 01.01.2015’ |
%W | Week for date | ‘Report run in week %W’ | ‘Report run in week 0115’ |
RPQ Status
1 – Edit – version
3 – Running – the Report is currently being produced and sent out.
8 – Queued – Report is in the queue, waiting for the scheduled time when it should run.
9 – Status:9 is used in two cases:
Complete – The report has been produced and sent out and a new RPQ has been made for the next scheduled run (new RPQ can be found in the ‘Dest’-field.).
Discontinued – The report should no longer run as a scheduled report and has been discontinued (no ‘next run’ will be found in the ‘Dest’-field).
D – Discarded – An RPQ in ST:1 can be discarded if it should not be scheduled.