Risks list (RISK)
Overview
The Risks list (RISK) application gives an overview of risk(s) already added in the Risk assessment (RAS) application. Note that new risks may be created directly in this application, not only via the Risk assessment (RAS) application.
Risk details area - Right side
Risk details area - Right side - Header
The header includes informational and, depending on the status of the risk, editable fields. It is important to note that, depending on the Source object type selected, the selection of available fields will vary.
Risk title field - Title set when creating the risk. Can be edited in Status 1-3.
Risk assessment field - Name of the risk assessment. Can be edited in Status 1-4 and Status 9 with the right permissions. Click the View icon to open the Risk assessment (RAS) application.
Description field - Description of the risk assessment. Set when the the risk was created. Can be edited in Status 1-3.
Risk owner field - Name of the Risk assessment (RAS) owner. Click the dropdown menu to change the Risk owner . Click the View icon to open the Personnel (PER) application to view details on the user. Can be edited in Status 1-3.
Source object type dropdown menu - Allows the user to select which RamBase object the risk is linked to. The user selects an object type and provides an identifier, or selects it from the dropdown menu. Depending on the object type selected, the following dropdown menus will be available:
Selected object type
Identifier
Sales order
Source sales order
Source order item
Customer
Source customer
Supplier
Source supplier
Finance project
Source finance project
Product
Source product
Production work order
Production work order
Quality issue
Quality issue
Risk assessment
Risk assessment
Custom
Provide an identifier and RamBase will link it to the risk.
Source document identifier
Risk details area - Right side - Tabs
The Risks list (RISK) application has three tabs:
Notes: This tab is used for unconnected notes of any kind.
Quality issues: Existing related issues from Quality issue (QIS) may be added in this tab.
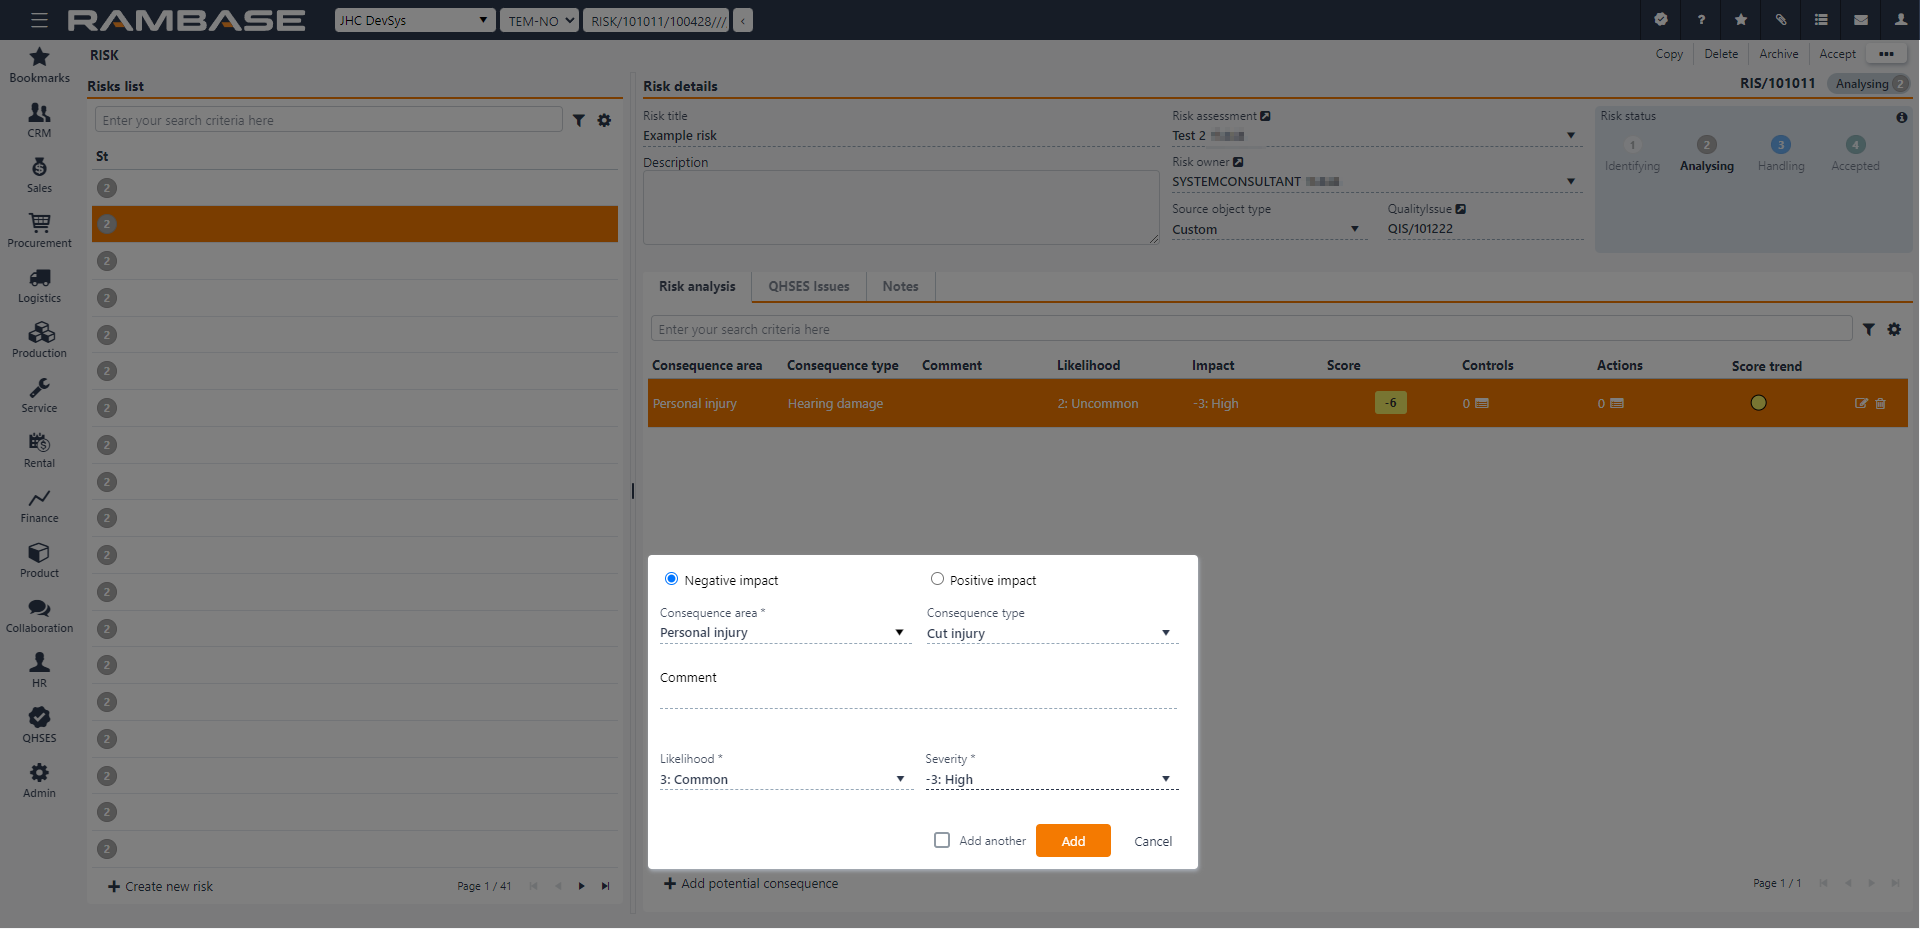
Risk analysis: In this tab, one or more potential consequences must be added for each risk.
Users select whether each potential risk has a Negative impact or a Positive impact (the latter is sometimes referred to as positive risk or a possibility).
Consequence area must then be chosen in the drop-down menu. It is then optional to choose a Consequence type from the next drop-down menu. For example, the Consequence area may be Personal injury, while the Consequence type could be Cut injury. The consequence areas and types are defined in the QHSES setup (QISADMIN) application.
There is also a Comment field, where the user may add any relevant information.
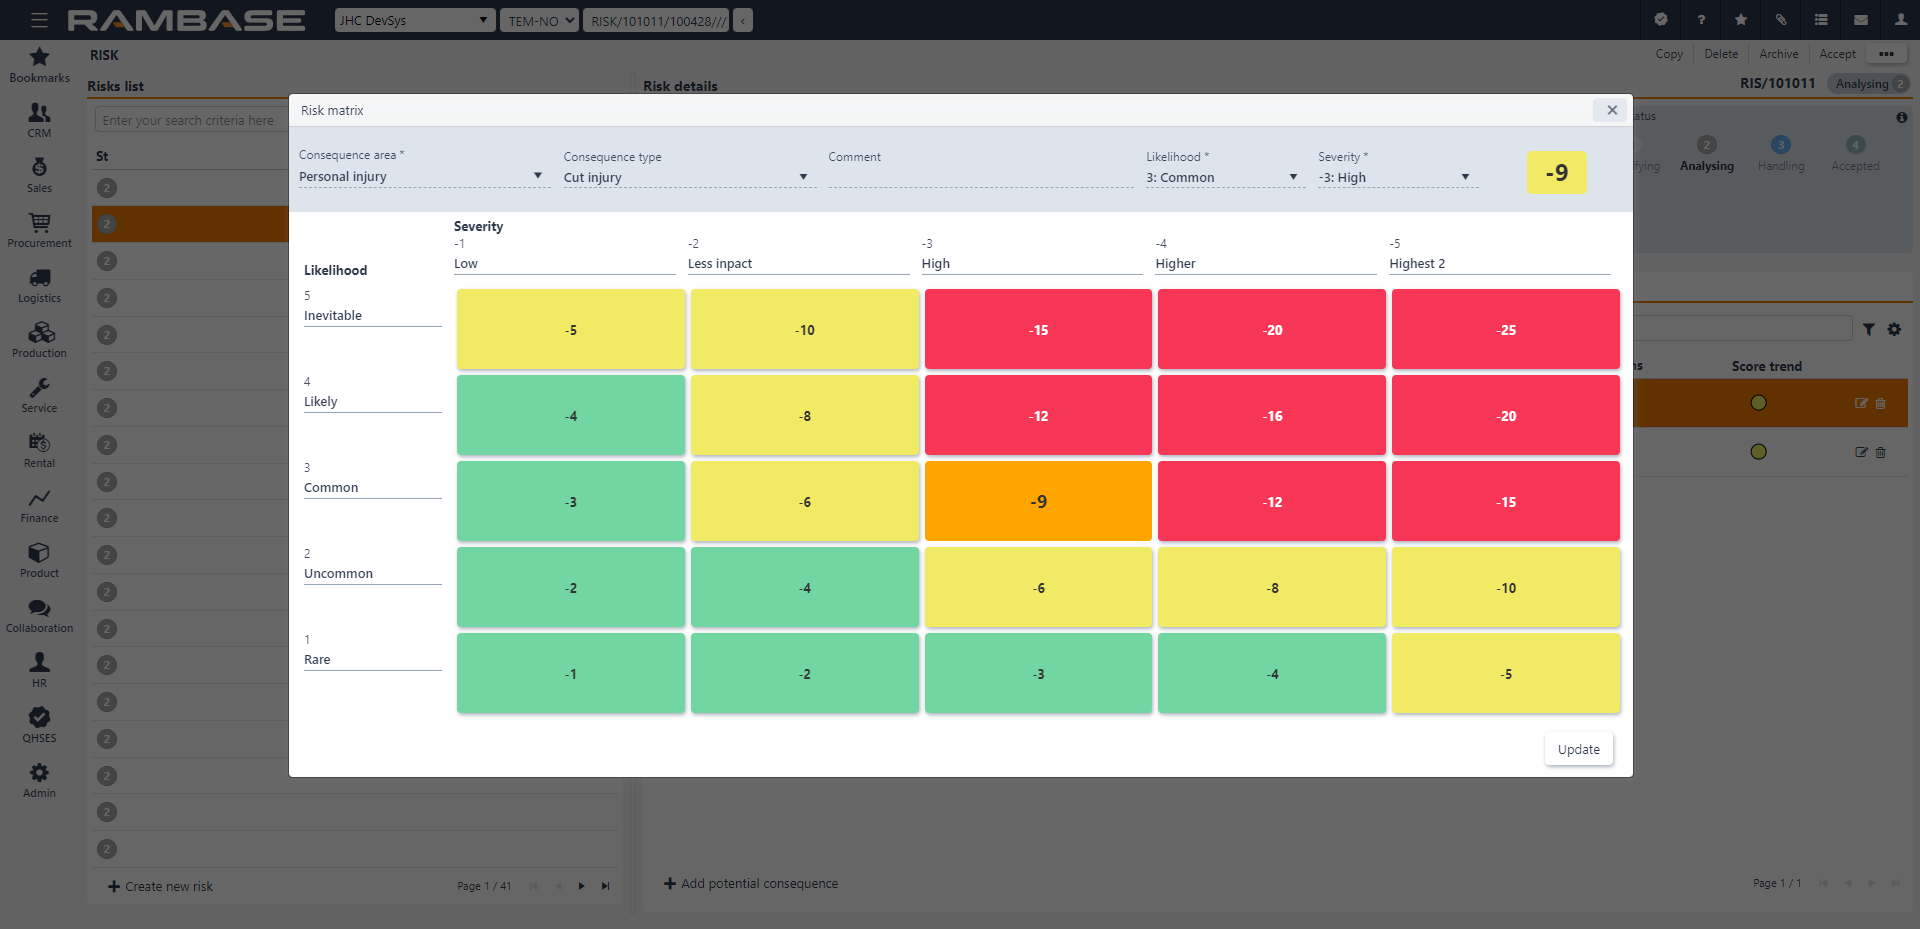
Likelihood and Severity are mandatory drop-down menus in which the user select the values corresponding to their assessment of each consequence. The risk matrix is defined in the QHSES setup (QISADMIN) application, with a 5x5 matrix as default.
After quantifying the consequences of a risk, the potential consequence will appear in the Risk analysis tab. Controls may then be added. This is done by clicking the icon in the Control column for the consequence in question. A control could either be existing from other risk assessments, predefined reusable controls or new. The predefined and reusable controls are defined in the QHSES setup (QISADMIN) application.
After controls have been added, actions should be added to handle/control the remaining risk. Add actions by clicking the icon in the Action column for the consequence in question. Users may add new actions, or existing ones (if any exists). Actions are then handled further in the Risk assessment (RAS) application under the Action overview tab or in the Task (TASK) application. In the Action overview tab, users may add a closed action to a control for the specific risk.
The statuses of risks are Status 1 - Registration, Status 2 - Under Assessment, Status 3 - Handling, and Status 4 - Accepted. All individual risks must be in Status 4 - Accepted before a risk assessment can be closed in the Risk assessment (RAS) application (Status 4 - Assessed).
Note
If the user opens an older version of an assessment, a warning will appear and provide a link to the most up-to-date version.
Context menu options
The context menu options are available in by clicking the Context menu icon in the top-right corner.
To enable some context menu options, Risk(s) (RISK) must be selected by clicking the Status icon. This is verified when the Status icon is replaced with a check-mark. Once one or more elements are selected, the extended context menu options are enabled. The extended context menu options are listed in the second table below.
Options | Description |
|---|---|
Start analyzing | To forward the Risk to Status 2 - Analyzing, select the Start analyzing option. Available in Status 1 - Identifying
|
Start handling | To forward the Risk to Status 3 - Handling, select the Start handling option.
|
Accept | To forward the Risk to Status 4 - Accepted, select the Accept option.
|
Copy | Select the Copy option to open the Copy popup where the user can copy and customize the new risk copy. The new risk copy will be set in Status 1 - Identifying.
|
Archive | To forward the Risk to Status 9 - Archived, select the Archive option.
|
Delete | To delete a risk, select the Delete option. The user will be asked to verify the choice by either selecting Yes or No in the popup. A deleted risk will be removed from the Risk list.
|
Available options when multiple risks are selected | Descriptions |
|---|---|
Change risk assessment | Opens the Change risk assessment popup where the user can use the Risk assessment dropdown menu to select a different risk assessment. |
Delete selected | Allows the user to delete the selected risk. Verify the choice by selecting Yes or No in the popup. |
Archive selected | To forward the selected risk(s) to Status 9 - Archived, select the Archive option. |
Clear selected items | To deselect risk(s), select the Clear selected items option. |