Assigning employees to work schemes
Once the Work Arrangements (WAR) documents are in place, employees may be linked to their respective work arrangements:
Enter PER in the Program field and press ENTER.
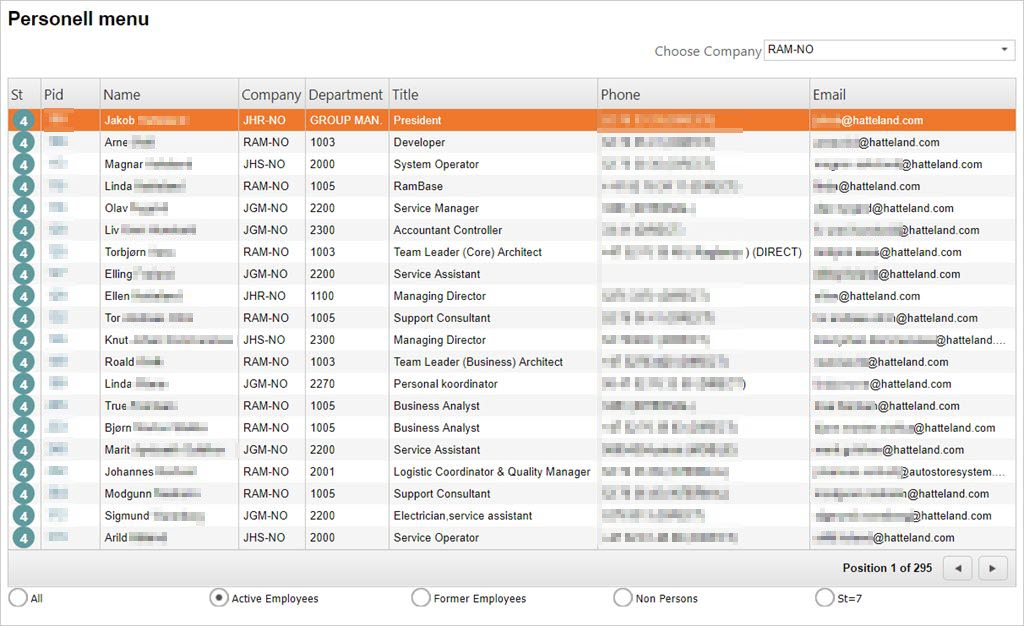
In the Personell Menu:
Select an employee from the list and press ENTER.
In the Personnel window:
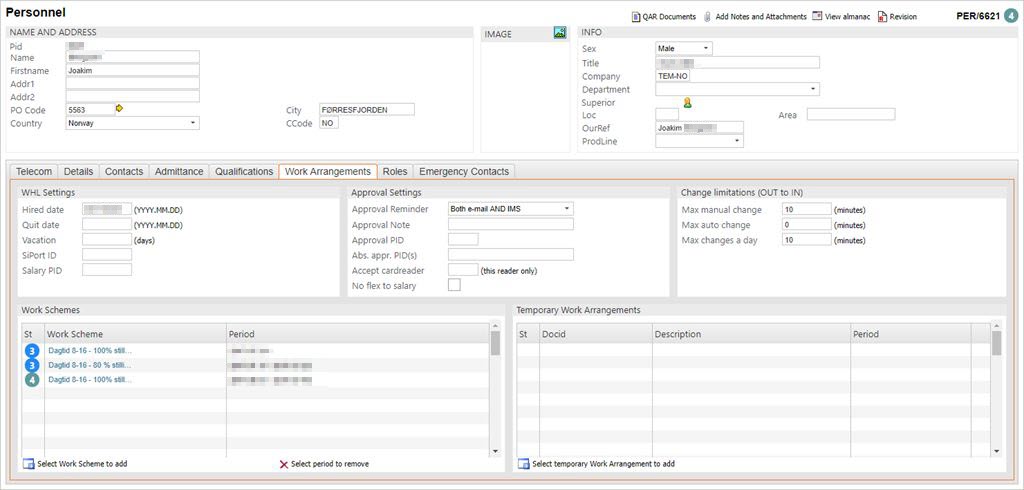
Click the Work Arrangements folder, (see below), and enter data into the following sections:
WHL Settings section
Hired date: Enter date hired. Use the form: yyyy.mm.dd.
Quit date: Enter the date when the employment is closed. Use the form: yyyy.mm.dd.
Vacation: The field shows the number of vacation days. All new employments may have the vacation field set to 0. In subsequent years the vacation is computed automatically on the 1st of January at 09:00 according to the following rules:
Day time workers: (Number of working days per week) * 5.
Shift workers: (Highest number of working days per shift) * 5.
Employees being 60 years or older: Follow the rules above and manually add 5 extra days to the result.
Any days remaining from last year is added to the result.
SiPort ID: Enter mapping PID for Siemens card reader.
Salary PID: Enter the PID that is used to represents the employee in the external wage payment system.
Approval section
Approval reminder: Enter reminder options for approval reminders.
Approval PID(s): Enter the PID(s) of the person(s) who approves the employee's work hours.
Abs. appr. PID(s): Enter the PID(s) of the person(s) who approves absence periods.
Group: Select the Work Scheme (WSR) to which this employee belongs. The associated WAR documents will immediately be listed.
Accept card reader: Enter card reader id if entries to the premises are limited to a single entrance.
No flex to salary: Tick to unable payment of flex time.
Change limitations section
Max manual change: Enter the maximum number of minutes that can be switched from OUT to IN in one operation.
Max auto change: Enter max minutes to be switched automatically.
Max changes a day: Enter the total minutes that can be switched from OUT to IN during a single work day.