Change parts and inspect LCM
Life Cycle Management (LCM) documents are used to track all changes in a product during its life cycle. There are situations where a kit needs to have one or several parts replaced, which needs to be registered in a LCM document for traceability and service reasons.
The qualifying criteria are:
The LCM must be in production,
or
There must be a service order for the LCM.
Changing a part in a kit
Open the related LCM document to the kit where you want to change a part.
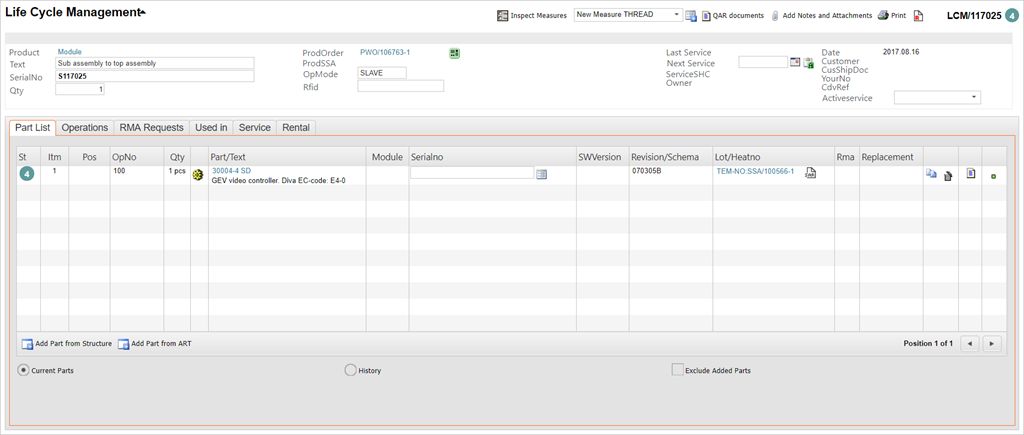
Here you will see the Change icon to the right in the item line. The icon is two overlapping sheets of paper.
If the desired part you wish to change is not present in the document, click the Add Part from Structure if it is present in the structure, or Add Part from ART if you need to find it in the Product (ART) application.
Highlight the desired part and press ENTER.
Click the Change part icon to open the Change LCM Part popup.
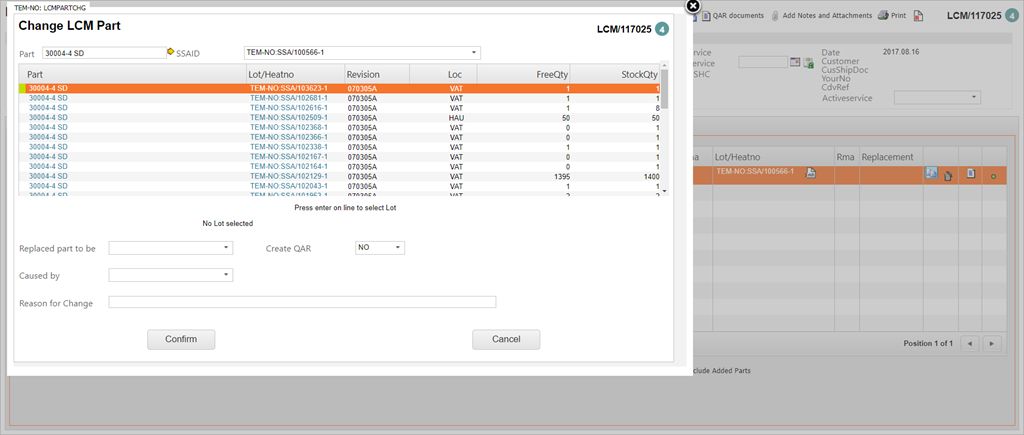
The part will now be selected and you must now choose what to do with the replaced part. The options are:
Returned to Stock
The old part will be put back into stock. A return sheet is printed, part must be put back in stock. The cost is not added to production.
Returned to Supplier
This option returns the faulty part back to the supplier. This creates a Supplier Return (SRT) document with a reference to this change. The cost of the part will not be added to the production as the supplier will carry this cost.
Scrapped
This option creates a Stock Correction (SAW) document and the part is scrapped and a new part is substituted in the production.
Press ENTER on line to select Lot. This will add the part to the To be replaced with field.
Choose what to do with the replaced part in the Replaced part to be field. Below you are presented with four fields which requires information concerning the change, the reason for it and what to do with the replaced part.
The Create QAR-field ask you if a Quality Assurance Report (QAR) document is to be created with a reference to the change. You may choose YES or NO, based on your use of QAR documents.
The Caused By field gives you the option to point to where the fault lies, which is either with the supplier or the production.
The Reason for Change field is a freetext field where an explanation must be entered.
Choose if a QAR document is to be created in the Create QAR drop down menu.
Enter a Caused by option.
Add info on the reason for change.
Enter the destination stock location for the replaced part in the Stock Location field. This field will be pre-filled with a default destination if you have a Stock Location (STL) defined as default stock location when part is changed in LCM in the Stock Location Details area in the STL application.
Click the Confirm button to confirm part change. This takes you back to the LCM document and you will see the Part Change: Picking in progress icon. Information regarding the change can be seen in the Replacement column.
Click the Part Change: Picking in progress icon, which will take you to the Pick Goods application.
Proceed with the picking process by entering the desired quantity and click the Confirm button at the bottom. If you use the Pick All button you will not need to click Confirm.
Note: If you have made an error, you can click the Part Change: Picking Completed icon on the LCM to return to the Pick Goods application. Clear the filter if needed and press ENTER to view all picked items. Click the Undo Pick All button to restart the pick process.
When you create the LCM, RamBase builds the part list as follows.
Create items for 1 pcs as shown above for parts with unit = pcs and with both INCLUDEINLCMPARTLIST = Yes (1) and
REQUIRESERIALNOTOSHIP = Yes (1) . The last of these two fields is shown in ART as ‘RequireSnoToShip’. Exception from this rule: Always create items for 1 pcs for sub assemblies with unit = pcs.
Create items with total quantity for parts with unit = ‘pcs’ and only INCLUDEINLCMPARTLIST = Yes (1). The result of this for the example above is given in the figure below.
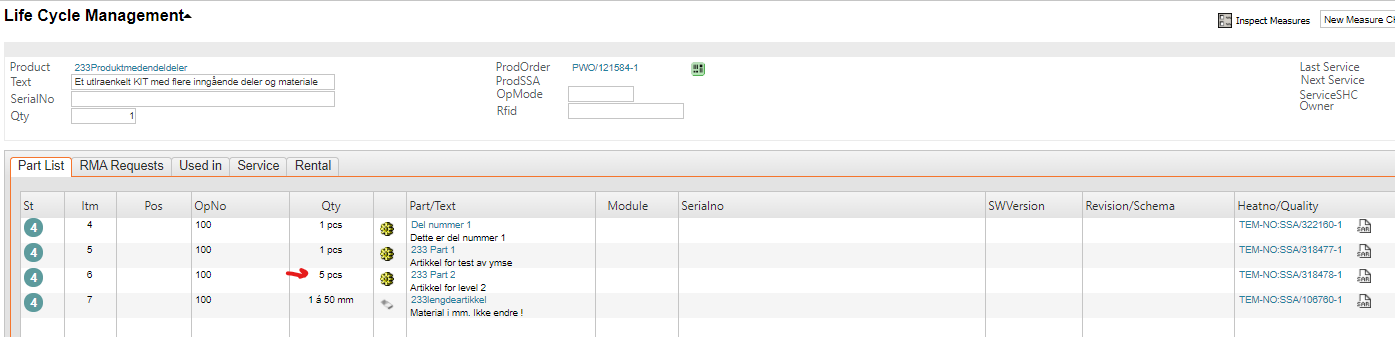
By opening the line to, for example, replace 2 of these 5 parts by first modifying the existing line to 3 pcs and then adding a new line for pcs of this part by the function Add part from Structure and modify the quantity to be added to 2 pcs.
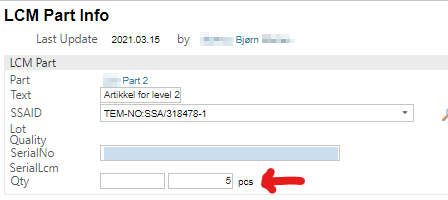
In Add part from structure, select the quantity to be added (the quantity that was reduced at the existing line).
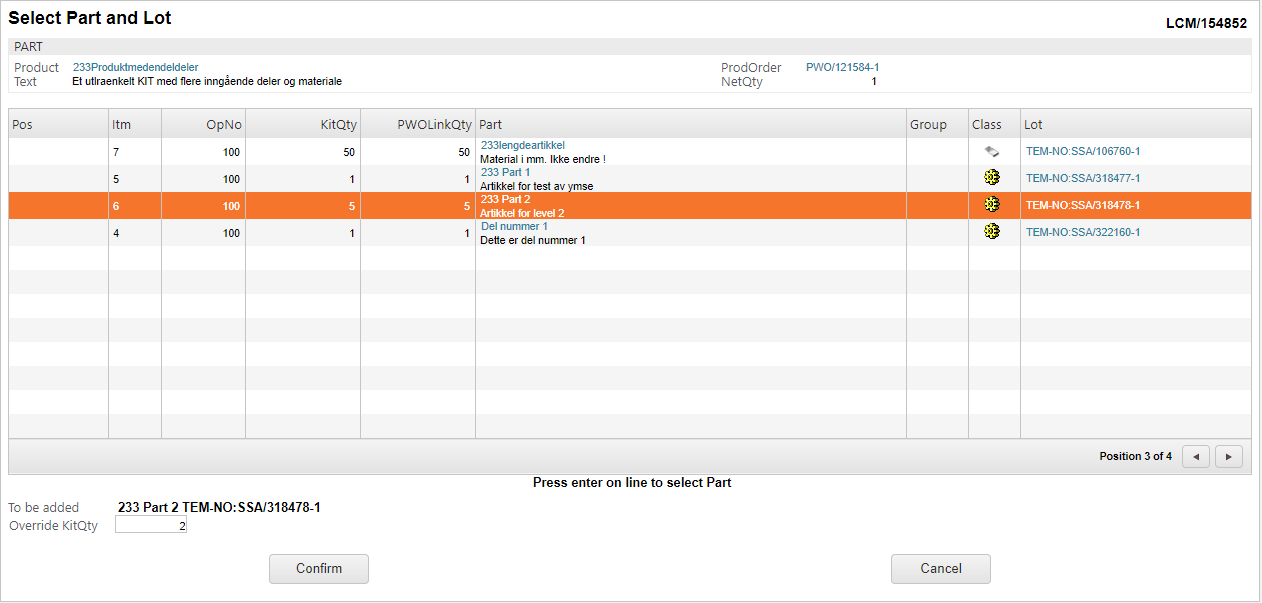
Select the part and change the quantity in Override KitQty. It is important to first reduce at existing line and then add correct quantity at the new line in order to not exceed the total quantity for the part.