Tracking Number Series (TRN)
The Tracking Number Series (TRN) application contains tracking numbers allocated to your company by the Carrier (CAR).
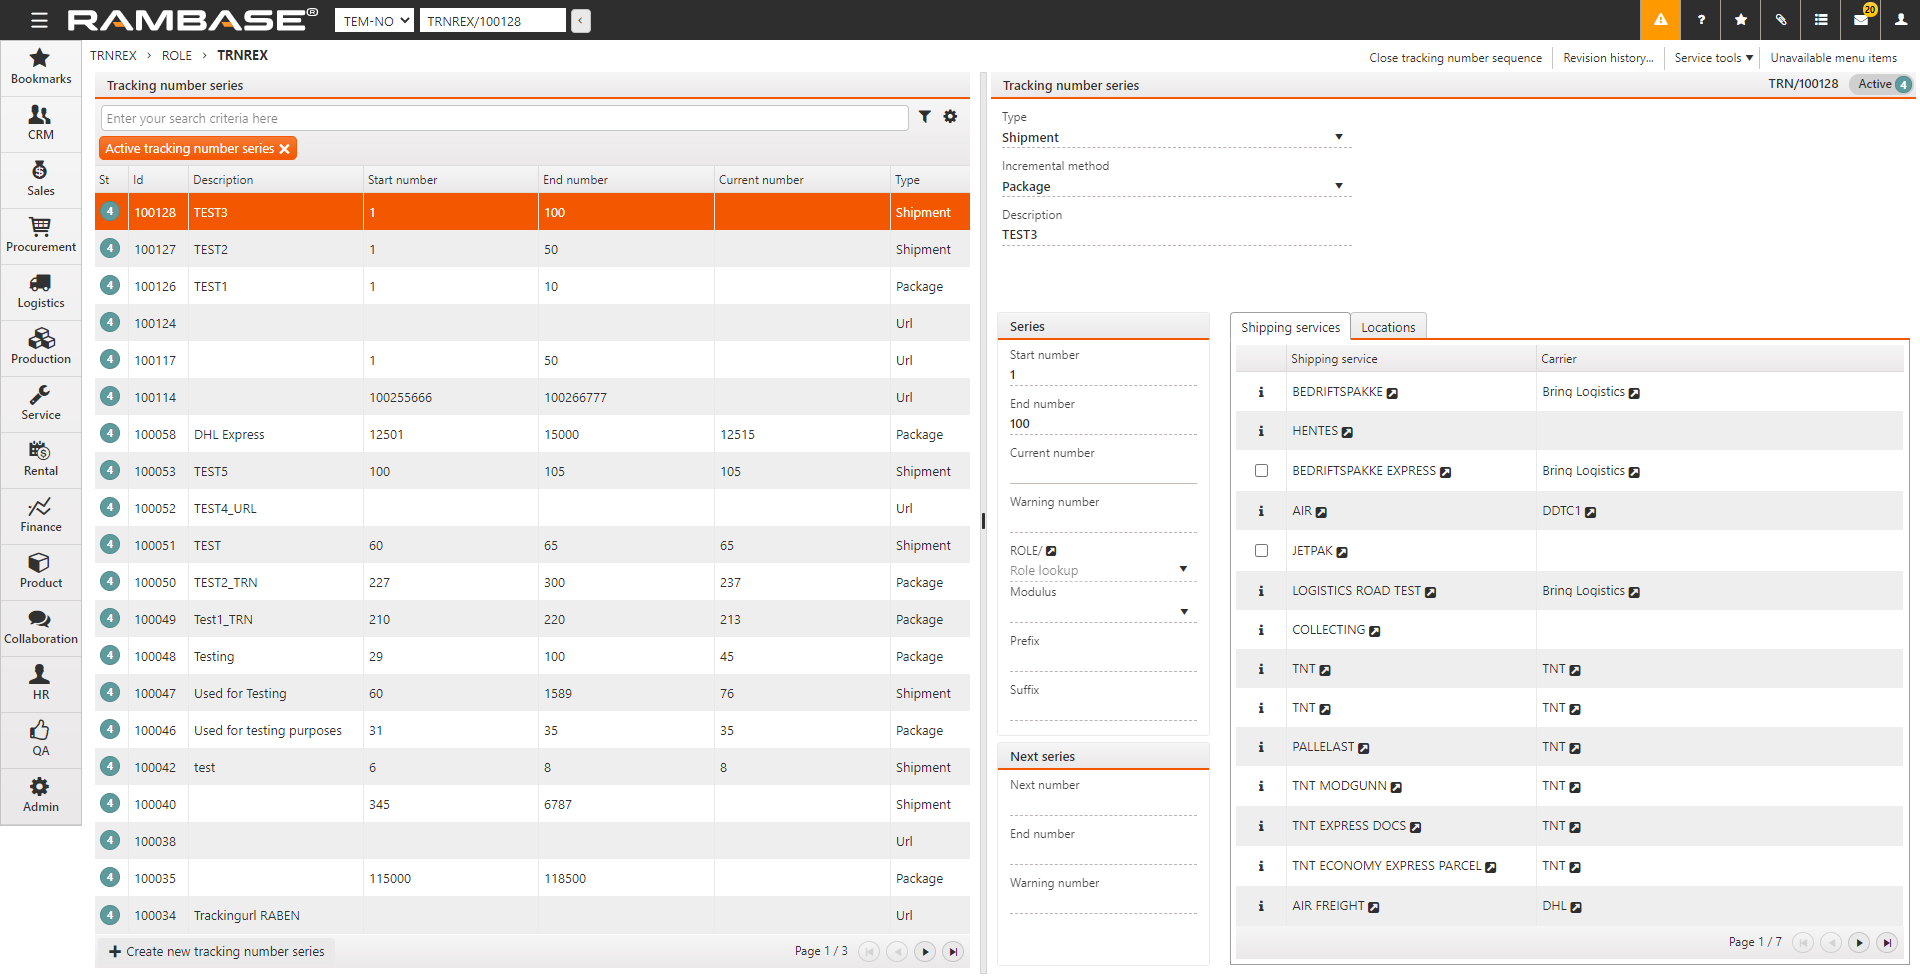
To open the TRN application, select Logistics > Shipping > Tracking number series in the Main menu.
Select Create new tracking number series.
Enter the following information.
Type. Choose the type of shipment the tracking number is associated with. You can choose the following.
Package, the tracking number used for packages in a shipment.
Shipment (the tracking number for the whole shipment.
URL (used when tracking number is generated from an external system, and you store the carrier's URL for package tracking in RamBase).
Incremental Method. The available options are Doc (same tracking number for all packages in shipment) and Package (new tracking number for every package).
Start Number. Enter the first number in the number series.
End Number. Enter the last number in the number series.
Select OK. The TRN document is created in Status ST:1. You can edit the mandatory fields, in which you had already entered information, and add more information in the other fields given below.
Description. Enter a description for the TRN in this free text field.
Current Number. The current generated tracking number is displayed here. This field cannot be edited manually.
Warning Number. Choose the tracking number that, when reached, gives a warning via the Internal Messaging System (IMS). The message is sent to the users that are assigned the ROLE associated with this TRN.
ROLE. Select
 to open the ROLE application where you can specify the role to associate with the TRN. You can also select
  to lookup and specify the role.
Modulus. This field allows you to add a pre-defined security number to the tracking number.
Prefix and Suffix. These fields allow you to add a prefix or suffix to the tracking number.
Next Number/End Number/Warning Number. These fields indicate which number series will be the next. If you have a new number series specified in these fields, no warning will be given when the previous series ends.
Shipping services. specify the shipping service (SHP) to be associated with this tracking number series. You can select multiple SHP by selecting the checkboxes. Some SHP are unavailable due to being associated with other TRN.
Locations. Select the warehouse locations (LOC) that will use this TRN.
Select F12 to open the action menu and select Register (ST=4) to register the TRN.