Role templates (ROT) application
Only available to RamBase consultants
The Role templates (ROT) application is designed to streamline and centralize the management of user roles and permissions. By providing a robust, scaleable, and flexible framework, Role templates (ROT) enables RamBase to define, manage, and deploy reusable sets of Permissions (PRM) and Duties (DUTY) across complex organizational structures.
A standout feature of Role templates (ROT) is its ability to pass on updates from templates to all derived roles, ensuring consistency and reducing administrative overhead. Integration with the Roles (ROL) application and other RamBase modules ensures that roles created in Roles (ROL) inherit permissions and duties from the Role templates (ROT), supporting a cohesive and scaleable approach to access management.
Navigate to the Role templates (ROT) application
Option 1: Click the Program field and type "ROT" and press ENTER.
Click here to read more about the user interface.
About the application layout
The interface is divided into four key areas:
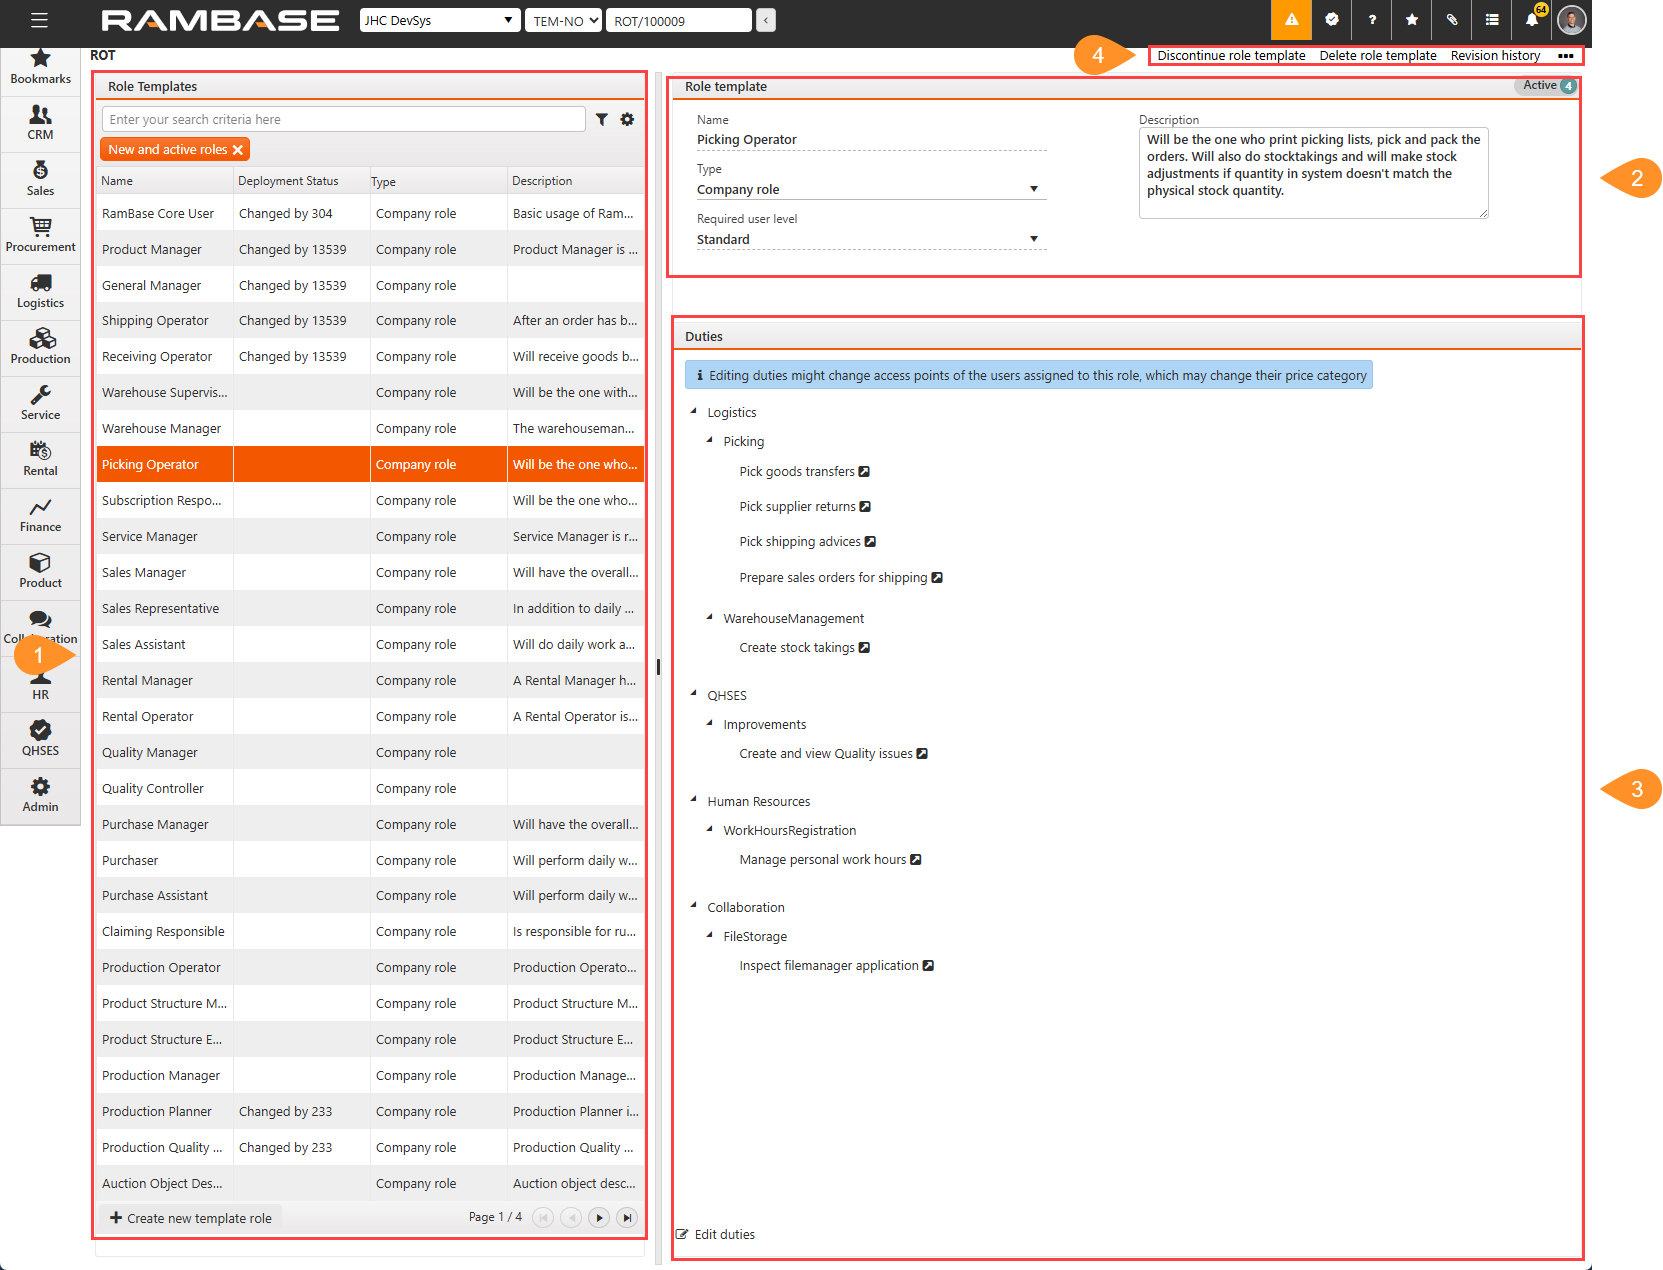
Located on the left side, this panel displays a searchable and filterable list of existing role templates.
Found at the top center, this section allows users to view and edit metadata for the selected role template.
This is the middle-right section, showing a hierarchical view of duties linked to the selected role. Users can expand/collapse categories and manage duties directly from this view.
Located in the top-right corner.
List
Displays all available role templates in a searchable and filterable list. This panel allows users to quickly locate and select a role template for further editing or review.
Search field, filter builder and column settings
The header contains multiple options to filter the list:
Column | Icon | Description |
|---|---|---|
St |
| Displays an icon indicating the status of the Role template (ROT). Potential statuses:
|
Role template id | Displays the identifier of the Role template (ROT). | |
Name | Displays the name of the Role template (ROT). The name is set when creating the Role template (ROT) and can be changed in the Name field found in the Header area. | |
Deployment status | Describes if the object has been changed locally and is ready to be deployed from the Repository. | |
Type | Role by company level (DB) or organizational unit (ORG) Displays the Type of the Role template (ROT): Potential types are:
| |
Description | Displays the description set in the Description field in the Header area. |
Create new template role button
Function: To create a new Role template (ROT) in Status 1 - Pending registration.
Button | Description |
|---|---|
| To create a new Role template (ROT) in Status 1 - Pending registration, click the Create new template role button. |

The procedure can be found here.
Role template - Header
Provides metadata and configuration options for the selected role template. This section is essential for defining the scope and purpose of each role template.
Banner
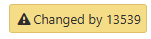
A banner will indicate who made the last changes to the Role template (ROT).
Banner | Description |
|---|---|
| Example of a banner to inform on who made the last changes to the Role template (ROT). |
Field/Drop-down menu | Description |
|---|---|
Name | Name of the Role template (ROT) |
Type | Role by company level (DB) or organizational unit (ORG) |
Required user level | The user level required to have this role. Only user having the same level or higher can be assigned. This field also controls which duties can be added to the role. Only duties with the same level or lower can be added. User levels (highest level first): Administrator, Partner, User, Portal user. |
Description | A description of the role, which can be updated in Status 1 - Pending registration and Status 4 - Active. With the purpose of being able to efficiently differentiate the roles. |
Duties - Tree list
Displays and manages the duties associated with the selected role template in a hierarchical tree format.
Tip
Hover over a Duty (DUTY) to view the description.
Functionality
Users can expand categories to view and assign specific duties, which are built from underlying permissions (privileges).
Icon | Description |
|---|---|
| To expand or collapse a module, click the Expand/Collapse icons. |
| To open the Duty (DUTY) application, click the View icon to inspect and edit details. |
| To remove a Duty (DUTY) from a Role template (ROT), click the duty to highlight it, and then click the Delete icon. |


Context menu
Context menu | Description |
|---|---|
Activate role template | To activate (set in Status 4 - Active) a Role template (ROT) in Status 1 - Pending registration, select the Activate role template option. |
Discontinue role template | To deactivate (set in Status 9 - Deactivated) a Role template (ROT) in Status 4 - Active, select the Discontinue role template option. |
Create a new Role template (ROT) and activate it
To create a new role template in Status 1 - Pending registration, click the Create new template role button located in the footer in the Role templates list.
Navigate to the Roles templates (ROT) application.
Navigate to the Role templates (ROT) application
Option 1: Click the Program field and type "ROT" and press ENTER.
Click here to read more about the user interface.
To create a new role template in Status 1 - Pending registration, click the Create new template role button located in the footer in the Role templates list.
In the popup, provide a Name.
When the name is provided, click the Create button.
Once a Role templates (ROT) in Status 1 - Pending registration, the template can be specified in the Role template header area. Duties for the template can then be specified in the Duties tree list.
Provide the details in the Role template header area; Type and Required user level.
About Type - Role by company level (DB) or organizational unit (ORG).
About Required user level - The user level required to have this role. Only a user, having the same level or higher, can be assigned. This field also controls which duties can be added to the role. Only duties with the same level or lower can be added.
User levels (highest level first): JHC, Partner, Standard, Portal user.
Start selecting the duties of the Role template (ROT) by clicking the Add Duty button found in the Duties tree list area.
Notice
Duties are created and built up with Permissions (PRM), which in the context of a duty, is called privileges, in the Duty (DUTY) application.
Read more about user admittance.
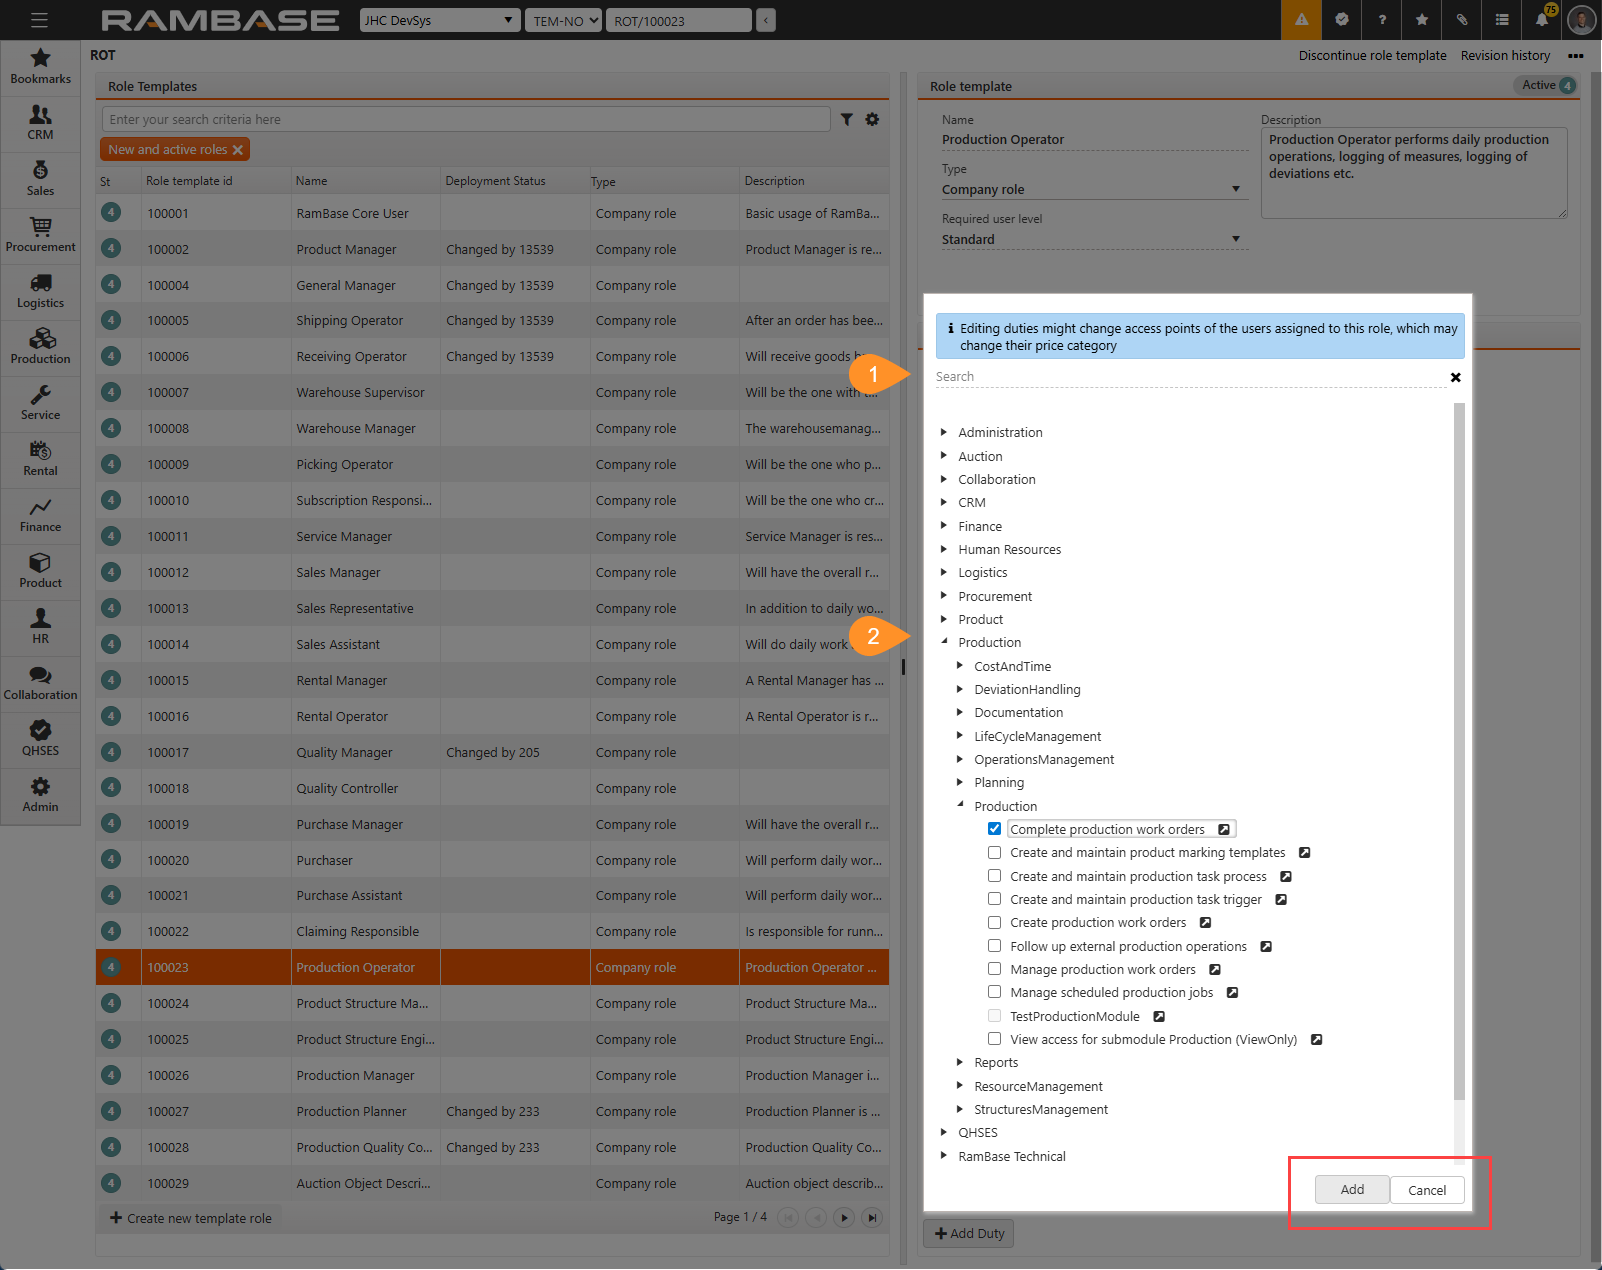
To add a Duty (DUTY) to the Role template (ROT) you can either Search(a) or Select(b):
Not able to select Duty (DUTY)?
Depending on the user's level, some duties might not be available (grayed out) due to the required user level for the Duty (DUTY).
Tip
If selecting multiple by searching for one, enabling it and then searching for another, the enabled Duty (DUTY) is added and will be listed after clicking the Add button.
To add a duty via search, click the Search field and type the name of the Duty (DUTY).
The results will be categorized by module; CRM, Collaboration, Product etc.
To select a Duty (DUTY) for the Role template (ROT), click the empty Checkbox, and then in the footer of the Duties tree list area, click the Add button.
To add a Duty (DUTY) by selection, single-click the Expand icon of the module where the duty is located, or double-click the Module; Finance, CRM, Production etc. to also expand.
Continue expanding the module until the Duty (DUTY) is located.
To select a Duty (DUTY) for the Role template (ROT), click the empty Checkbox, and then in the footer of the Duties tree list area, click the Add button.
To activate a Role template (ROT) in Status 1- Pending registration, click the Context menu and select the Activate role template option to set it in Status 4 - Active