The Gantt Planner Tool (RPLAN)
RPLAN is a tool that you use to see a comprehensive visual presentation of the production plan and the resource load. You can drag activities and tasks to change the plan.
Several users with permissions can make changes to the same plan, so the users must decide the protocol for making changes to plans. RamBase or RPLAN do not manage or control multiple versions of the plan.
Preferences
To access the Preferences, click on the cogwheel icon in the upper right corner of the application. Each change must be submitted and RPLAN must be reloaded for the modifications to work.

Preferences are divided into three tabs:
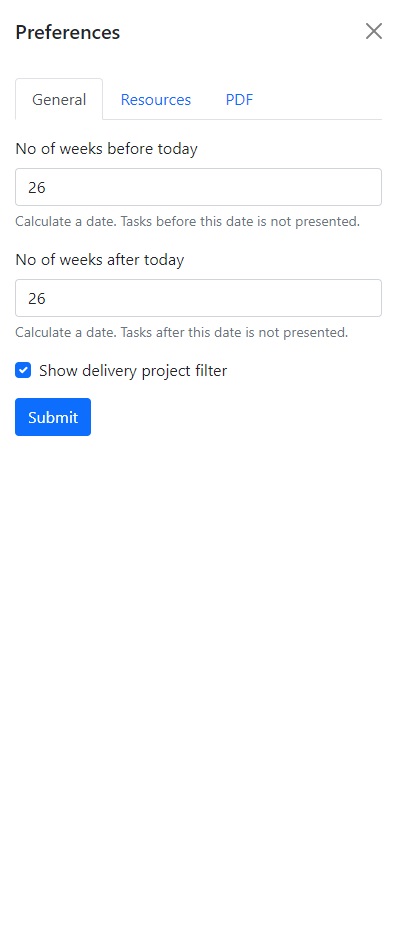
General
Allows the user to set the number of weeks that will be displayed in the timeline. The setting by default is limited to 26 weeks before/after the current date.
Important
There is a hard limit of maximum 52 weeks in advance (after the current date).
The user can also activate or deactivate the Show delivery project filter.
In this tab the user can override the default sorting by providing a custom numbering.
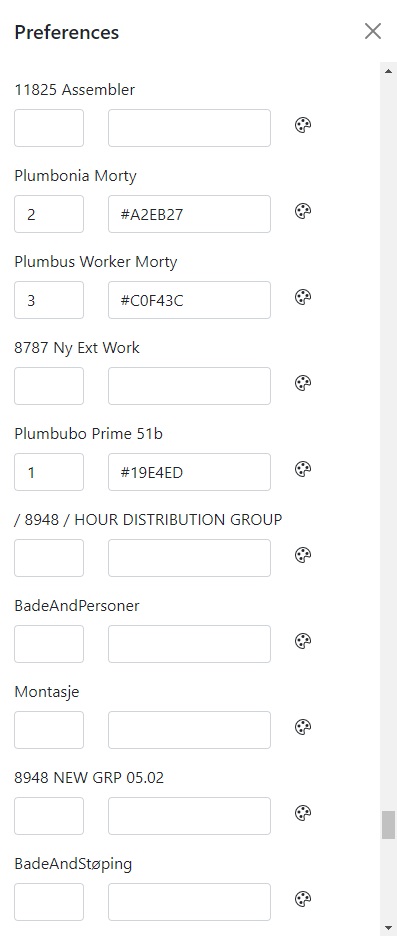
The user can also set background color on each resource by clicking on the color palette icon.
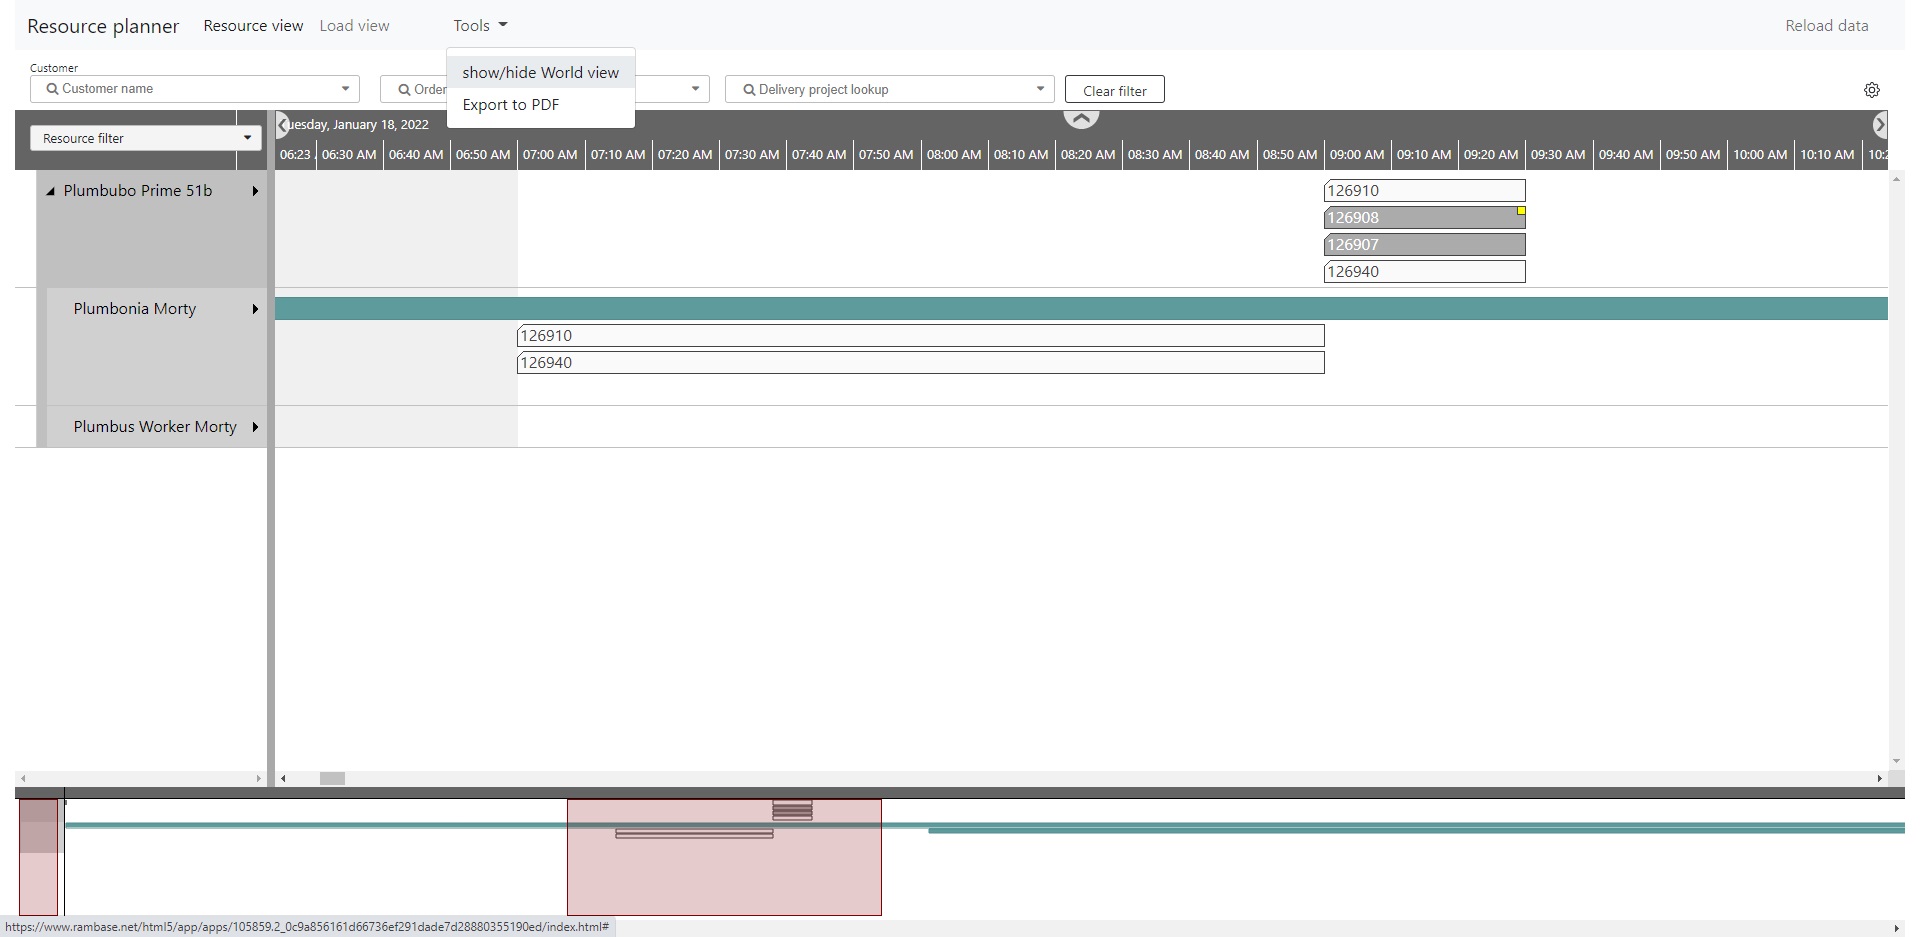
The user can change several settings for the Export to PDF tool.
Margins - user can change the top/bottom/right/left margins on the printed document. The default value is 10.
Page orientation - user can change the orientation of the document from the portrait to landscape. The default value is portrait.
Printing mode - modifies the way the image in the document is generated.
Page format - the user can select a predefined format or provide the width and height in millimeters.
Zoom factor in % - modifies the zoom factor for the image in the document.
Vertical/horizontal page count limit - limits the number of vertical/horizontal pages in the document.
Product licensing and access control
RPLAN is licensed from a third party vendor, Netronic Software. The tool is used as an add-in to RamBase. The license is based on a monthly subscription for the RamBase customer with an unlimited number of users. RamBase (JHC) manages access to the tool in the near term. When a customer is given access, a RamBase partner manages the user access.
If you have permission to view planned operations and make changes in RPLAN, you can view and update the plan in RamBase. If you do not have permission to update planned operations, you will see an error message and cannot update the plan.
Read permission | ViewPlannedOperations Task: Run RPLAN Role : Run RPLAN |
Update permission | UpdatePlannedOperations Task: Plan production work orders Role: Production planner |
Features
The key features of RPLAN are:
When you open RPLAN, data is loaded directly from the resources, the work orders and the associated operations.
View plan by resources, planned jobs and load (resource load).
Drag to move jobs along the timeline. or between resources.
RamBase does not automatically save the changes you make in RPLAN. You can decide whether to save the changes or not.
Various colors denote the various statuses, similar to the status colors in RamBase.
Overloaded resources are indicated by a warning icon.
Detailed information about jobs and work orders.
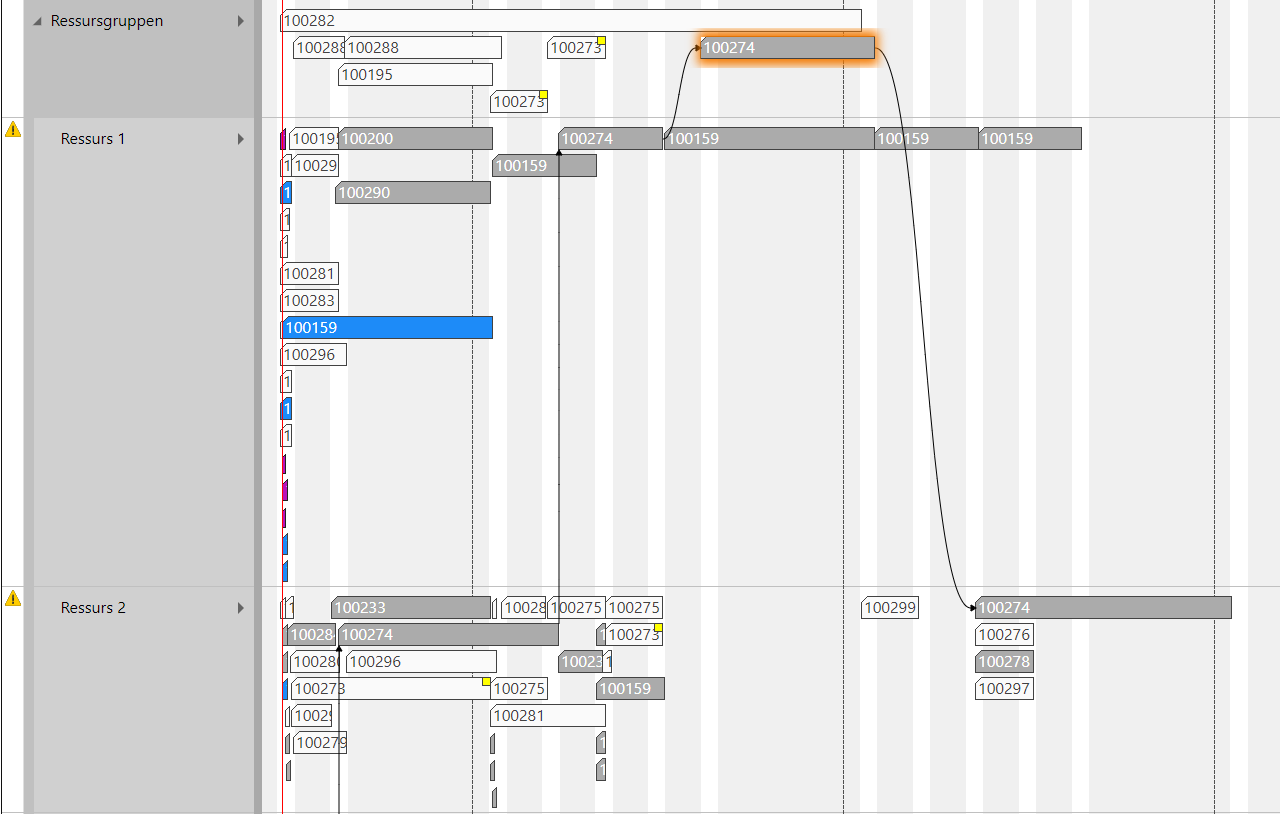
Shows connections (constraints) between the jobs for a work order.
High priority job marking.
Scroll functions to move horizontally in time and to scale the view per day/week up and down.
Use a variety of preference settings to customize the RPLAN overview.
Export the different views as PDF files.
Display the World view to get an additional overview of the operations.
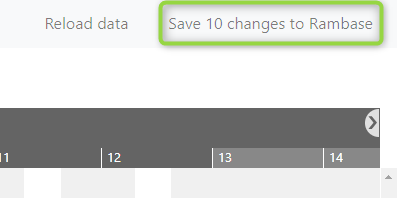
Save your changes to RamBase
Select Save changes to RamBase.
Your changes are committed to the corresponding Planned operations (PLO) in RamBase and the flag IsChangedByPlanner is set to 1 in these PLOs. There are two options to commit the changes to the Work order operations (WOO) and subsequently the job list for the Resources (RWOO):
The company setting AutoSync Planning Operation with Work Order Operation is set to ON: The WOO is updated automatically by changing the corresponding PLO.
The autosync is set to OFF: Use PRODPLANSYNC and update the work order operations by command.
To discard your changes, close RPLAN or select Reload Data.
Use RPLAN
To start RPLAN, Type RPLAN in the Program field and press the Enter key.
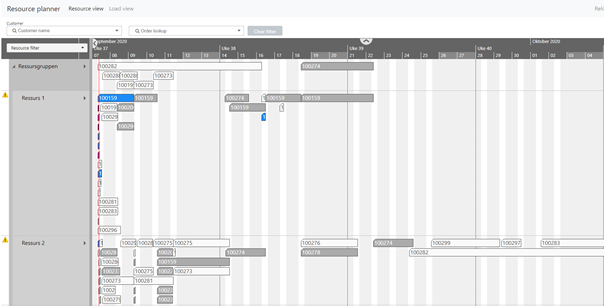
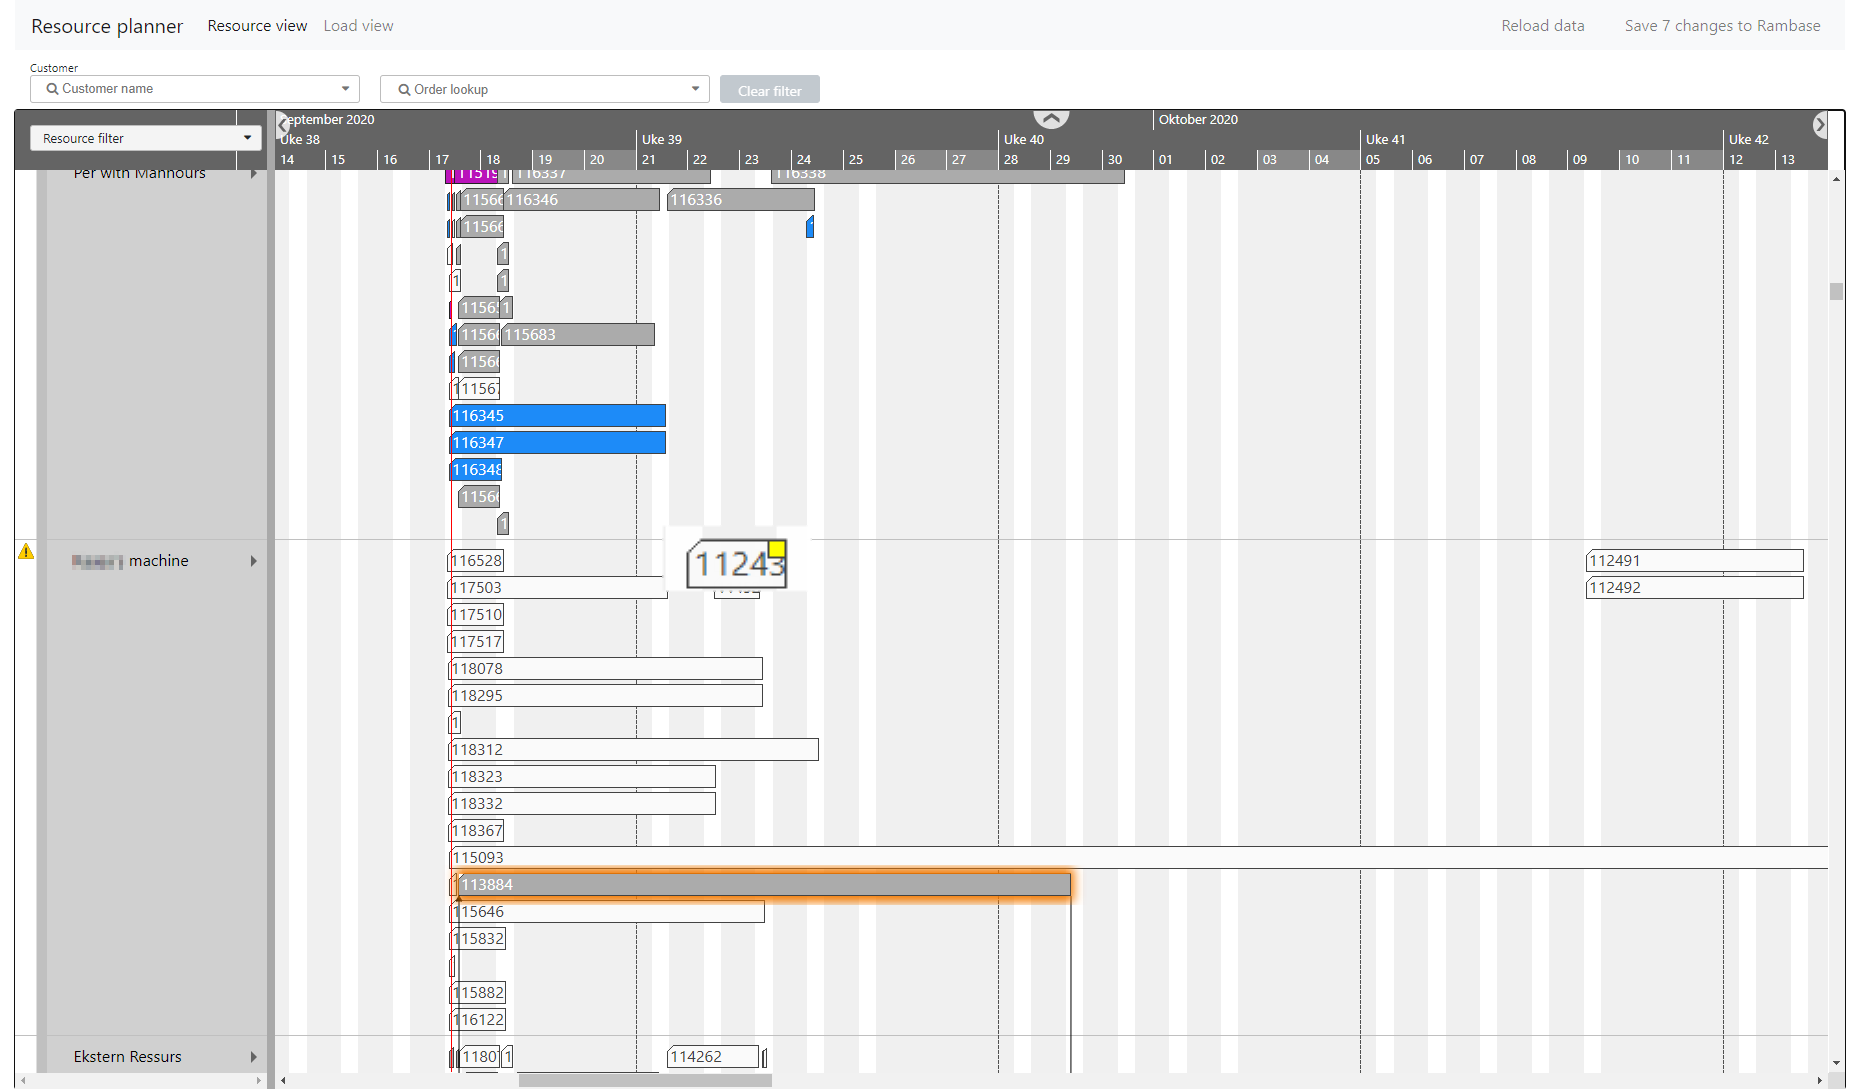
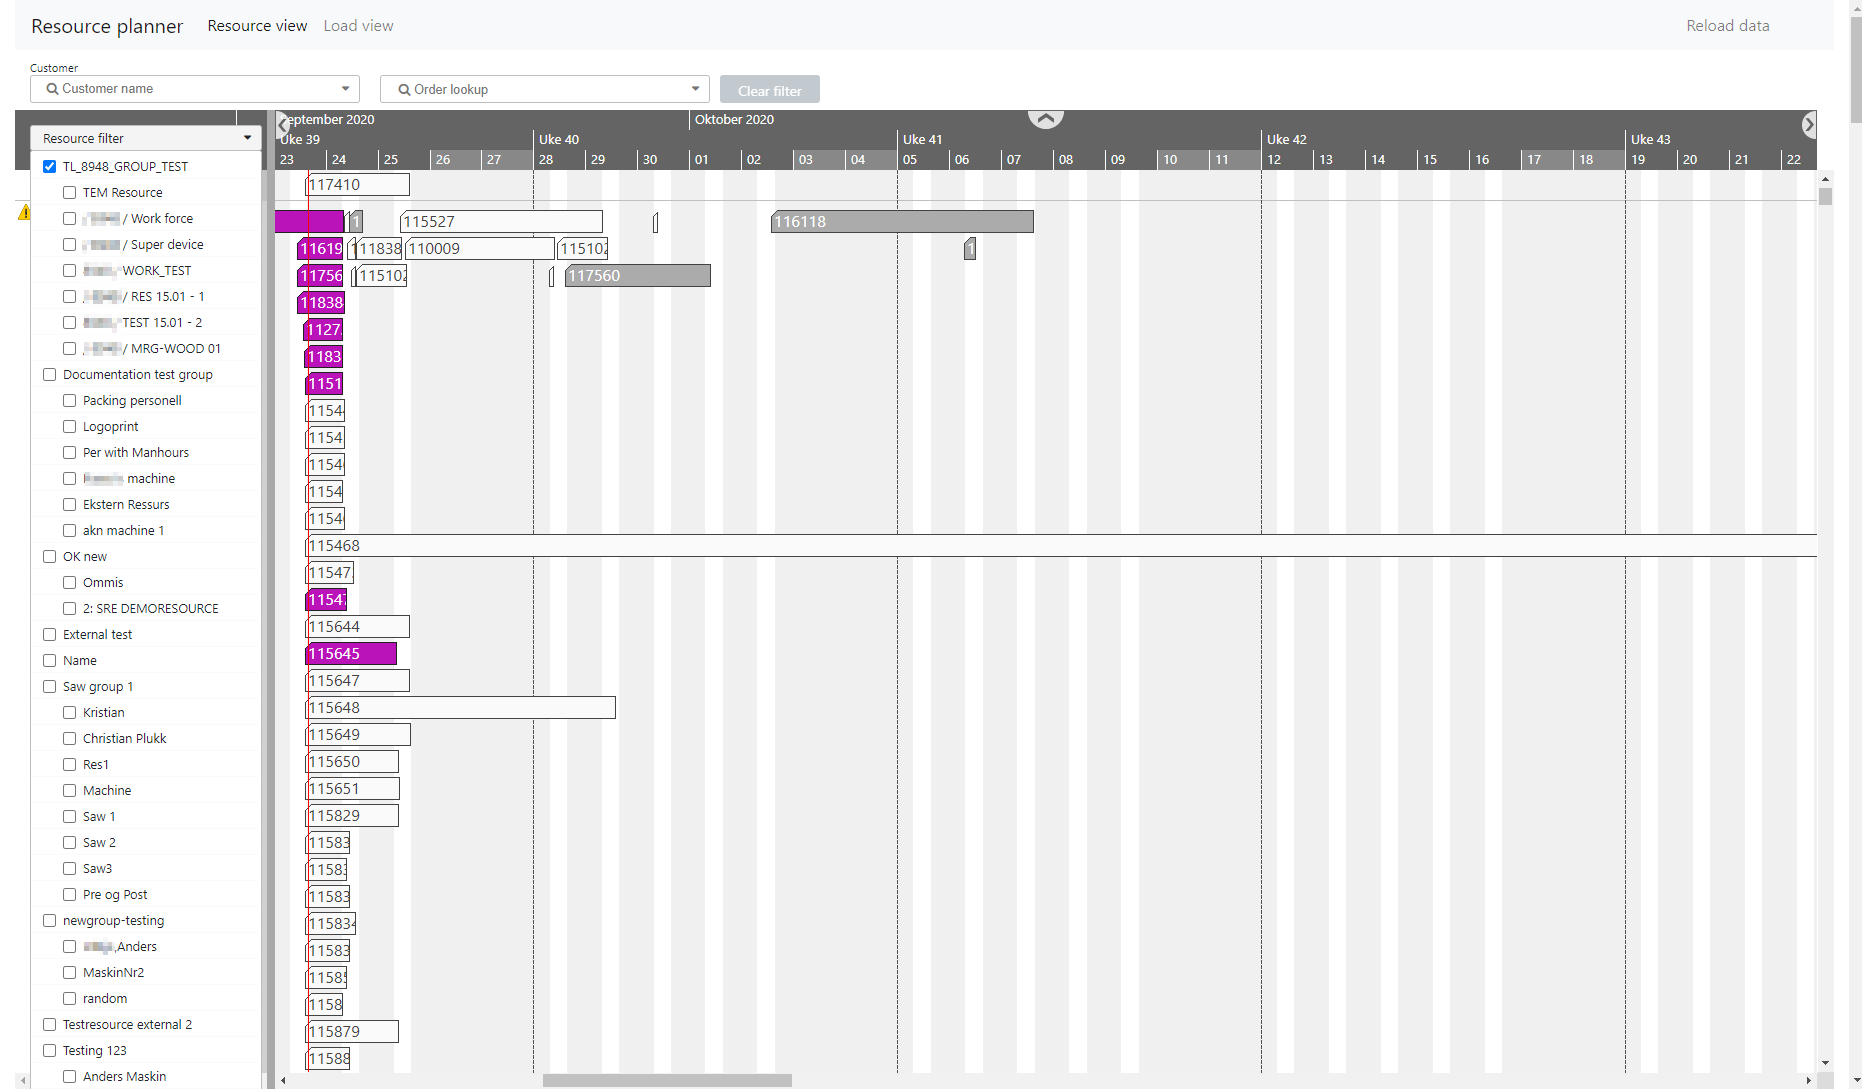
Resource view – resources and planned jobs
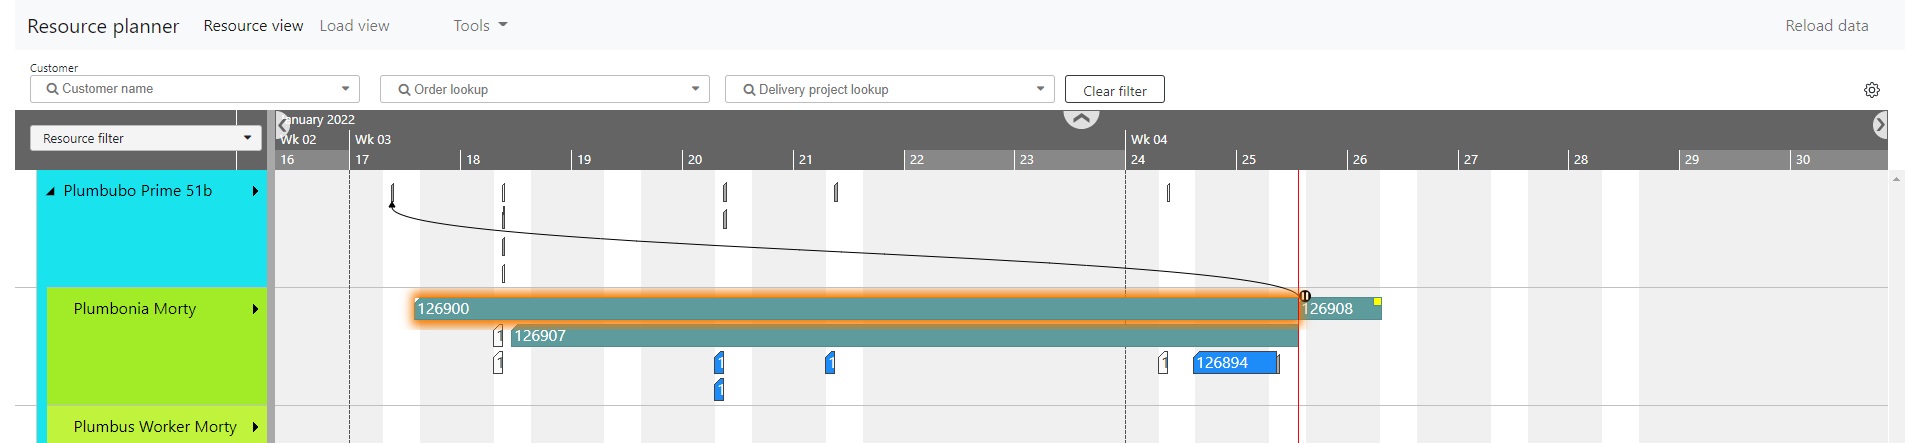
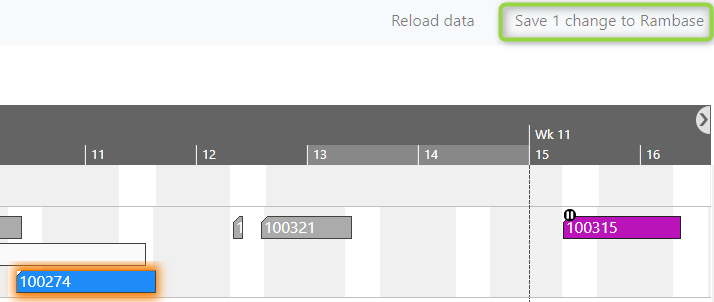
When you open RPLAN, the Resource view is displayed by default. The resources and resource groups are shown on the left and the planned operations (PLO) are shown as bars in the grid. The assigned resource or resource groups are shown along with the plan timelines. The Production work order (PWO) number is shown in the bar, and the color of the bar indicates the status of the task.
Purple - the task is active.
Blue - the task is ready to start.
Gray - the task in waiting on some pending action.
White - the work order is not released for production
Mouse scroll functions
Use the mouse scroll wheel to access various functions in RPLAN.
Place the cursor in the grid and scroll up or down to scroll through the resources and production tasks.
Place the cursor in the grid and select shift to scroll the timeline in either direction.
Double-click the timeline bar and scroll to scale the display from days to weeks or hours and minutes.
Drag the timeline in either direction to advance the timeline or go back.
View more Information on production tasks
Every bar in the grid represents one Planned operation (PLO). Do the following to get more information about the operations and the work orders.
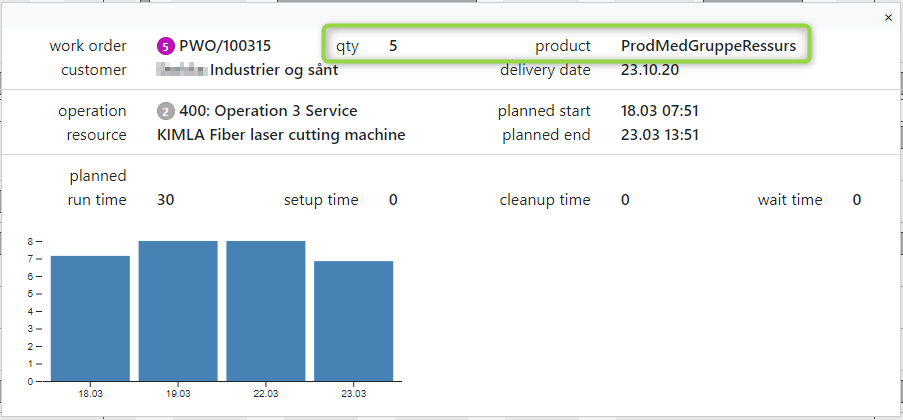
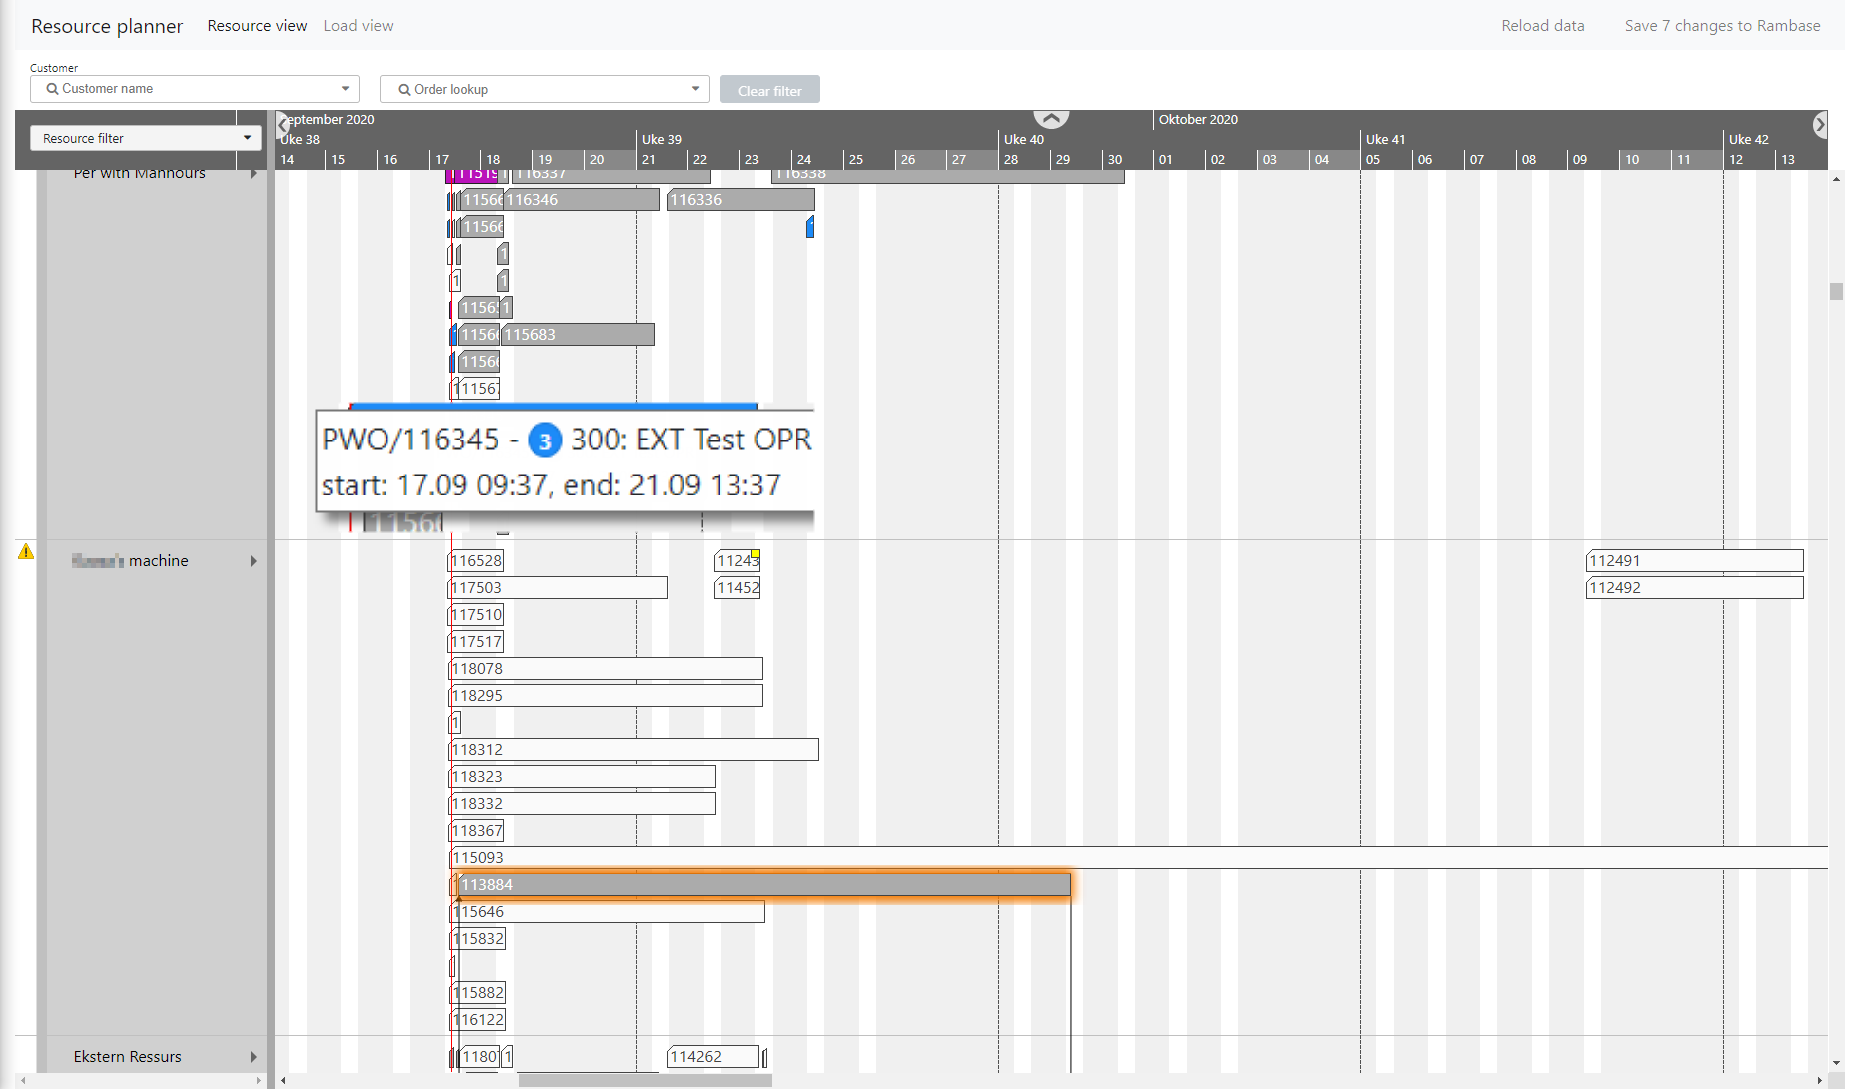
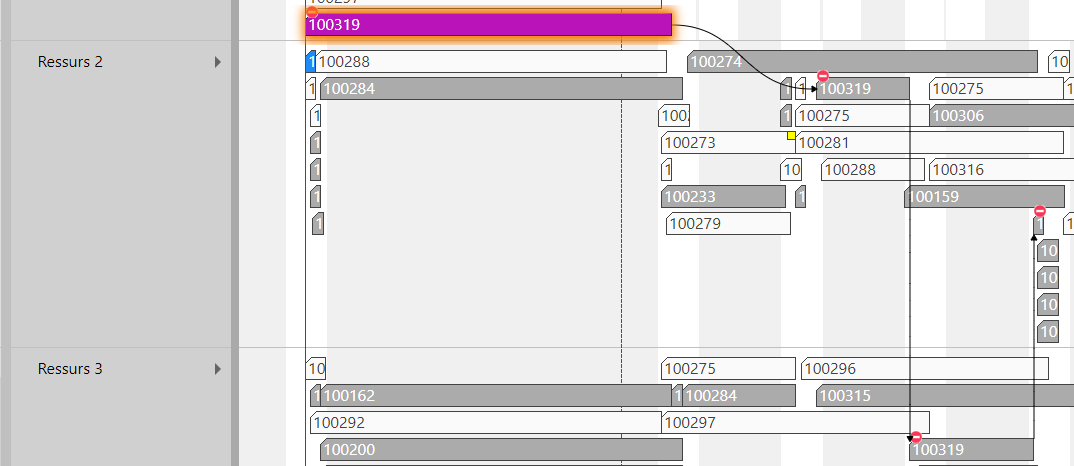
Hover over a bar to see the workorder number, operation status, requested completion date, start time, end time, and planned times.
Click the bar to see connections to other operations for the work order.
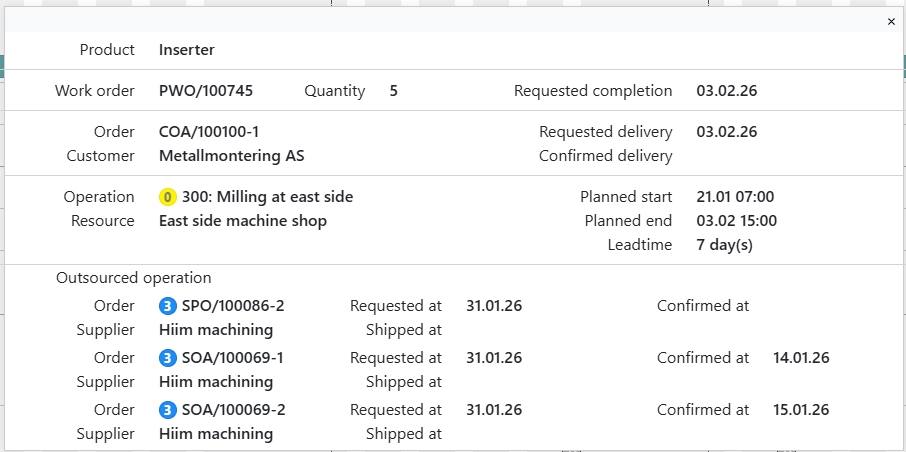
Double-click the bar to see more information about the work order and operation such as information regarding the product, customer order (if applicable), and external operation (if applicable). Click the X in the top right corner or the ESC button on your keyboard to exit the pop-up window.
High priority production tasks
High priority PLO are indicated by a yellow dot in the upper right corner of the bar.
Change the plan by moving production tasks
You can move the production tasks in three ways.
Change the start date and time for one task. Drag the bar horizontally to the necessary start date and time. The accuracy of the new start time depends on the selected granularity of the timeline. If the scale of the timeline is in minutes, the start time can be set more accurately by dragging, than if the scale of the timeline was in months. The rules for changing production tasks by dragging are as follows:
You can overlap production tasks.
You cannot move production tasks that have commenced, which are indicated by purple bars,
Assign the production task to another resource. A production task can be assigned from the resource group to one of the members of that group or from one member to another. Drag the production task to the necessary resource.
Select several jobs for moving to a new start time or to another resource group member. Ctrl + click the necessary task bars and right click them to select the necessary action. You can move the selected production tasks by x number of days or assign them to a different resource.
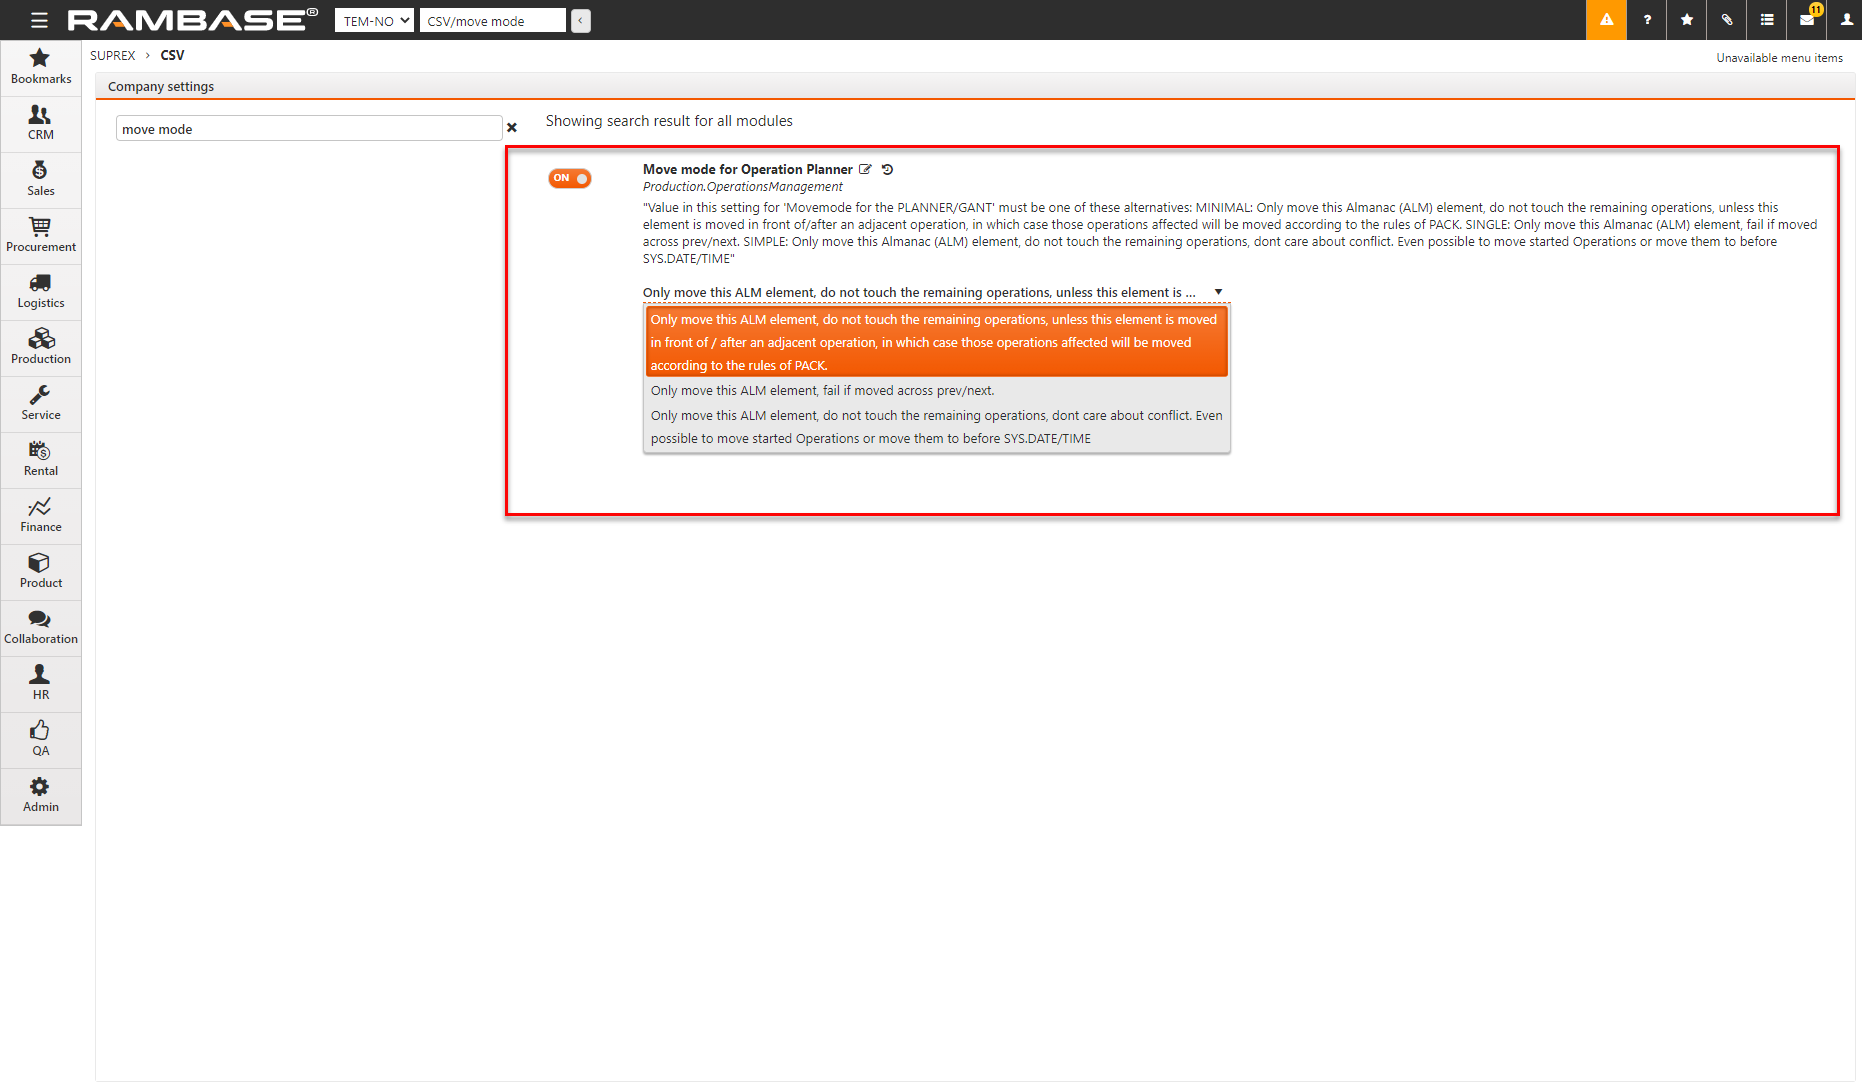
Setup move mode
The Move mode setting must be enabled. Type CSV in the program field and press the Enter key.
Set the Move mode for Operation Planner to ON. There are three options in the list, select the necessary option.
MINIMAL: Only move this Planned operation (PLO) element, do not touch the remaining operations, unless this element is moved in front of/after an adjacent operation, in which case the affected operations are moved according to the rules of PACK.
SINGLE: Only move this Planned operation (PLO) element, fail if moved across prev/next.
SIMPLE: Only move this Planned operation (PLO) element, do not touch the remaining operations. Even possible to move started operations or move them to before SYS.DATE/TIME.
External operations for external resources
External operations that are not yet purchased, unlinked to an Purchase Order (SPO) and/or Purchase order response (SOA) can now be moved in the planner. External operations that have been purchased, indicated by the padlock icon in the bar, cannot be moved.

To change external operations, change the purchase order, then reconfirm the purchase order.
Note
Calculation logic of external operation start and end dates
When an external operation is not yet purchased, no outsourced orders are linked to it, the Start and End dates in RPLAN are calculated according to Lead time for the external operation.
Lead time ignores any unavailable periods or non working days from working time templates that the external resource might be using in that given period.
If Lead time is not defined, the operation Run time is used instead.
Run time is calculated according to the working time template the external resource might be using in that given period.
When an external operation is purchased (SPO) and later confirmed by a purchase order response (SOA), the following logic applies:
If a purchase order (SPO) has a Scheduled shipping date defined and it is earlier than the Planned start on the external operation, then the Scheduled shipping date is used as the start date. If multiple purchase orders are linked to the same operation, the earliest Scheduled shipping date will be identified and used. Otherwise, the Planned start date is used.
If a purchase order response (SOA) has a Confirmed delivery date defined and it is later than the Planned end on the external operation, then the Confirmed delivery date is used as the end date. If multiple purchase order responses (SOA) are linked to the same operation, the latest Confirmed delivery date will be identified and used. Otherwise, the Planned end date is used.
Resource load warning
You can see a warning icon, a yellow triangle on the left of resources that have more assigned work than available capacity for one or more days.
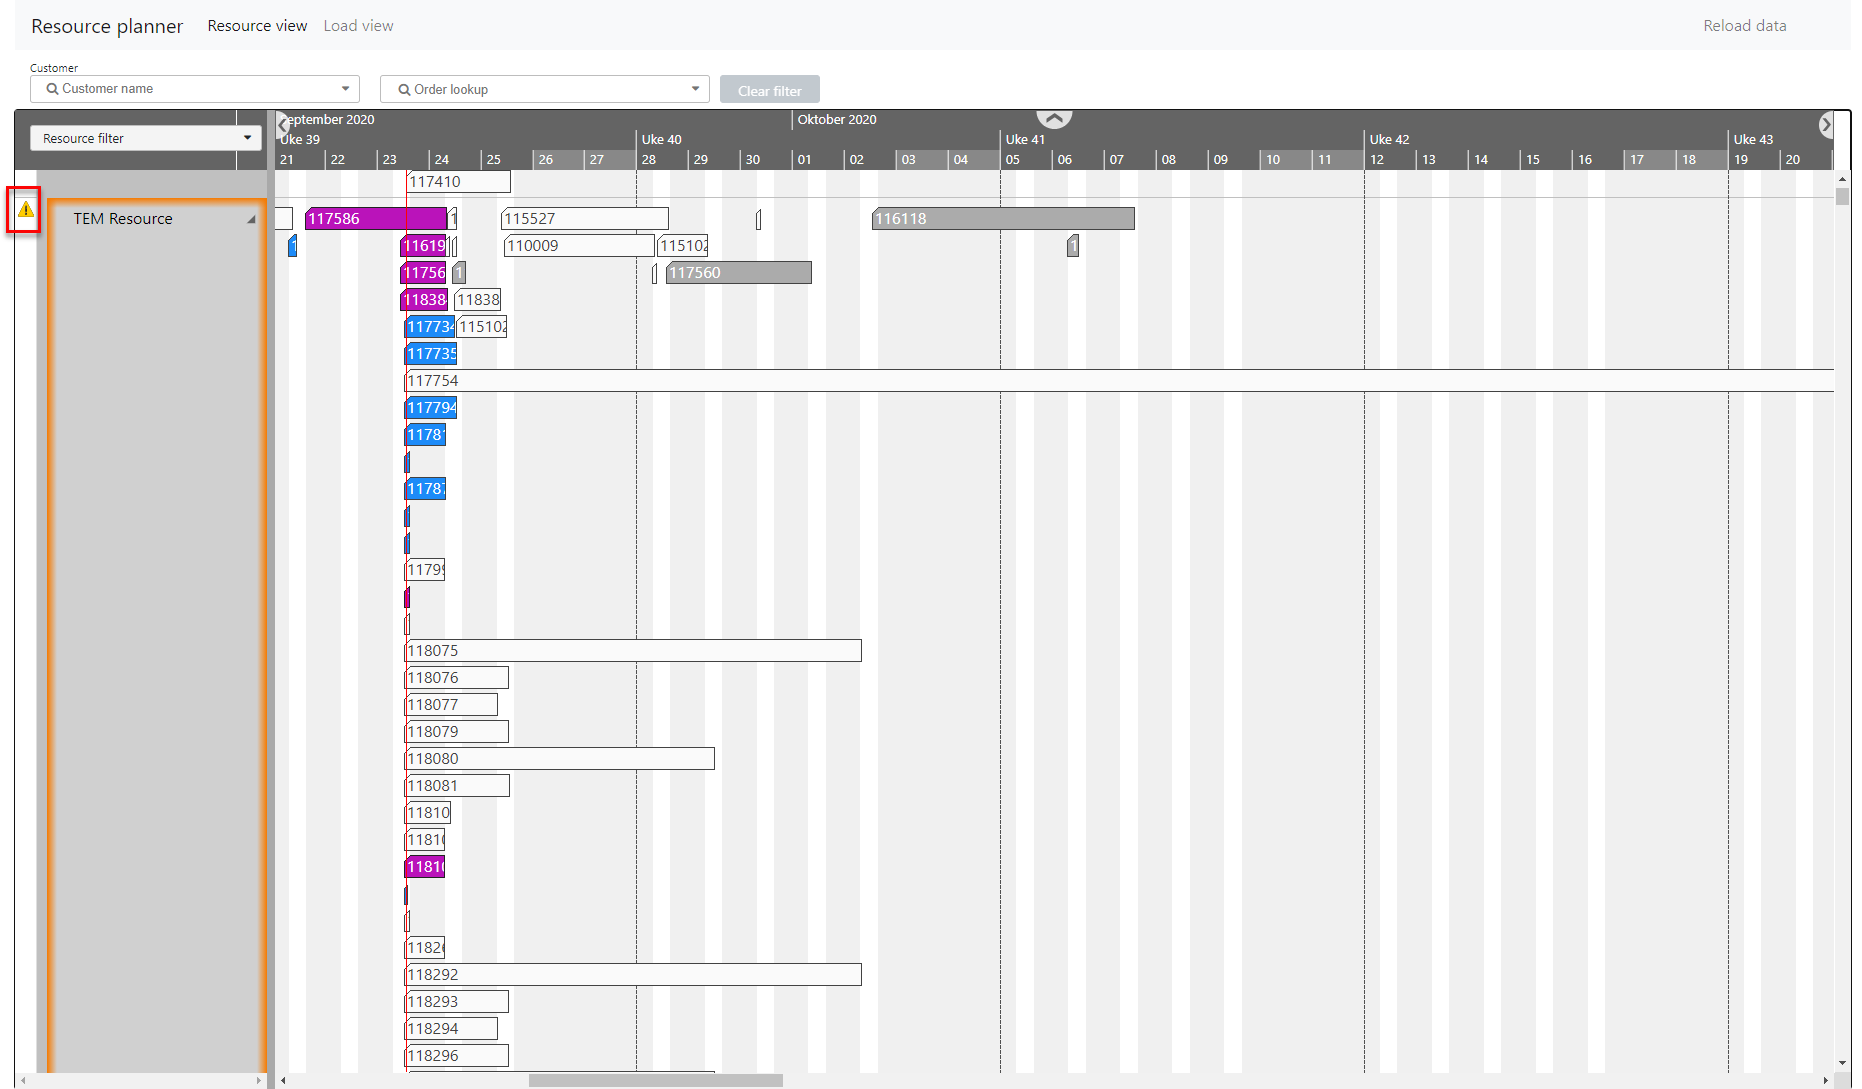
Select arrow icon to the right of the resource to inspect the load.

Select the red load bar to see a pie chart of the planned tasks and hours assigned.
Load view – resource load by date
The load view shows the resources, capacity and load per day.
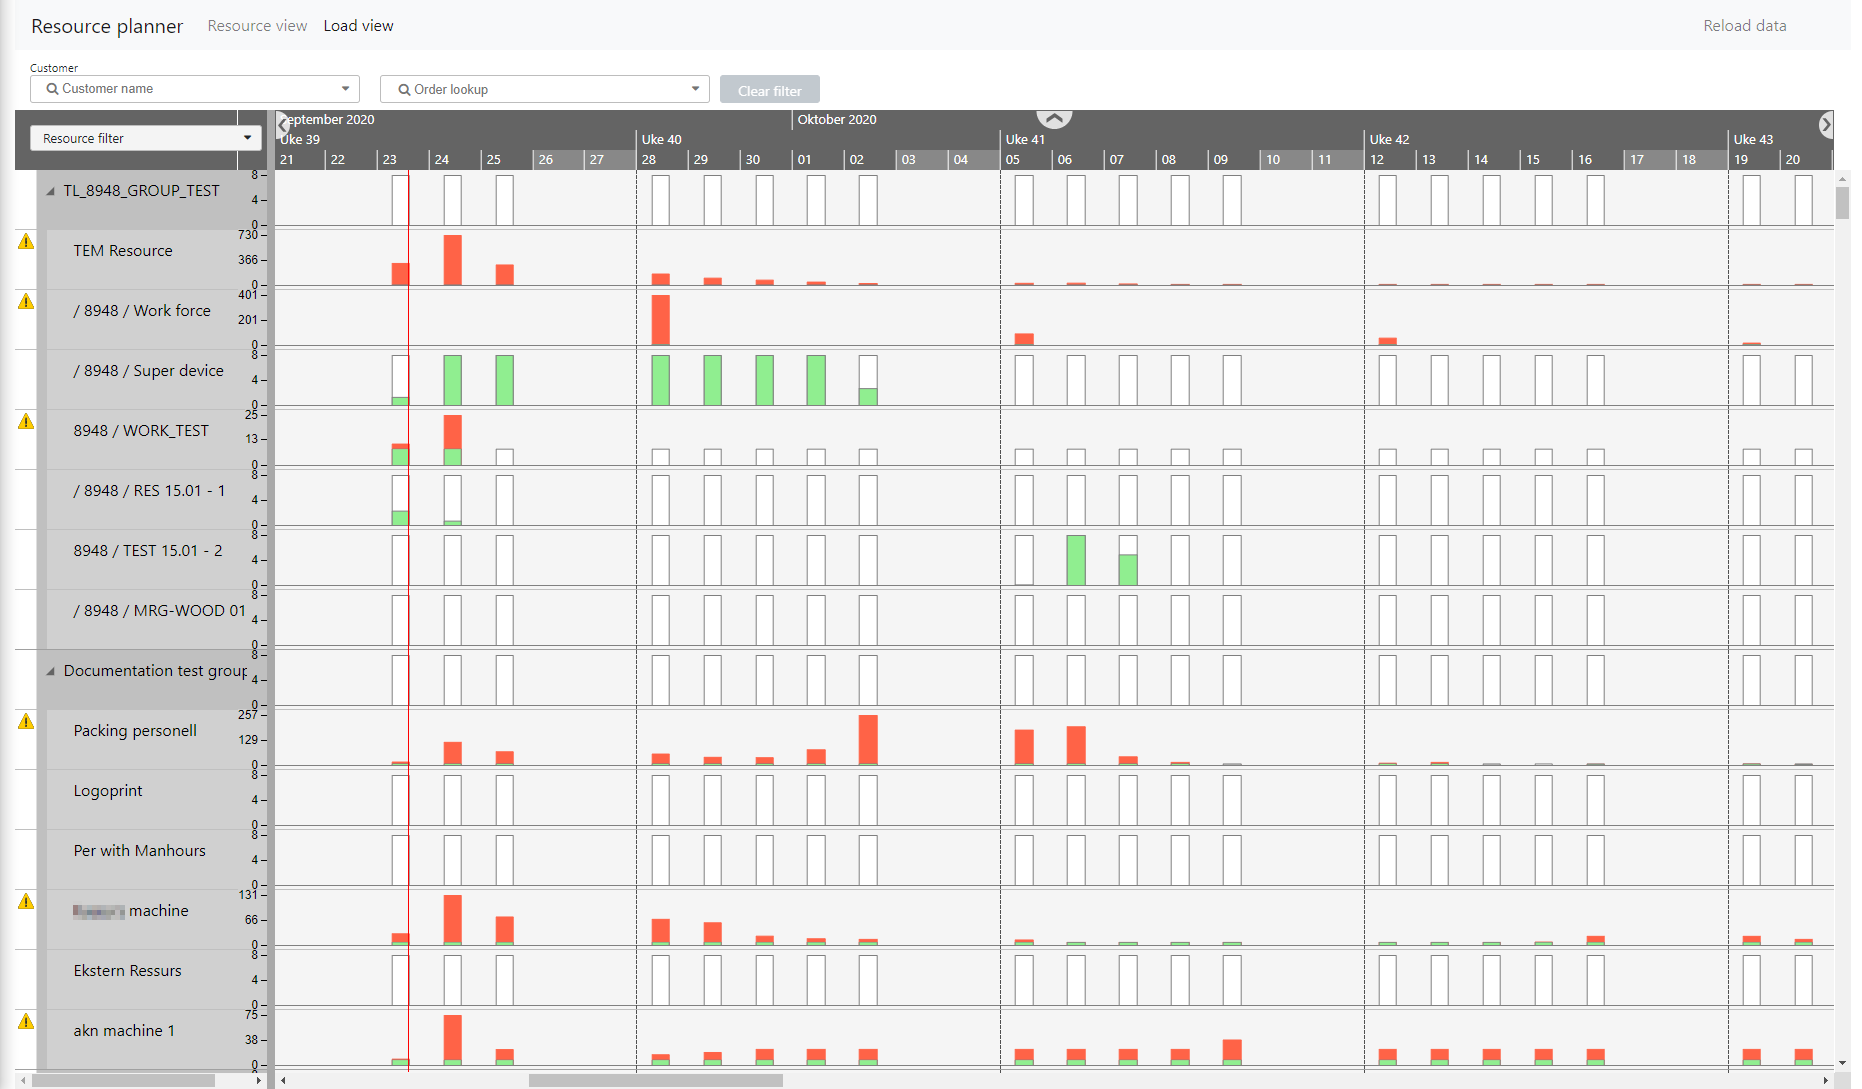
The bars in the load view are color-coded as follows:
A white bar represents the capacity in hours per calendar shift for the day.
A green bar indicates the load per day when the load is within the available capacity.
A red bar indicates the resource load exceeds the assigned hours for that date.
Select any bar to see a pie chart of the planned tasks and hours assigned.
Filters
Resource filter
Use the resource filter to limit the view to selected resources, Select one or more resources or resource groups to view.
Customer and customer order filter
Select a customer in the Customer list, which shows only customers related to open work orders. The view is limited to work orders (main and subs) for the selected customer. Bars applicable to other customers appear dimmed. Select the Customer order (COA) number in Order lookup to limit the view to work orders related to one specific customer order item.
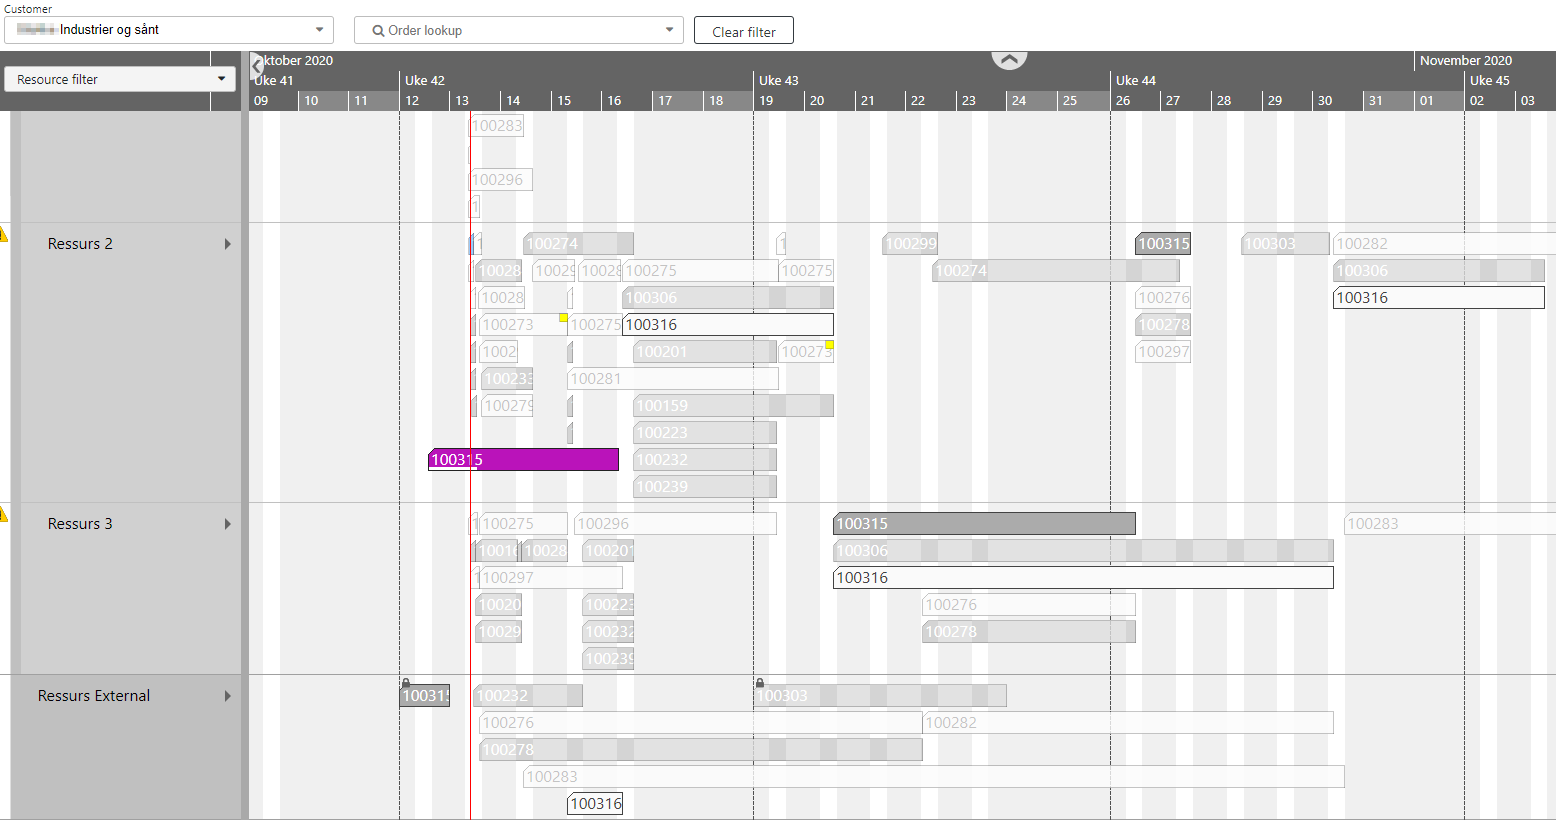
A Production work order (PWO) or a Work order operation (WOO) that is set on hold is indicated by Stop icon on one or more bars.
Delivery project filter
See the Preferences section for instructions on how to activate the filter.
The delivery projects filter displays a list of Projects (PRO) for a selected customer. This view is limited to projects that are linked to order items for the selected customer. If a Project (PRO) is not linked to any items, it will not be displayed on list.

Handling paused operations
Work order operations (WOO) that are currently paused are indicated by Pause icon in RPLAN.

When you double-click the operation bar shown above, a window appears, to inform you that the operation has been rescheduled . The paused plan window is shown below.
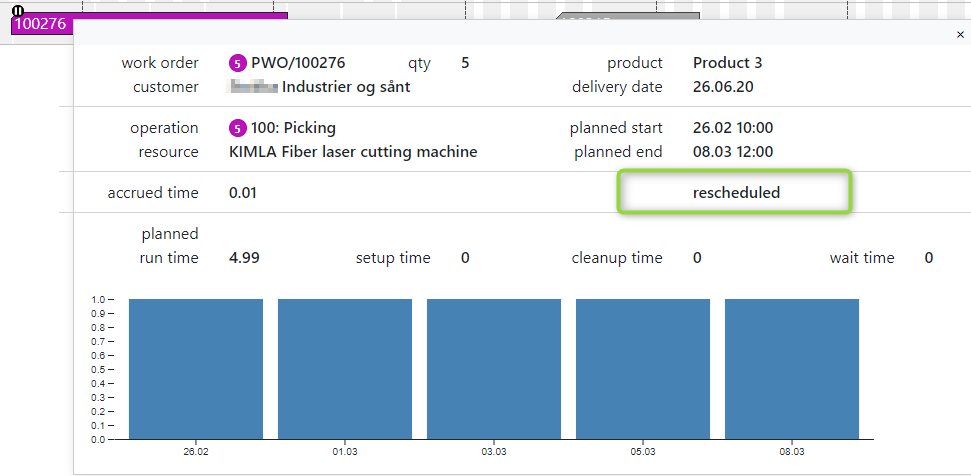
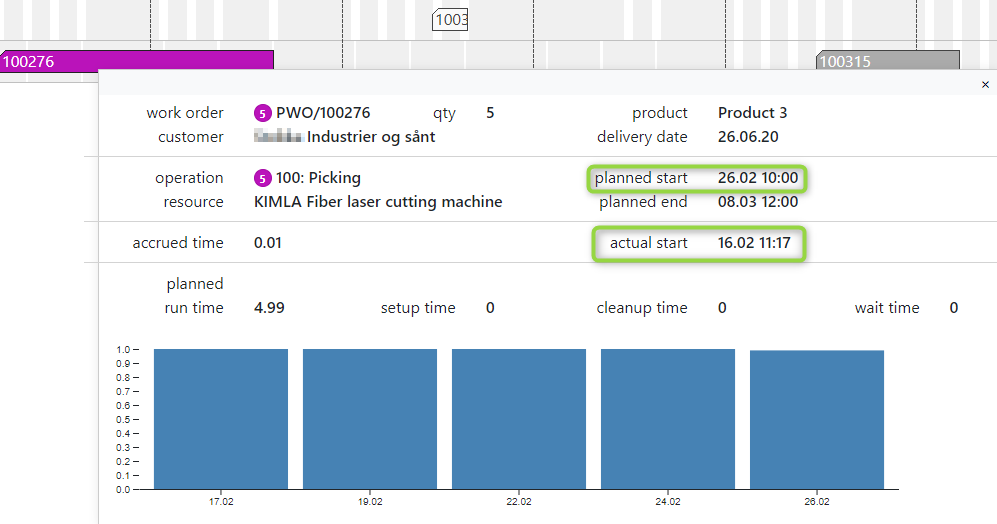
Rescheduled (paused) operations are put on the plan according to the planned start date. If the operation has commenced again, the actual start time is used and displayed. The plan may have to be reloaded in RPLAN to use the actual start time as shown in the window below.
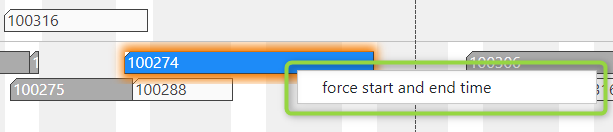
Change the start and end date/time in the operation
You can change the start and end time of an operation by right clicking on the associated bar, and selecting force start and end time.
You can manually change the given periods. You must change both the start and end time before the changes can be saved.
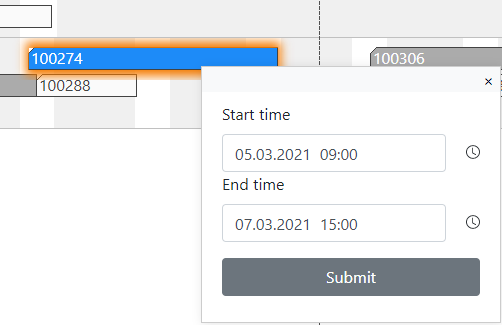
Planned start and end dates are changed in RamBase only after the changes are saved in RPLAN. This function is only available for operations which are not active.
Recalculate all operations for a resource
You can recalculate the planned operations according to the current capacity of a given resource.
You must select a specific resource by using the left mouse button. Select multiple resources with Ctrl + left click.
Right click on your selection and select Recalculate resource.
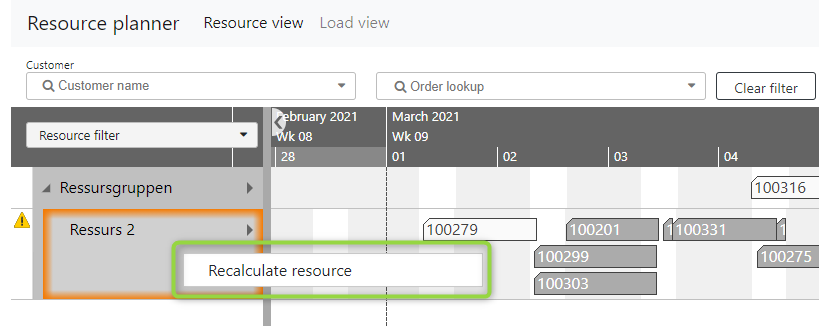
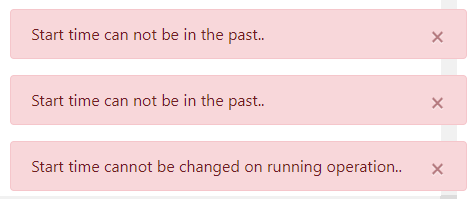
Every operation is calculated separately to comply with the current resource calendar, while maintaining the original start date. If some operations cannot be modified for any reason, RamBase notifies you.
After the resource recalculation, you must save the changes to RamBase.
Product and quantity information for a selected operation
The popup window for the selected operation now displays information about the quantity and the product that will be manufactured under the production order.