[en] QHSES setup (QISADMIN)
[en] The QHSES setup (QISADMIN) application provides tabbed interfaces for administrative functions in QHSES. In order to use this application, the QHSES Administrator role must be enabled for the specific user.
[en] To open the QHSES setup application, start in the RamBase menu and select Admin, then QHSES administration. The 6 tabs in which to administer the QHSES setup are QIS, Risk, Consequence areas, Consequence types, Cost categories and Requirement references.
[en] QIS
[en] The QIS setup has 5 tabs; Issue types, Issue categories, Direct cause, Root cause and Settings. In all the tabs excluding Settings, the query builder can be used to create search queries in the Search field. In all the tabs excluding Settings and Issue types, select the Predefined filters icon to apply predefined filters and view the filtered results.
[en] Issue types
[en] Create new issue types for incident reporting and view, edit or delete existing issue types. Select the Add new type button and enter a name for the issue type in English, then select Create. Select the Edit icon to edit the name. You can also provide translations of the name into other languages, for use when you change the default language.
[en] There is by default one Issue type registered in your system, this is called Incident. You are not able to delete this issue type or edit it, this is because it is a global Issue type. When using this issue type in the QIS application you are required to add actual consequences. If you do not add this, you will get a message saying: Missing actual consequences! (Required for incidents).
[en] Issue categories
[en] Select Add new category to add a new issue category, enter a name for the issue category in English, then select Create. This will automatically go to Status 4.
[en] Direct cause and Root cause
[en] Select Add new direct cause category to add a new direct cause category, enter a name for the direct cause category in English, then select Create. Select the Edit icon to edit the name. You can also provide translations of the name into other languages, for use when you change the default language. This will automatically go to Status 4.
[en] You can easily deactivate Direct Causes by using the Deactivate direct cause category icon or Restore direct cause category by using the Reactivate direct cause category icon.
[en] There is by default one Cause categories in both Direct cause and Root cause registered in your system, this is called Not specified.
[en] You are not able to delete this Cause category, or edit it, this is because it is a global Cause category. Not specified causes will be used on quality issues where there is nothing added by the user yet. This can be seen in the Widget for Direct Causes and Root Causes.
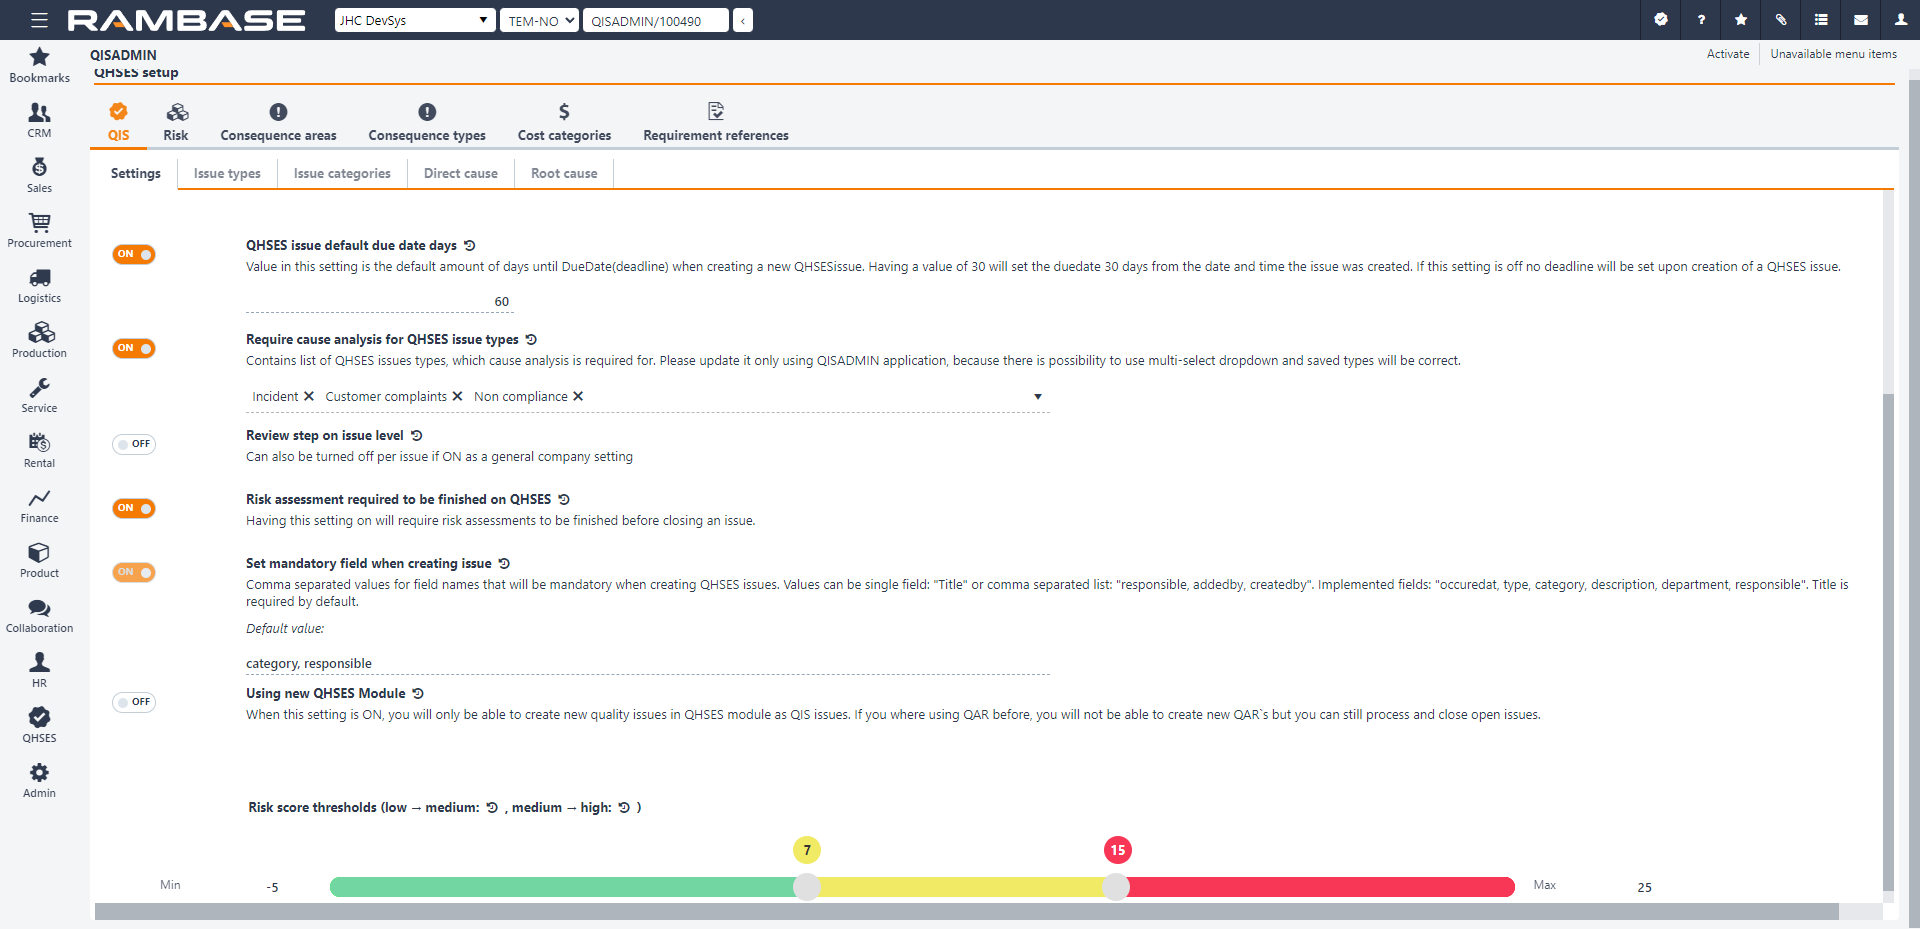
[en] Settings
[en] Enable various settings for QHSES and set the risk score thresholds.
[en] Set mandatory field when creating issue : Title is required by default. It is also recommend to add Department or Responsible to make sure a responsible is notified by IMS when a new QIS issue is reported.
[en] Risk score - Use the sliders to set the boundaries for where your company wants to have low (green), medium (yellow), and high (red) risk. Risk score varies from Min 1, Max 25, drag the sliders to set the thresholds for risk scores.
[en] Risk
[en] The Risk tab comprises 4 subtabs: Negative risk matrix, Positive risk matrix, Controls and Settings.
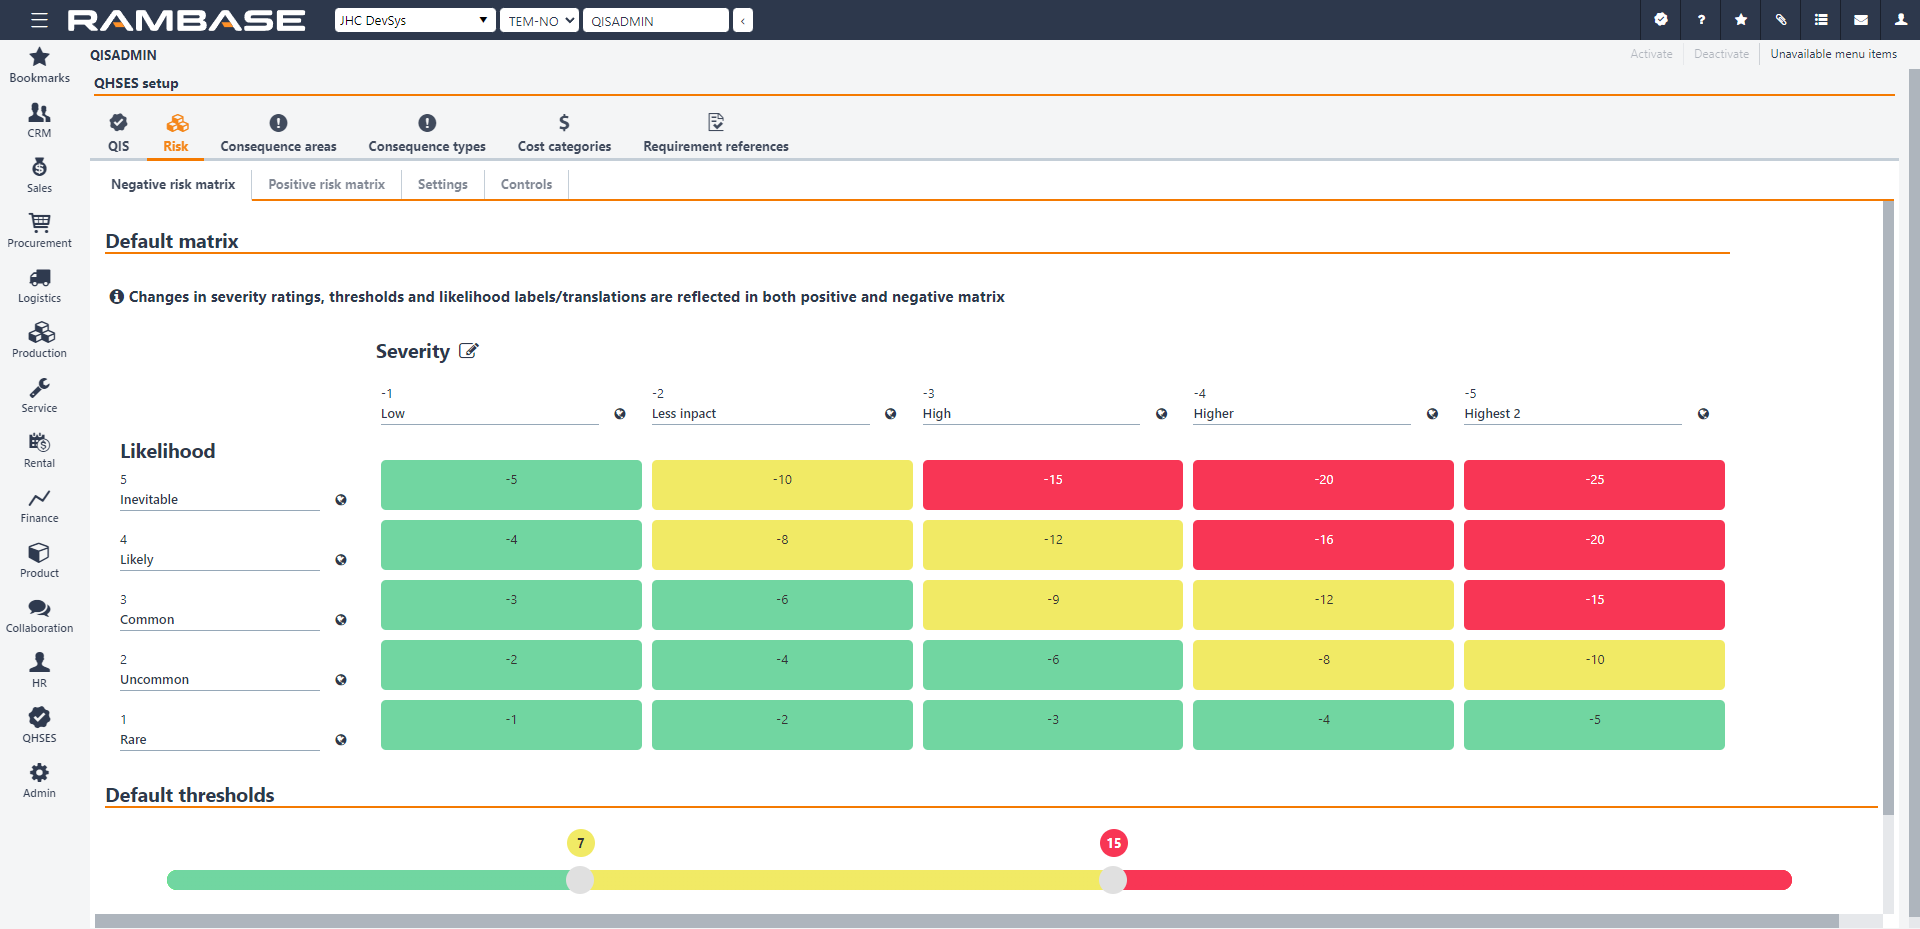
[en] The Negative risk matrix and the Positive risk matrix tabs are mutually dependent. Changes in the severity ratings, thresholds, and likelihood labels/translations in one are thus reflected in the other (after a page refresh). Both tabs are divided into:
[en] Default matrix, where the default risk matrix values chosen, and
[en] Default thresholds, where the values of when a risk level is changed is chosen. (In other words when the risk level goes from green/light blue to yellow/medium blue and yellow/medium blue to red/dark blue.)
Uwaga
[en] When setting up the negative/positive risk matrix for the first time, Matrix scale will also be available in these tabs. Under Matrix scale it possible to change the matrix from its default 5x5 dimensions. However, this should only be done after careful consideration, as it is not possible to change the dimensions after a consequence area has been created. Matrix scale will disappear from the tabs at that point.
[en] In the Controls tab, existing mitigating actions are added. These reusable controls may be added to a risk or risk assessment where applicable.
[en] In the Settings tab, selecting Doing assessment reminder will cause the responsible for a risk assessment to get a reminder via IMS message.
[en] Consequence areas
[en] The Consequence areas tab is shared by the Quality issue list (QIS) application and the Risk assessment applications. The content in this tab will be company specific, as it is based on activities and risks which varies from company to company.
[en] To add a new consequence area, click Add new consequence area in the bottom left corner. Enter a name and click Create. Click the Edit icon to edit the name or provide translations of the name. The new consequence area has to be activated by clicking Activate in the top right corner. It may later be set to Status 9 by clicking Deactivate in the same place. The Inactive consequence area setting has the same function and can be found at the top of the area to the right. Beneath it, there is a setting called Use default, which should be selected in order to lock the matrix of the specific consequence area to the default matrix set in the Risk tab.
[en] The consequence area has three tabs; Negative risk matrix, Positive risk matrix and Consequence types.
[en] The default matrix in the Negative risk matrix and the Positive risk matrix tabs is the one that is set in the Risk tab. However, it is also possible to change the Severity values of the negative/positive risk matrix for the consequence area in question. This is done by clicking the Edit icon and changing the numerical values to the preferred ones, and confirming by clicking Ok.
[en] In the Consequence types tab, consequence types may be connected to the consequence area in question. This may be done by clicking Add existing consequence or Add a new consequence in the bottom left corner of the tab area, entering the relevant name and clicking Create. Consequence types may be added both when the consequence area in question is in Status 1 - Registering and Status 4 - Active.
[en] Consequence types
[en] In order to add a new consequence type, click Add new consequence type in the bottom left corner, enter a name and click Create. Click the Edit icon to edit the name or provide translations of the name. The consequence type has been created and set in Status 4 - Active.
[en] Cost categories
[en] Select Add new cost category to add a new cost category, enter a name in English, then select Create. Select the Edit icon to edit the name. You can also provide translations of the name into other languages, for use when you change the default language. This will automatically go to Status 4.
[en] You can easily deactivate cost categories by using the Deactivate cost category icon or Restore cost categories by using the Reactivate cost category icon.
[en] The Cost registered on quality issues will not affect the Finance module, in any accounts.
[en] Requirement references
[en] Select Add new standard requirement to add a new standard requirement, enter a name for the requirement in English, then select Create. Select the Edit icon to edit the name. You can also provide translations of the name into other languages, for use when you change the default language. This will automatically go to Status 4.
[en] You can easily deactivate standard requirements by using the Deactivate standard requirement icon or Restore it by using the Reactivate standard requirement icon.