Tworzenie oferty sprzedaży (CQU)
Istnieją dwie metody tworzenia oferty sprzedaży (CQU). Można ją utworzyć od podstaw lub przenieść zapytanie ofertowe sprzedaży (CRQ) do oferty.
Tworzenie nowej oferty sprzedaży
Aby otworzyć aplikację Oferta sprzedaży (CQU), znajdź pozycję Sprzedaż w menu RamBase, a następnie pozycję Wycena. Kliknij pozycję Oferty sprzedaży, aby wejść do aplikacji CQU.
Kliknij ikonę Utwórz nową ofertę w lewym dolnym rogu.
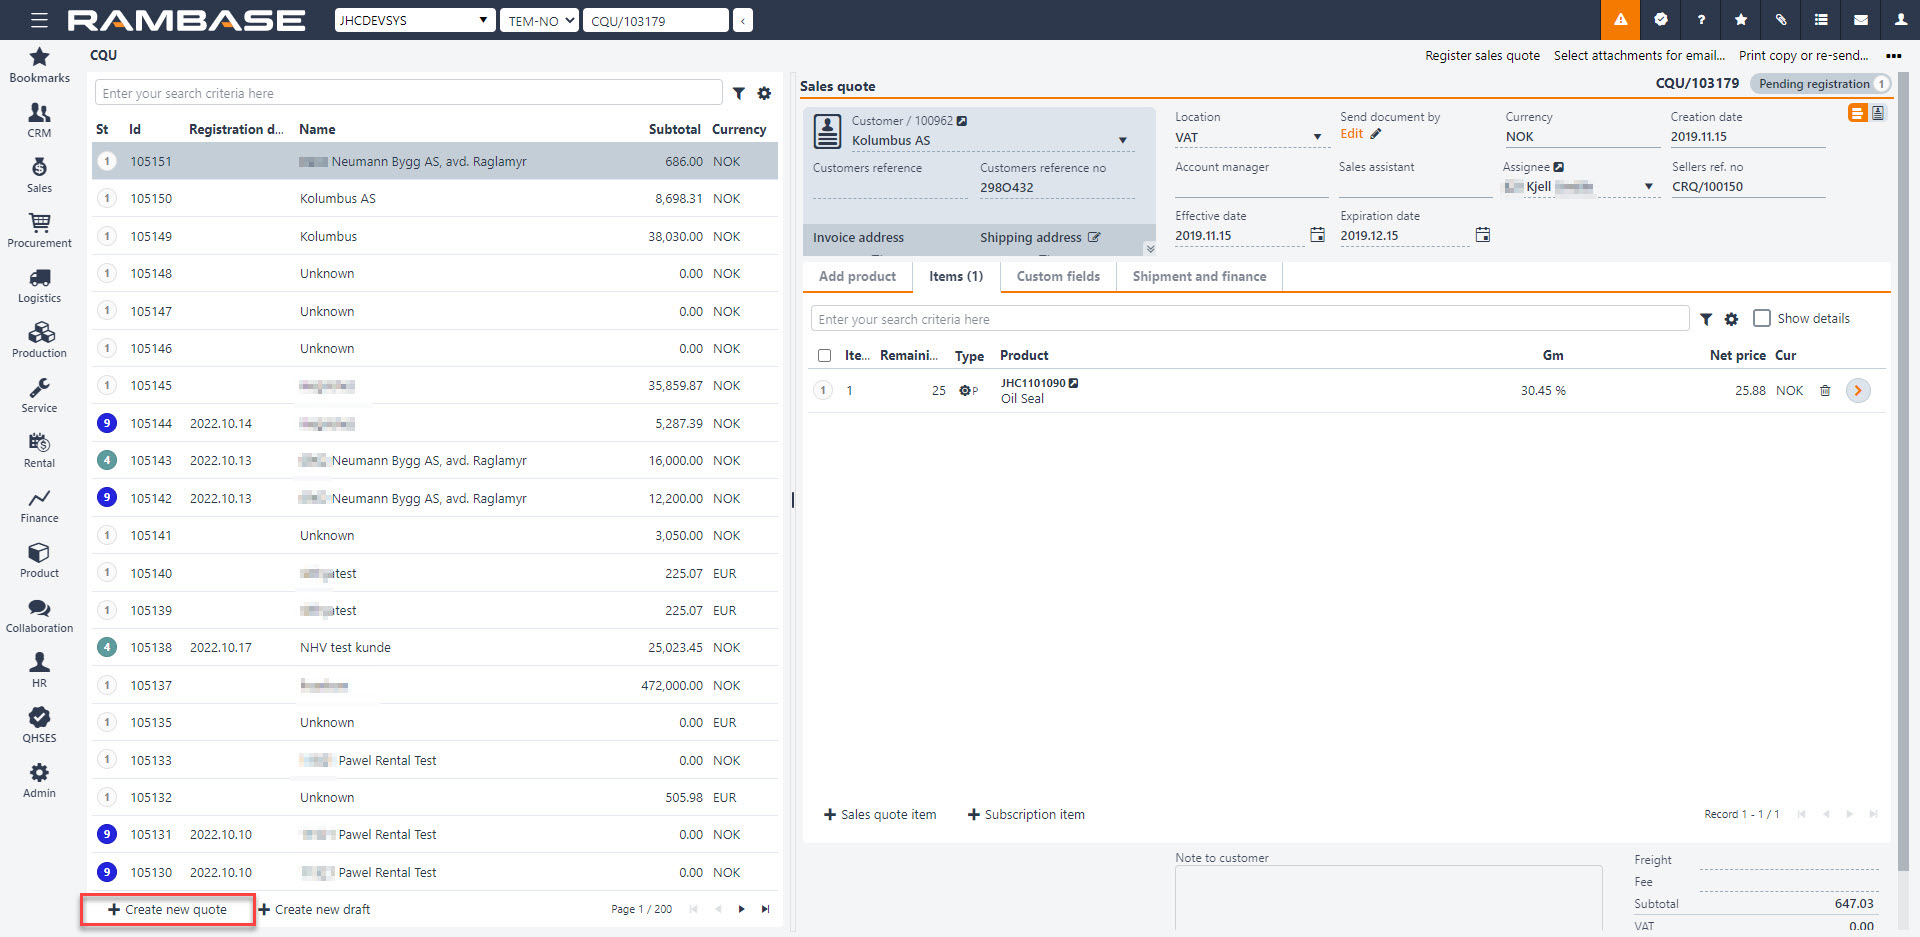
Aby znaleźć nabywcę wpisz część jego nazwy w polu wyszukiwania nabywcy lub kliknij strzałkę skierowaną w dół, aby otworzyć menu wyszukiwania. Wybierz nabywcę, a jeśli ma on kilka adresów, wybierz adres nabywcy w polu wyszukiwania adresu. Wyświetlany adres jest adresem wybranym jako domyślny w archiwum Nabywca.
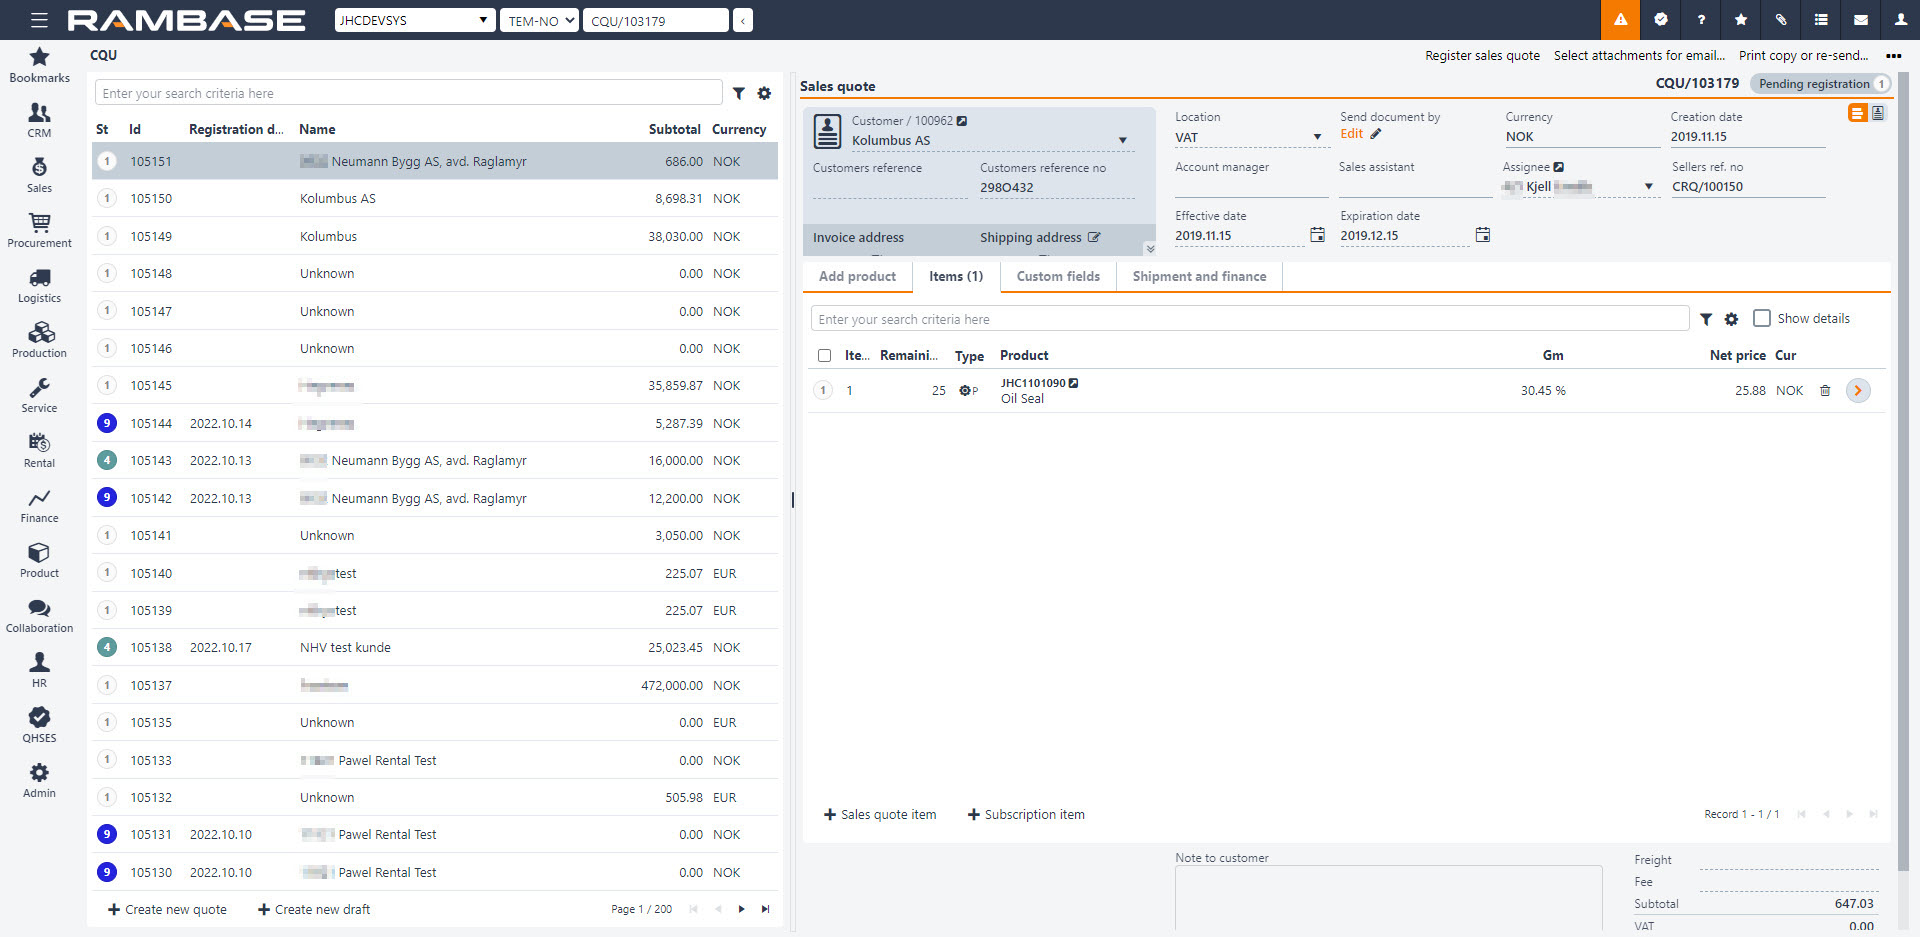
Po powrocie do dokumentu zauważysz, że CQU otrzymała numer porządkowy. Oznacza to, że dokument został zapisany i jest dostępny do dalszego przetwarzania. Wszystkie przechowywane informacje dotyczące nabywcy, takie jak cena i warunki dostawy, będą dostępne.
Numer RFQ z nabywcy może być ustawiony w polu Numer referencyjny nabywcy. Osoba odniesienia dla nabywcy może być ustawiona w polu Odwołanie do nabywców.
Aby dodać produkty, kliknij przycisk Utwórz nową pozycję.
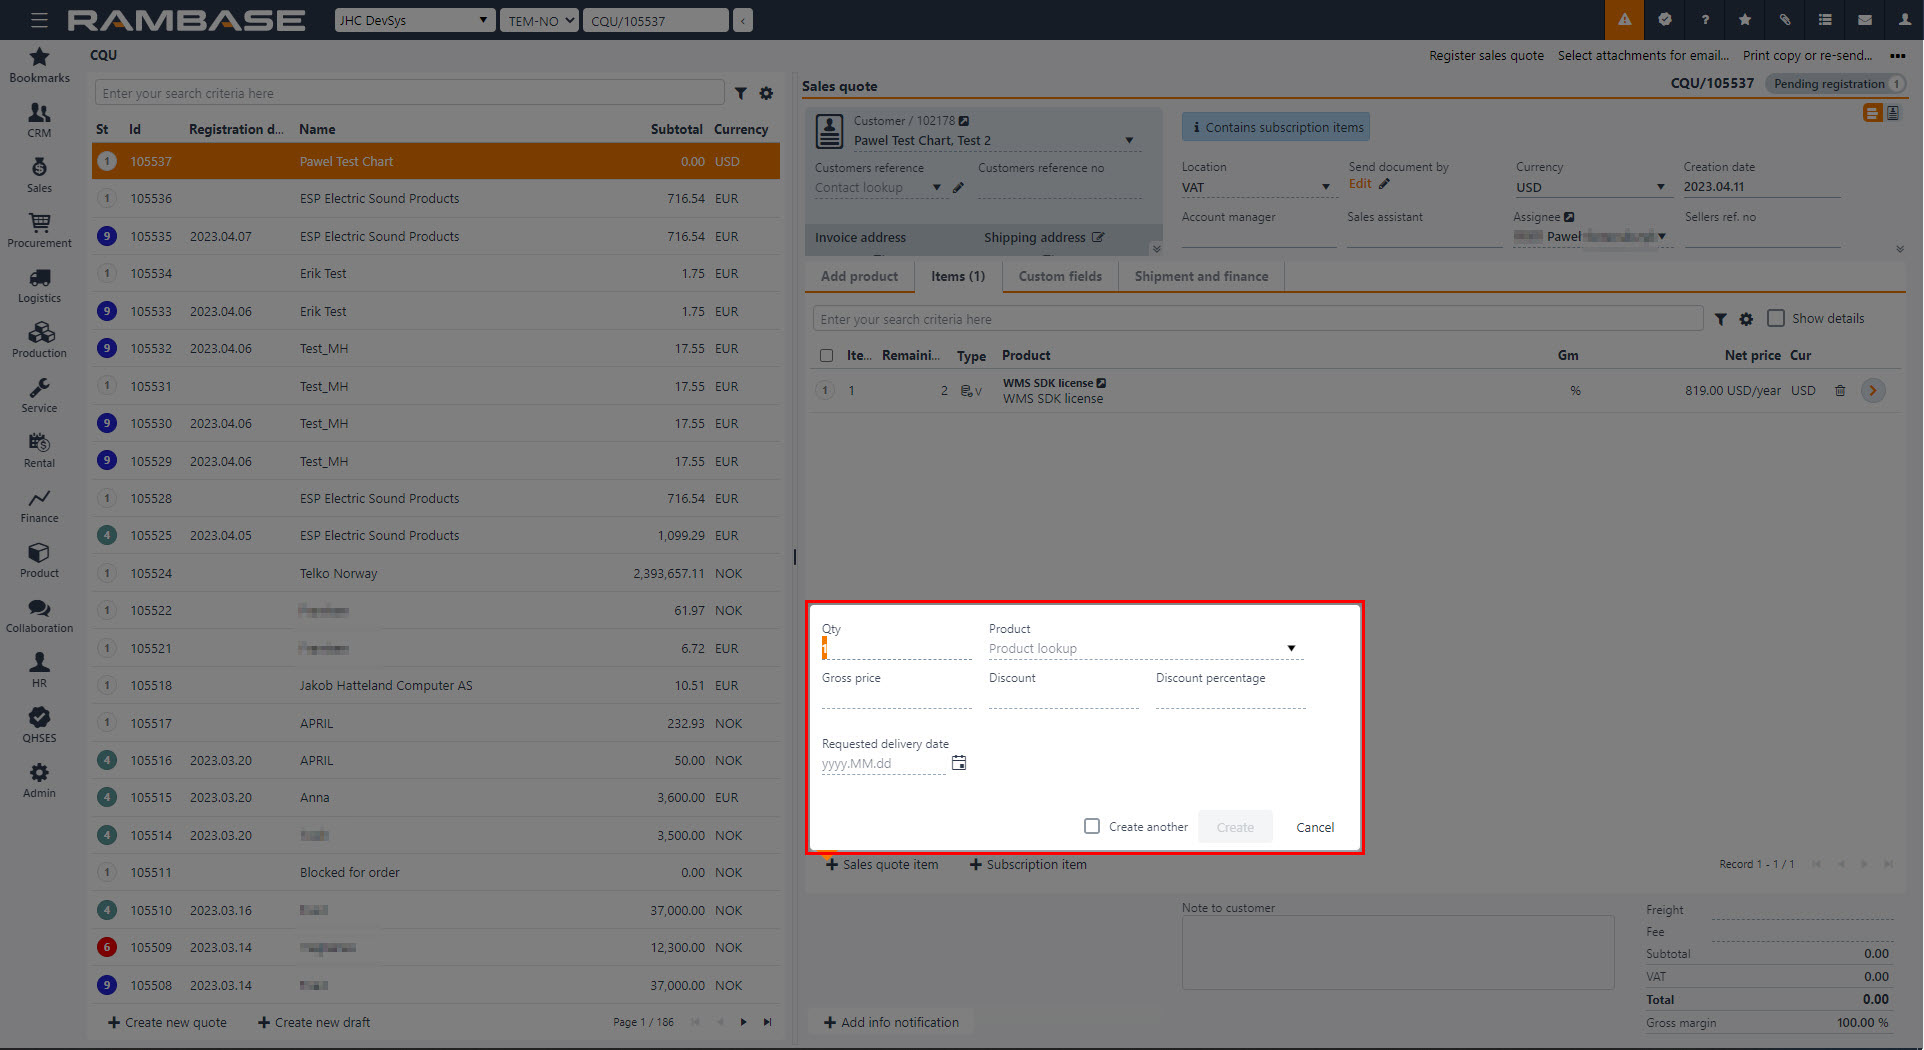
Spowoduje to otwarcie okna podręcznego, w którym należy wprowadzić odpowiednie informacje. Wybierz ilość w polu Ilość i wprowadź nazwę produktu w polu Produkt, aby znaleźć go w archiwum. Jeśli zapas ma stałą cenę sprzedaży, zobaczysz ją w polu Cena. Można ją zmienić. Cena zostanie ustalona w następującej kolejności:
Cena sprzedaży z zapasu dla PriceGroupAgr, do której nabywca należy.
[en] Item price agreement (IPA)
[en] Product (ART) price - Where the priority to find the applicable product is:
[en] PLI (Price list)
[en] VPA (Volume price agreement)
[en] STD (Standard sales price)
[en] If no applicable price can be found based on this, there will be attempt to calculate item price based on standard cost price of the product, in this priority.
[en] GM from Company setting (CSV) Default Gross Margin on Sales documents
[en] 25% GM (Hardcoded)
Możesz ustawić informację dotyczącą tego, kiedy nabywca potrzebuje towarów. Aby ustawić żądaną datę dostawy, kliknij ikonę kalendarza obok pola Żądana data dostawy i wybierz datę. Można ją zmienić.
Jeśli chcesz dodać kilka pozycji, kliknij pole wyboru Utwórz kolejną i powtórz proces dodawania pozycji.
Kliknij przycisk Utwórz.
Jeśli chcesz dodać kilka pozycji, kliknij przycisk Utwórz nową pozycję i powtórz proces dodawania pozycji.
Aby ustawić okres trwania oferty, użyj pól Data wejścia w życie i Data wygaśnięcia.
[en] Create a draft
[en] A draft can automatically be created by clicking the Create new draft button in the menu. When a draft is created, the menu will automatically be collapsed to give more overview. Draft will create a document for a default customer, found in the Company settings (CSV) Default customer account for sales draft. If no Customer (CUS) is set up in this Company settings (CSV), RamBase will create one named as Unknown. This will have base data according to standard create values for this company. The base data can be changed for this Customer (CUS) afterwards if it is required, or the user can create a Customer (CUS) manually and add this to the Company setting (CSV). It will not be allowed to register documents for this Customer (CUS), users must change to a real Customer (CUS) before registering.
[en] When creating a draft It is possible to add Products (ART) by searching them up in the Quick search field. Clicking on the Quick search filter icon will list a series of checkboxes. The user can decide which categories are to be included in the search. Hover over the Quick search filter icon to quickly see which categories are included in the search. New items can be added by clicking the Plus icon.
[en] Add product
[en] The Add product tab shows a Location available field and a Total available field. Location available inspect stock and available quantity for Location (LOC) of the document. Total available inspects stock and available quantity for all Location (LOC).
[en] The Show details checkbox gives an overview over 4 useful tabs:
[en] Tab names | [en] Description |
|---|---|
[en] Product details | [en] Lists information from the related Product (ART) |
[en] Accessories | [en] Accessories registered from Product (ART) |
[en] Replacements | [en] Replacements needed for a Product (ART) |
[en] Transactions | [en] Shows backlog items, Quote items and Invoice items |
[en] When adding items from the Add products tab, they will appear in the Items tab.
[en] The Show details checkbox gives an overview over 5 useful tabs:
[en] Tab names | [en] Description |
|---|---|
[en] Item details | [en] List information from the related Sales order item (COAITEM) |
[en] Notifications | [en] Notifications for this item |
[en] Product details | [en] Lists information from the related Product (ART) |
[en] Landed costs | [en] Shows the chosen purchase currency and the landed cost in purchase currency and sales currency |
[en] Accessories | [en] Accessories registered from Product (ART) |
[en] Re-arrange order items
[en] It is possible to re-arrange items before registering a Sales quote (CQU) and sending it to the Customer (CUS), so that the items can be presented in logical order. Re-arrange item can be found by clicking the Context menu and then click on the Change items order.
[en] The Item field is an id of an item and the field LineNo will take over as the sorting key. LineNo will decide the order of lines and will be used as sequence number for items. Item and LineNo will not necessarily be synchronized. When an item is deleted, it will simply not exist anymore. PDFs to Customers (CUS) will show a column for LineNo rather than Item. The field LineNo can be found as a column in the Sales quote item (CQUITM). When forwarding a Sales quote (CQU) to a Sales order (COA), item will be created in the LineNo order in the new documents.
Tworzenie oferty sprzedaży z zapytania ofertowego sprzedaży
Aby utworzyć CQU z CRQ, musisz przekazać dokument CRQ do dokumentu CQU. CRQ oparta na CRQ będzie zawsze zawierać te same informacje, co zapytanie, ale będzie mieć opcję dodania lub zmiany informacji.
Sposób przekazania dokumentu CRQ do dokumentu CQU można znaleźć w temacie Monitorowanie zapytania ofertowego sprzedaży.
Kopiowanie CQU do CQU
Możesz skopiować istniejącą CQU, aby utworzyć nową CQU. W aplikacji CQU. W menu kontekstowym wybierz opcję Kopiuj ofertę sprzedaży do nowej oferty sprzedaży.
Aby skopiować specjalne struktury do nowej CQU, w CSV wpisz polecenie COPY*SPECIAL*STRUCTURE i wybierz klawisz Enter.
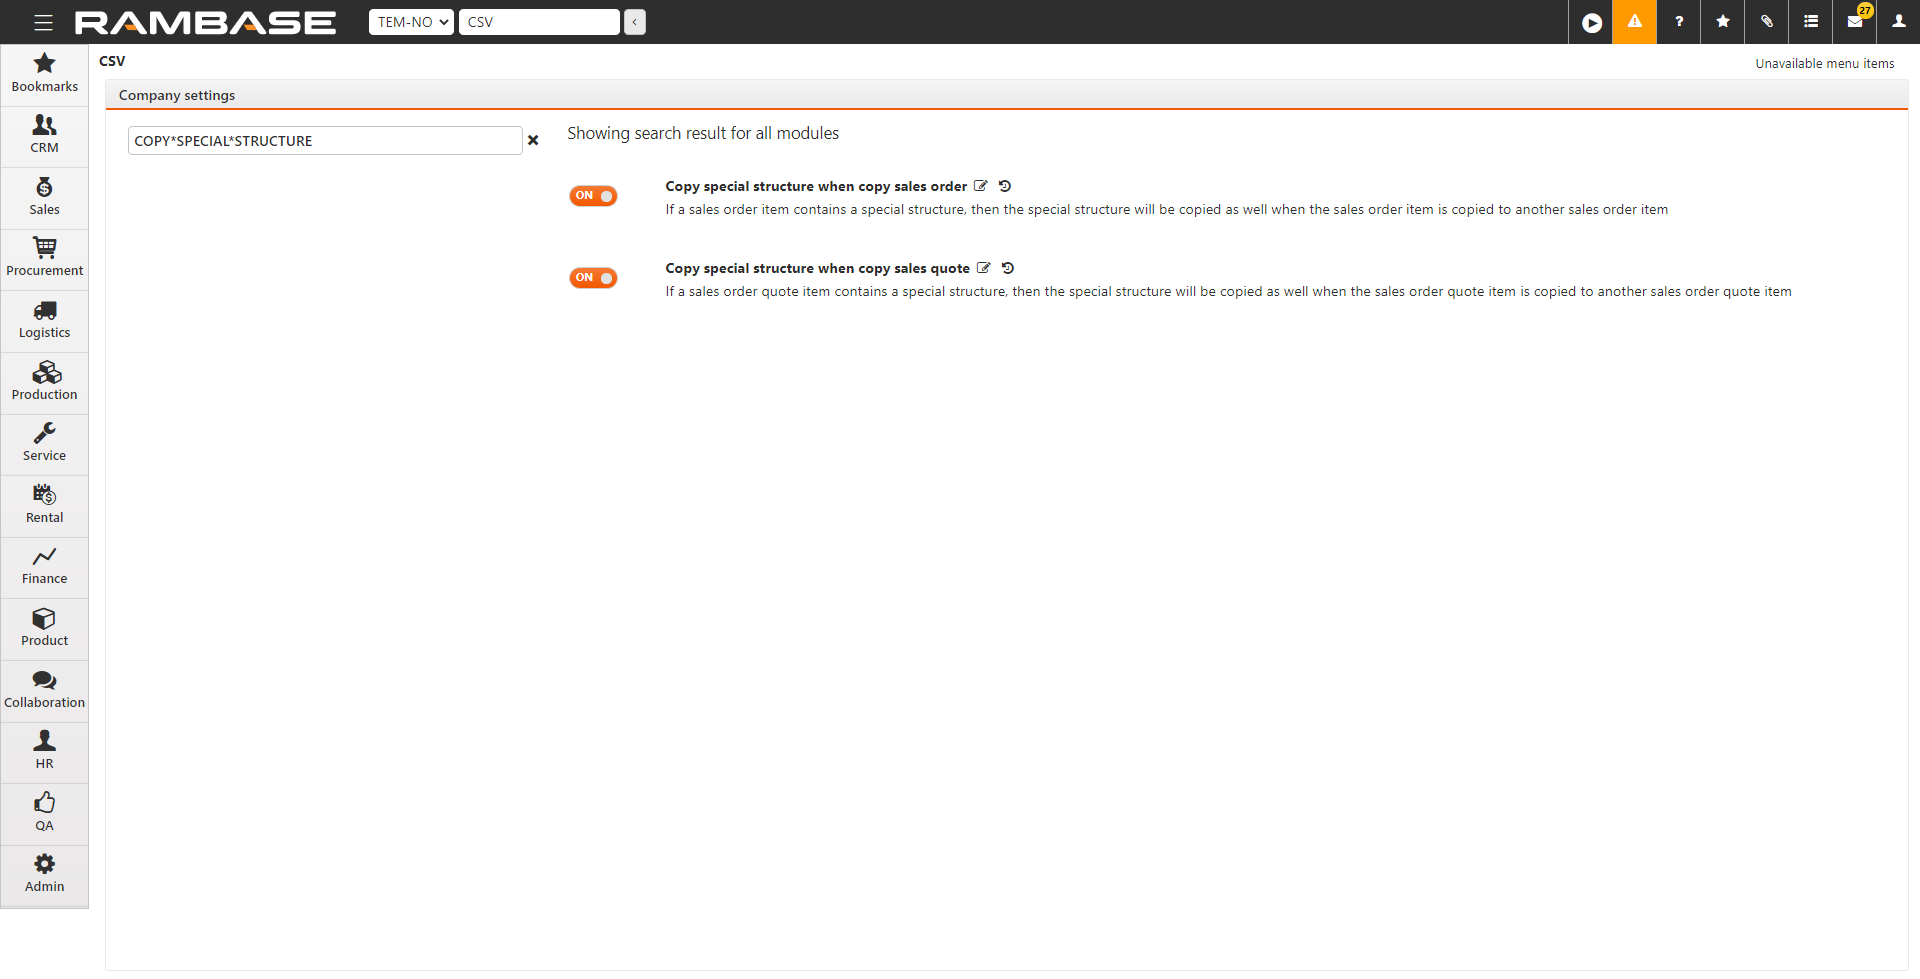
Zaznacz opcję Kopiuj specjalną strukturę podczas kopiowania oferty sprzedaży, aby włączyć to ustawienie.