Tworzenie monitu
Możesz utworzyć i wysłać monit do jednego nabywcy oddzielnie lub do wszystkich nabywców jednocześnie.
Tworzenie nowego monitu
Aby otworzyć aplikację Monit (RMR), znajdź pozycję Finanse w menu RamBase, a następnie pozycję Należności. Kliknij Serie monitów, aby wejść do aplikacji RMR.
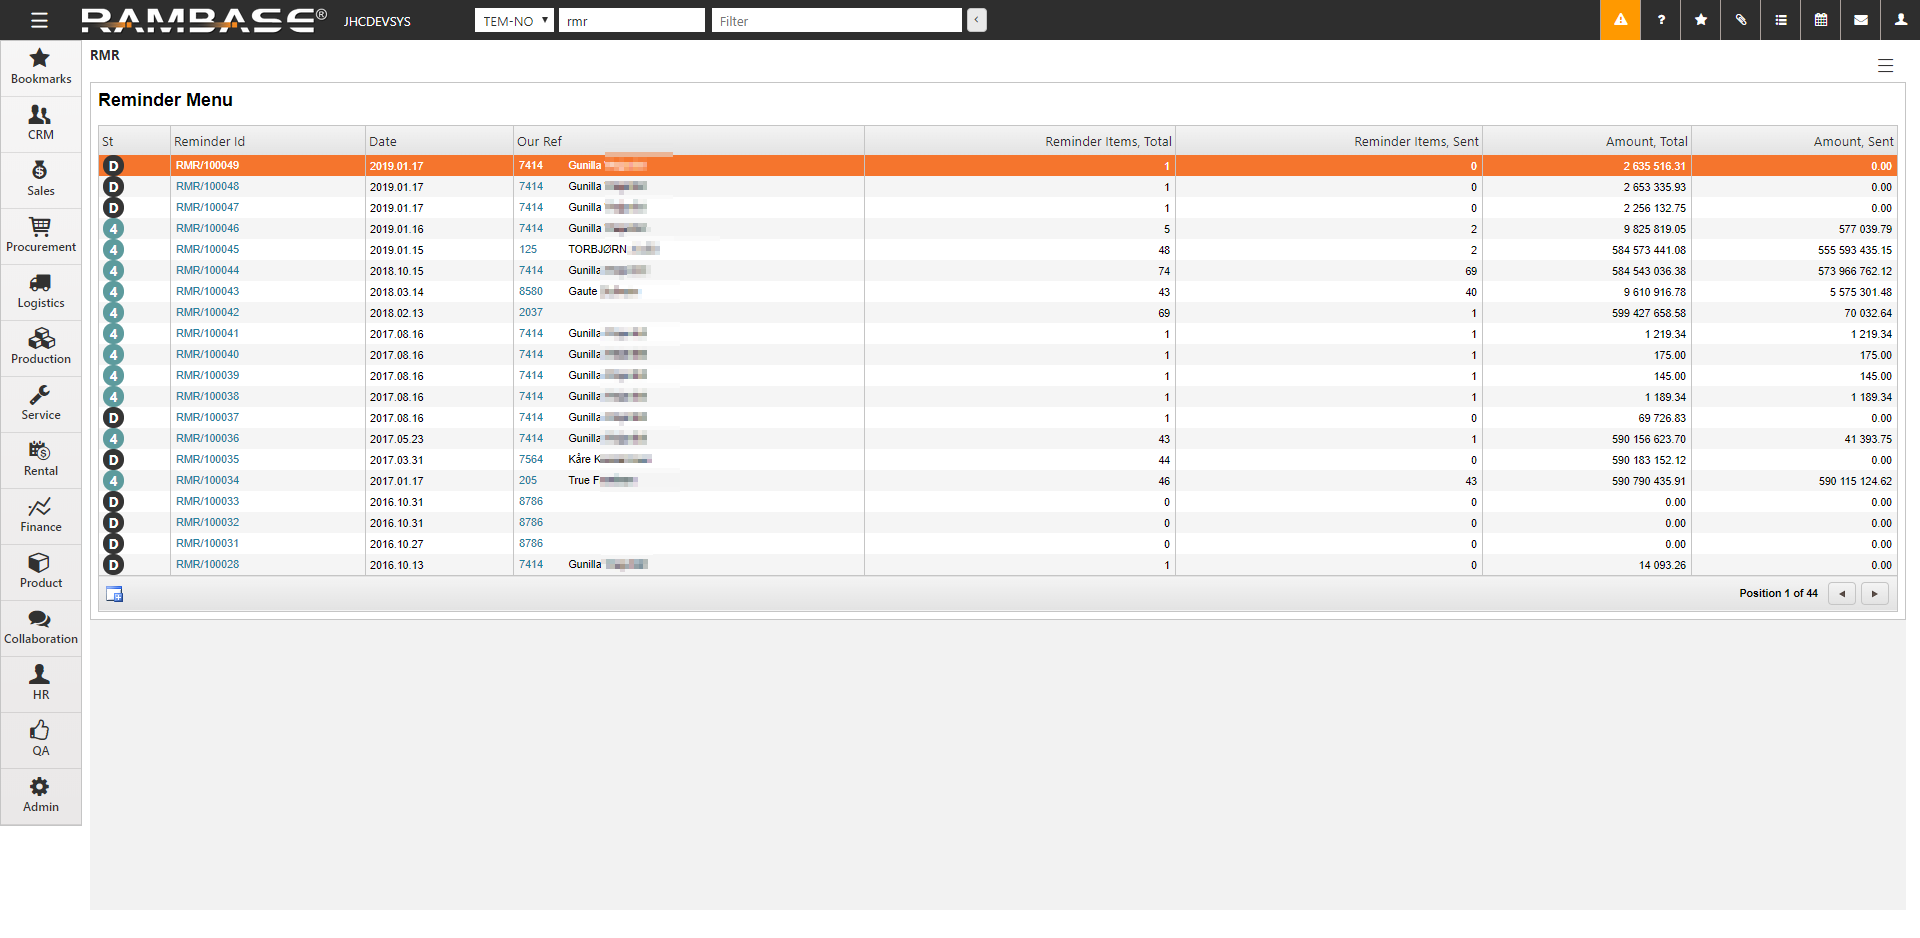
Kliknij ikonę Utwórz nowy w lewym dolnym rogu menu monitu. Wiele informacji jest już wprowadzonych w wyniku domyślnych ustawień programu, ale można je edytować dla każdego monitu.
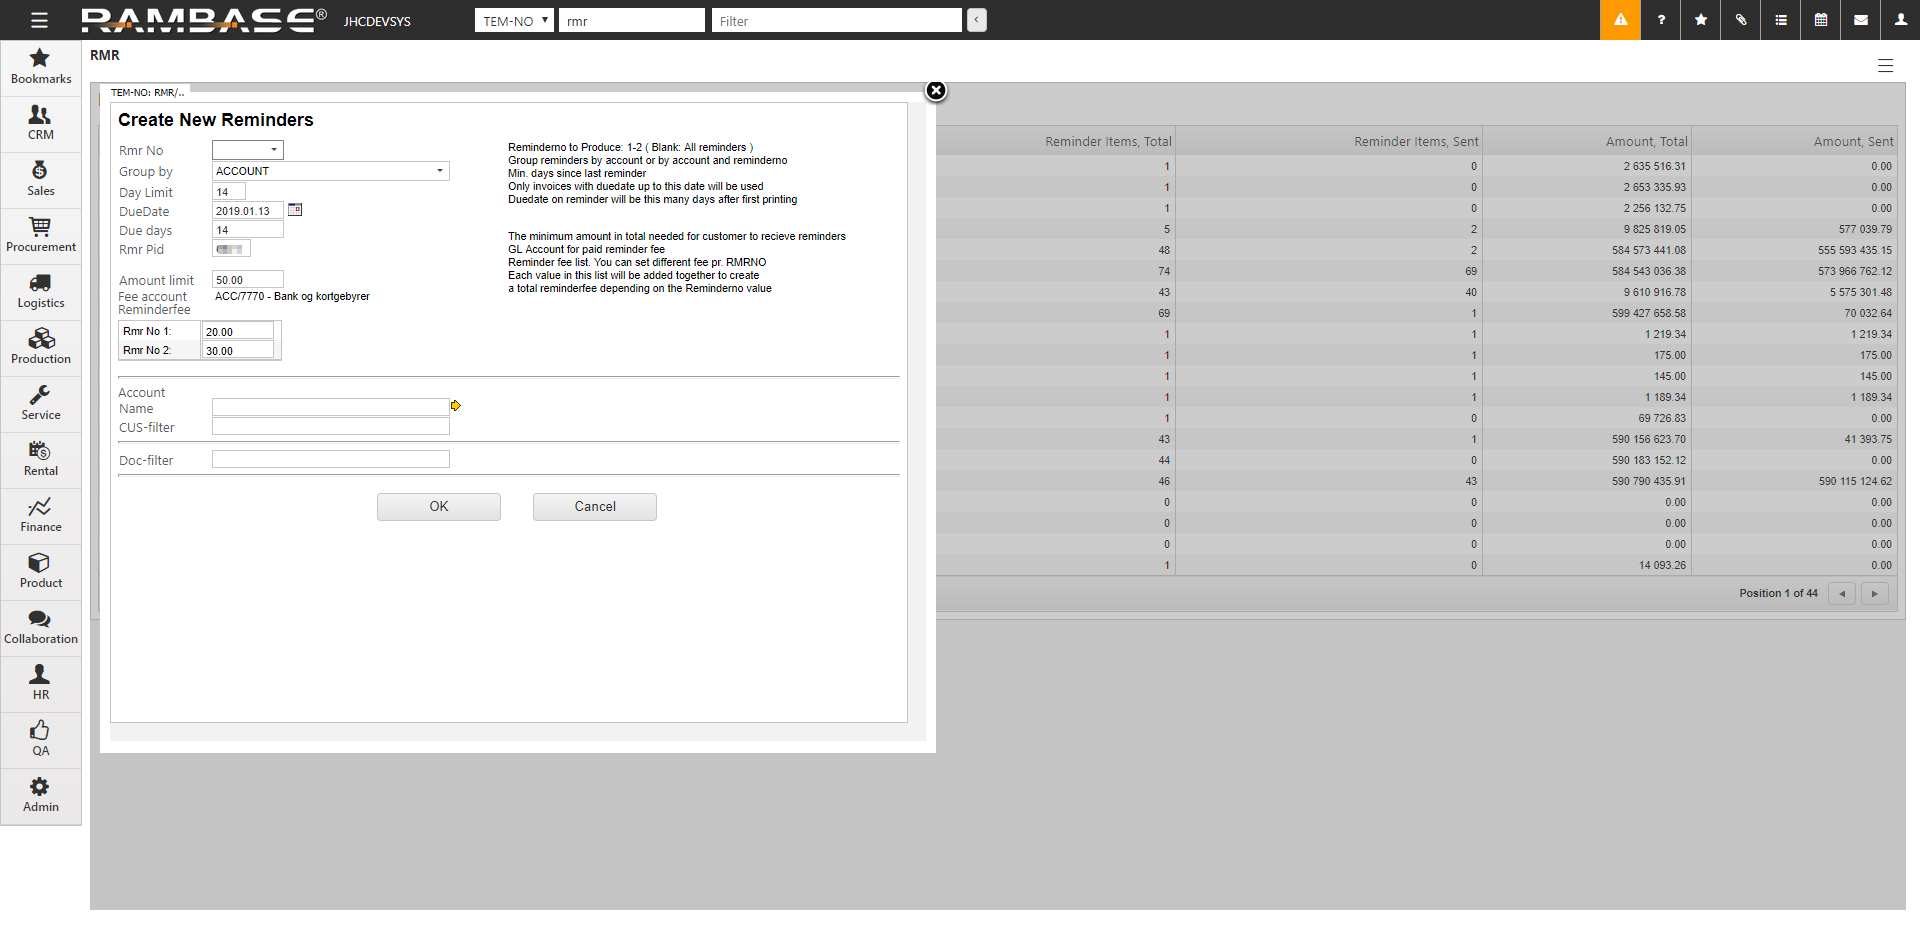
[en]
Wybierz numer monitu w polu Nr monitu. Pole Nr monitu definiuje, czy chcesz zarejestrować tylko 1. monity, tylko 2. monity (lub tylko 3. dla tej sprawy) albo wszystkie.
Opcjonalnie możesz edytować pola: Limit dzienny, DueDate, Dni zaległości, Reminderfee, Grupuj według i Limity kwotowe.
Możesz utworzyć monity dla jednego, konkretnego nabywcy. Przefiltruj nabywców, klikając ikonę żółtej strzałki obok pola Nazwa konta.
Kliknij przycisk OK. Monit pojawi się na liście monitów (RMR) i będzie gotowy do dalszego przetwarzania (St:0).
Oznacz bieżący monit i naciśnij klawisz ENTER.
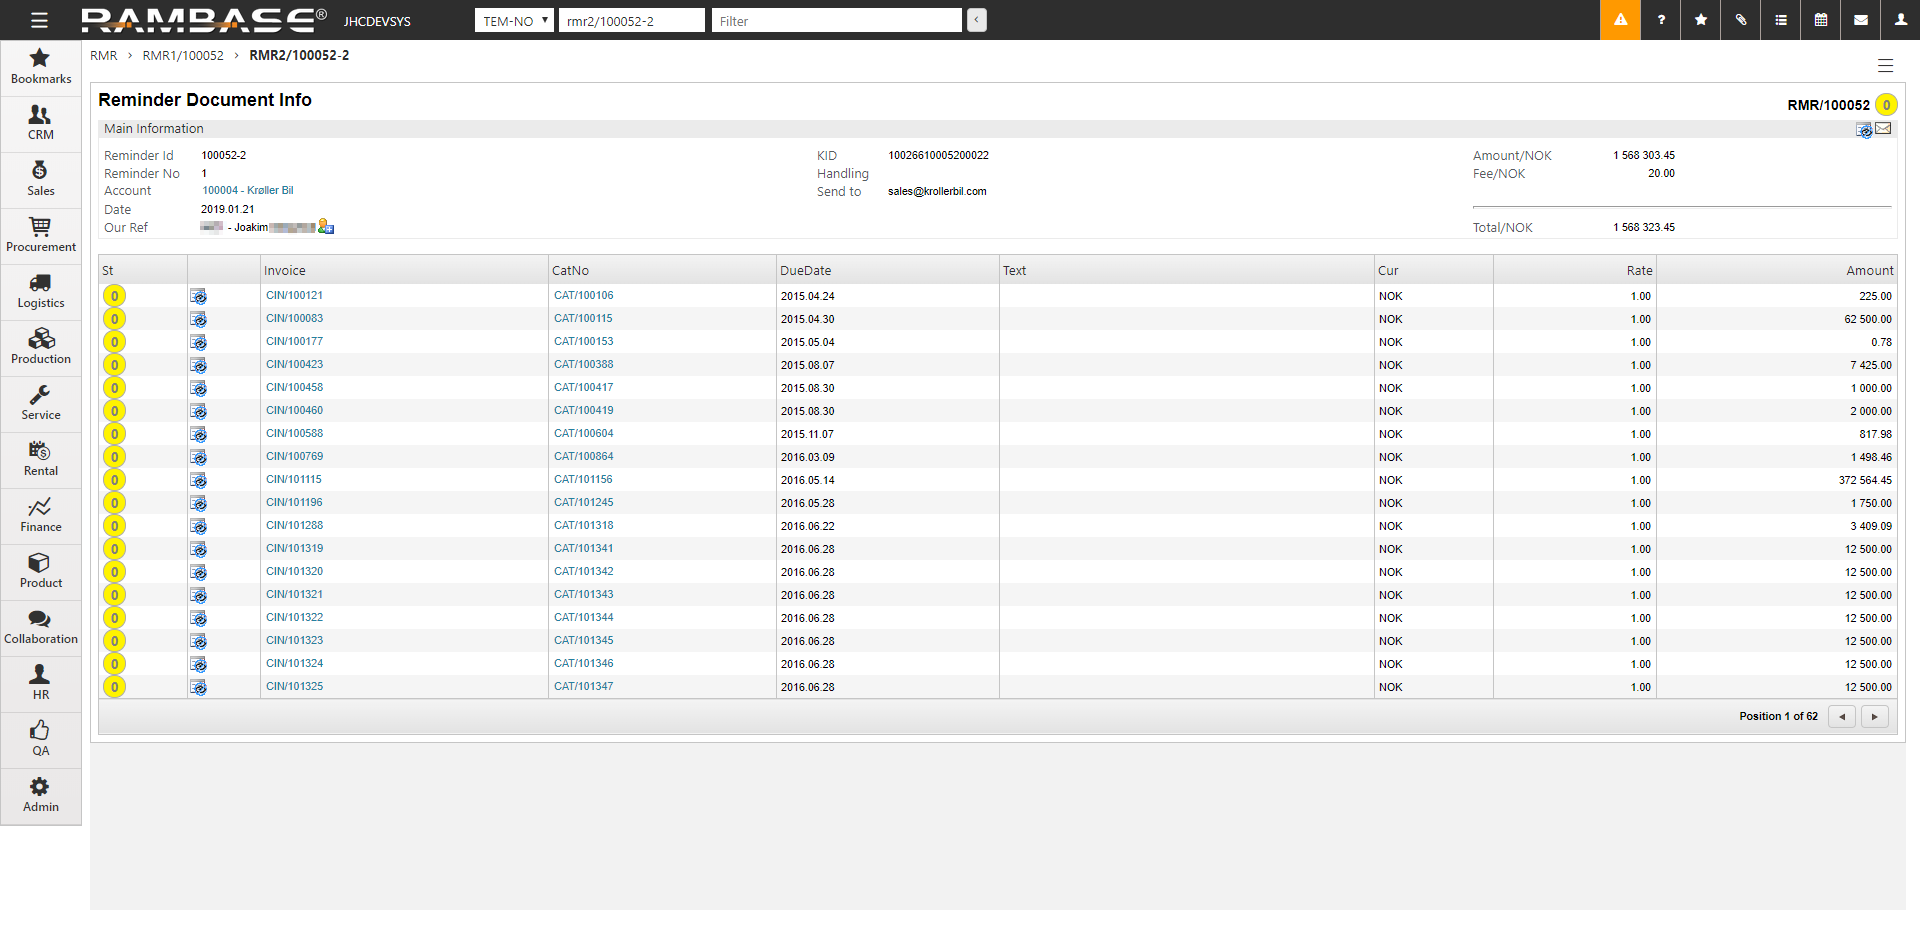
Sprawdź zawartość. Jeśli niektóre z wygenerowanych monitów nie powinny zostać wysłane, odrzuć je, klikając ikonę w powiązanych pozycjach.
Naciśnij klawisz ESC.
Z poziomu dokumentu naciśnij klawisz F12, aby otworzyć menu akcji, i wybierz opcję Wyślij ten monit.
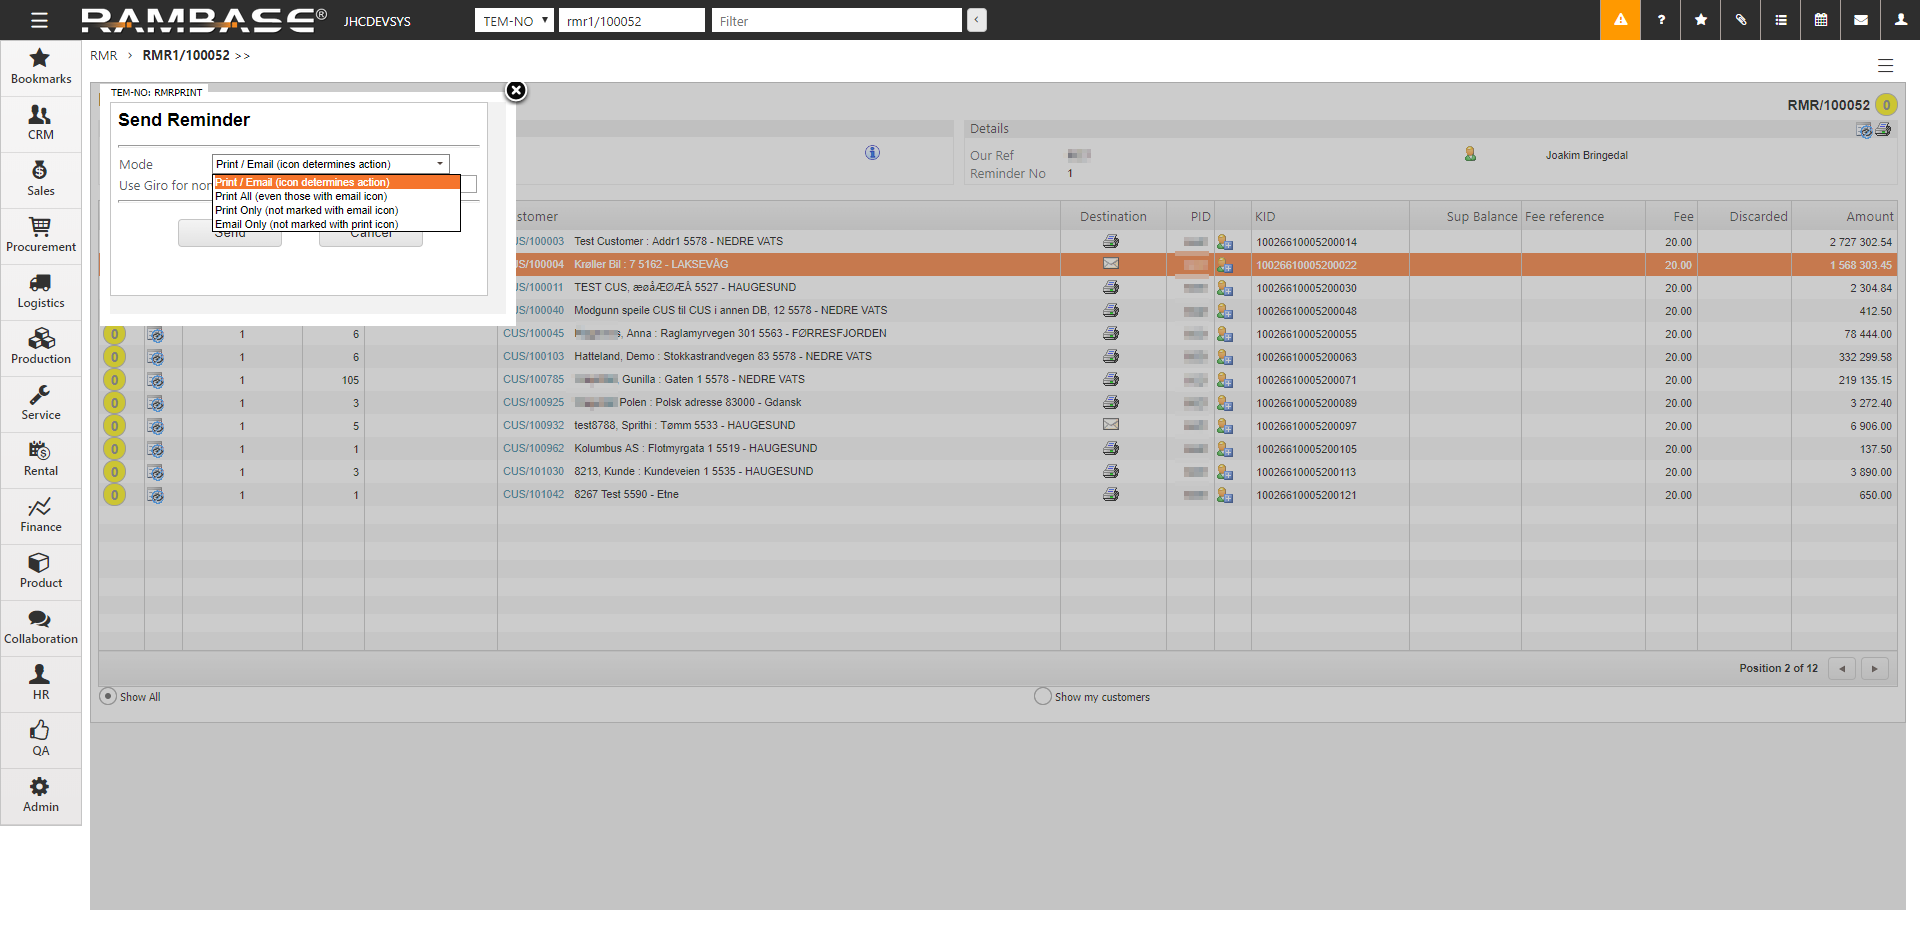
Wybierz preferowany tryb. Wybór zostanie zapisany w szczegółach nabywcy (CUS) i zostanie zaktualizowany dla następnego zadania monitu.
Kliknij przycisk Wyślij.
Monit nadal będzie wyświetlany na liście RMR, ale został wysłany do nabywcy w formie drukowanej lub pocztą elektroniczną (St:4).
[en] If the Customer (CUS) is set up with more than one e-mail account to receive Reminder menu (RMR), only one e-mail account will be added to the Reminder menu (RMR). If several employees at the customers site should receive the Reminder menu (RMR) as an email, the customer could consider setting up an email account such as invoice@companyname.xxx where several employees have access.
[en] Reminder status vs Sales invoice (CIN) status on Reminder (RMR)
[en] The statuses shown are reminder-status, not the status of the Sales invoice (CIN)
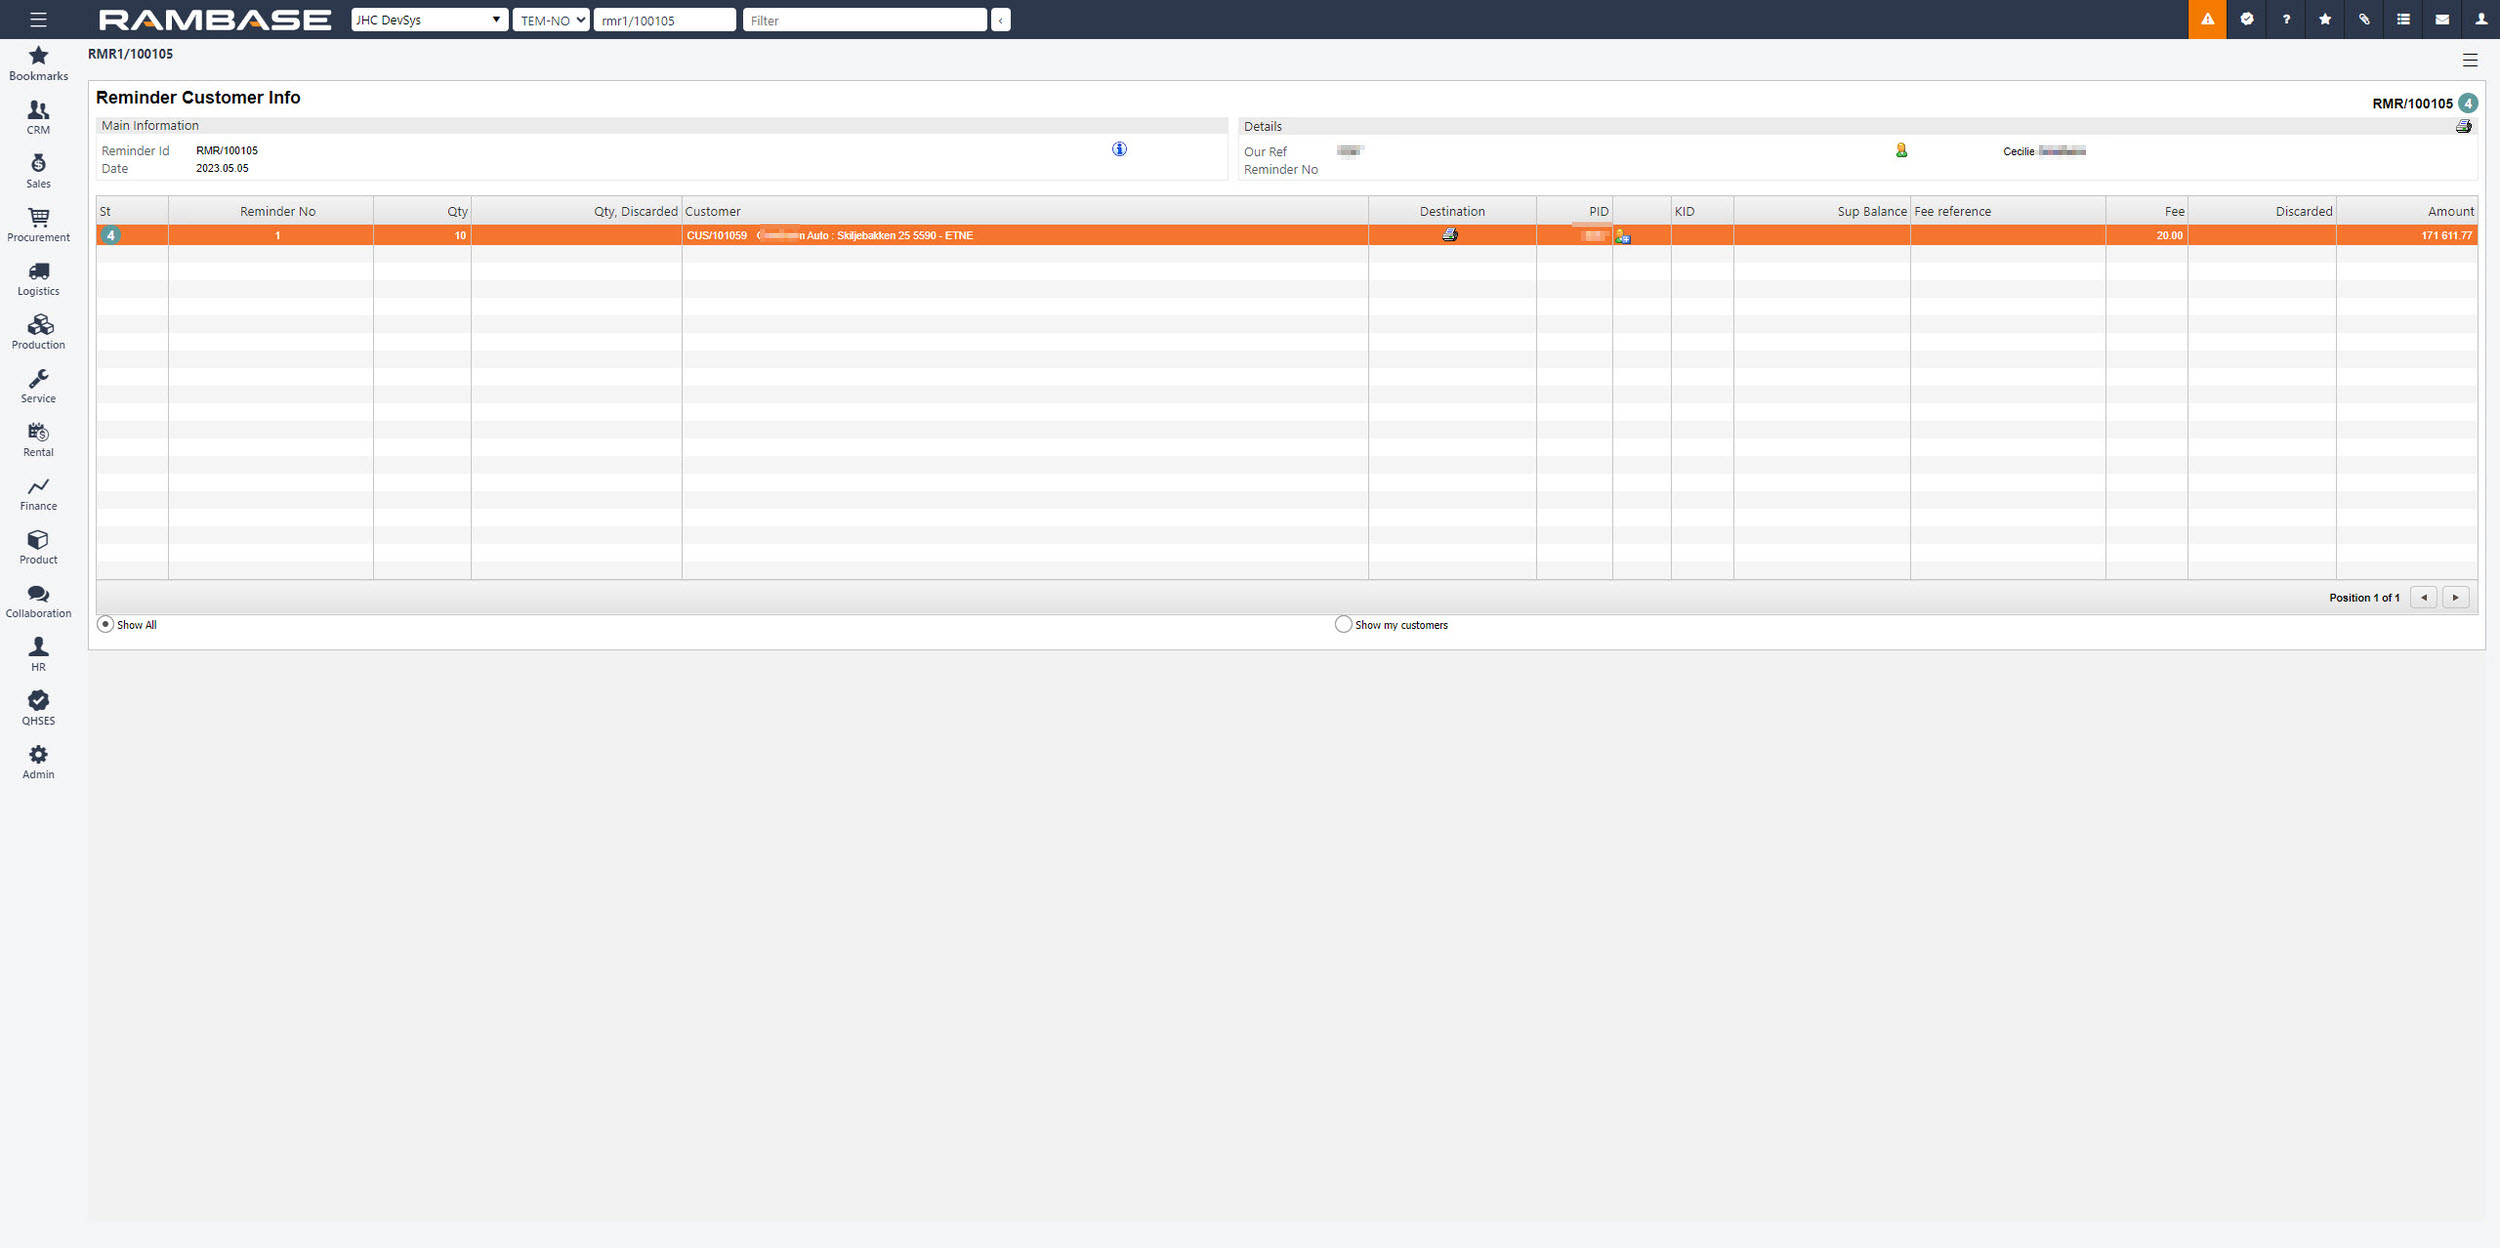
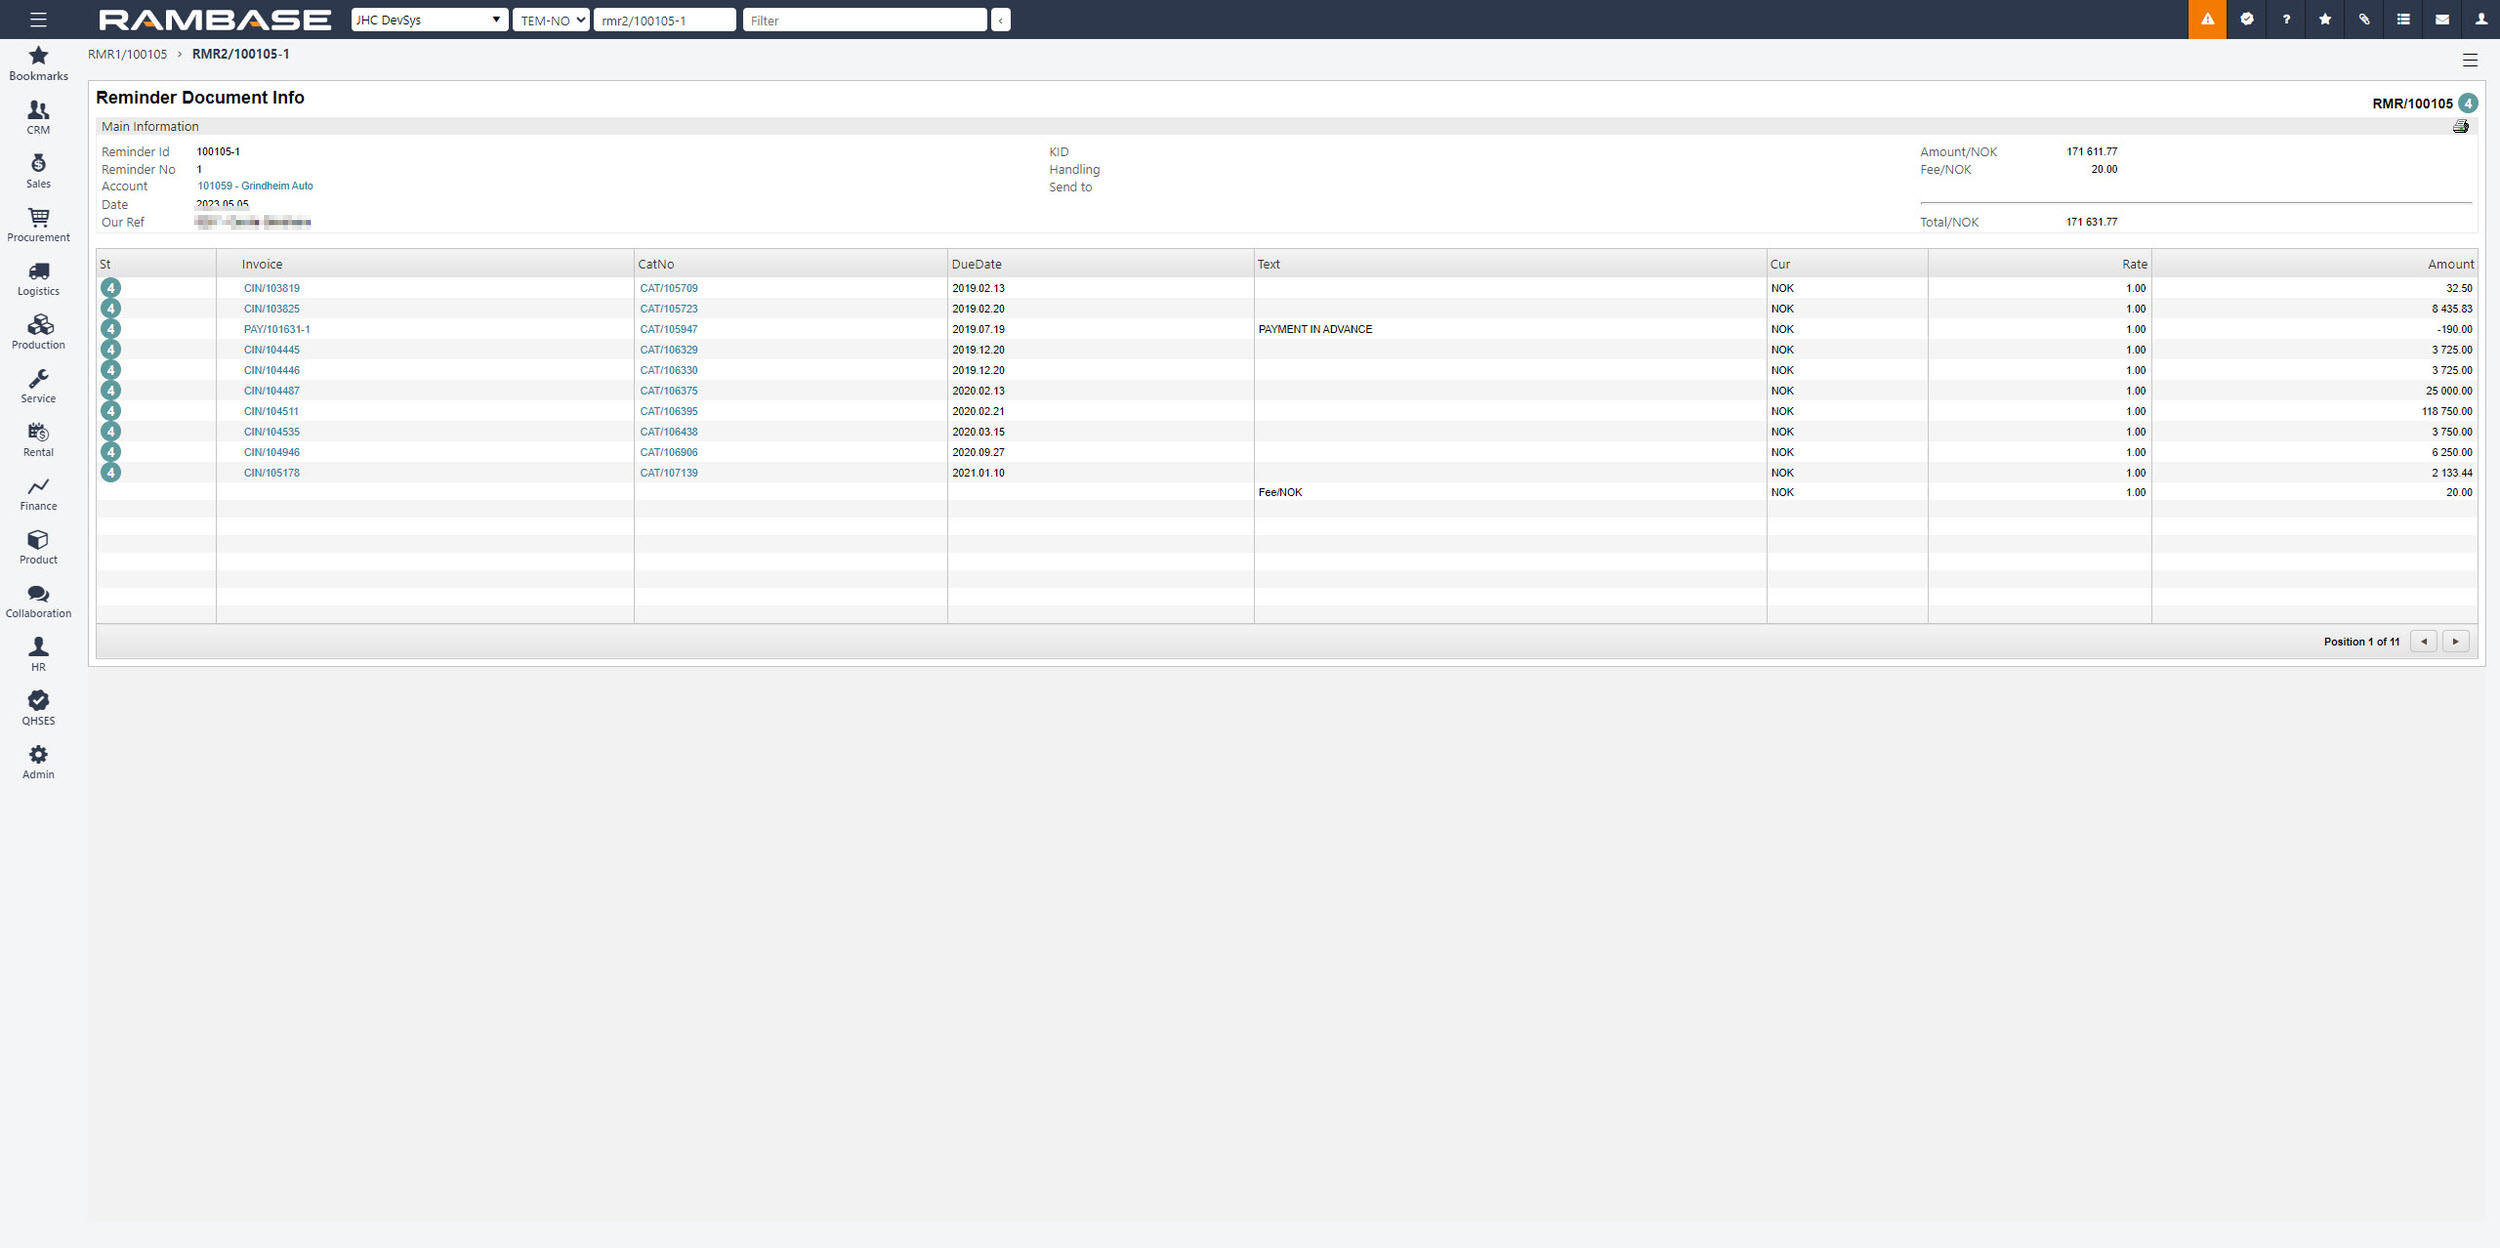
[en] Press the F12 option or right click on the mouse to see a menu option called View Report: Invoices all. This is a report where users will see both status for the invoice and the reminder status.

[en] If the Customer (CUS) is set up with more than one e-mail account to receive Reminder menu (RMR), only one e-mail account will be added to the Reminder menu (RMR). If several employees at the customers site should receive the Reminder menu (RMR) as an email, the customer could consider setting up an email account such as invoice@companyname.xxx where several employees have access.
[en] If an Reminder (RMR) is in Status 0, it is not possible to create a new Reminder (RMR). Either one have to complete the ongoing Reminder (RMR) or set it to Status D by using the Discard all Reminders in status:0/2 icon in the upper right corner beside the Print icon.