[en] Measurements - Definitions and templates
[en] Introduction
[en] Purpose of the document
[en] The purpose of this document is to describe the functionality for creating Measurement documents (MSR), definitions and templates.
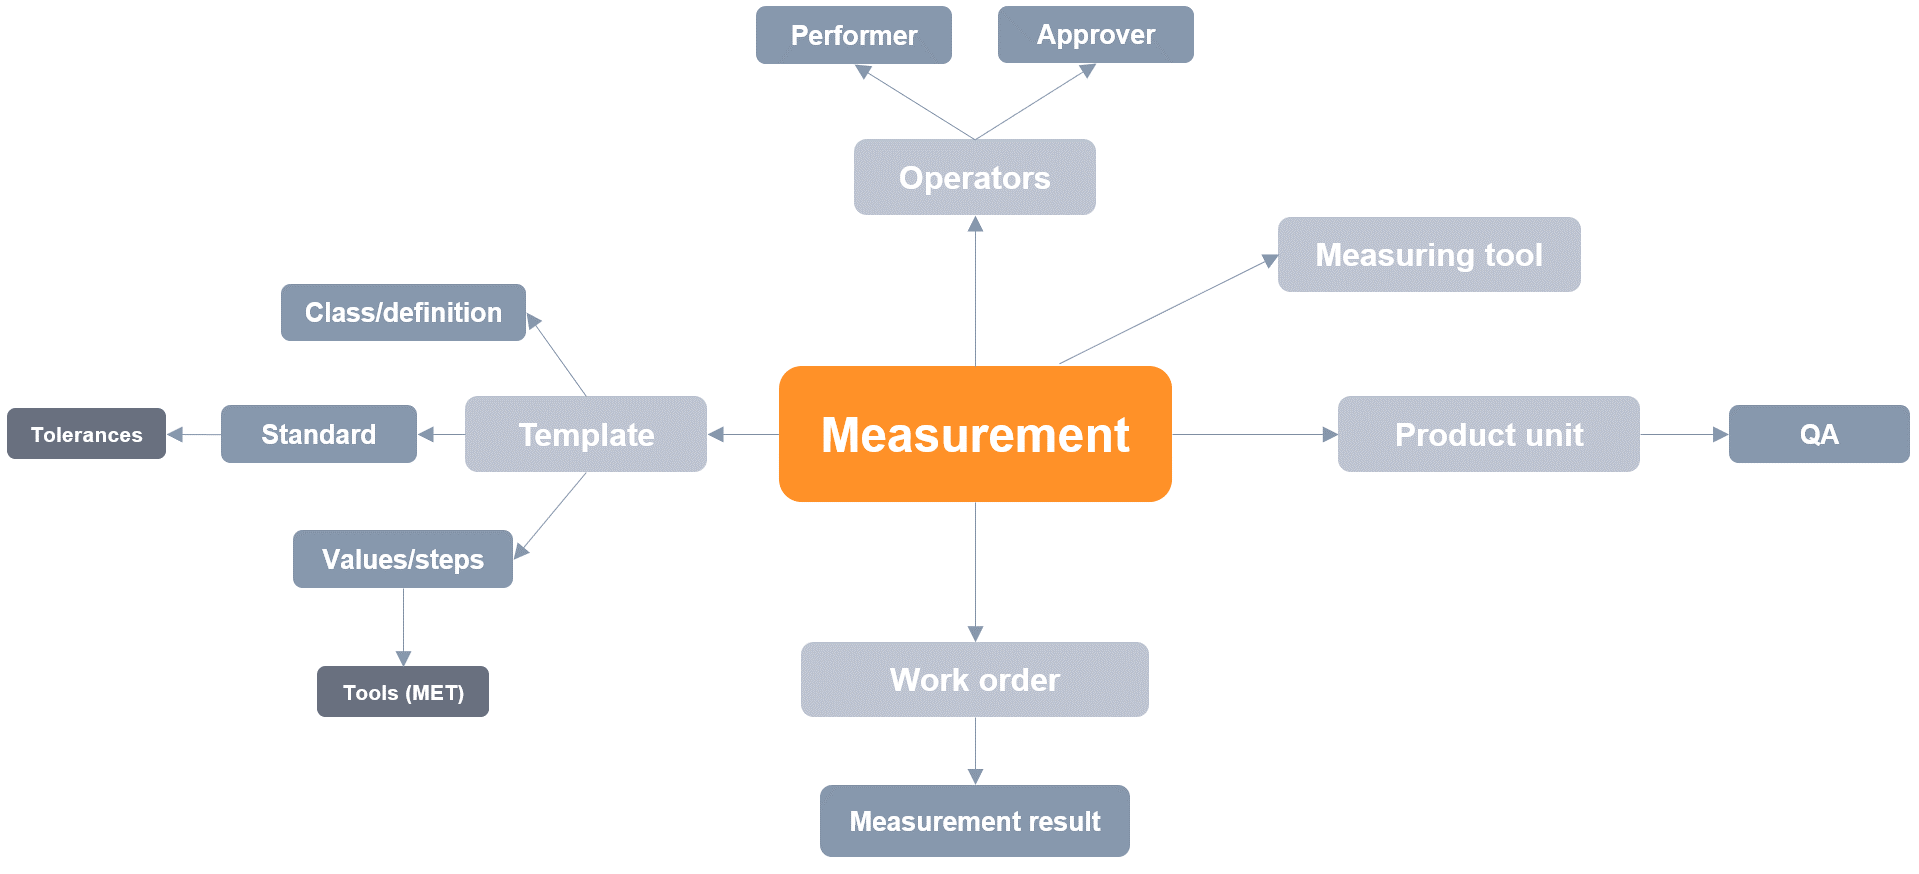
[en] Measure definition (MEASUREDEF)
[en] Measure definition (MEASUREDEF) is the application and tool to create the layout and content for MSR classes like PIF, ITP, THREAD, CALIBRATION and CHECKLIST. These MSR types are controlled/specified via the Class field. One definition (Class) decides the layout for all MSRs within this class.
[en] Exception
[en] The definition for the class DIMENSION cannot be viewed or modified as this is a fixed global setup.
Ważne
[en] Be aware of that by changing the Definition, one does also change the layout/columns of all templates and MSRs belonging to that specific class. All Class values must be specified in a value list, and until further this can only be done by RamBase (via Domain menu (DOF)).
[en] Measure standards
[en] Measure standards, ISO or other approved standards, defines the allowed tolerances for mechanical measurements. There are several classes and types, and each of them have their own set of tolerances. These standards are used by the Measurement documents (MSR) both to inform the users about the tolerances that apply and to warn the user if the measured value is out of tolerance and therefore deviates from the upper or lower tolerance that is set.
[en] A measure standard can be added for several measurement units by defining the “permissible deviations for”, which again can have several tolerance classes like Rough, Medium” and Fine.
[en] MSR Templates
[en] Each Definition may have several MSR Templates. A template can be valid for one specific Product (ART) or for a planning category (group of products) and is the basis for the measurement form’s values and steps. A single template can include up to 700 rows
[en] When creating an MSR, it is always based on a template. The MSR will get all values and fields from the template, but the layout, field names and columns are controlled by the definition.
[en] Templates are often linked to one measure standard at the top level as values will automatically get their upper and lower tolerances in the table view (especially for dimension templates). Symbol and Unit will then automatically be filled based on the Standard and ToleranceClass that is chosen in the dropdown menu. However, one may change the measure standard on one or several values in the table if necessary.
[en] Template valid for one specific product
[en] This option is typically used for the DIMENSION class as dimension measurements are normally product specific, but templates for other classes can also be linked to one specific product. Go to the Product (ART) by clicking the link in the Product field and choose the Context menu option, Measures. Choose a Class in the dropdown menu and then click the New Template icon. You can choose to create a new template from scratch or copy a template from another product by using the option Copy from other Part.
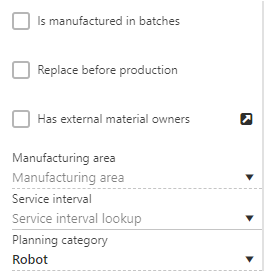
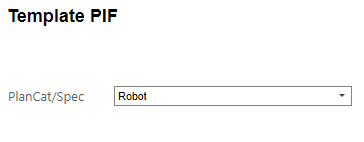
[en] Template valid for a planning category
[en] Templates for a group of products are normally created for classes like Check lists, Product inspection forms and Thread certificates.
[en] Planning categories are specified in the Domain values (DOV) application, and must be added to the Products by navigating to the Properties and the selecting the Production sub-tab.
[en] In the Product (ART) application:
[en] In the MSR template:
[en] Creating an MSR Definition
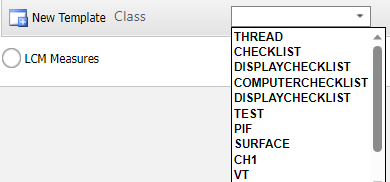
[en] Available Classes
[en] All classes must be defined in a value list in Domain menu (DOF) application, but this is restricted to consultants.
[en] Application / tool to create a definition (measurement class)
[en] The Measurement menu has a radio button, Definitions for users that are allowed to create and modify measurement definitions.
[en] The New definition option opens the application Measure definition (MEASUREDEF) where you select Class and add a Class description before starting to build the layout.
[en] The MEASUREDEF application
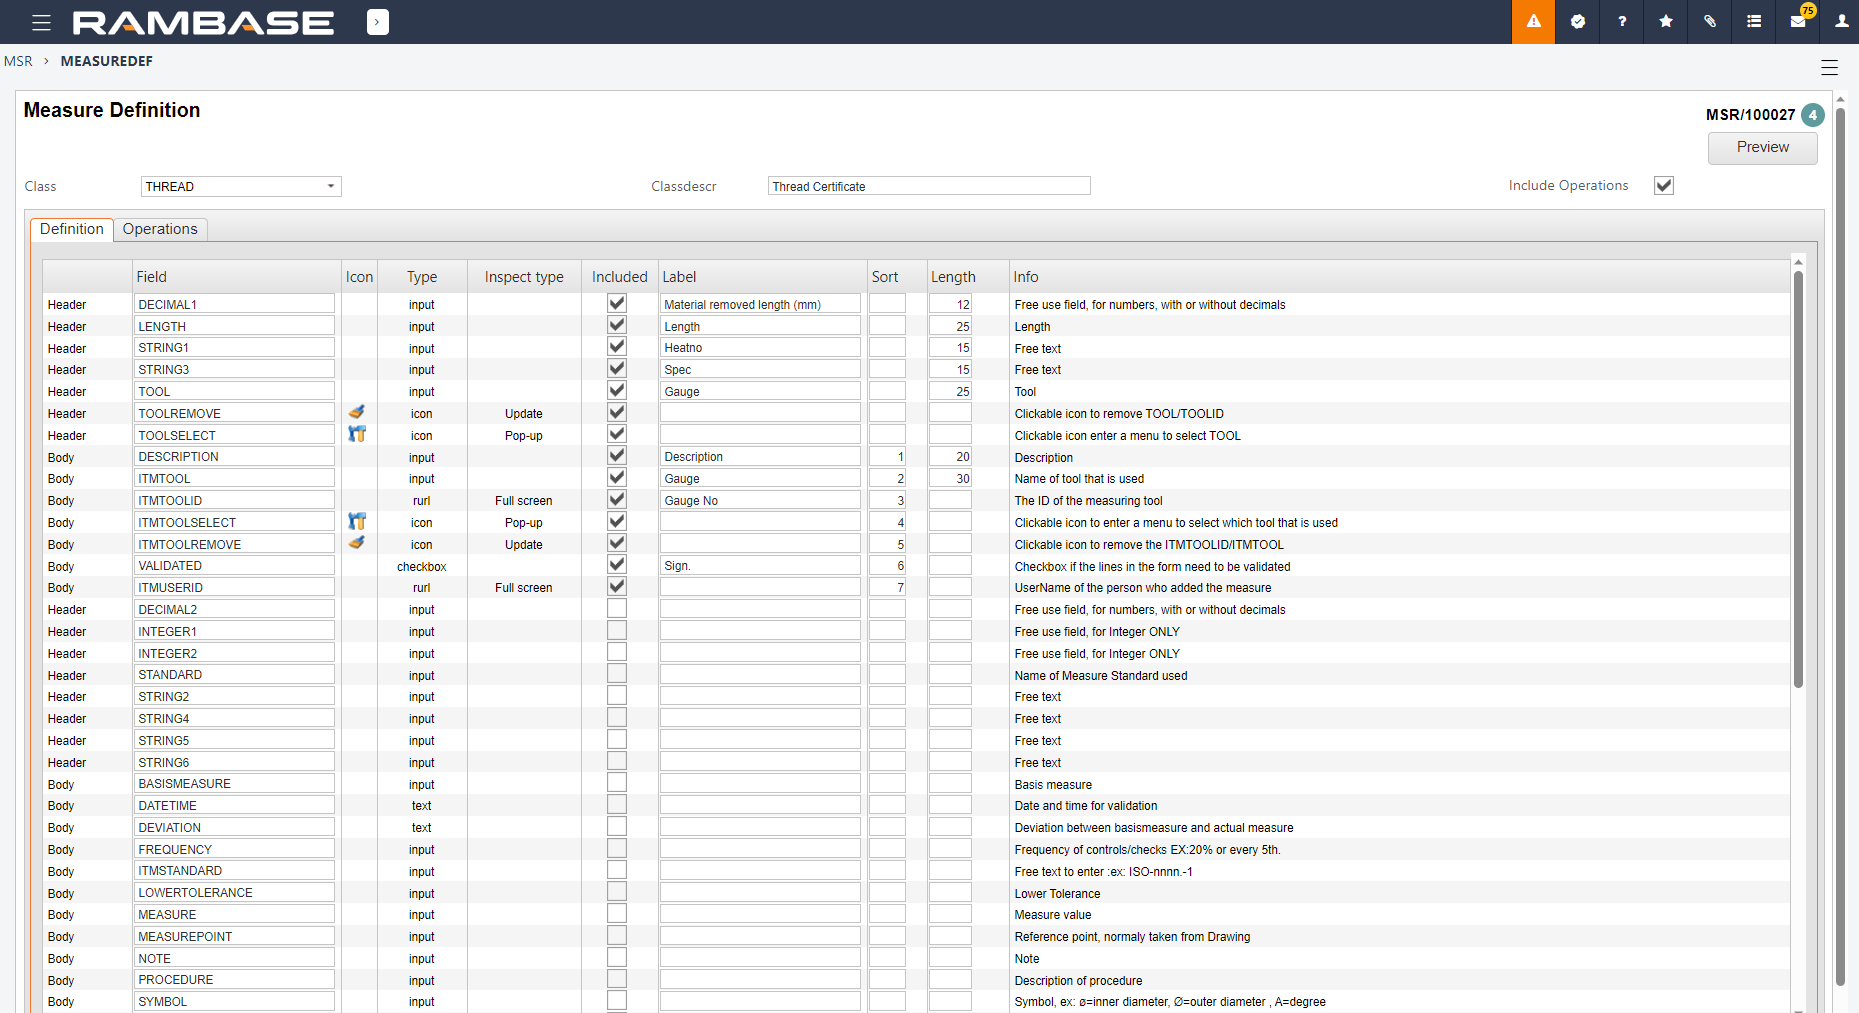
[en] Field classes
[en] Header fields
[en] All selected header fields will be at the header of the measurement form
[en] Body fields
[en] All selected body fields will be columns in the measurement form
[en] Footer fields
[en] There are two available fields for the measurement form footer
[en] Field names
[en] The Field column shows the field name from the data dictionary. The corresponding field name that is wanted to be shown in the layout and print of the final measurement forms must be specified in the column Label.
[en] Icon
[en] Some fields in the header and the body have an action linked to it, like Select tool, Remove selected tool, etc. These icons will show behind the column/field if chosen to be included.
[en] Type
[en] Field type, i.e. input field, text field, rurl field (inspect) and checkbox.
[en] Included
[en] Box to select if the field or column shall be included in the definition.
[en] Sort
[en] Sort fields of columns in the body grid (table). First column is “1”. Only numeric, non-decimal values.
[en] Length
[en] Field length specified by number of characters with the restriction of maximum 120 characters. It is important to evaluate and limit the length of fields. There is a total width of characters at the body layout, limited by i.e. printout.
[en] Remember that minimum length for body fields should be the length of the chosen field name.
[en] Include operations
[en] The include operations select box at the header is only to be used if the work operations are done during production, i.e. milling, MPI, pressure test should be specified at the footer of the printout.
[en] MEASUREDEF Actions
[en] Select the Class and set the Class Description at the header of the document
[en] Activate the Definition by clicking the Activate Template icon in the upper right corner
[en] Start selecting fields/columns, give them names, length and sorting
[en] It is possible to preview the measurement form by clicking the Preview button.
Uwaga
[en] There are some fixed fields that will be added to the form. These are fields gathered from the actual Production work orders (PWO) that the measurement form is created for, like serial number, drawing number, revision, order number, part number (product) etc.
[en] Create an MSR Template
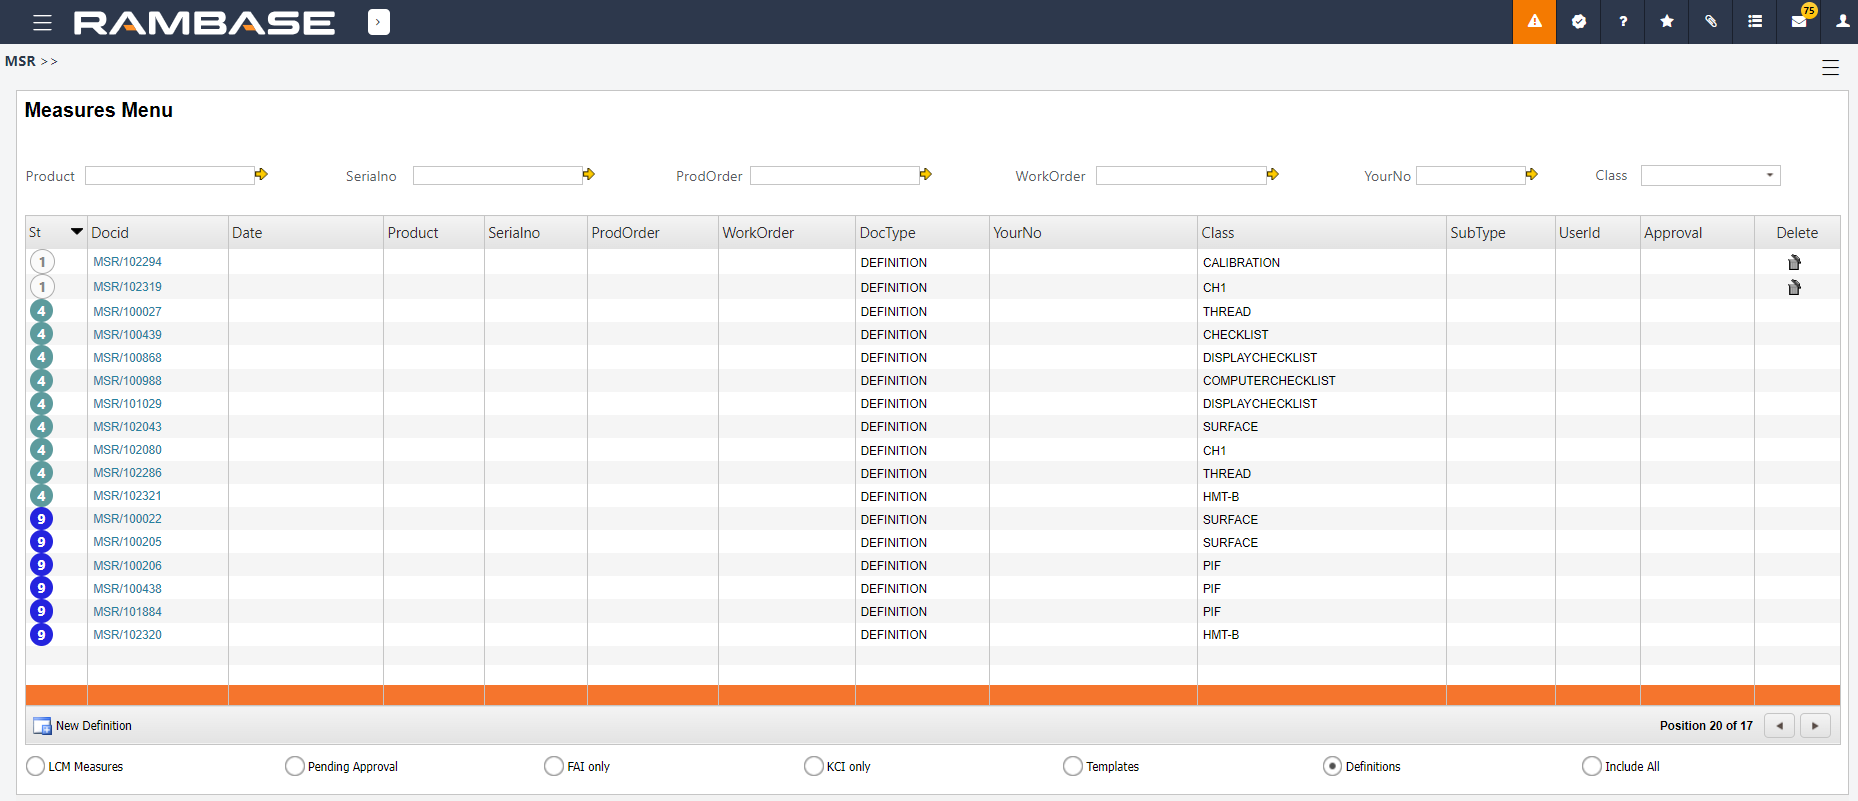
[en] The Measurement menu (MSR) has a radio button, Templates that will open a list off all templates that are created. Valid templates have Status 4, not valid have Status 9 and not yet activated Status 1.
[en] Valid templates can be opened by clicking the Make edit version, and then modified. The old version will be closed by activating the new version and the new version will be valid for all measurement forms that uses that template.
[en] Select the class (definition) to create a template for:
[en] When selected, click the New Template icon and a new template MSR is created in Status 1. Fields and columns are set by the corresponding definition. Select a Planning category and set the measure points in the table and fixed values for header/footer fields before activating the template to Status 4.
[en] Measurement approvals
[en] Approval of measurement forms is set on the measurement template (Approval YES/NO). Configuration of whom is to approve the actual measurement forms is done by creating an approval group in the Group application (GRP):
Name: MEASUREAPPROVAL
CLASS: MEASUREAPPROVAL
Members: The people responsible for approving the measurements
[en] Once this is configured the members of the measurement approval group will get the admittance to approve measurement forms
[en] Performing measurements
[en] When operators are working on specific Work order operations (WOO), the natural first step of adding measurements would be by navigating to the Product units tab and then to the Measures column:
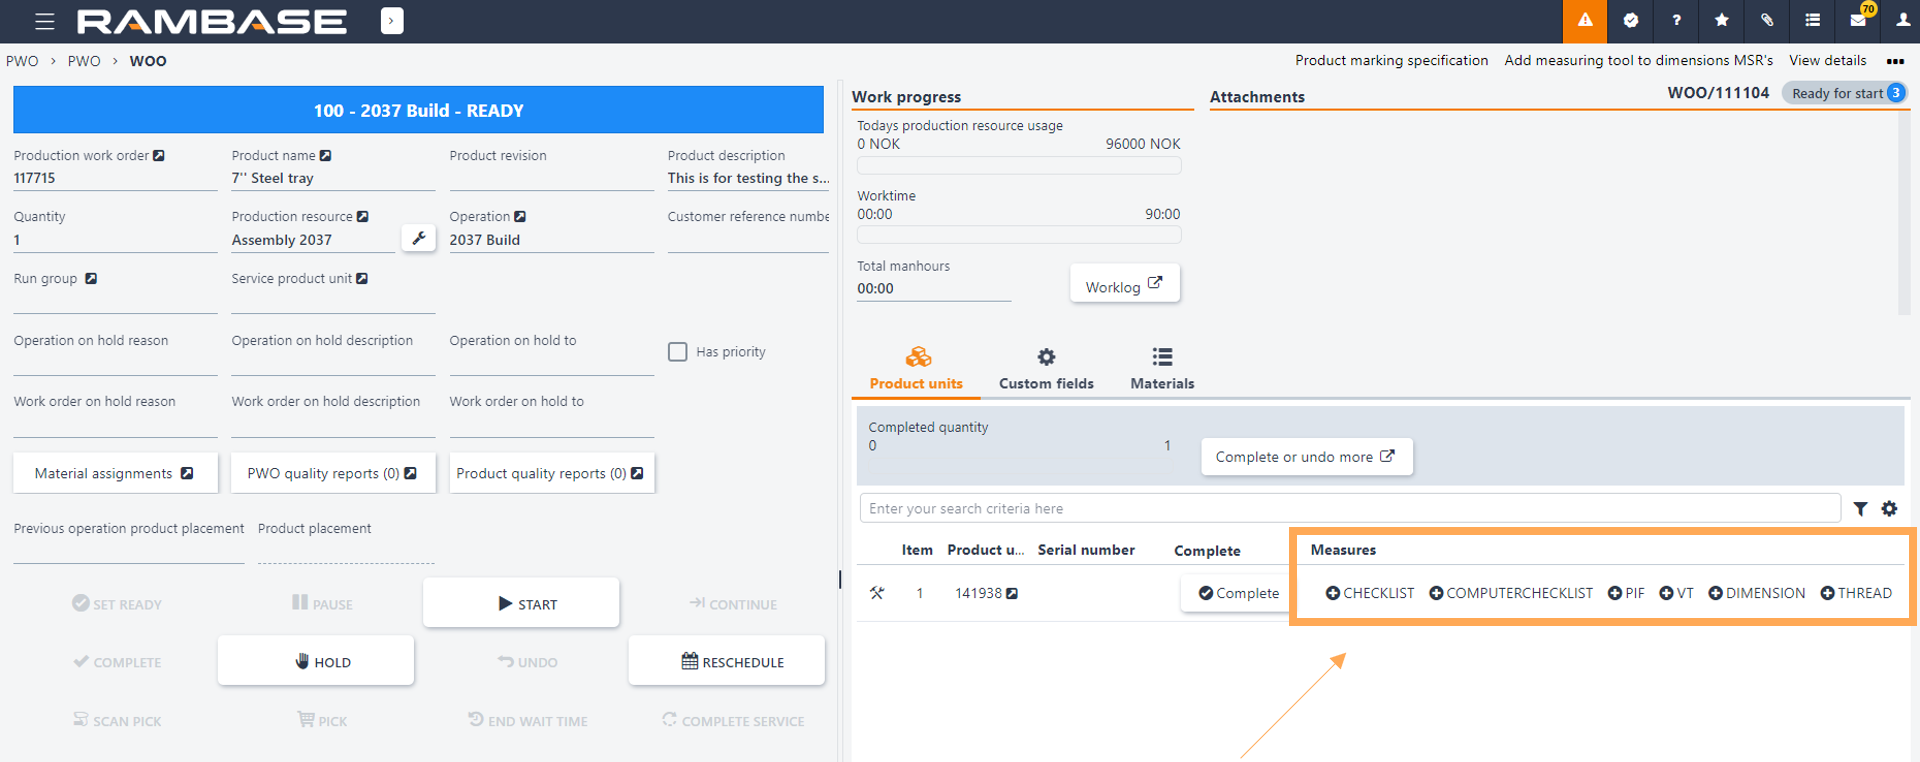
[en] The different options in the Measures column are the different definitions that are defined in the system. The operator will then get a measurement form based on whether there is a template created for the chosen definition.
[en] In this example there is a template created for the specific product that the operator is producing. When choosing Dimension, a measurement form called First article inspection will then open, and they will only need to fill the measures in each row:
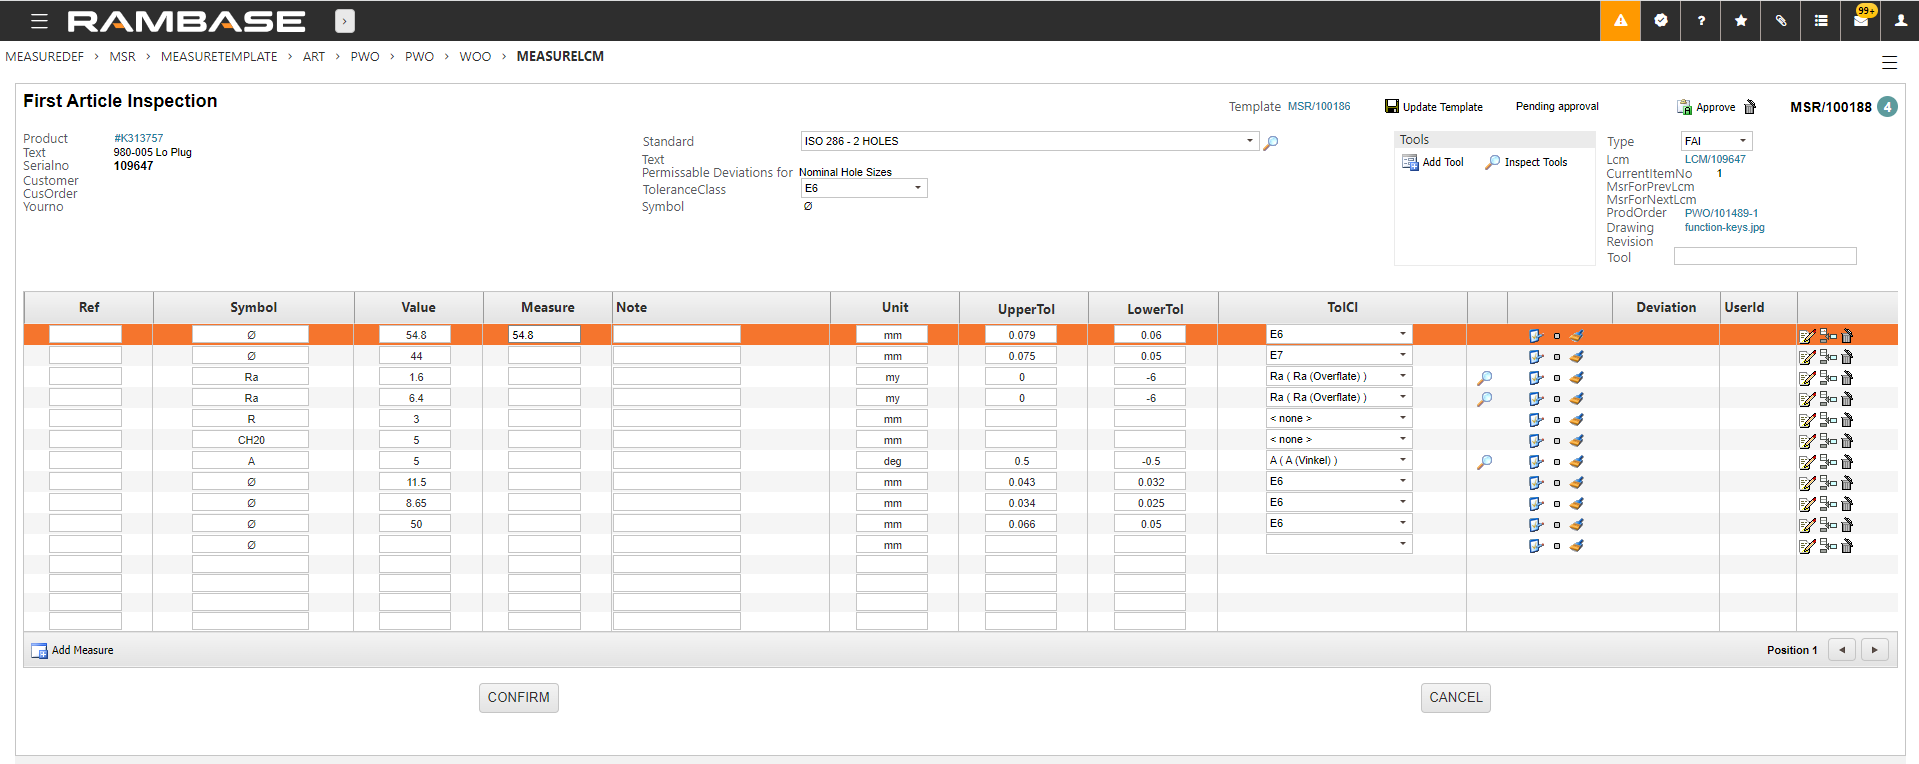
[en] When the Measure column is filled, the operator will choose Confirm. If approval is necessary, the person added to the approval group will get an Approve icon in the upper right corner. The next natural step will then be to Create and link pdf. This can be added to the documentation package and sent to the customer. The Create and link PDF" option will attach the PDF as a file to the Product unit (LCM) where the measurement was performed.