[en] Postpone VAT
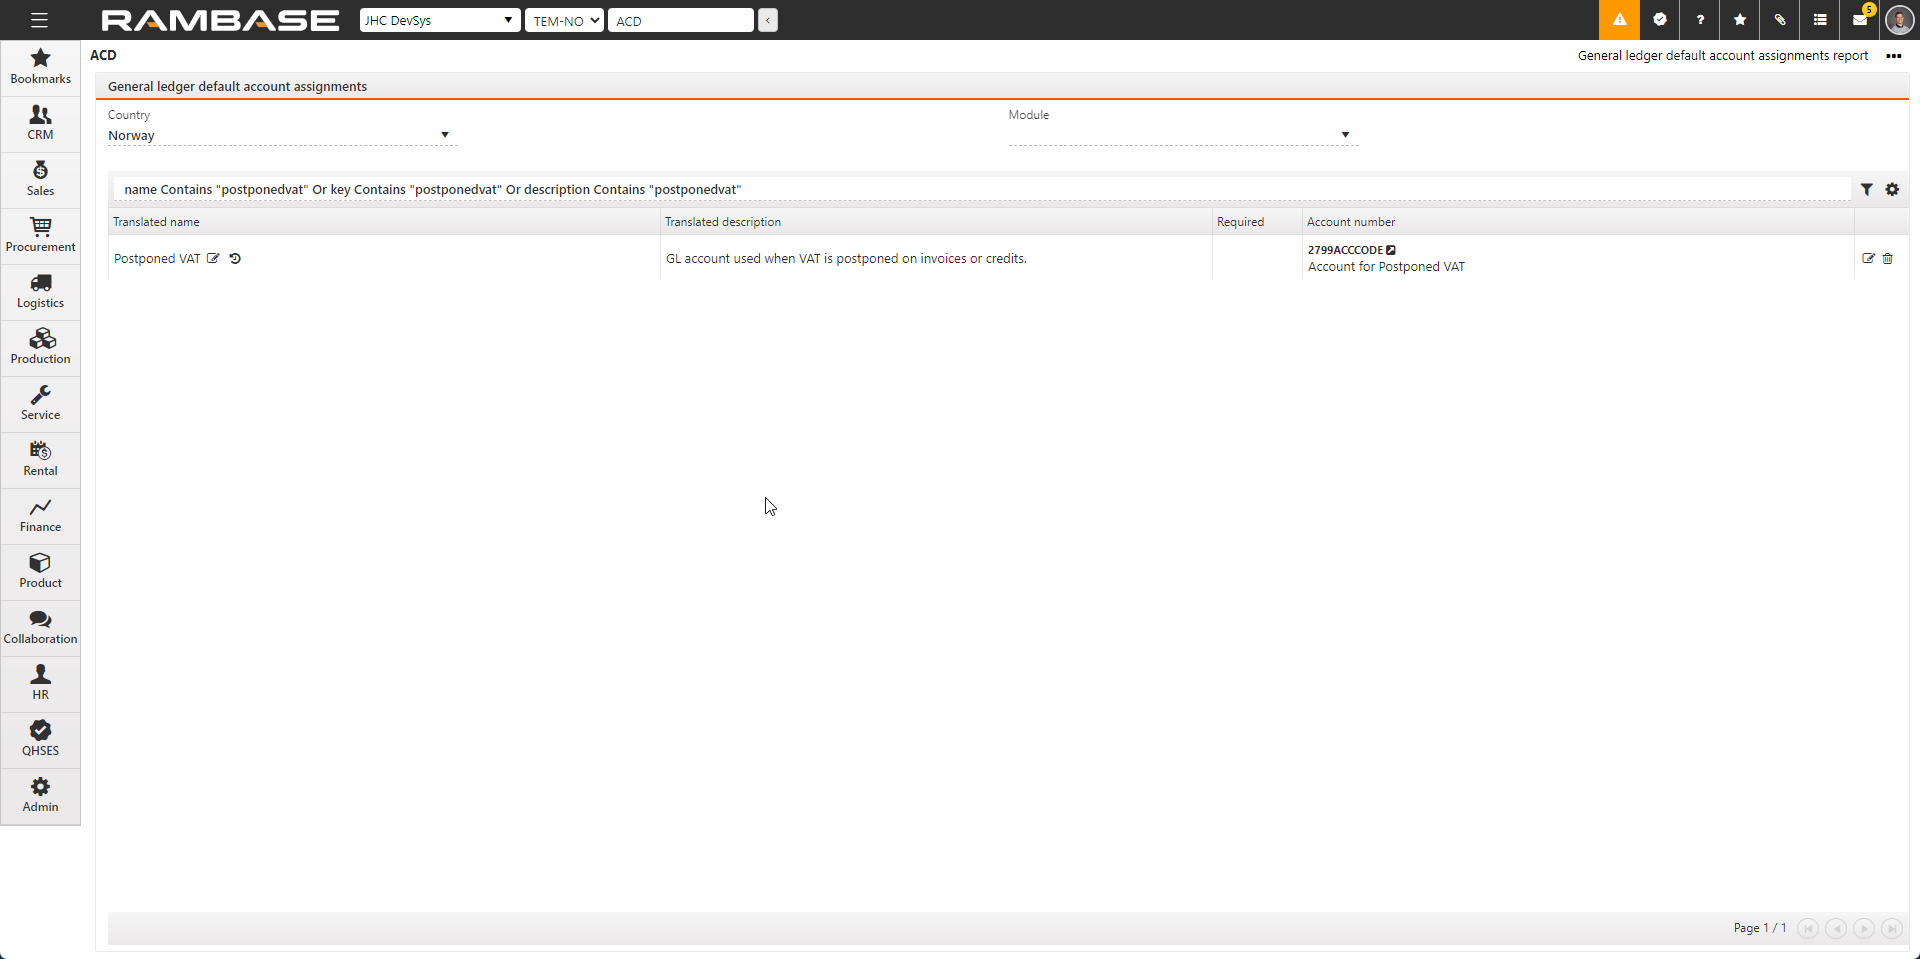
[en] Verify Postpone VAT - Setup
[en] Verify that Postponed VAT is set up in the General ledger default account assignments (ACD).
[en] From the RamBase menu, click Finance and then Base registers. Finally click Default accounts.
[en] In the Search field type Postponed VAT, or find it in the list.

[en] Recommended reading
[en] To set up read more about the Enter Account defaults (ACD) application.
[en] Postpone VAT - Procedure
[en] It is possible to postpone VAT if you are unsure of the period in which it will be reported. It is possible from both incoming and outgoing invoices.
[en] From the RamBase menu, click Finance, then Payables and finally Supplier invoices to open the Supplier invoices (SIN) application.
[en] Select or search for the supplier invoice in question.
[en] From the Context menu, select the Postpone VAT option.
[en] A banner will be displayed with the text Postponed in the VAT area.
[en] If the Supplier invoice (SIN) is in Status 1 - Pending internal validation or registration
[en] Use the Postpone VAT checkbox in the VAT area.
[en] Click the Accounting tab and then the sub tab VAT adjustments.
[en] Listed here are all the General ledger items (ATR) for the selected Supplier invoice (SIN), where the VAT amount has been moved from the VAT account to the Account for Postponed VAT.
[en] In the VAT area, click the View icon next to the VAT posting field to open the VAT posting (VAP) application. A Yes will be stated in the Postponed field.
[en] Note that the VAT period field will be blank if it is undecided which period this is to be reported. To respost the VAT to a specific period, follow the procedure below.
[en] Repost VAT to a specific period
[en] From the RamBase menu, click Finance, then Payables and finally Supplier invoices to open the Supplier invoices (SIN) application.
[en] Select or search for the supplier invoice in question.
[en] From the Context menu, select the Repost VAT option.
[en] In the Repost VAT popup, click the VAT period dropdown and select a period.
[en] Click the OK button.
[en] Note that the Postponed banner is now updated with the Reposted banner, in the VAT area.
[en] Click the Accounting tab and then the VAT adjustments tab.
[en] Note that the reposted General ledger items (ATR) are now included
[en] In the VAT area, click the View icon next to the VAT posting field to open the VAT posting (VAP) application. A NO will be stated in the Postponed field.
[en] The value selected in the VAT period dropdown in the Repost VAT popup, will be displayed in the VAT Period field.