[en] Procedures in Subscription
[en] About
[en] The following text will outline the main steps, with references to the detailed procedures.
[en] Example:
[en] Solution outline element A1 is detailed in A1 - Procedure - Create a Rental contract (RCT) in Status 1 - Pending registration.
[en] Example scenario:
[en] Customer (CUS) wants to subscribe to multiple Products (ART).
[en] Solution outline
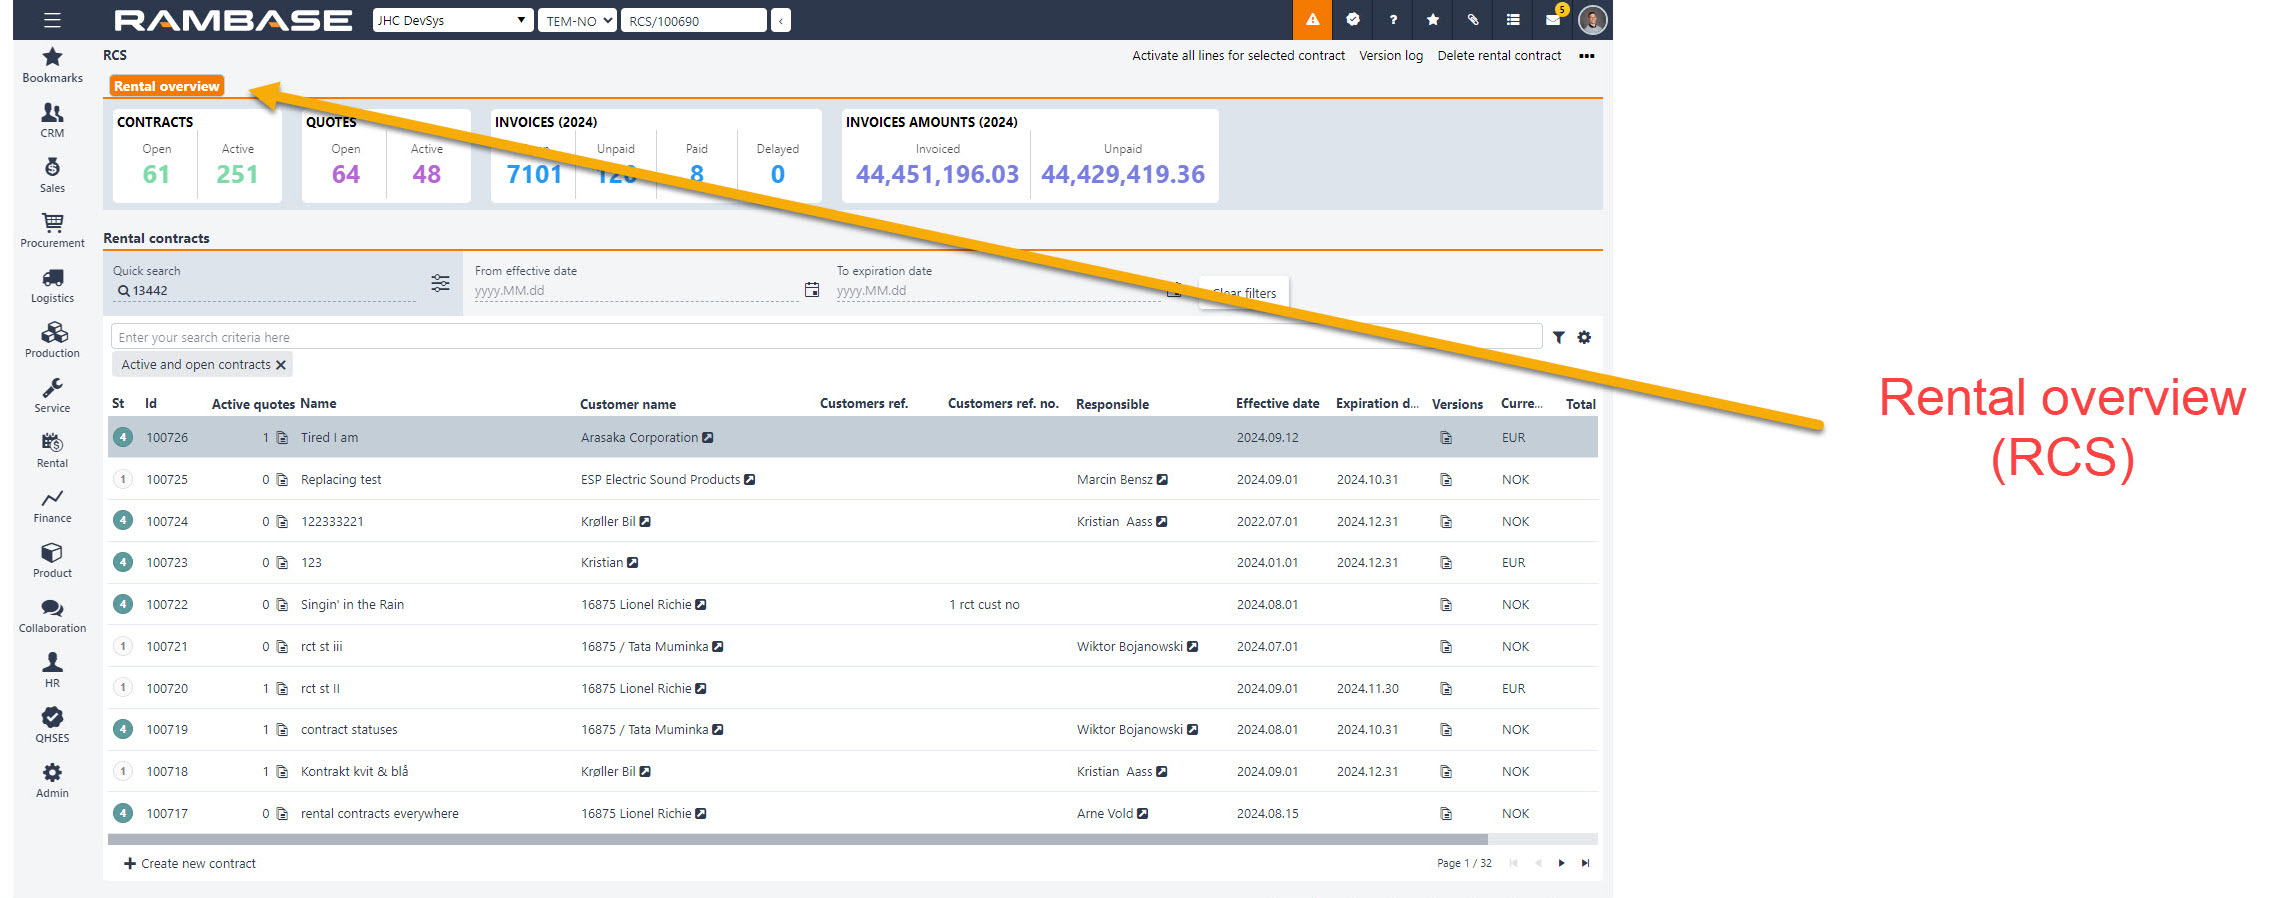
[en] Create a contract in the Rental overview (RCS) application by clicking the Create new contract button.
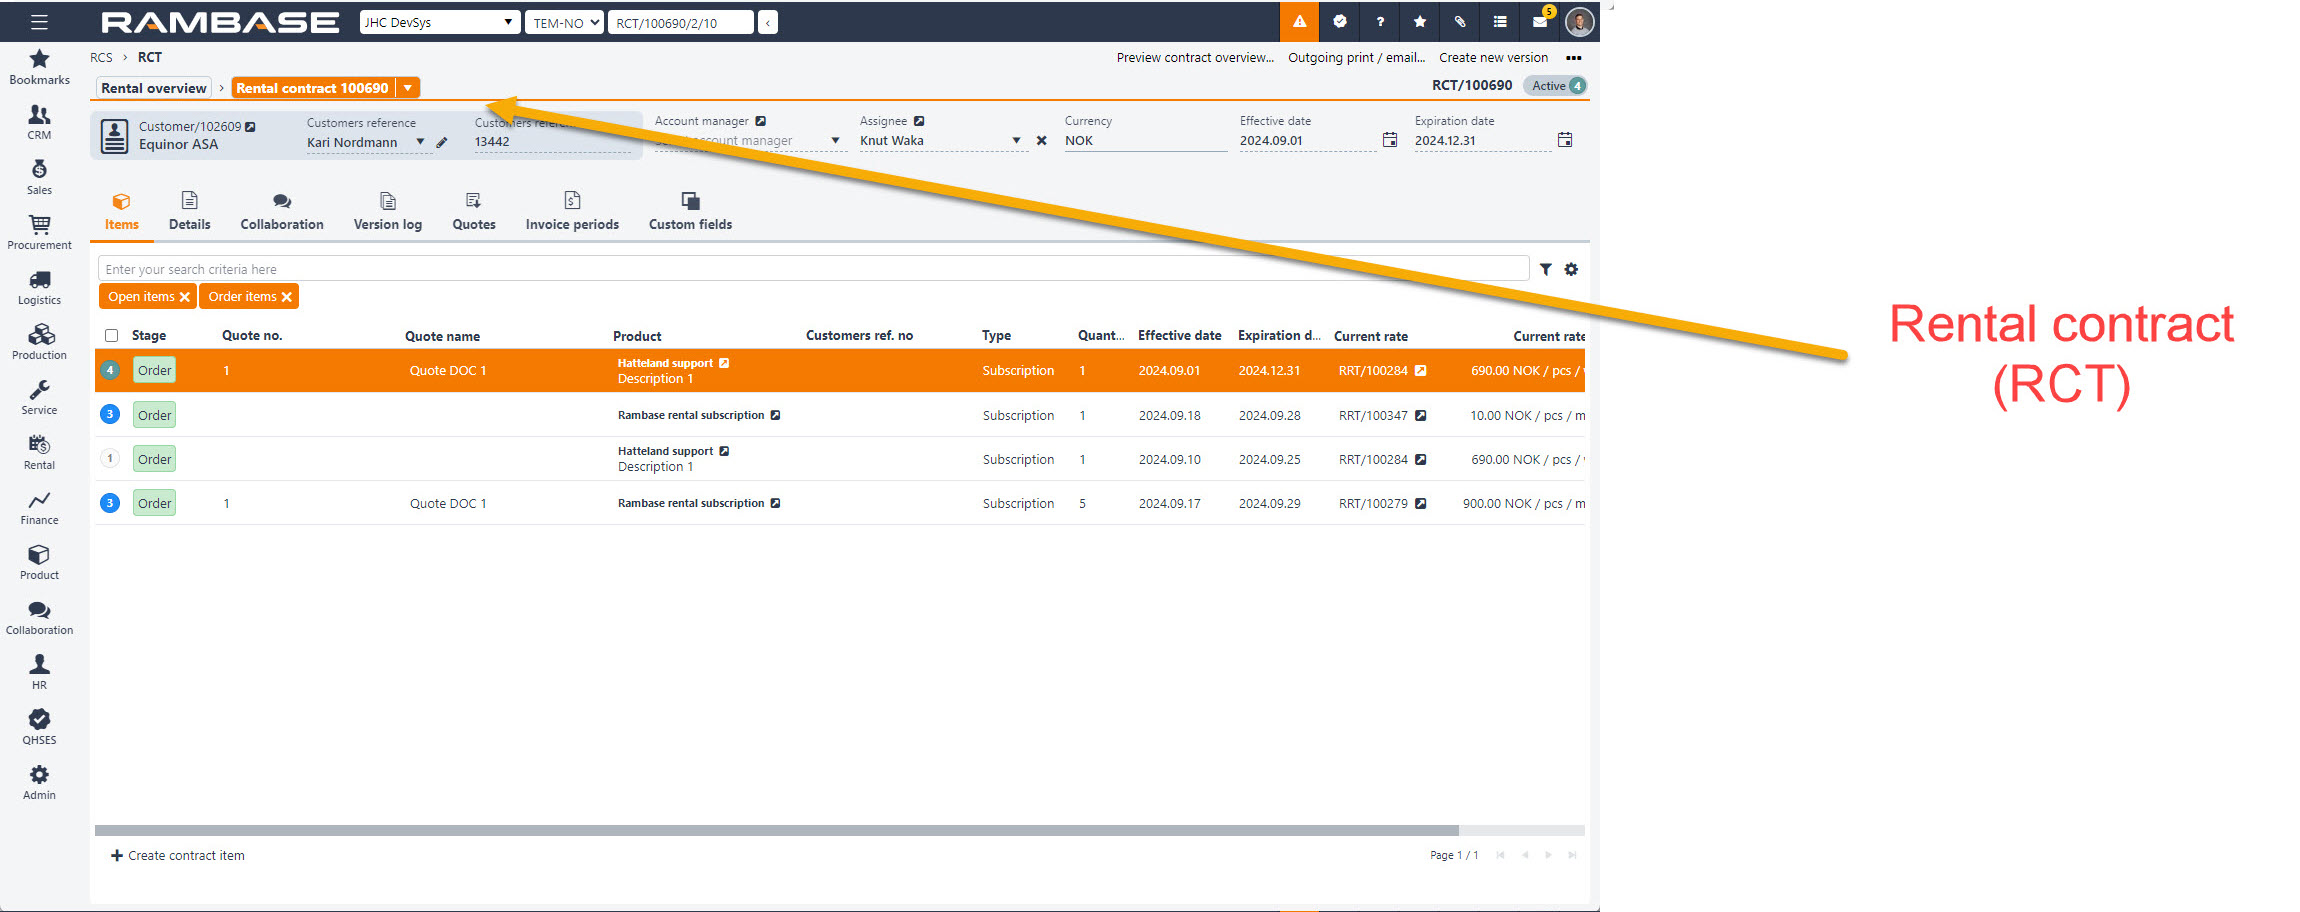
[en] Navigate to the Rental contract (RCT) application by clicking the Right arrow icon in the Rental overview (RCS) application.
[en] Create a quote by clicking the Create a quote button in the Quotes sub-tab.
[en] Create contract quote items by clicking the Create quote item(s) in the Contract quote items area of the Quotes sub-tab.
[en] Register the contract quote by selecting contract quote and selecting the Register quote items option in the Context menu.
[en] Send the contract quote to the Customer (CUS) by selecting the Send quote to customer option in the Context menu.
[en] Approve contract quote items on customer feedback by clicking on the Status icon to select the contract quote item and then selecting the Approve quote items option.
[en] Reject contract quote items on customer feedback by clicking in the Status icon to select the contract quote item and then selecting the Reject quote option.
[en] To create a new version of the Rental contract (RCT), click the Create new version button.
[en] A1 - Procedure - Create a Rental contract (RCT) in Status 1 - Pending registration
[en] Required fields in the Create new contract popup are marked with an asterisk(*).
[en] This procedure only covers the minimum required setup.
[en] To start creating a new Rental contract (RCT) in Status 1 - Pending registration, click the Create new contract button located in the footer of the Rental overview (RCS) application.

[en] Create new contract button
[en] In the Create new contract popup, select a Customer (CUS) in the Customer drop-down field.
[en] Note that the Address, Payment terms and Currency fields are auto-filled from the information set in the Customer (CUS) application.
[en] Type the name of the new Rental contract (RCT) in the Name field.
[en] Click the Calendar icons and select an effective date, and optionally set an expiration date in the Effective date and Expiration date fields.
[en] Invoicing schedule
[en] The user can also specify the invoicing schedule by clicking the Invoicing schedule icon to expand the available options:
[en] Payment terms drop-down menu
[en] Invoice schedule drop-down menu
[en] Automatically invoiced checkbox
[en] Advance invoicing checkbox
[en] Schedule base date field and Calendar icon
[en] To create the new Rental contract (RCT) in Status 1 - Pending registration, click the Create button.
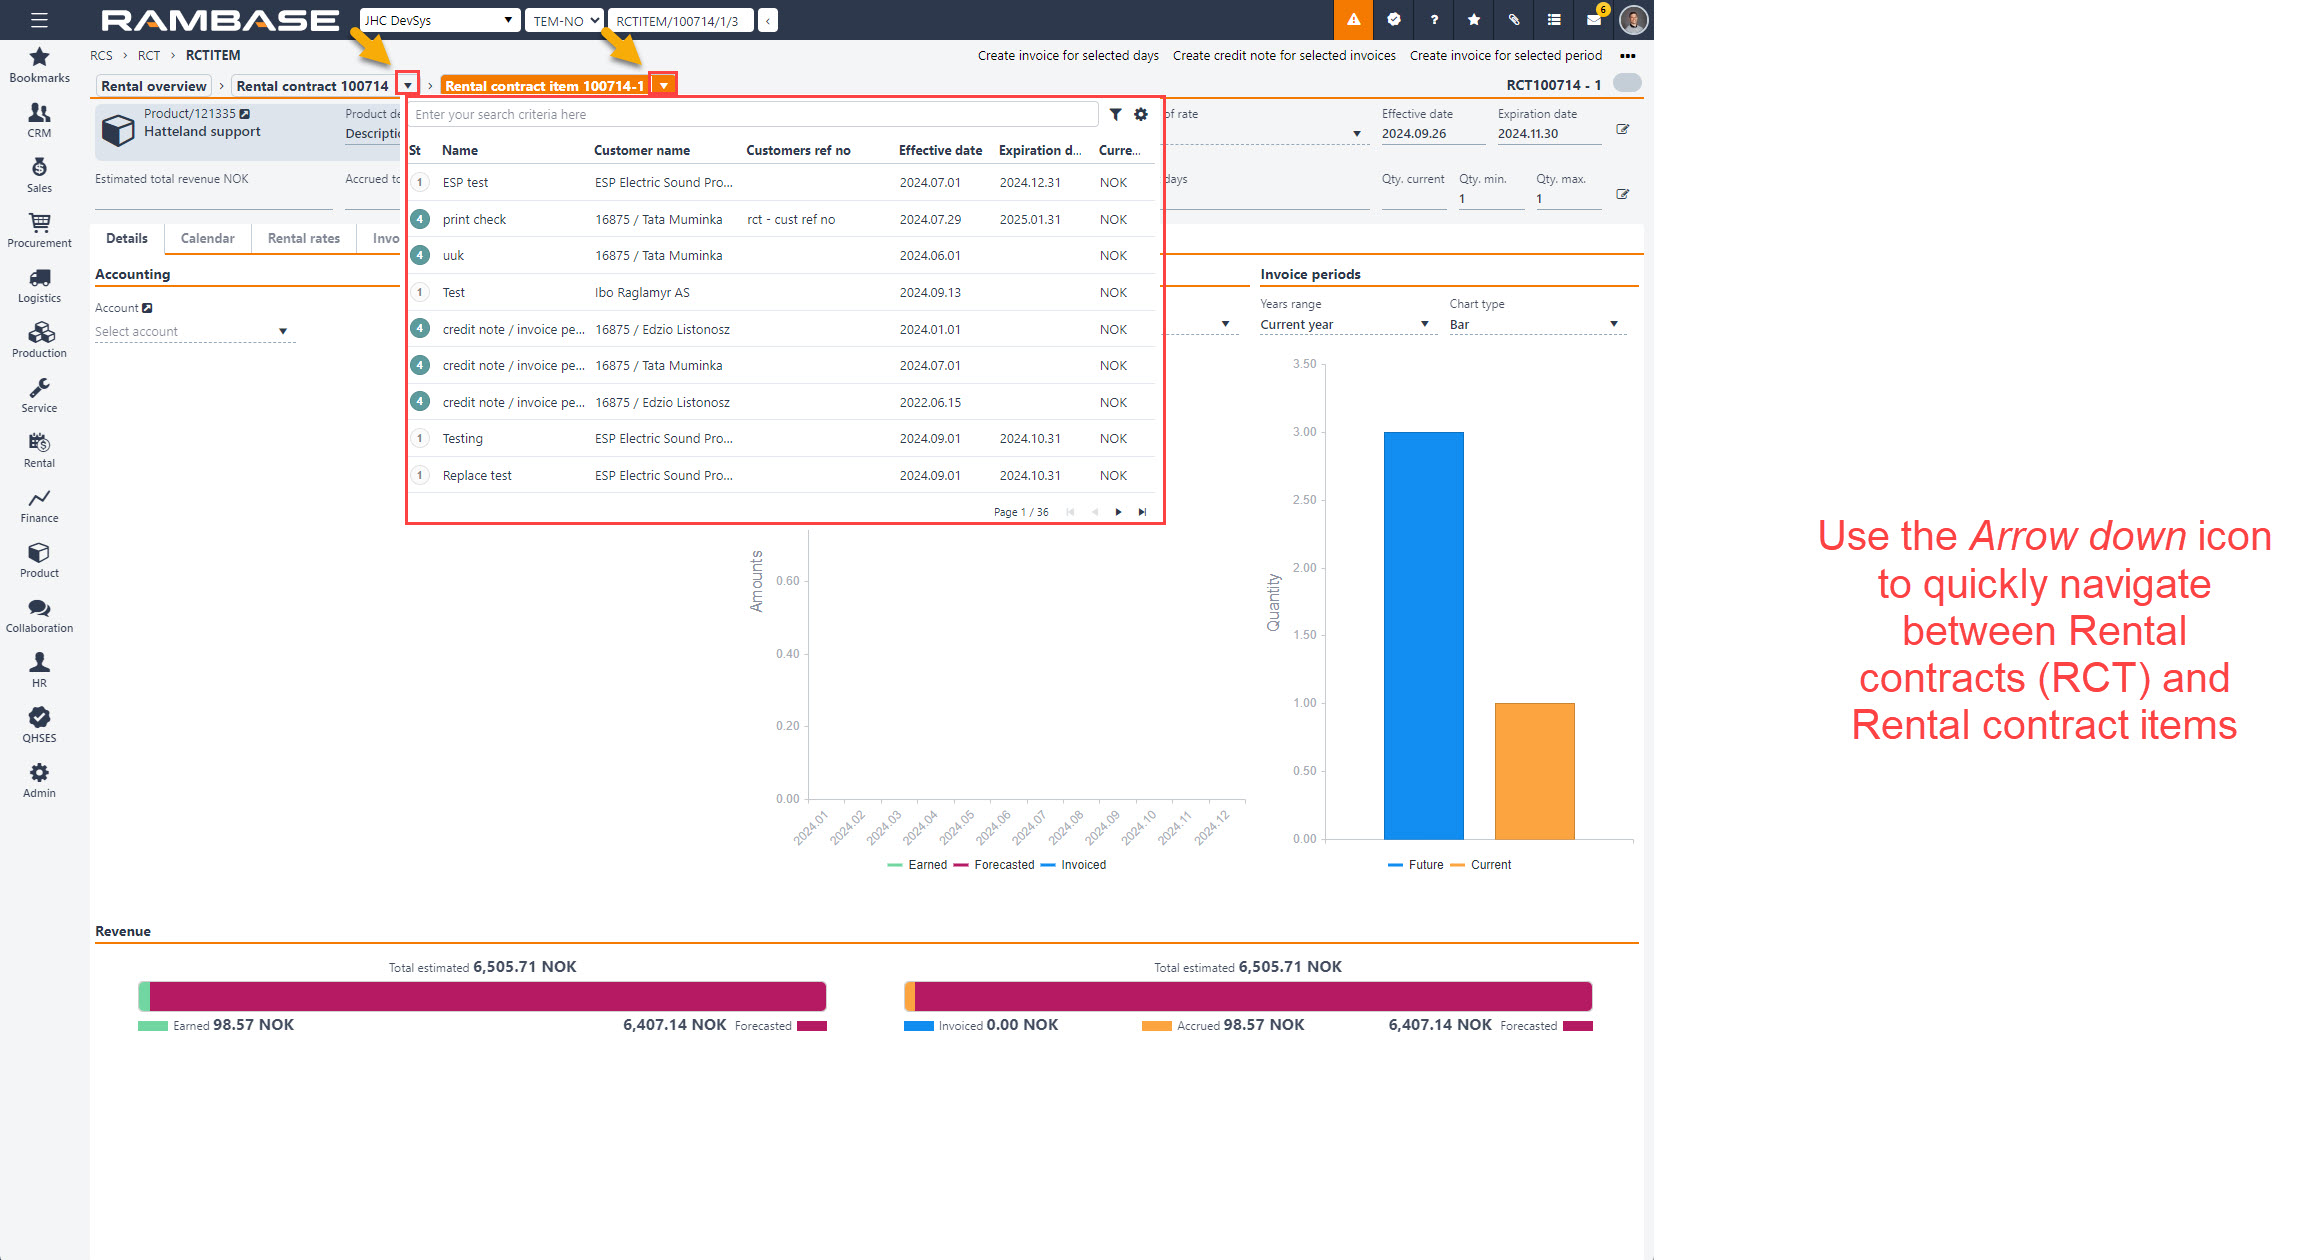
[en] A2 - Navigation in and between Rental overview (RCS), Rental contract (RCT) and Rental contract item (RCTITEM)

[en] Navigate to a Rental contract (RCT) from the Rental overview (RCS)
[en] From the RamBase menu, click Rental, followed by Rental contract and then finally select Rental contracts to open the Rental overview (RCS) application.
[en] In the Rental overview (RCS) application, either search for or select the Rental contract (RCT) from the list in the Rental contracts area.
[en] To navigate from the Rental overview (RCS) and open the Rental contract (RCT) in the Rental contract (RCT) application, either press ENTER once the Rental contract (RCT) is selected and highlighted, or click the Right arrow icon.
[en] A3 - Procedure - Create a contract quote in Status 1 - Pending registration in the Rental contract (RCT) application
[en] From the Rental contract (RCT) application, in the Quotes tab, click the Create quote button.
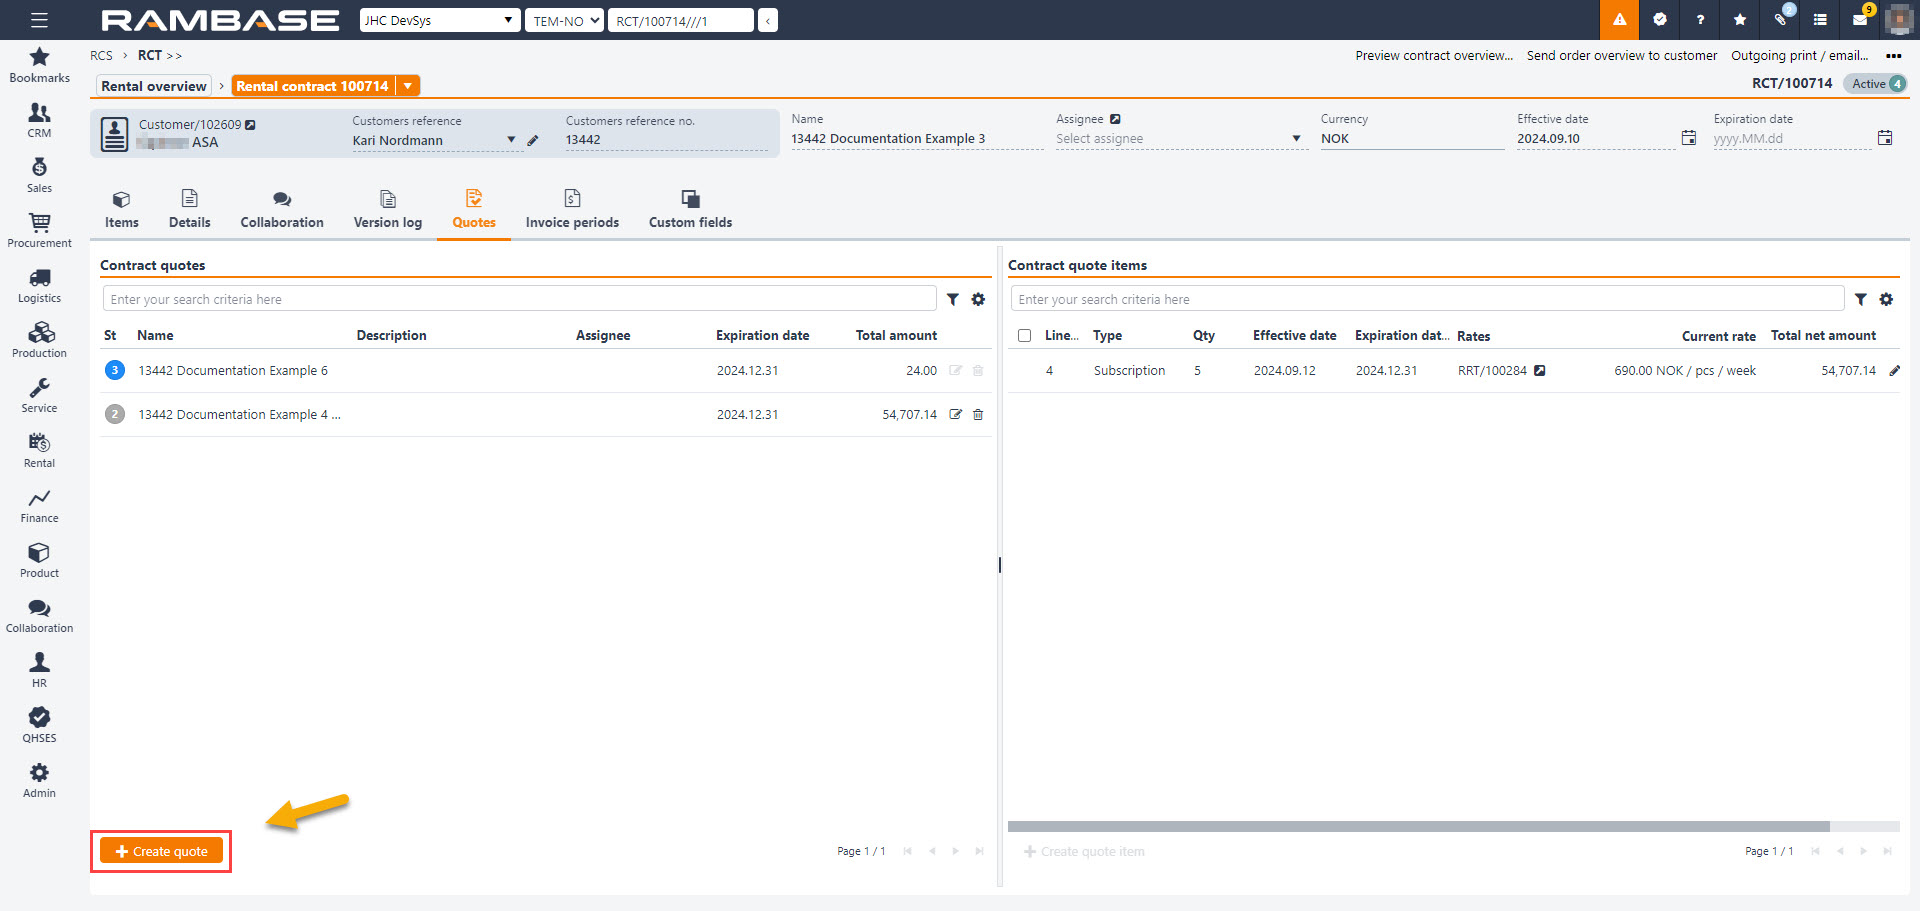
[en] At a minimum, provide a Name for the contract quote and click the Create button.
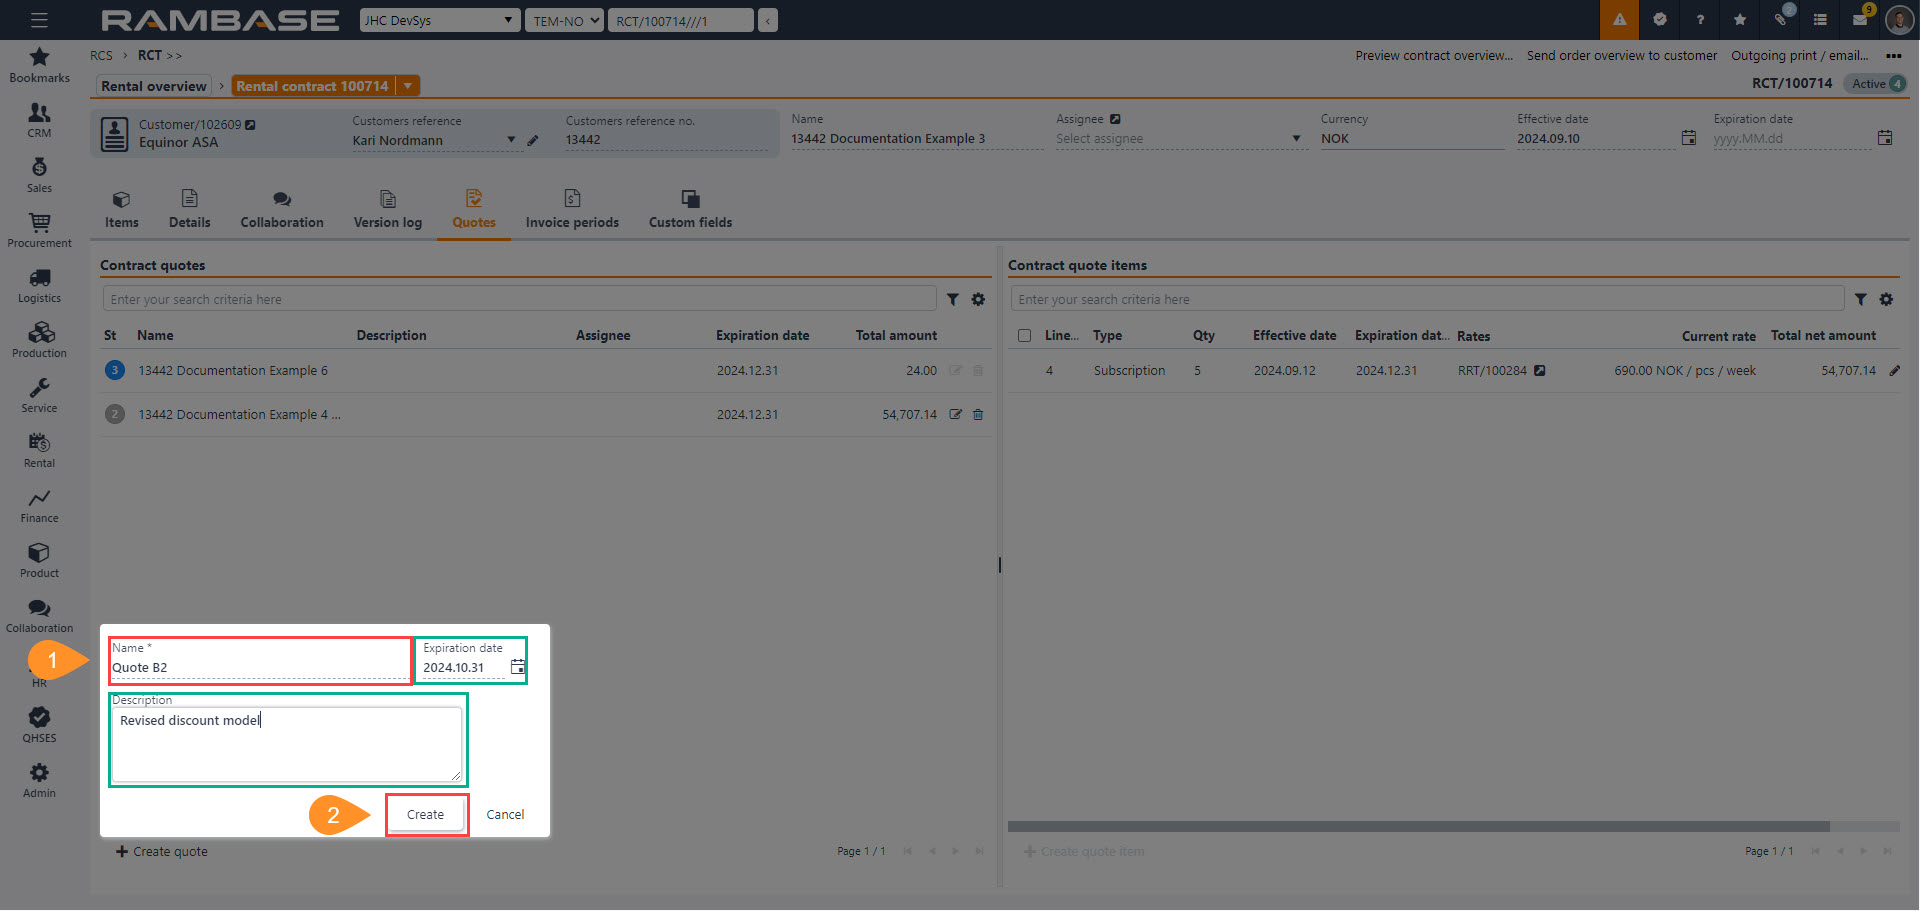
[en] A contract quote is now created in Status 1 - Pending registration.
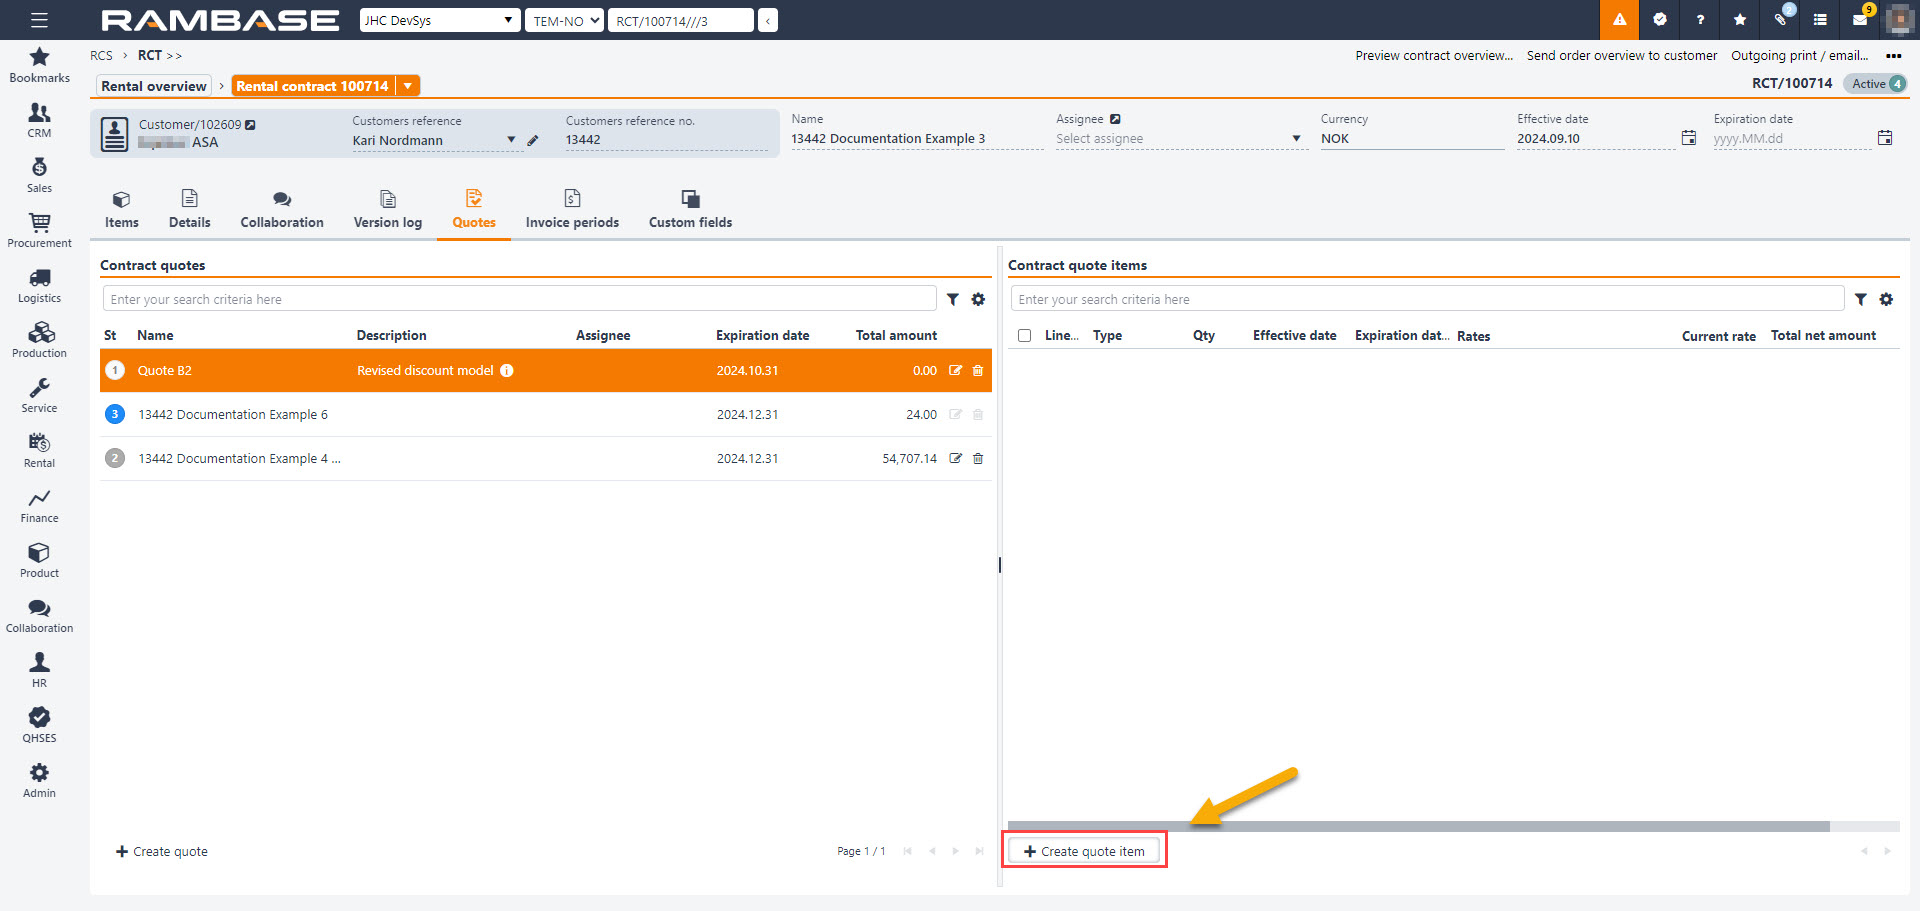
[en] A4 - Create a contract quote item in the Rental contract (RCT) application
[en] From the Rental contract (RCT) application, in the Quotes sub-tab, click the Create quote item button.
[en] In the Create quote item popup, specify the details.
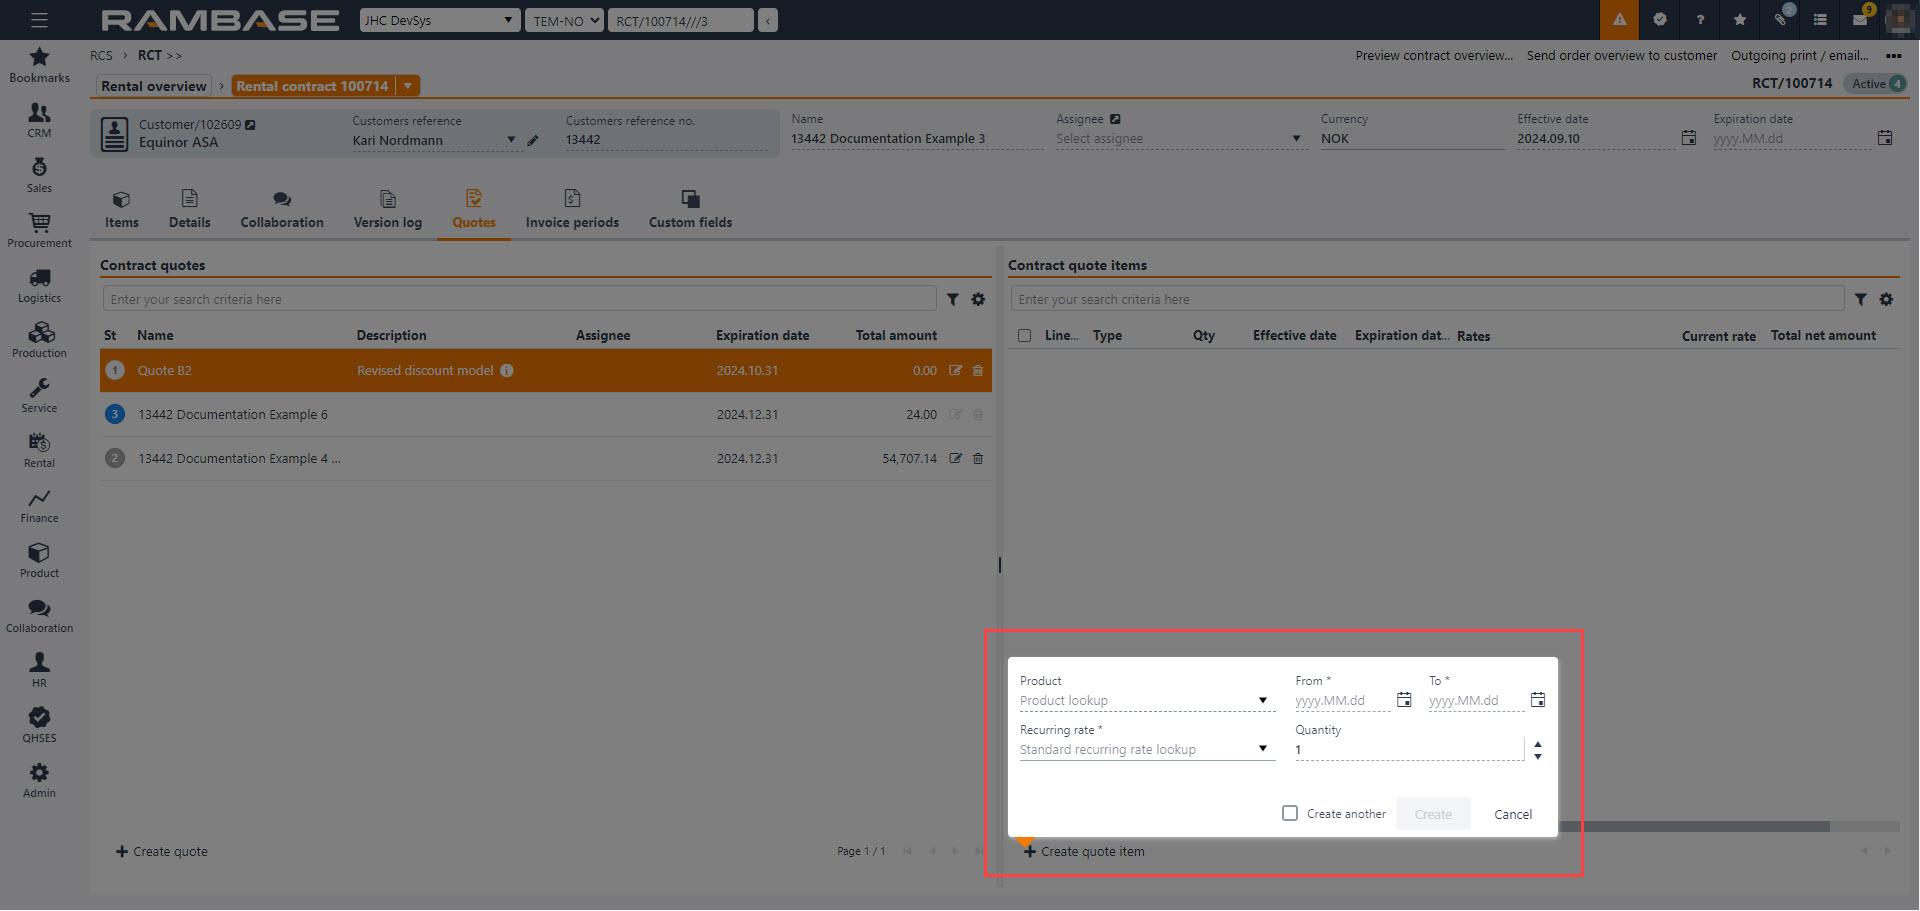
[en] In the popup select a Product (ART) in the Product drop-down menu.
[en] Set a From and To date in the related fields.
[en] Select a Recurring rate, which is specific for per Product (ART) and setup in the Recurring rates (RRT) application.
[en] Set a Quantity for the quote item.
[en] Optionally, create a special rate for the quote item by expanding the Create special rate fields.
[en] Set a Rate aspect - Either by quantity or duration.
[en] Set a Recurring period - Day, week, month or year.
[en] Set a Base rate in the currency set up in the Recurring rates (RRT) application.
[en] When the i, ii and iii are set, click the Add button to add the special rate.
[en] Optionally, Add rate step based on the Rate aspect by clicking the Add rate step button.
[en] B1 - Register quote item in the Rental contract (RCT) application
[en] From the Rental contract (RCT) application, click the Quotes sub-tab.
[en] In the Contract quotes list, select the contract quote to be set in Status 2 - Registered.
[en] To register and set the contract quote in Status 2 - Registered, click the Context menu button found in the top-right area of the application and select the Register quote option.

[en] Context menu button
[en] B2 - Send quote to Customer (CUS) in the Rental contract (RCT) application
[en] From the Rental contract (RCT) application, click the Quotes sub-tab.
[en] In the Contract quotes list, select the contract quote to be set in Status 3 - Active quote.
[en] To register and set the contract quote in Status 3 - Active quote, click the Context menu button found in the top-right area of the application and select the Send quote to customer option.
[en] Context menu button
[en] From Stage Quote to Stage Order
Uwaga
[en] When all contract quote items are approved or rejected, the contract quote is processed.
[en] A minimum of one (1) contract quote item is approved and no (0) remaining contract quote item(s) is/are in Status 1-3:
[en] Contract quote is set then in Status 9 - Processed and is progressed from the Quote stage to the Order stage. Can be inspected in the Items sub-tab.
[en] A minimum of one (1) contract quote item(s) is/are rejected and no remaining contract quote item(s) is/are in Status 1-3 or 9:
[en] Contract quote is then set in Status 7 - Rejected.
[en] B3 - Approve contract quote items in the Rental contract (RCT) application
[en] From the Rental contract (RCT) application, click the Quotes sub-tab.
[en] In the Contract quotes list, select the contract quote to potentially be set in Status 9 - Processed.
[en] In the Contract quote items list, click on the Status icon to select the contract quote item(s) to be approved.
[en] To approve the contract quote item(s) and set the contract quote item in Status 9 - Closed, click the Context menu button found in the top-right area of the application and select the Approve quote items option.
[en] Context menu button
[en] B4 - Reject contract quote items in the Rental contract (RCT) application
[en] From the Rental contract (RCT) application, click the Quotes sub-tab.
[en] In the Contract quotes list, select the contract quote to with contract quote items to be set in Status 7 - Rejected.
[en] In the Contract quote items list, click on the Status icon to select the contract quote item(s) to be approved.
[en] To reject the contract quote item(s) and set the contract quote item in Status 7 - Rejected, click the Context menu button found in the top-right area of the application and select the Reject quote items option.
[en] Context menu button
[en] C1 - Create a new version
[en] To create a new version of the Rental contract (RCT), click the Create new version button.
| [en] Create new version button |

[en] From the RamBase menu, *****
[en] In the Rental overview (RCS) application, select the rental contract and click the Right arrow icon to open the Rental contract (RCT) application.
[en] To view closed and active versions, click the Version log sub-tab.
[en] To create a new version, click the Create a new version button in the Versions area.
[en] Set a name for the new version in the Name field.
[en] Note the version number.
[en] To set the new version as the version in Status 4 - Active, and set the previous version in Status 9 - Closed, click the Save button.