QHSES - Quality, HSE and Security assurance
The QHSES module enables you to get the overview that you need to be able to focus on the right areas within your business to support continuously improvement. Based on your requirements, you choose how issues are to be reported, within several areas. QHSES module covers all the requirements you need to fulfill to be able to work within ISO requirements.
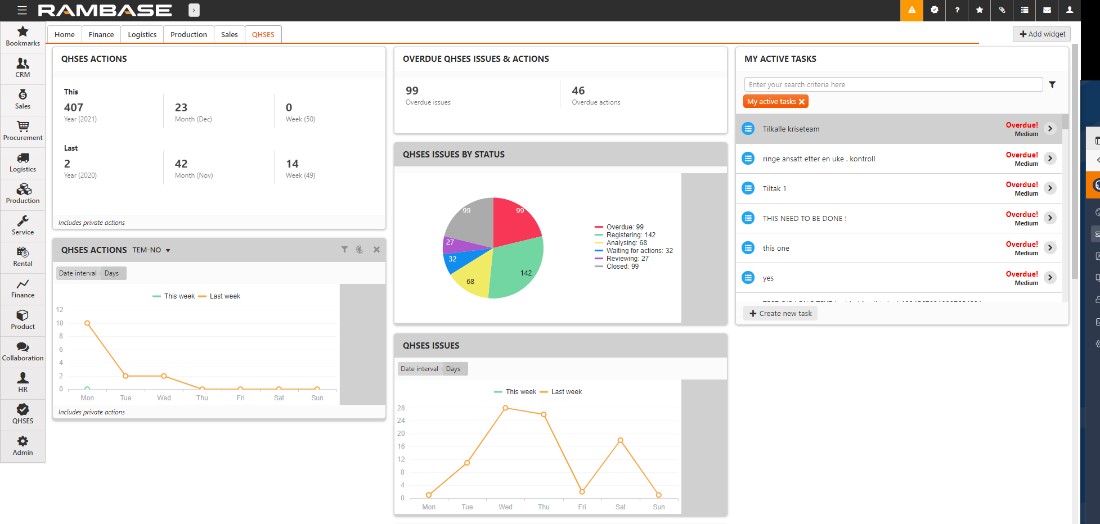
Report quality incidents and deviations, HSE observations, security weaknesses easily either by mobile app or desktop app. All issues will be processed within the same application in RamBase, following a flow that easily indicates what the status is. You decide if you want to review all issues or some, allocate work to colleagues with actions, do cause analysis with the why-why method, add consequence and simple risk assessment for reporting and statistics, and much more. QHSES module comes with a separate dashboard with many useful widgets for easy tracking of key-figures indicating the health of your business.
How to process QHSES issues (QIS)
Use the QIS application to report incidents, observations, improvement suggestions or any deviations from standard operating procedure.
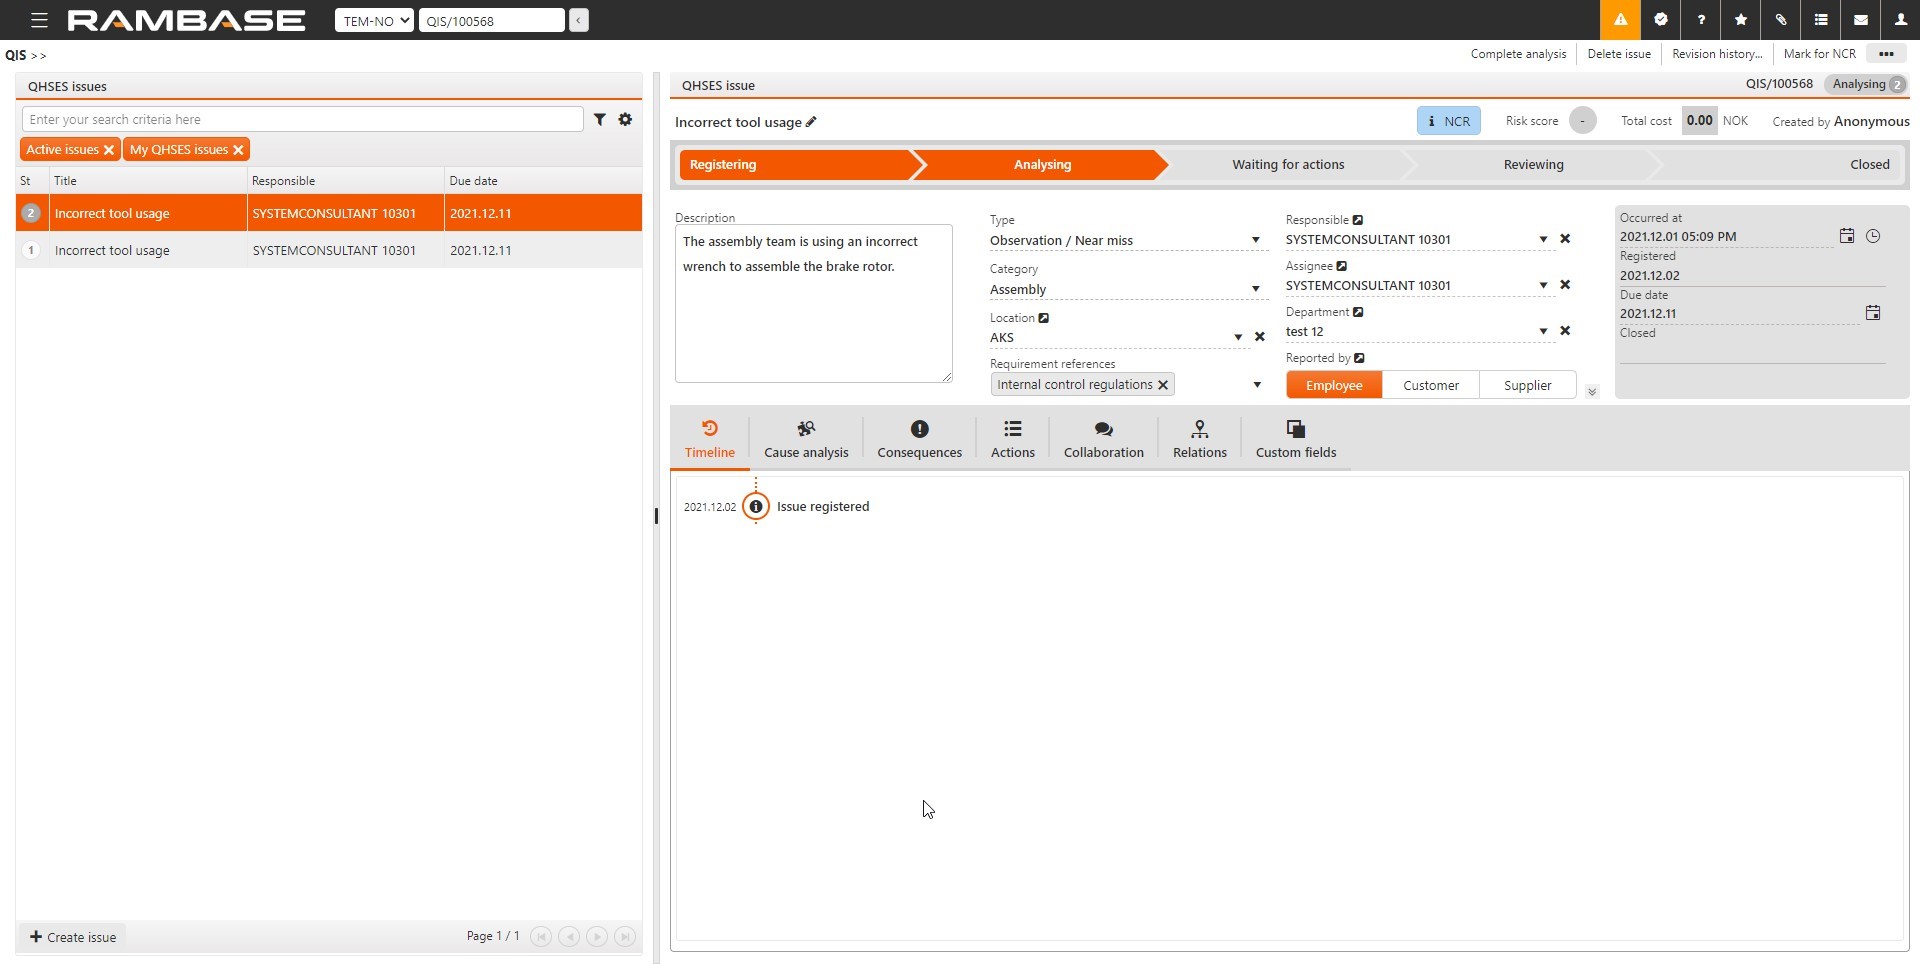
To open QHSES Issues (QIS) Select QHSES -> Corrective & Preventive actions -> QHSES issues in the RamBase menu.
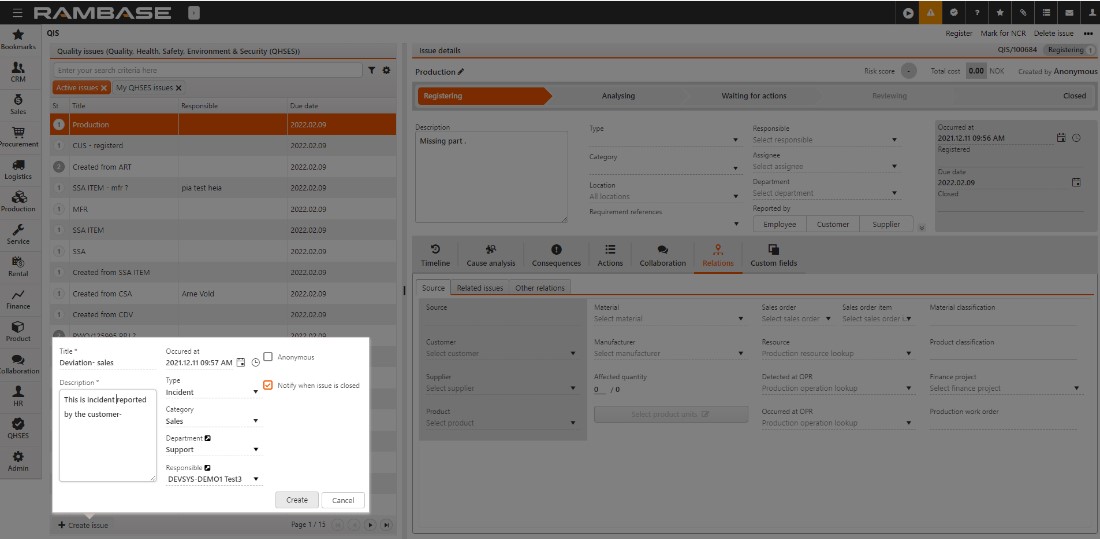
Select Create issue and enter the following information in the window. In addition to this you can also register QHSES issues by using our RamBase Mobile application with the same steps.
Title - Enter a descriptive title for the issue.
Description - You can enter a description of the issue in the free text field.
Occurred at - Select the date and time of the occurrence of the issue.
Type - You can select the type of issue here. You can add a new issue type in QISADMIN.
Category - Select a category for the issue. You can add a new issue category in QISADMIN.
Department - Select the department in which the issue occurred. Select the arrow icon to inspect the department in the Department (DEP) application.
Responsible - Select the employee who shall have the main responsibility for the issue.
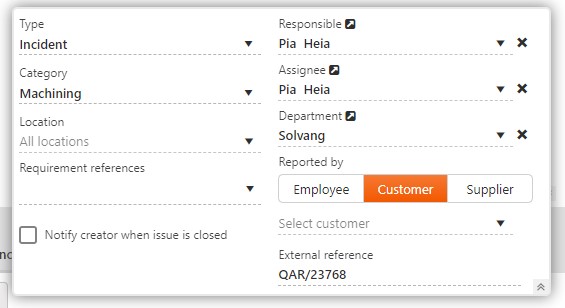
Anonymous - Select this checkbox to report the issue anonymously.
Notify when the issue is closed - Select this checkbox to be notified when the issue is closed. If you select Anonymous reporting, this checkbox is not available, and you will not be notified if the issue is closed. This is only applicable of you are the creator of the issue.
Notifications (IMS) is automatically sent to the one that is set as responsible, assignee and the one that is responsible for the selected department when the QHSES issue is registered. One week in advance of the deadline in the QHSES issue there will be triggered a reminder notification, and again a day before deadline. If the QHSES issue is still open after deadline, there will be sent a reminder once a week each Monday if the QHSES issue is overdue.
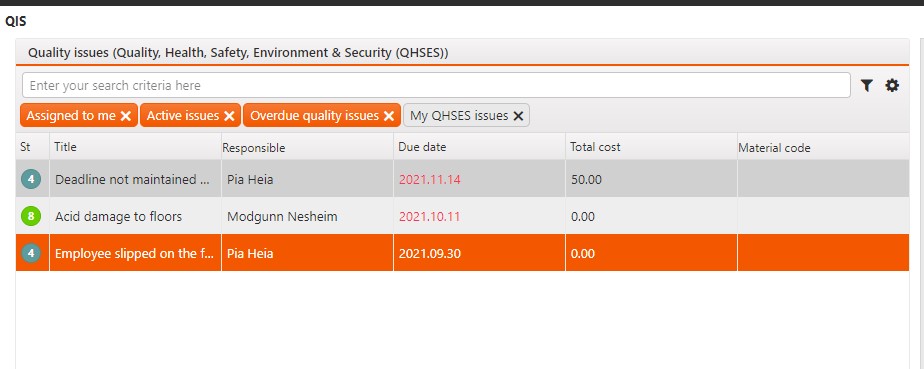
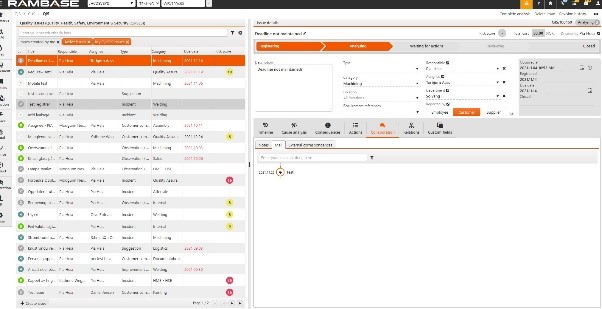
You can easily see the due dates that are overdue in the main view.
The due date is updated to the color red when its overdue, to make it easy to spot.
You can also use the Overdue Quality Issues and Actions Widget to get a quick overview.
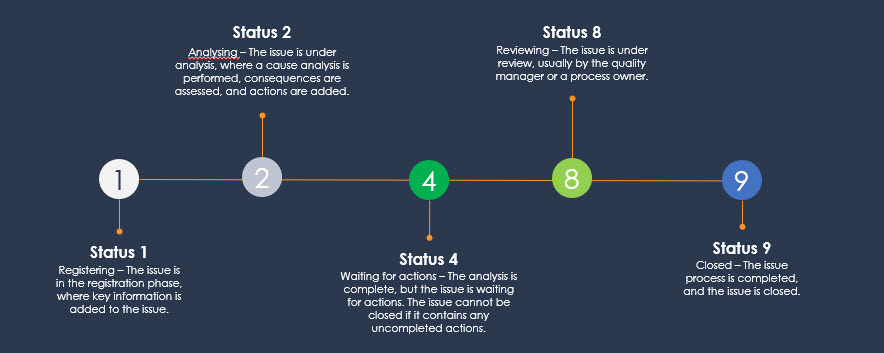
Select Create, the issue is created in Status 1 (Registering) and displayed in the right pane. Due date will be set based on the setting in QISADMIN called QHSES issue default due date days.
Select the dropdown menu in the Location field to lookup and select the location for the issue that occurred. Select the arrow icon to inspect the location in the Location - MainData application.
In Requirement references, select a reference for the issue. You can also select multiple references if necessary. This can be an ISO quality standard, an internal procedure manual or other standard or regulation that is a reference for the issue. Requirement references are used to mark the QIS Issues with which requirement / where is the requirement that this deviated from or is related to. This helps you to keep track of status of compliance work, and you can easily find areas that needs focus and improvement. Organizations may set up their own requirements in addition to e.g ISO`s, such as additional requirements in Quality handbook, work processes, procedures etc. You can also add other laws and regulations that the company must follow, such as the Working Environment Act, the Internal Control Regulations, the GDPR, etc.
Responsible - Select the employee that should have the main responsibility for the issue. The responsible person should follow up and make sure the issue is processed by the correct people and needs permission to forward the issue to review and/or close.
Assignee - Select the person you want to assign the issue to. This is the person that should work with the issue. E.g. do the cause analysis or consequence and/or risk assessment. If the responsible can perform these tasks themselves, there is no need to assign it to an Assignee in addition.
Department - Select the dropdown menu in the Department field to lookup and select the department to where the issue belongs, if applicable.
In Reported by, select Customer, Employee or Supplier as the reporter, if applicable. Select the dropdown menu to lookup and select the Employee, Customer or Supplier name. Select Register in the context menu to register the issue. The issue is then set to to Status 2 (Analyzing) and the Timeline shows the issue as Registered.
In External reference you can add the external ID number that is reported from the customer or suppliers system where they are processing the corresponding deviations and actions. This information will also be included in the External Correspondence.
Occurred at gives the date and time of occurrence, registered gives the date the issue was registered.
Due date gives the deadline for closure and is calculated based on the value of QHSES issue default due date days in QISADMIN.
Closed gives the date on which the issue was closed, the field is blank if the issue is open.
In Cause analysis you can do a Why-why analysis. Select Why to add a cause and drill down as much as you need to get to the root cause.
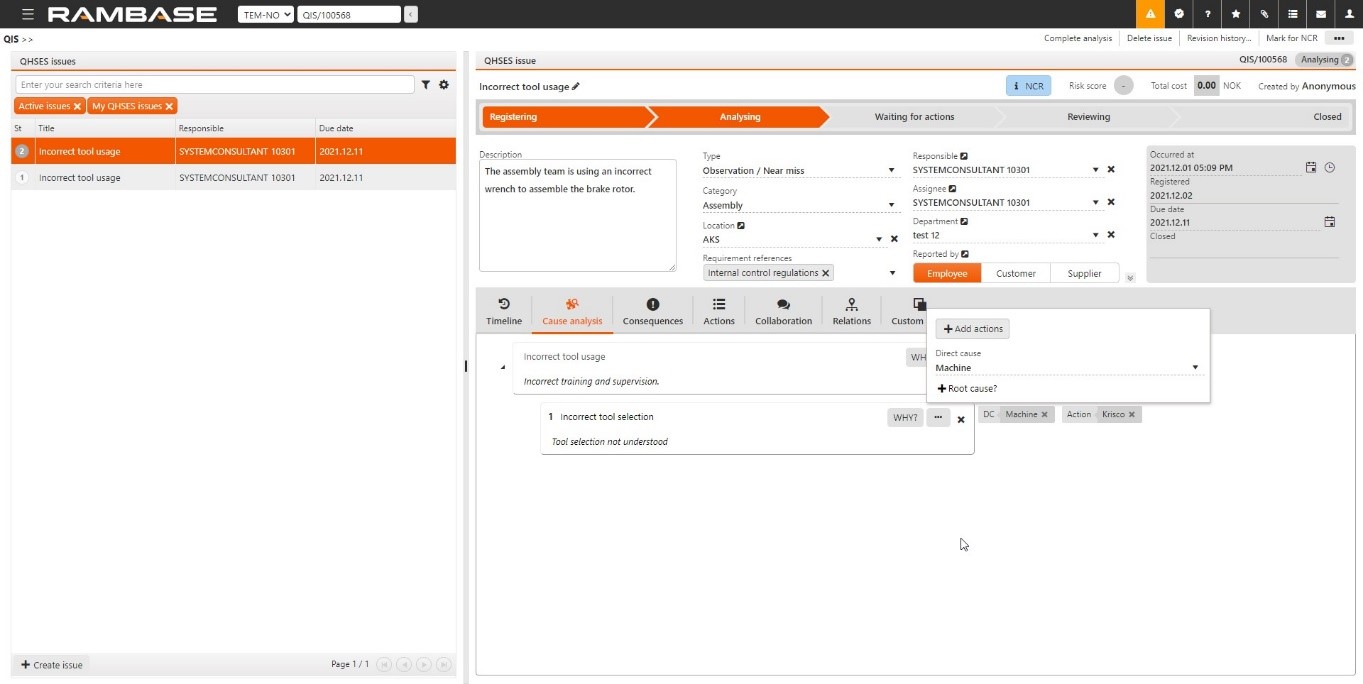
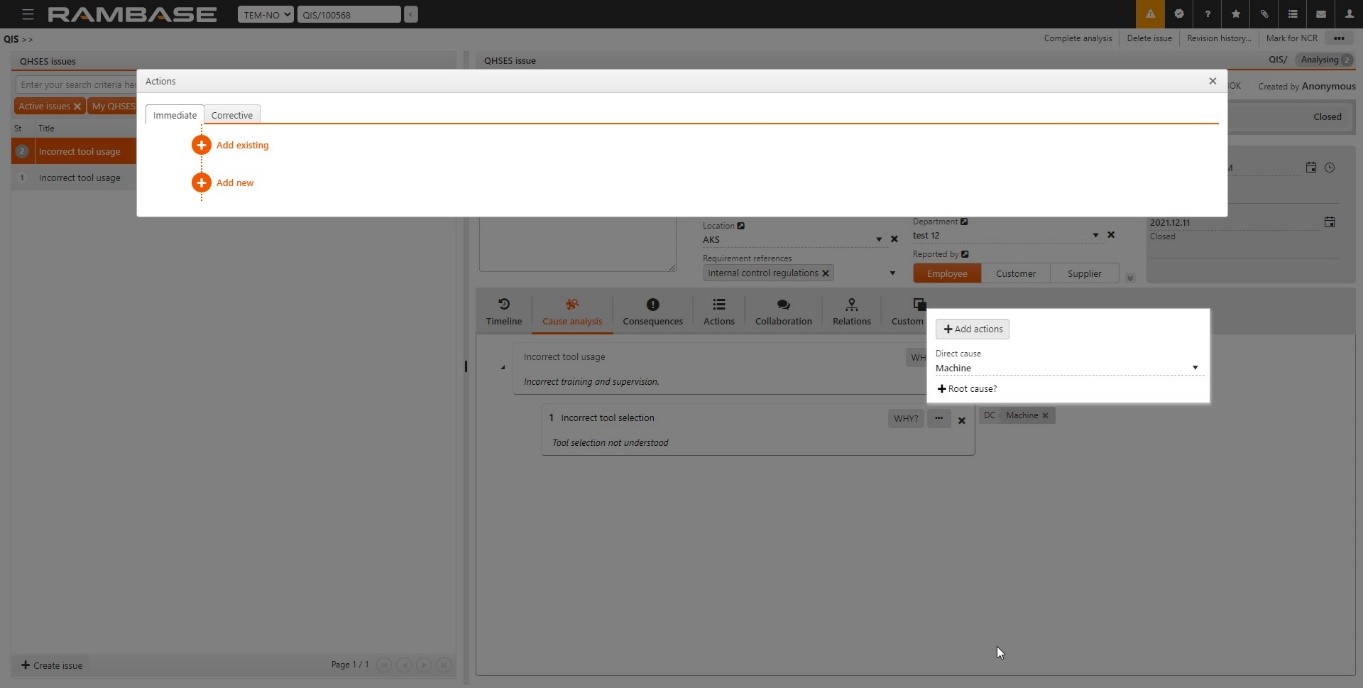
Select the ... icon and Add actions to specify immediate and/or corrective actions to mitigate the issue. There are two options Add Existing and Add New.
Existing actions are all actions (tasks) existing in RamBase, by default it suggests filtered actions by My Tasks.
You can easily deactivate the predefined filter to get an overview of all actions created. It is optional to add actions directly on the cause element, but if you do so, you will be able to see the connection also from the Action, that it is linked to a cause. You can also select and add a Direct and Root cause. Direct cause can be added to causes that are not at the bottom of the Cause analysis WHY tree, but the last leaves in the tree requires a Root cause.
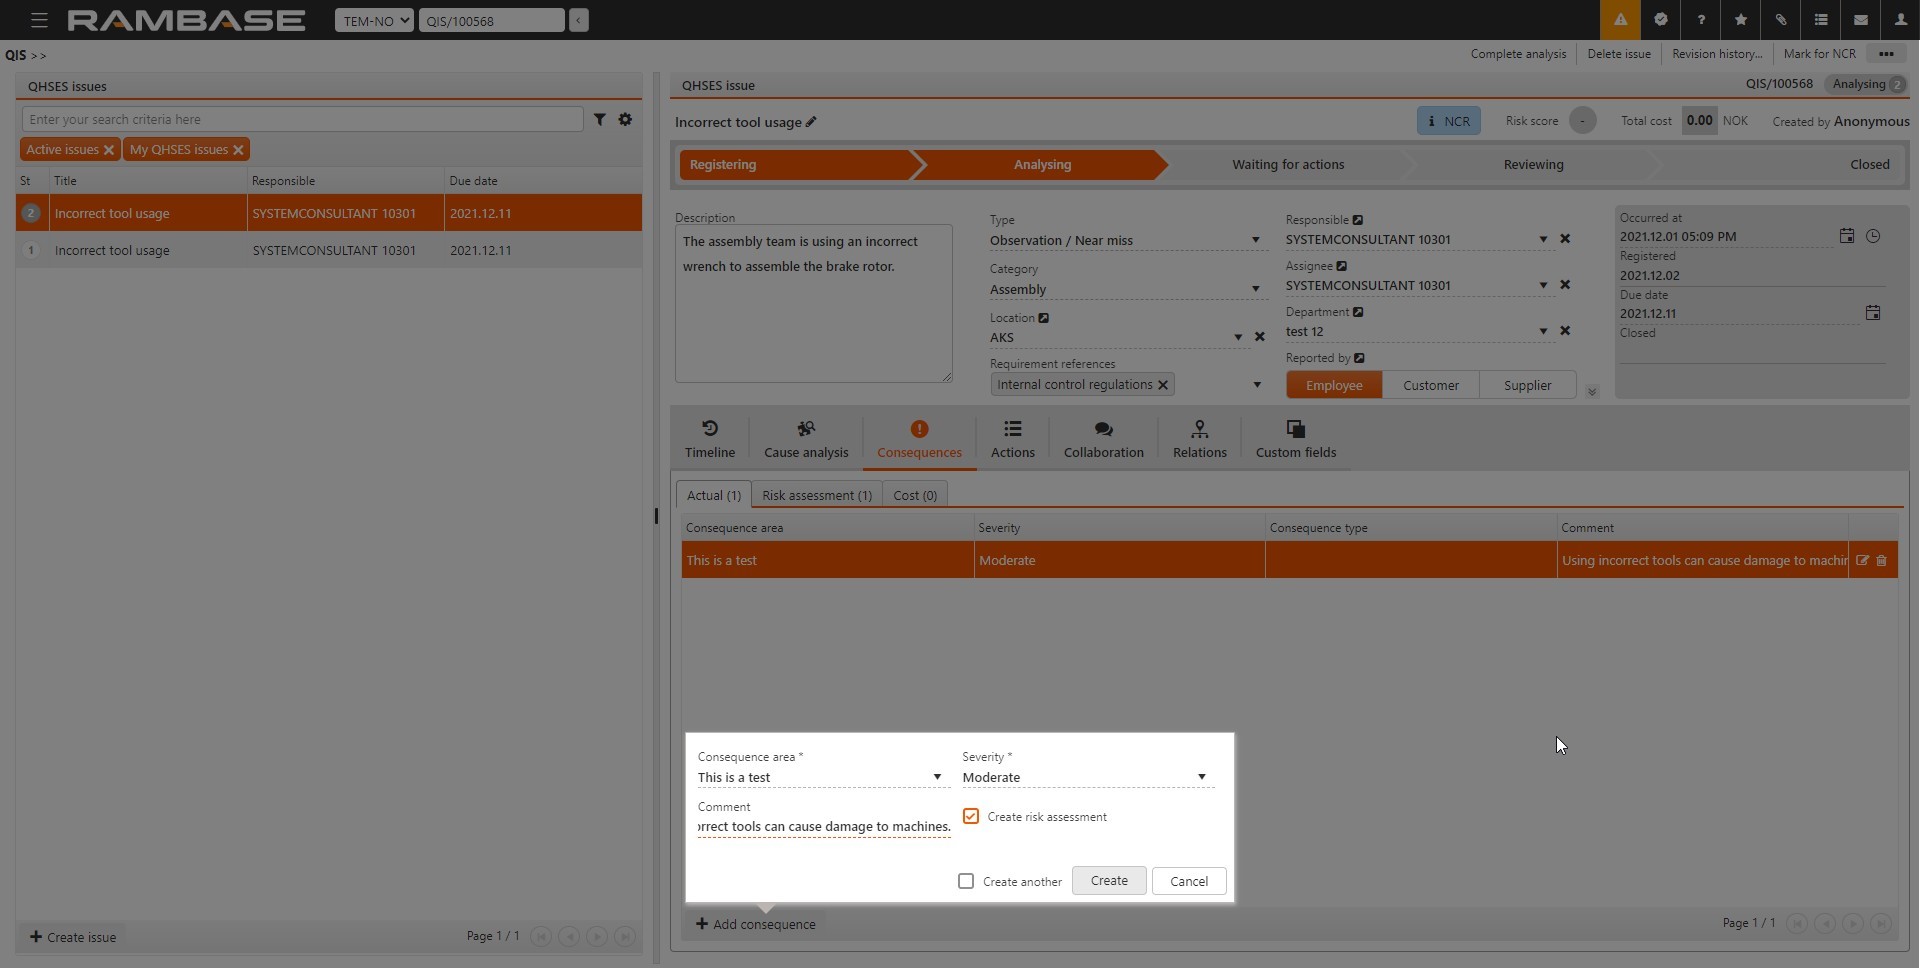
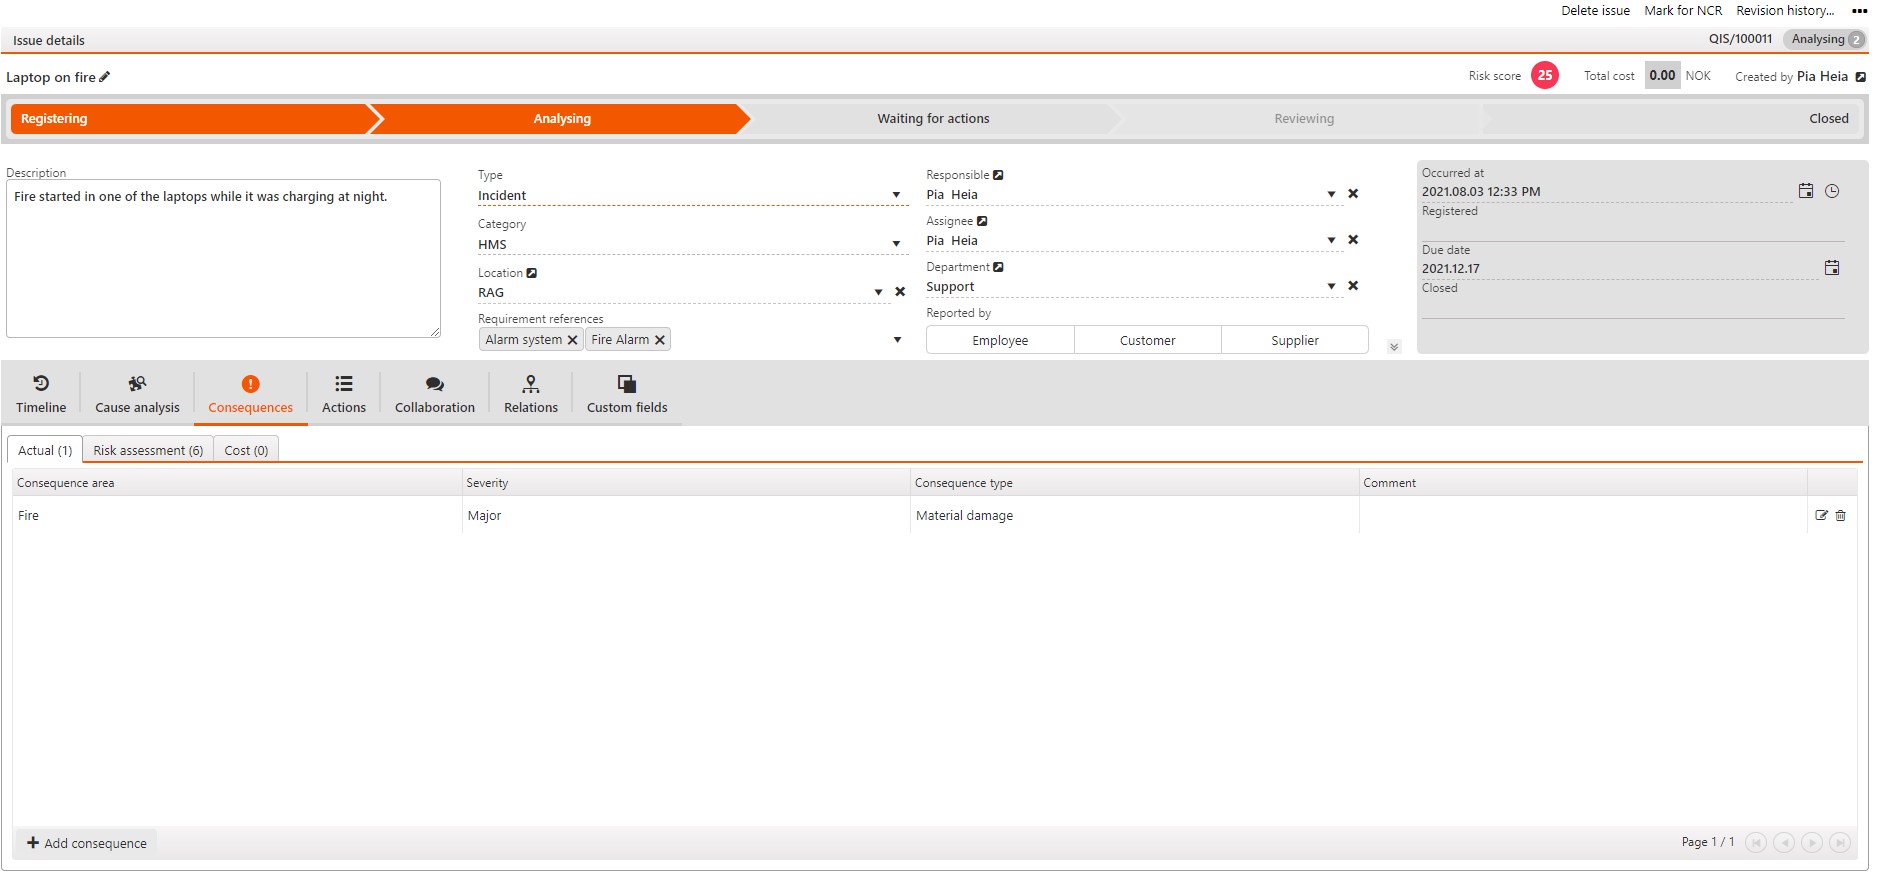
You can add consequences to the issue in Consequences. Select Add consequence to add the following information to a consequence.
Consequence area - Specify the area where the consequence of the issue has occurred.
Severity - Select the severity of the actual consequence of the incident.
Comment - Add a comment here if necessary.
Select Create risk assessment if you want to create a risk assessment for this issue – how bad could it have gone?
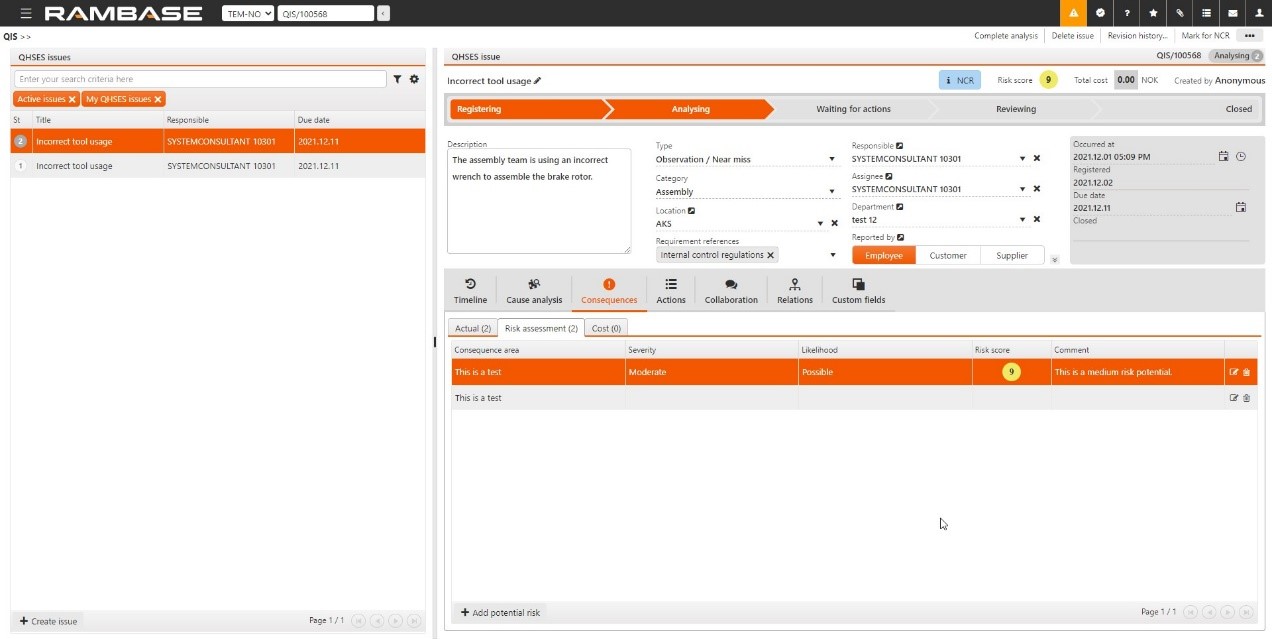
View and edit the risk assessment in Risk Assessment. When you complete the risk assessment, the risk score is computed and given, based on your choices of Severity and Likelihood. Are there several risk areas you need to asses, you will see the highest score in the main view –over the right pain.
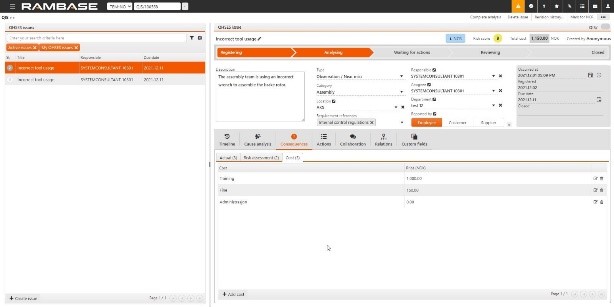
Select Add cost in Cost to quantify the financial cost of the issue. Specify the Cost category and cost, then select Create. Cost in QIS issues do not affect any accounts in RamBase.
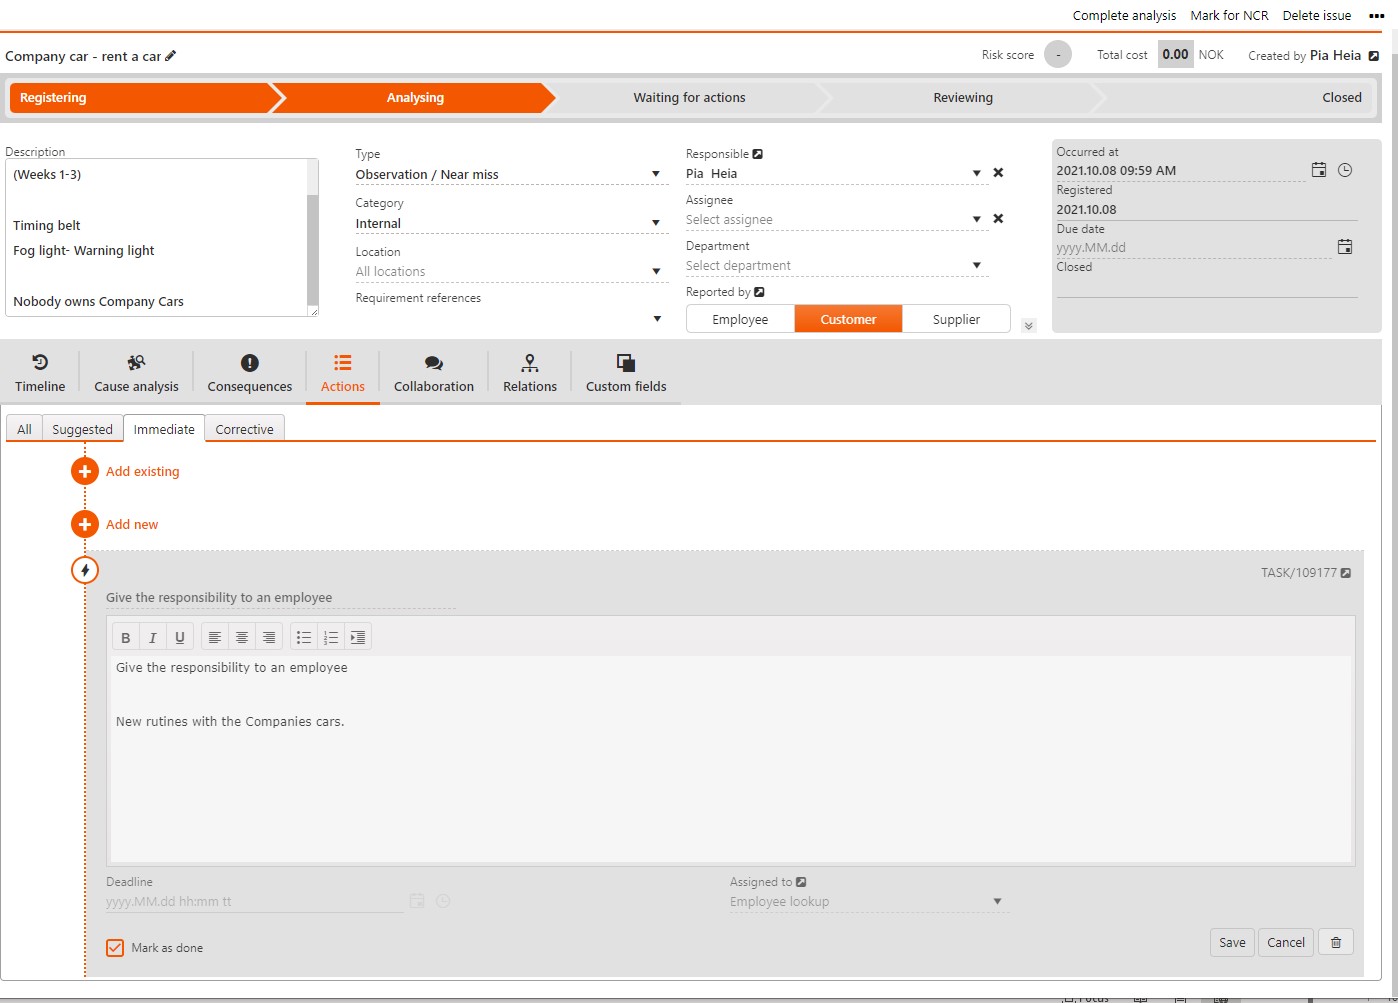
In Actions, you can add Suggested, Immediate and Corrective actions.
Suggested actions will in most cases already be registered on the issue based on input from the person who reported the issue.
You can either add an existing task from another QHSES issue or any Task in RamBase, or you can create a new task for action.
You can see these actions in the timeline. All actions are created as tasks so you can also view and edit the actions in the TASK application, if necessary.
When you create tasks, you can assign them to any employee in Assigned to and you can set a Due date for the Action (Task). Mark the task as Done when completed.
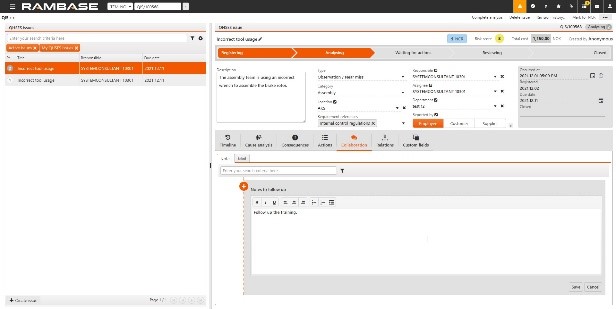
In Collaboration, you can add notes so that others working on the issue can view your notes, and vice versa. In Email, you can also add emails from Outlook by using the Rambase Outlook add-in. This can be connected to the one that is set up as Reported by; Customer, Supplier, Employee and from the tab relations -> Source if it is connected to a Customer or Supplier.
External Correspondence
Here there are several request/reports to choose from.
NCR Concession request, NCR Deviation request and Corrective Action Report.
This is to report a non-conformance, either if it has happened, or if it will happen.
You can create and send a request to a customer for approval of the deviation, for documentation purpose. The reply from the customer must be uploaded on the request as a response and will be decisive on what you should do with the deviation further on.
You can mark the QHSES Issue with NCR by Selecting the Mark for NCR in the context menu to mark the QHSES issue.
NCR Concession request / NCR Deviation request
NCR Concession request is used when you have discovered a deviation in advance, and you need to report this to the customer, either to get the deviation approved or decide some actions based on the feedback. A correspondence is then sent out to the customer regarding the deviation, and the customer will give you a feedback if it is Approved, Conditionally approved or Not approved. Based on what the customer decides, you will then choose an Action, e.g., Scrapped, Credit Note or one of the other options.
NCR Deviation request is used when you discover that there are deviations - when the work has started and you have to apply for approval from the customer. A correspondence is then sent out to the customer regarding this deviation, and the customer will give you feedback about what they expect you to do further on. Based on what the customer decides, you will then choose an Action e.g., Scrapped, Credit Note or one of the other options.
To Create NCR Concession request or Deviation request select Create New and choose NCR Concession / Deviation request.
The information is extracted from the QHSES issue as it is at this point in time, you can edit and add more information in the request if wanted.
Request
To save the NCR Concession / Deviation request Click Save, and the NCR Concession / Deviation request goes to Status 1 (draft).
When you select Send to myself, you will get this sent by email as a PDF file and the status will go to Status 2 (Waiting for Response). If the QHSES issue has files attached in File Manager, you will have the option to include selected files in the email that is being sent.
In Status 2, you have an option to upload the Signed document by selecting Upload in main view directly.
To close the NCR Concession / Deviation request –, select Close Correspondence and the status will be updated to Status 9 (Closed).
Response
You can easily go to Response by selecting this in the top pane.
Choose status on NCR Concession / Deviation request, here there are 3 different statuses to choose from: Not approved, Conditionally approved and Approved.
Based on the feedback from your customer, you will set the correct status of the NCR. If it is approved, the NCR will go directly to Status 9 (Closed). If it is set to Conditionally approved, it will go to Waiting for actions, pending some rework or something. If it is not approved, you need to manually consider if the NCR should be closed or not.
You can also add Comment, External reference (if this is not already added in the QHSES issue) and you can add Action by selecting the dropdown menu, You can also upload the signed Document, directly here. Then select Save and all the information will be added.
You can easily Edit NCR Concession request, by using the Edit icon or Delete the NCR Concession request by using the trashcan icon.
If you would like to view the PDF file before sending you can do this by using the magnifier icon.
Corrective Action Report
Corrective Action Report is a tool for sending a response to the customer/supplier that has reported a deviation. For example, that a product is broken in shipment or a suggested improvement in a process that has not worked optimally. The report is used to give the customer/supplier an answer. You justify actions, both short and long term to prevent this happening again. This is to ensure that the case has been handled correctly.
To create Corrective Action Report select Create New and choose Corrective Action Report.
The information is extracted from the QHSES issue as it is at this point in time, you can edit and add more information if wanted.
When you click Save, the information will be saved, and the status will be updated to Status 1 (Draft).
You can easily Edit Corrective Action Report by using the Edit icon or Delete the Corrective Action by using the trashcan icon.
When you select Send to myself, you will get this sent by email as a PDF file and the status will go directly to Status 9 (closed). If the QHSES issue has files attached in File Manager, you will have the option to include selected files in the email that is being sent.
To close the Corrective Action Report without sending the report to yourself in email, select Close Correspondence and the status will be updated to Status 9 (Closed).
If you would like to view the PDF file before sending you can do this by using the magnifier icon.
Technical Clarification
Technical Clarification is used if you early in the flow see the need for an improvement suggestion. The quality of the product can be improved, and you can send a Technical Clarification to ask for permission to change something like e.g. material etc. You then use this Technical Clarification and send it to the customers asking for approval of a suggested change.
To create Technical Clarification, select Create new and choose Technical Clarification.
The information is extracted from the QHSES issue as it is at this point in time, you can edit and add more information in the request if wanted.
You can add Comment, External Reference (if this is not already added in the QHSES issue) and you can add Actions by selecting in the dropdown menu.
You can upload signed documents directly here. Then select Save and all the information will be added.
You can easily Edit the Technical Clarification by using the Edit icon or delete the Technical Clarification by using the Trashcan icon
Request
To save the Technical Clarification, click Save and the Technical Clarification goes to Status 1 (draft). When you select Send to myself, you will get this sent by email as a PDF file and the status will go to Status 2 (Waiting for response).
If the QHSES issue has files attached in File Manager, you will have the option to include selected files in the email that is being sent.
In Status 2, you have an option to upload the signed document by selecting Upload directly in the main view.
To close the Technical Clarification, select Close Correspondence and the status will be updated to Status 9 (Closed).
Response
You can easily go to response by selecting it in the top pane.
Choose status on the Technical Clarification. Here there are 3 different statuses to choose from: Not approved, Conditionally approved and Approved.
Based on the feedback from the customer, you will set the correct status of the Technical Clarification. If it is Approved, it will go directly to Status 9 (Closed).
If it is set to Conditionally approved, it will go to Status 8 - Pending Actions. If it is Not Approved, you need to manually consider if the Technical Clarification should be closed or not.
You can also add Comment, External Reference (if this is not already added in the QHSES issue) and you can add Actions by selecting in the dropdown menu.
You can also upload signed documents directly here. Then select Save and all the information will be added.
You can easily edit the Technical Clarification. By using the Edit icon or delete the Technical Clarification by using the Trashcan icon.
Relations
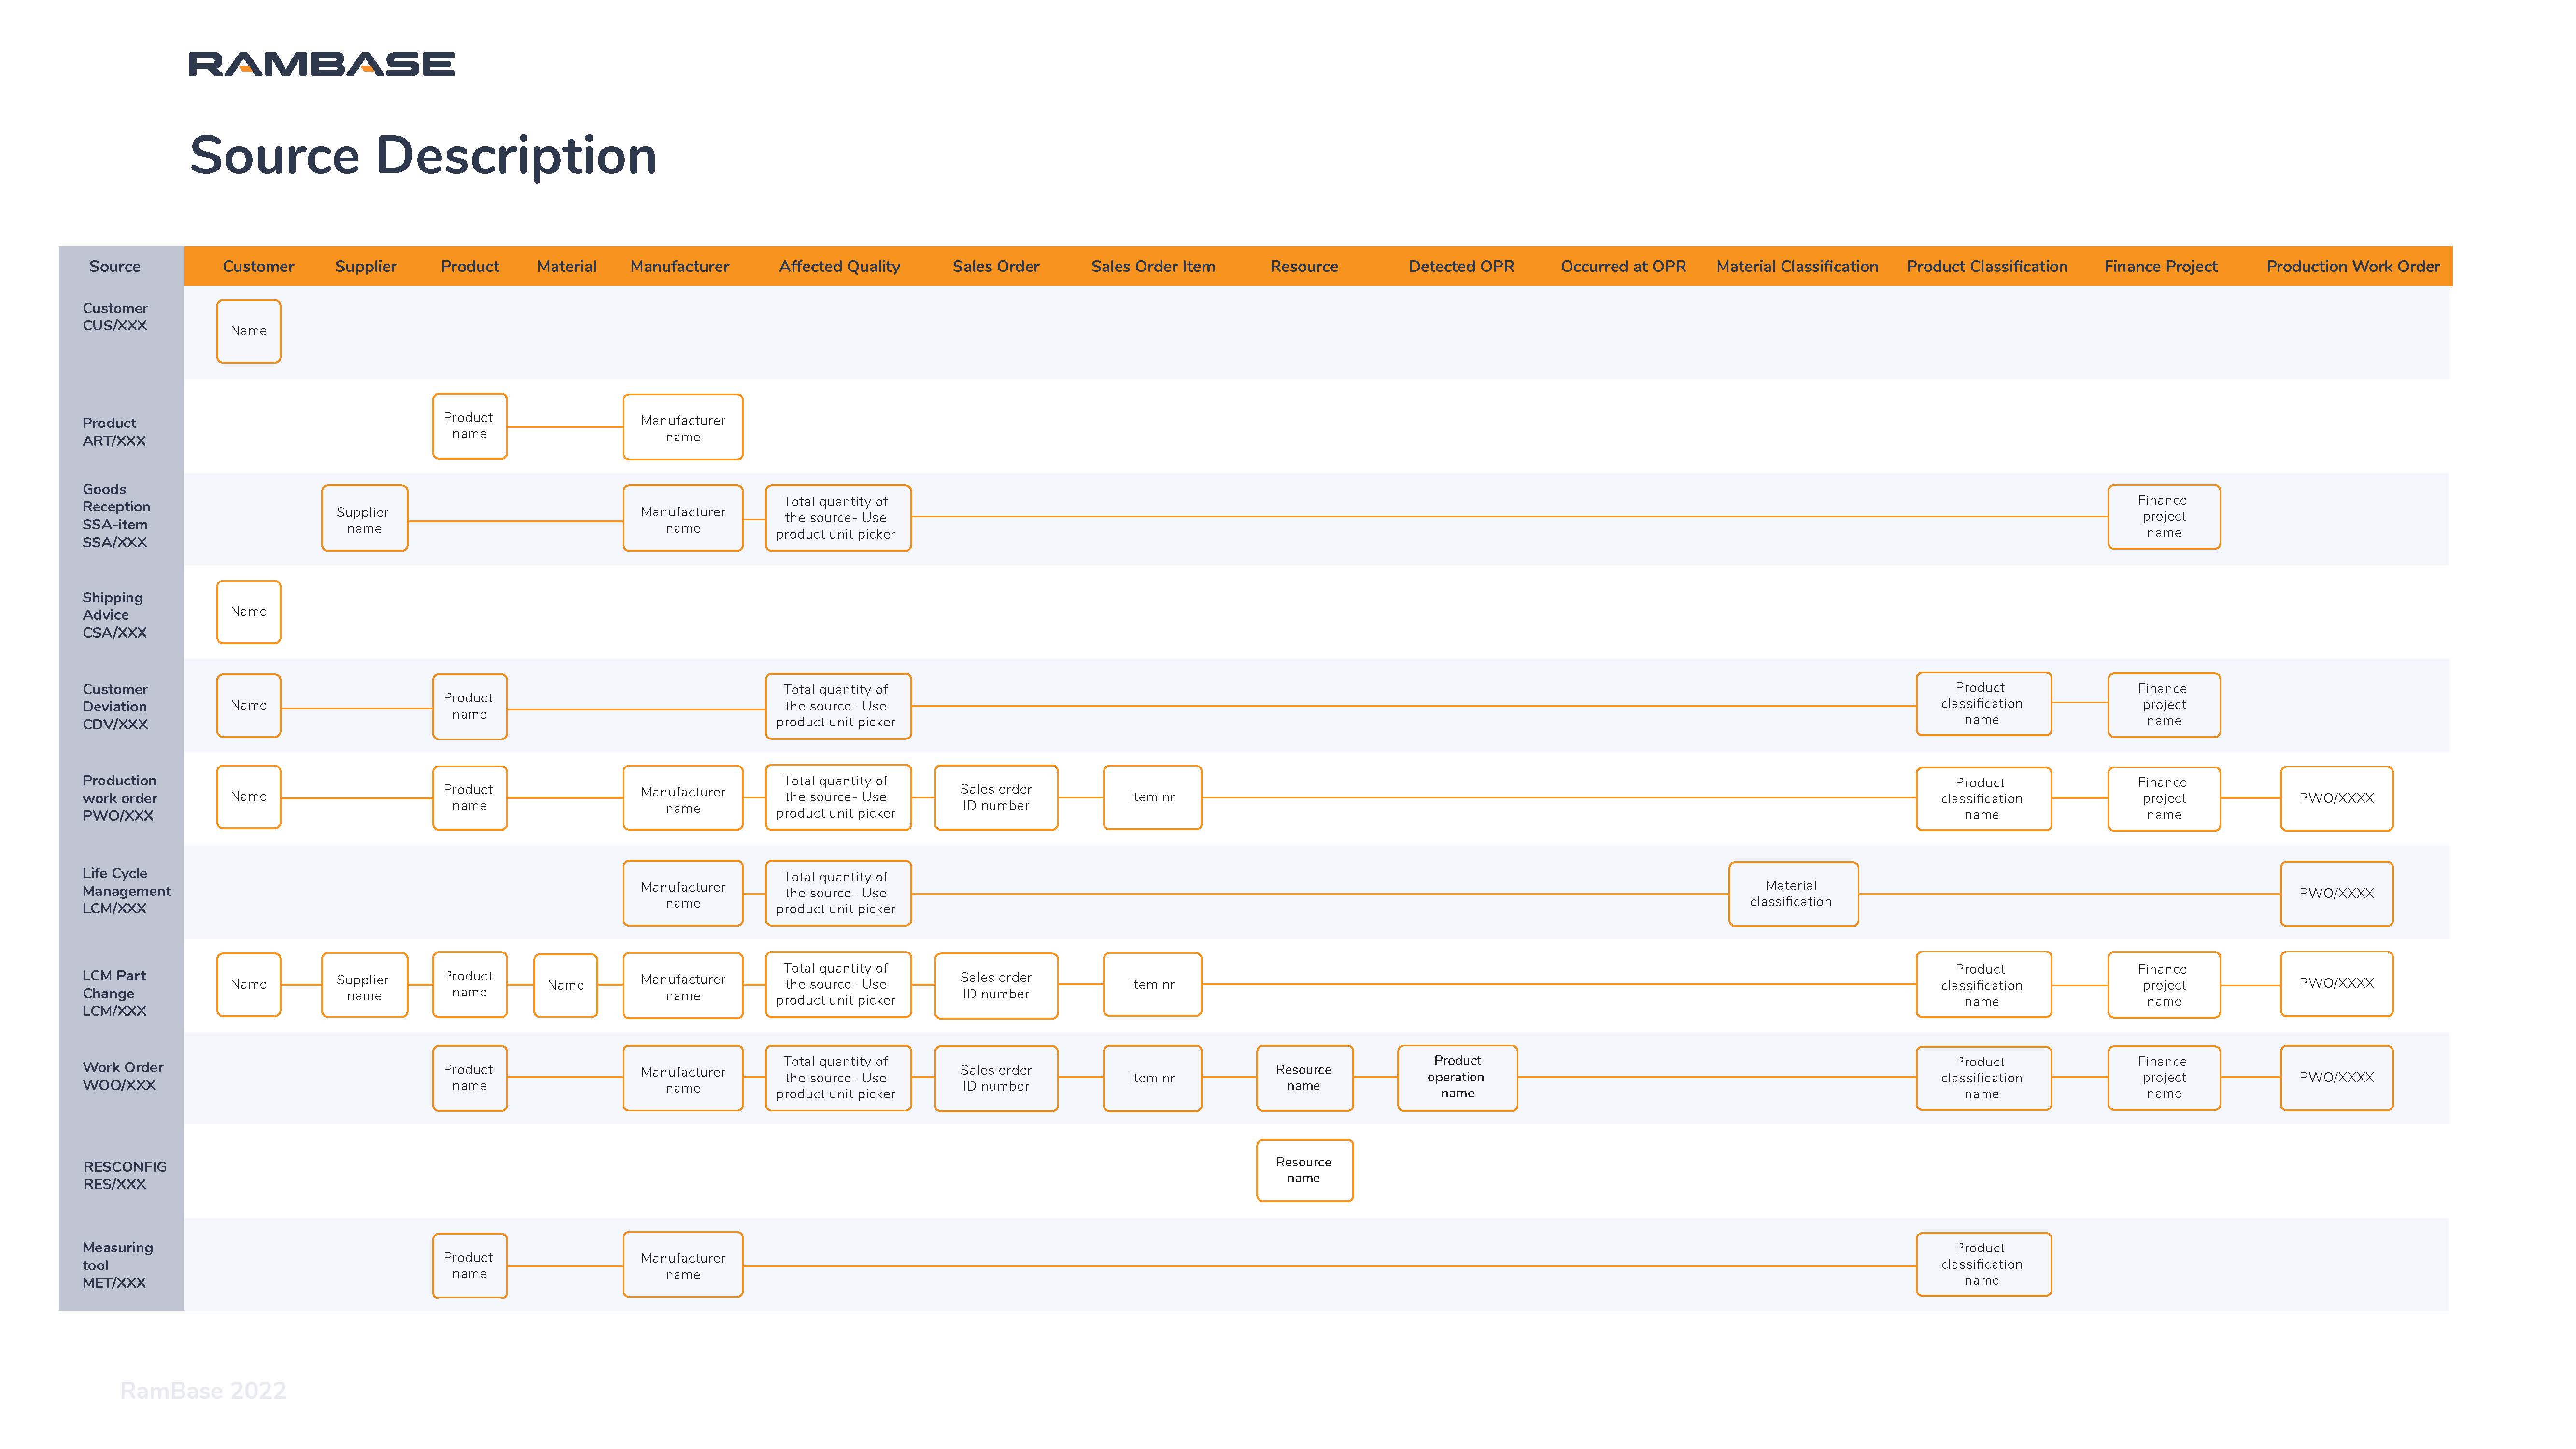
Under the Source tab you will find related information to this Source document added to the QHSES issue, from anywhere in the ERP system where the incident occurred or was discovered, e.g. PWO, CDV, LCM, Part change etc.
You can also add the document Id nr. in the Source field manually if this field is not filled out. (Can only be set one).
Data filled in Relations – Source fields is only based on data on source document at the time the issue is created and will not be updated if anything changes in the source document, e.g. the PWO.
Related issues allow you to link any issue to the present issue.
Select Add related issue in the Related issues tab. then select Relation type and the QHSES issue -> to inspect the linked issue.

You can also link to other objects in other relations. Select the Object type and select on the right-side field to look up and select the object, which can be:
Sales Order, Supplier, Customer, Finance project and Custom.
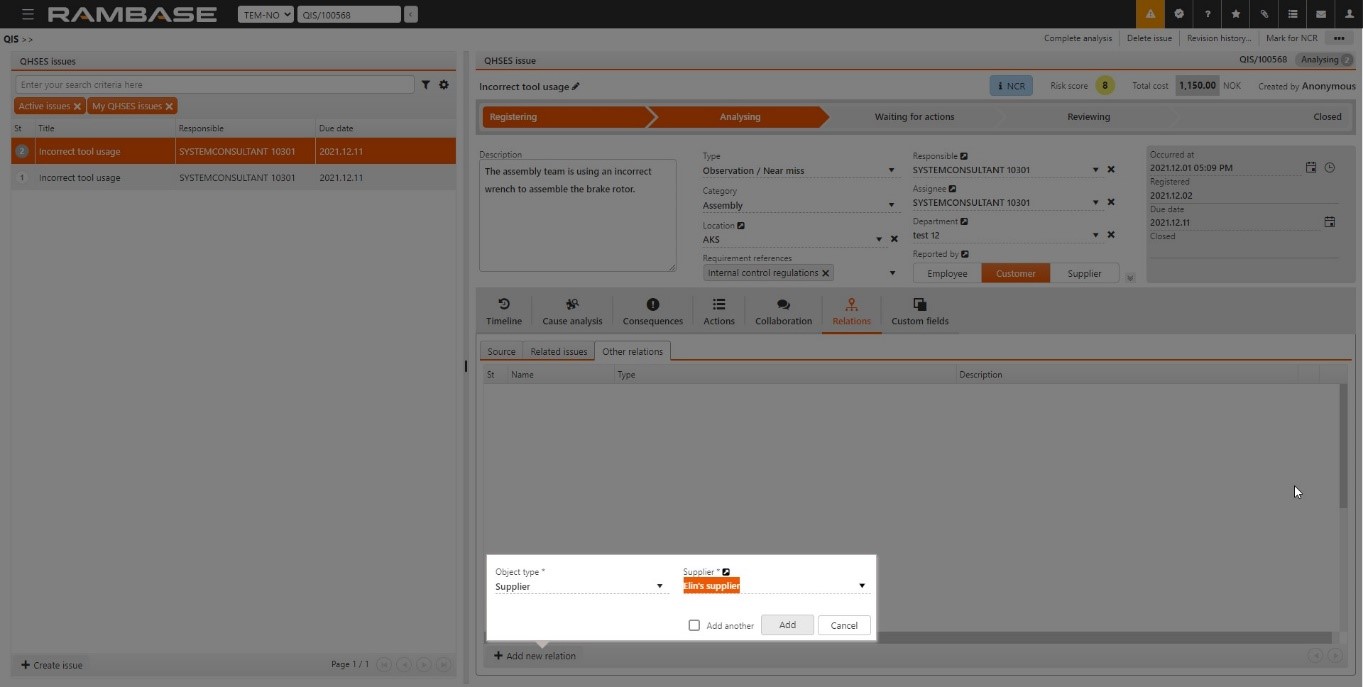
Select Create to create the link.
Select > to view the object in the parent application. For example, a Supplier object opens in the Supplier (SUP) application.
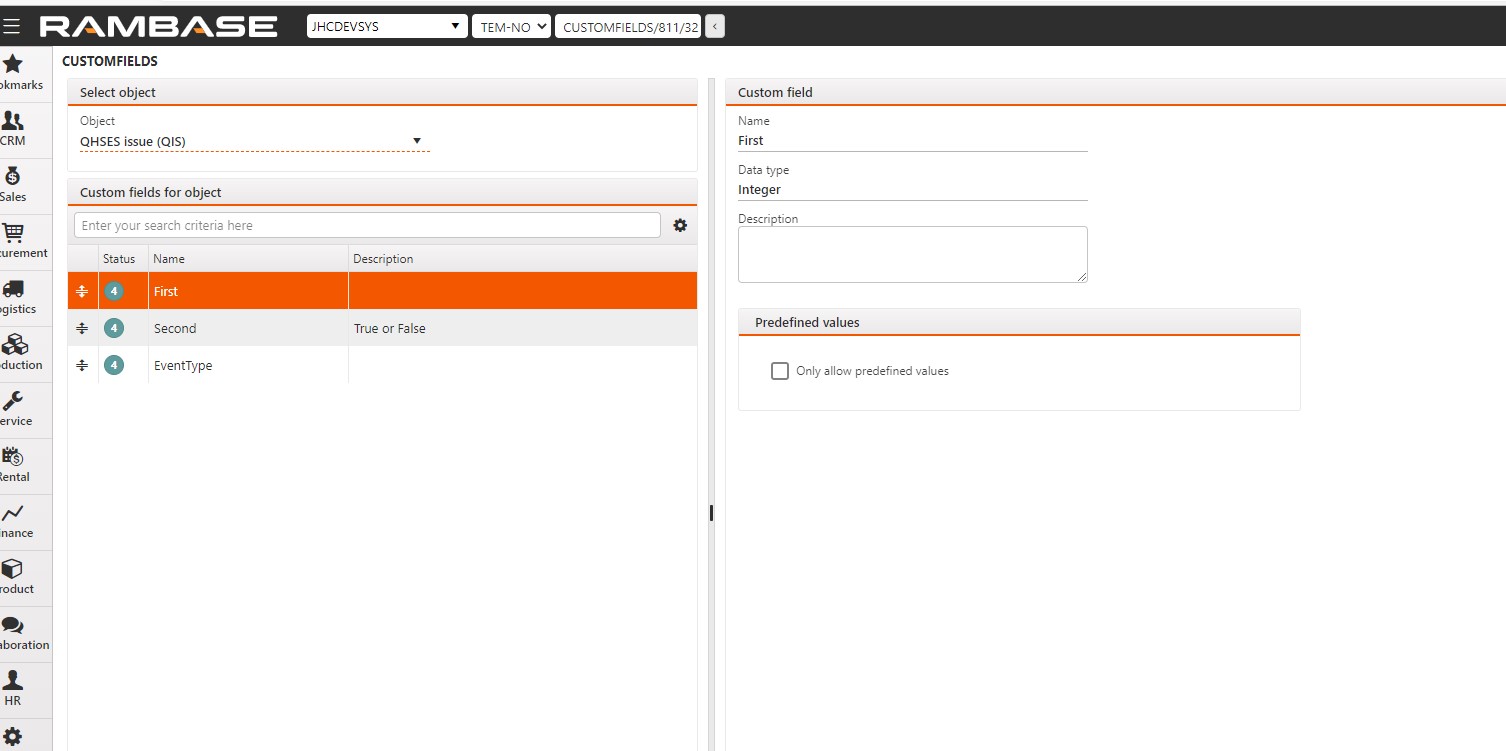
The Custom fields can be customized by using the Custom fields app – Type CUSTOMFIELDS in the search field, click on the dropdown menu in the Object field and select QHSES issue (QIS) to add fields.
Select Complete analysis and select Yes in the window that appears. Select Require review to require a review by the Responsible person before the analysis is completed. The issue is set to Status 4 once the analysis is completed. And set to Status.8 if the issue is in review. Default review ON/OFF is set in Settings, in the QISADMIN application.
If you normally have a Quality Manager or a Process owner reviewing issues before they can be closed, we recommend you set this setting to ON.

The person who is reviewing can either be assigned to the issue, or they can pick them up by checking the QHSES Status widget, paying attention to Status: Review.
All the actions associated with the issue must be marked as complete to close the issue.
Select Close issue in the context menu to close the issue. The issue is set to Status 9.