Pre-Payment to Supplier
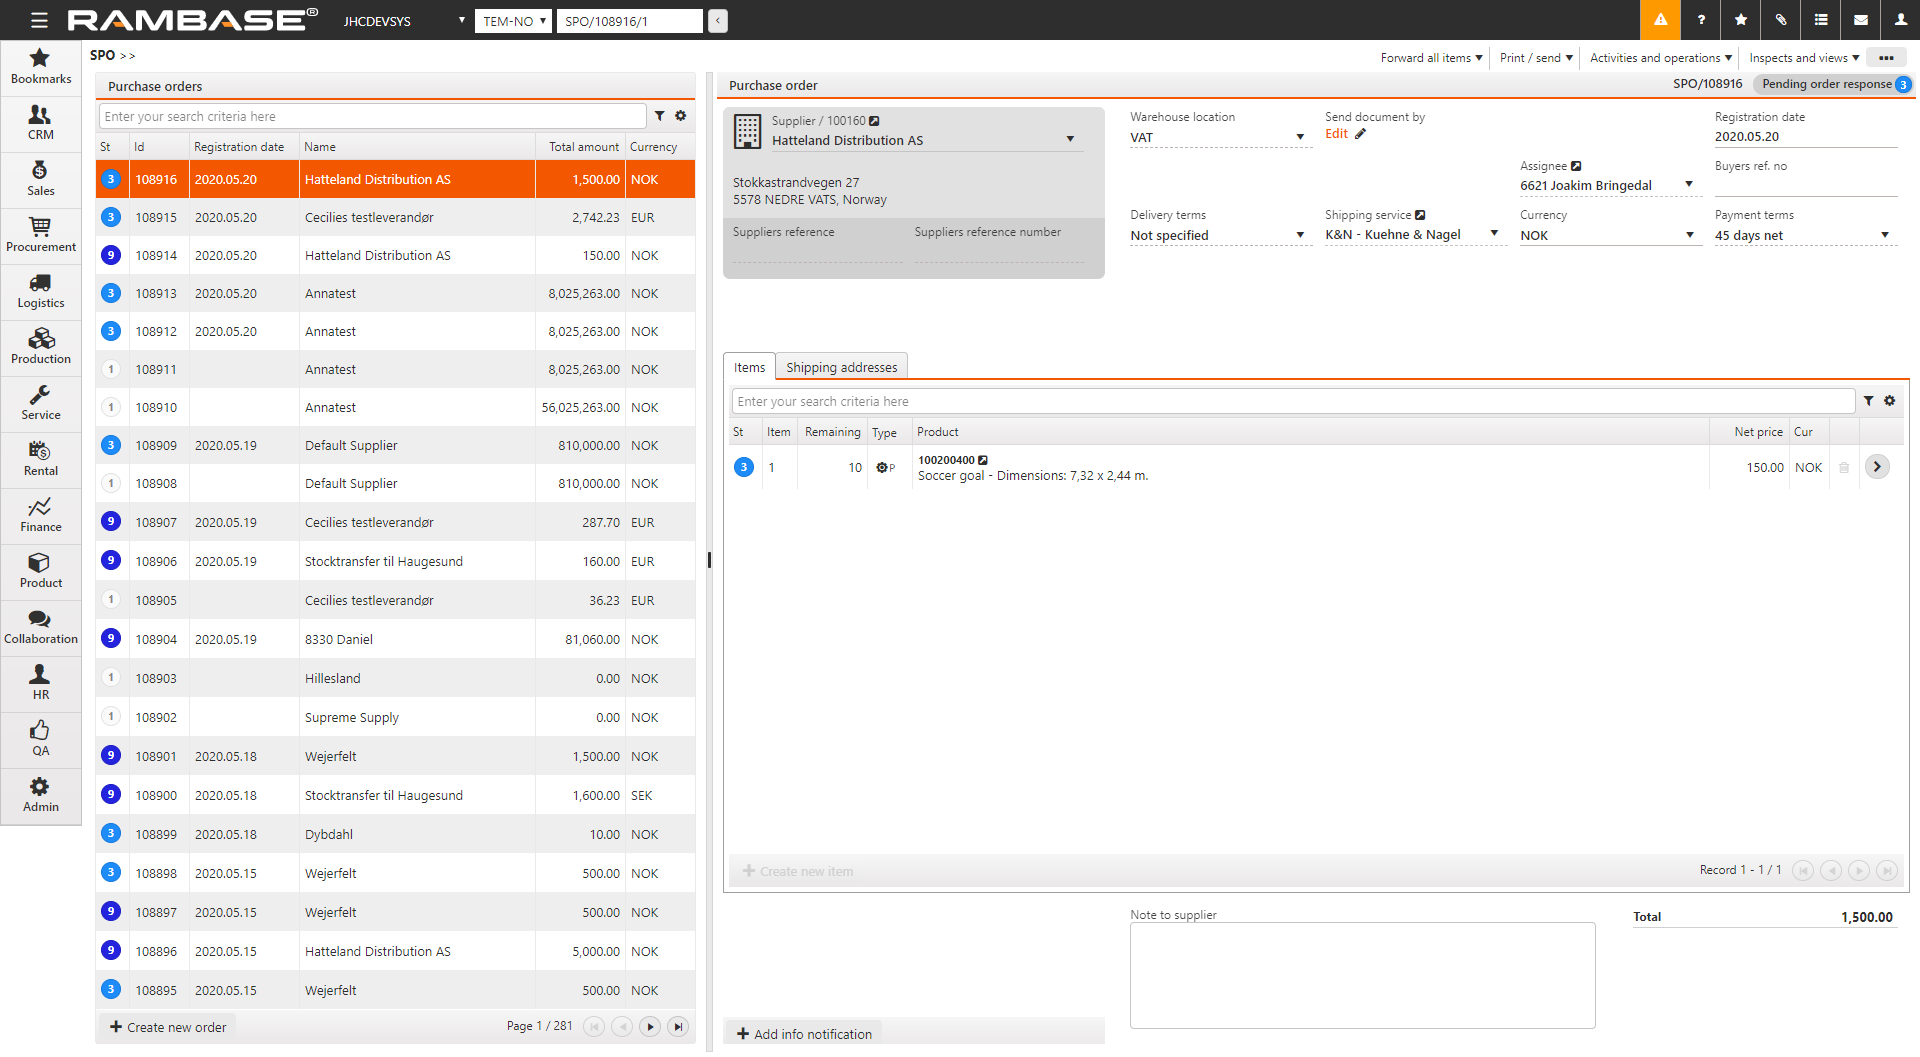
To open the Purchase orders (SPO) application, find Procurement in the RamBase menu and then Purchasing. Click Purchase orders to enter the SPO application.
Create a Purchase order (SPO).
Click on the Register purchase order option in the context menu to register the SPO.
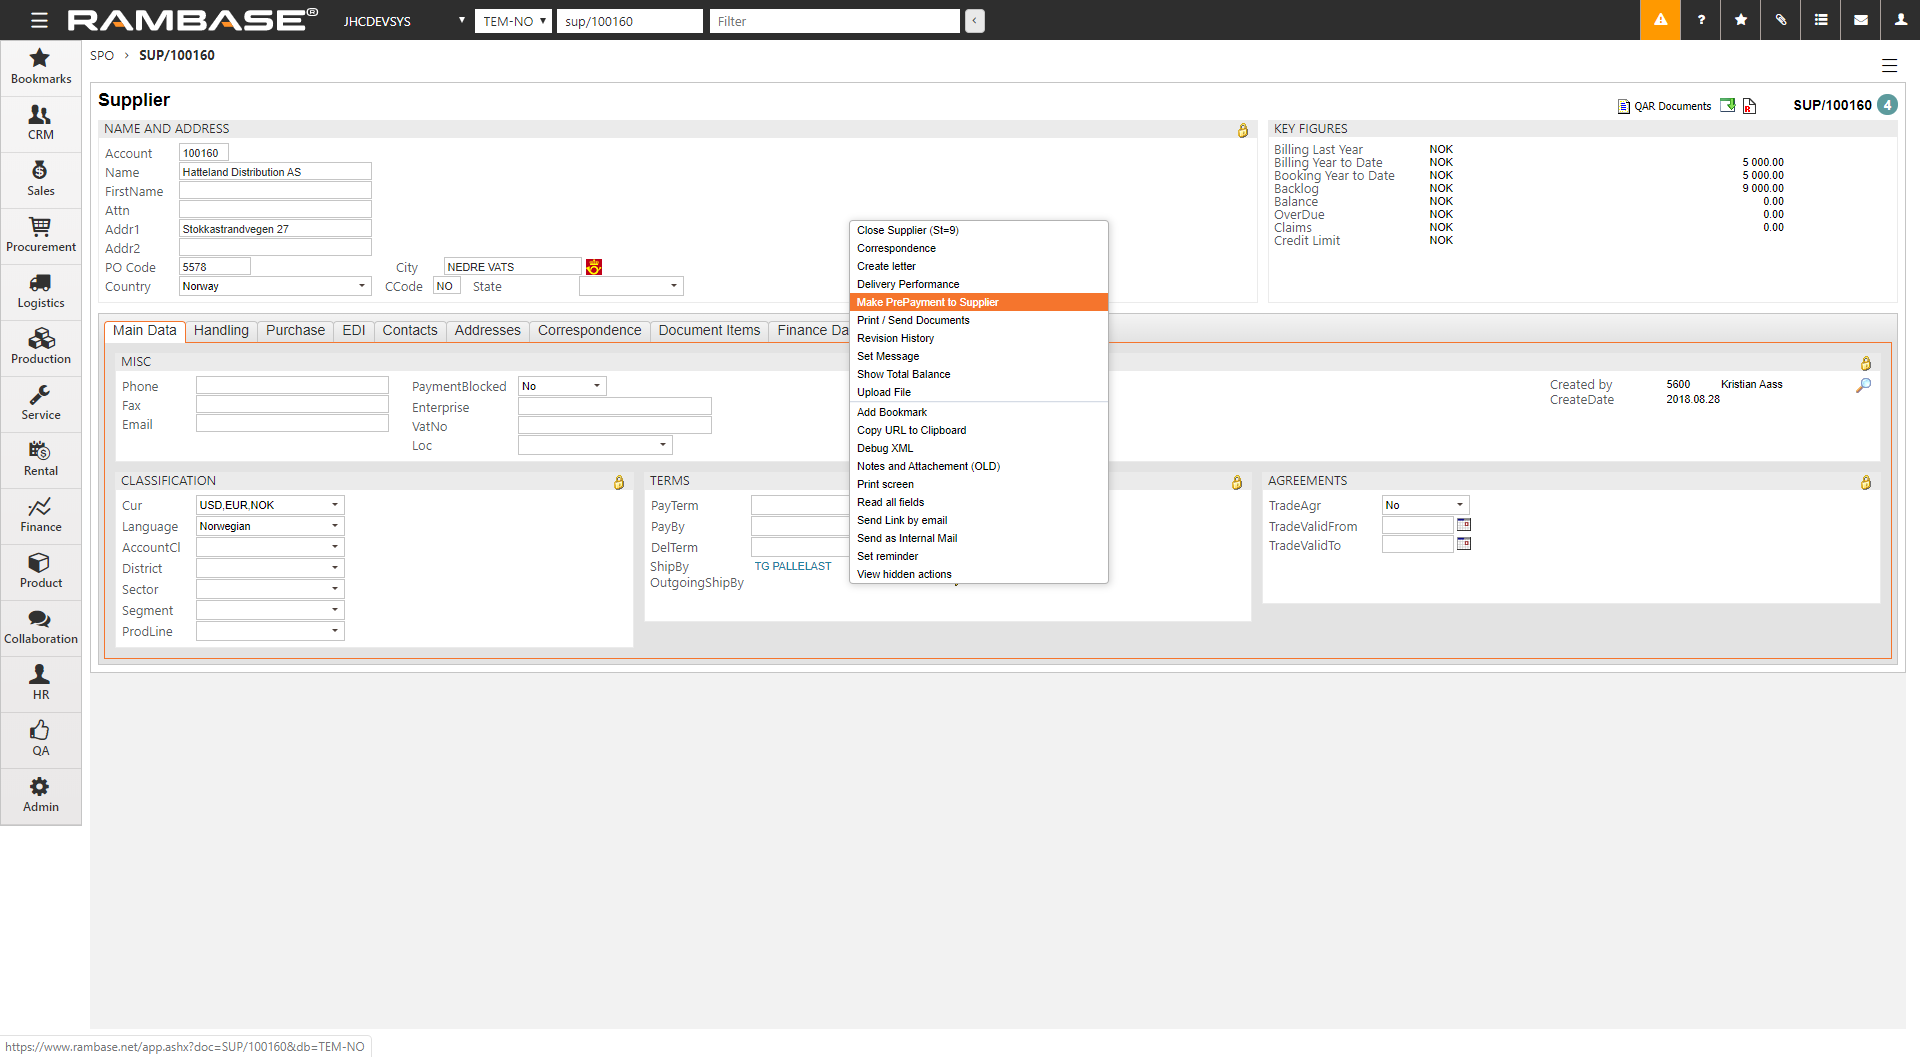
Enter the Supplier and press F12 to open the action menu, choose the Make PrePayment to Supplier option.
Select bank in the BankNo field.
Select currency date in the CurDate field.
Select amount in the Amount field.
Recommended, but optional, write the SPO reference in the Text field.
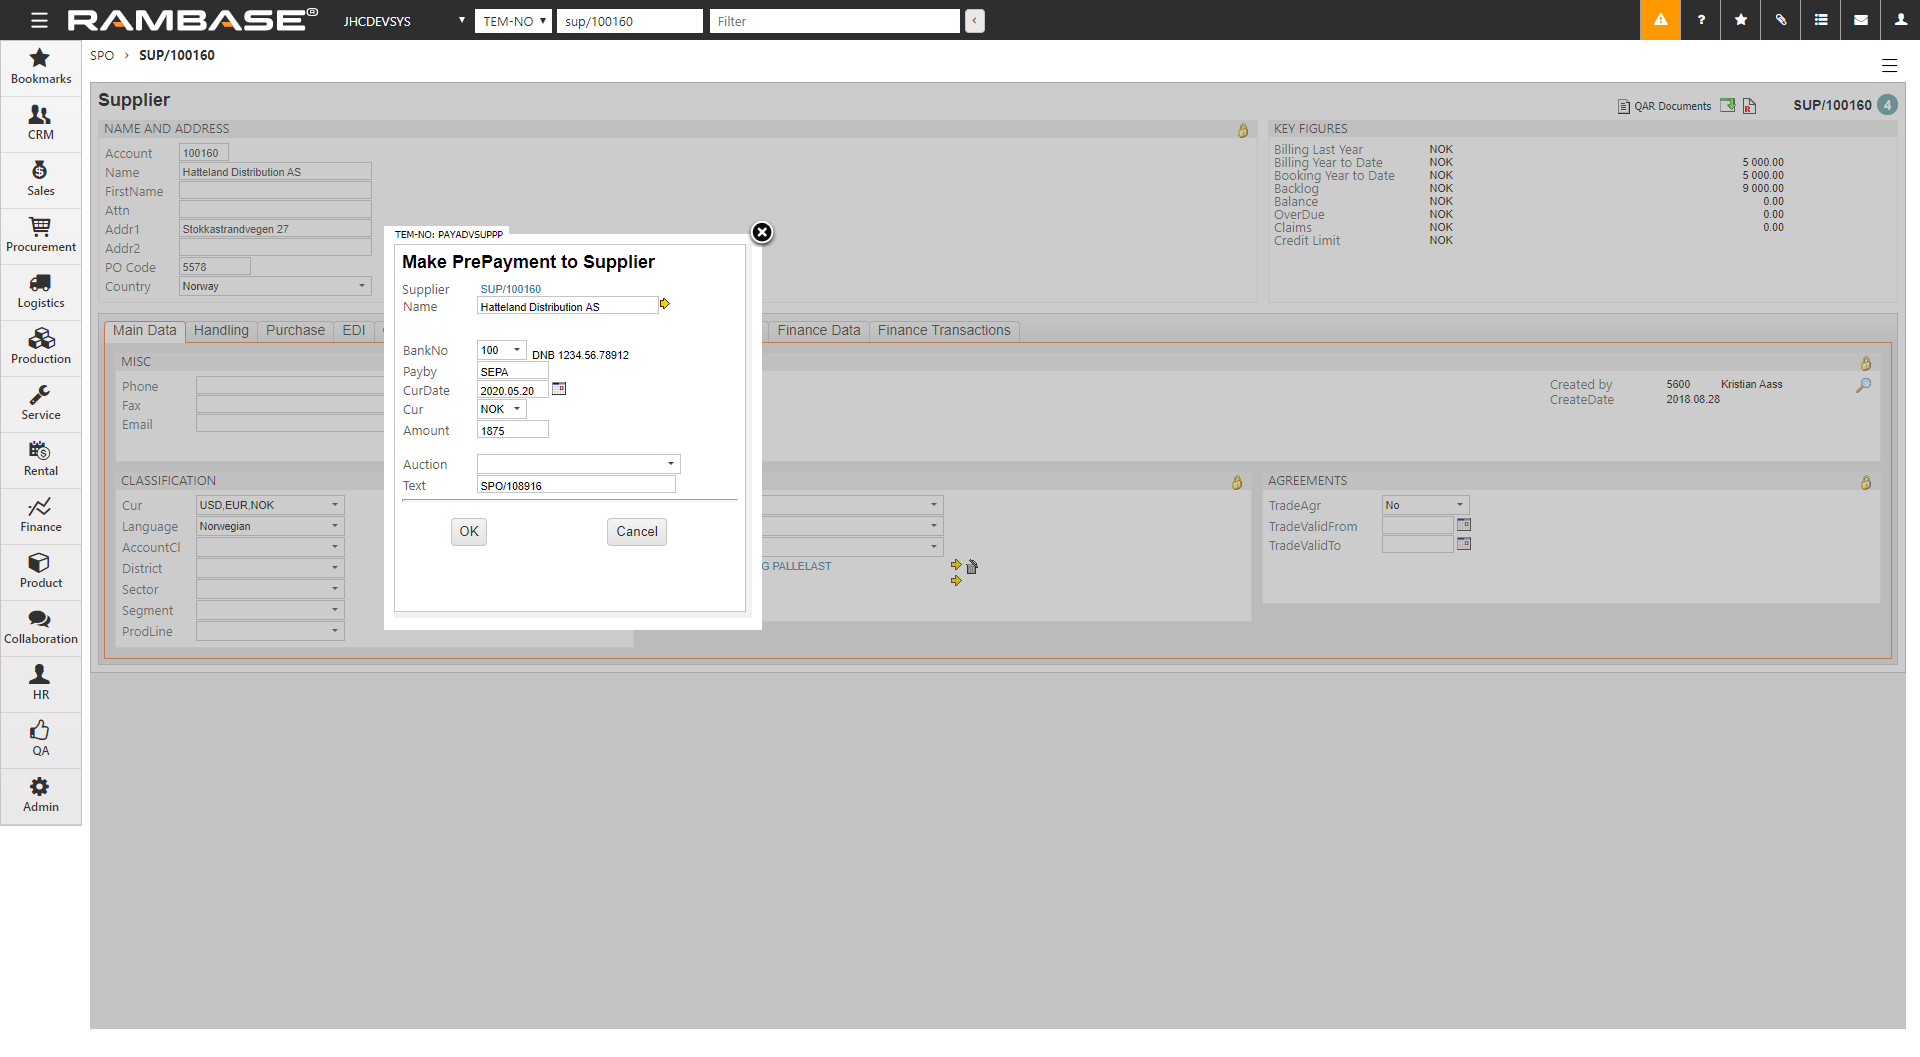
Click the OK button.
This will create two payments.
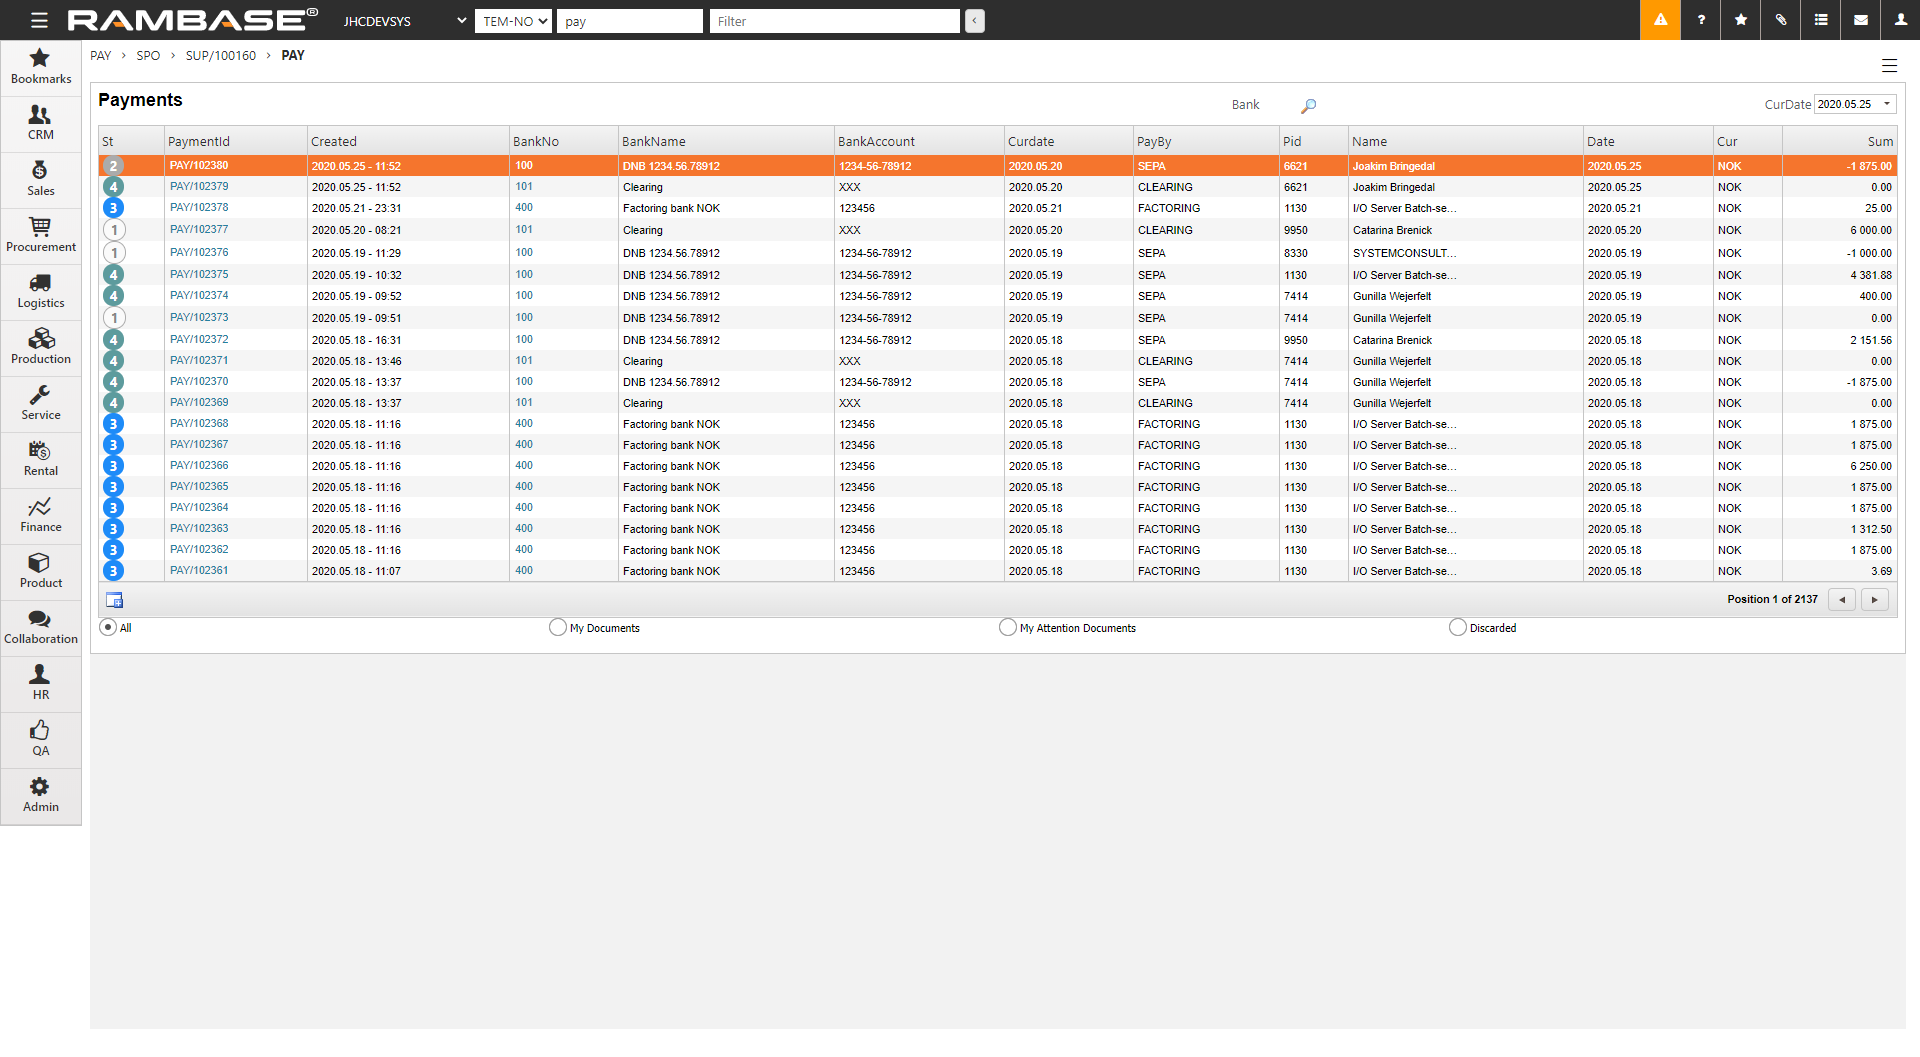
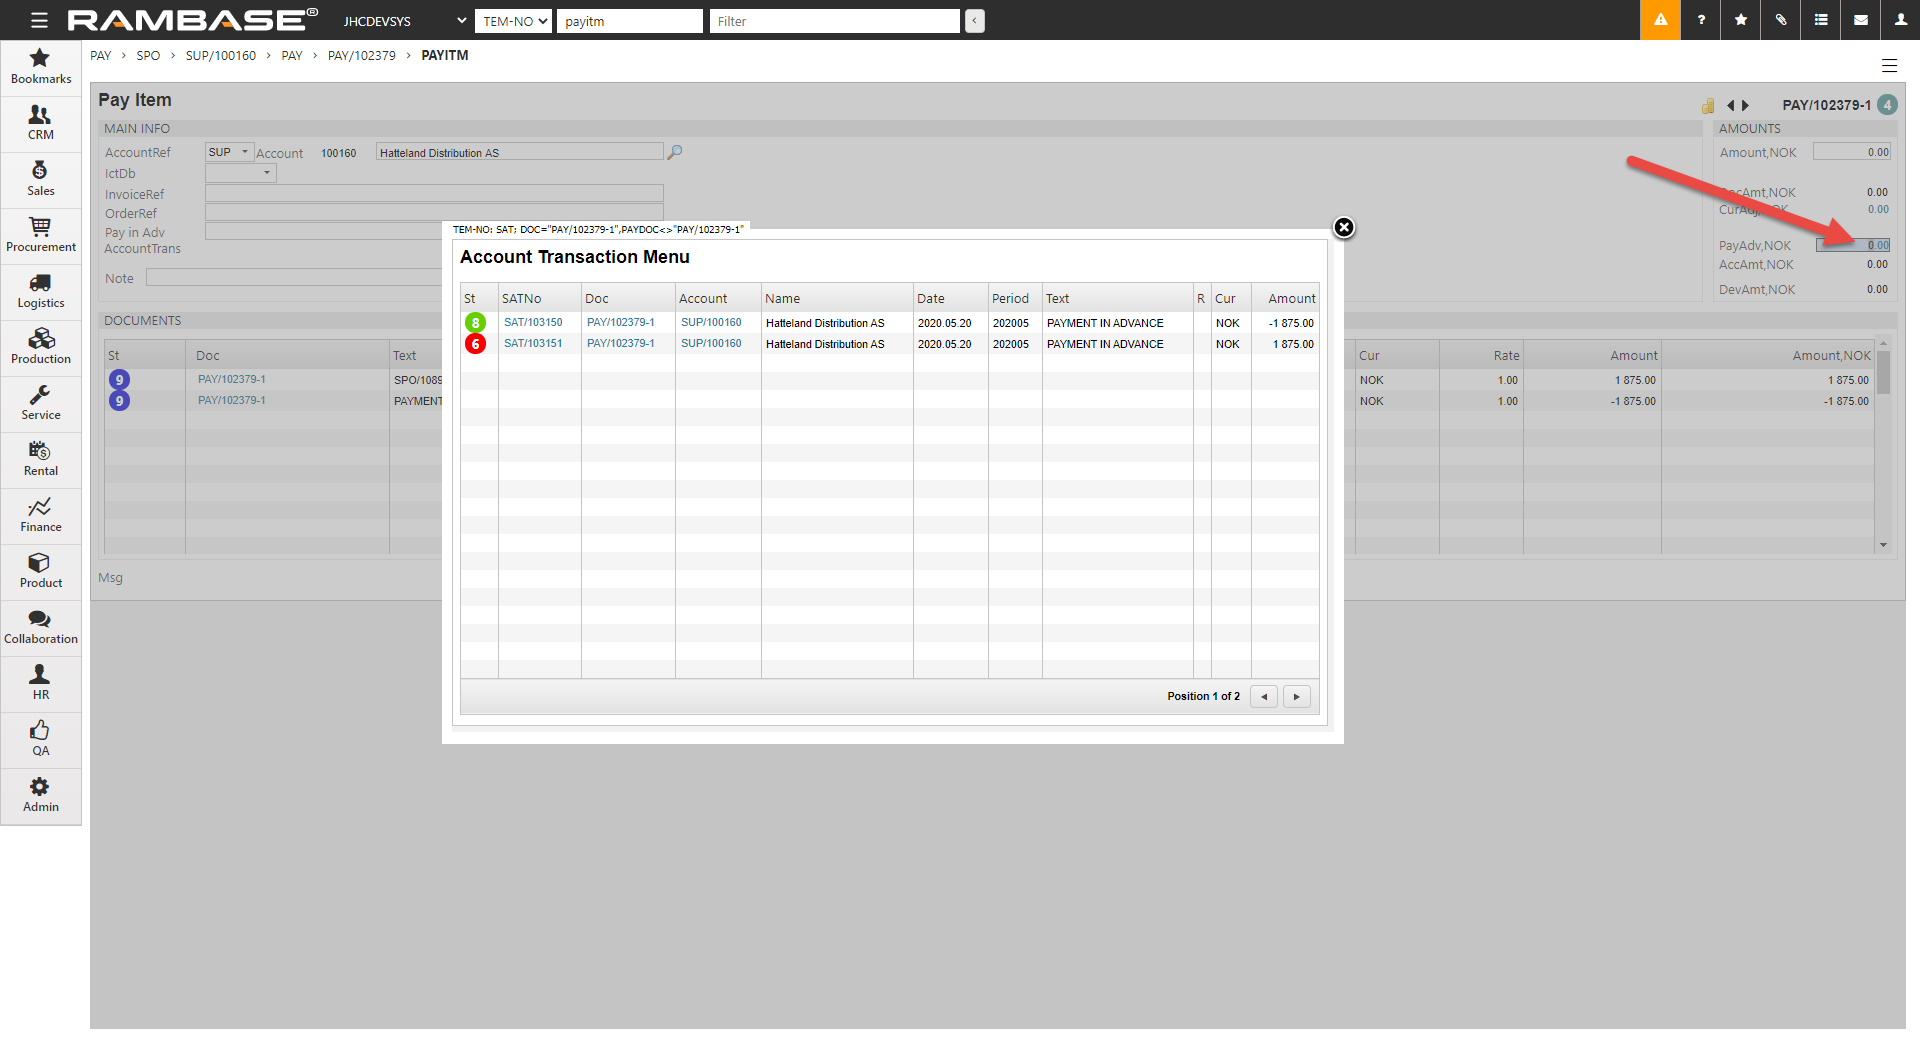
The first PAY document goes to the clearing bank and to status 4. This pay has created two subsidiary ledger entries. One for payment of the amount to the Supplier (SAT document in status 8) and one for offset to be used later when the SIN is registered (SAT document in status 6).
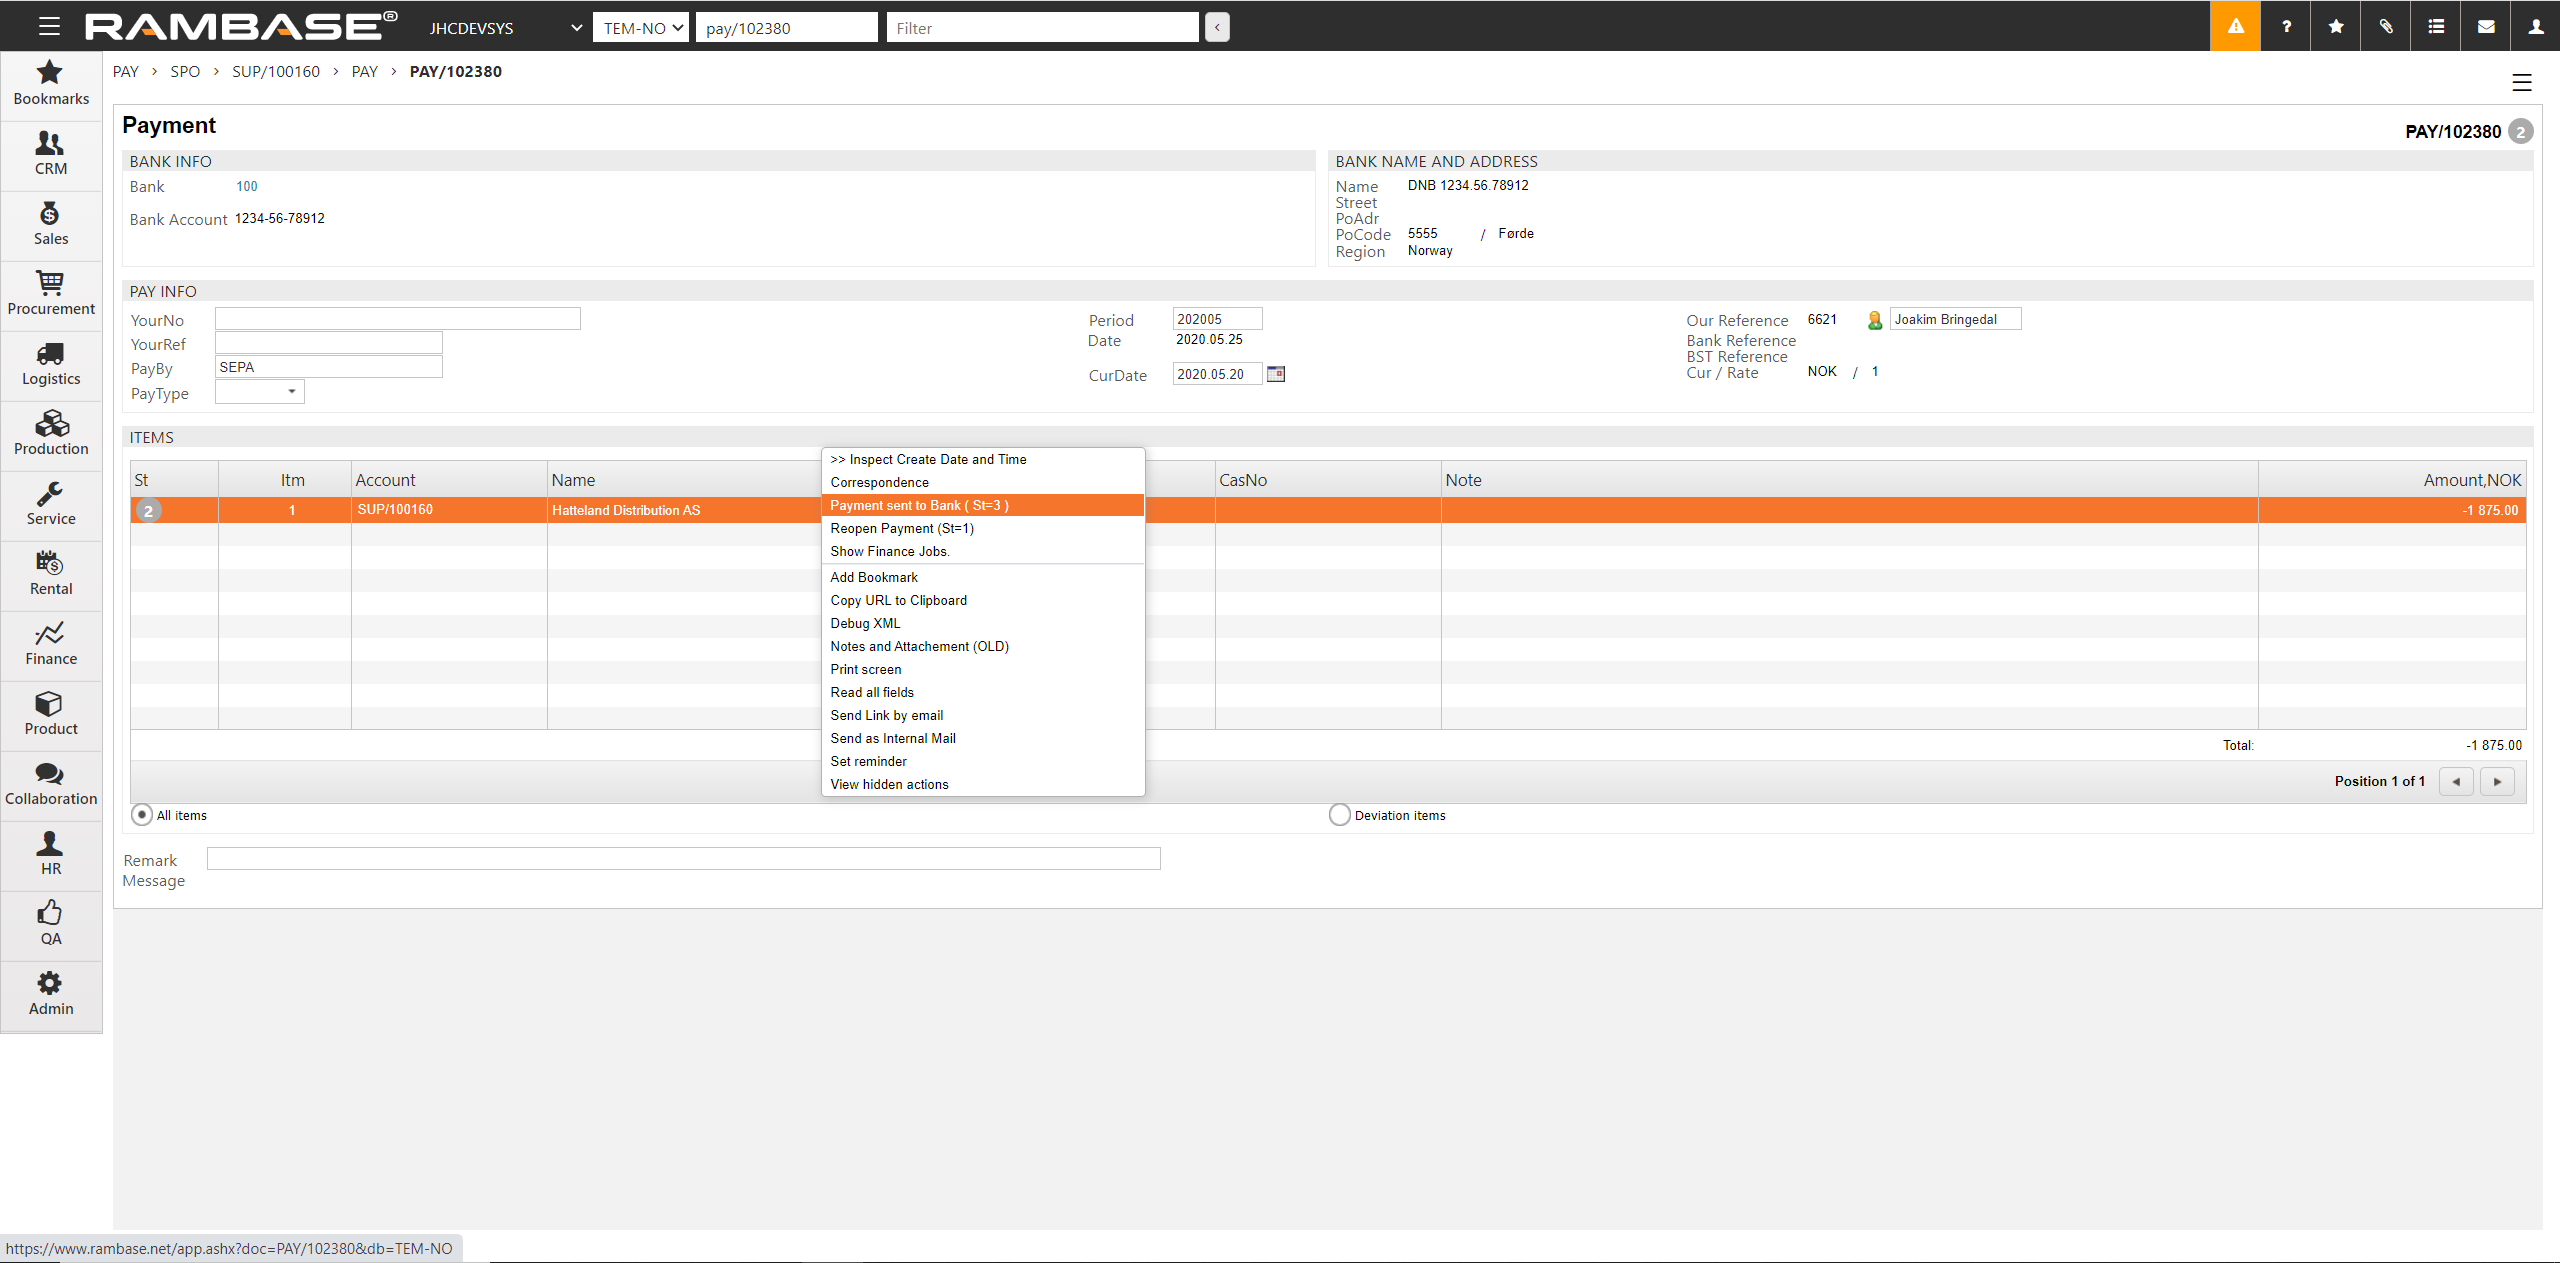
The SAT document in status 8 belongs to the PAY document in status 2. Settle the payment in the bank and then press F12 to open the action menu and choose the Payment sent to Bank (St=3 ) option.
When the amount is deducted in the bank, press F12 to open the action menu and choose the Register Payment option to set it to status 4.
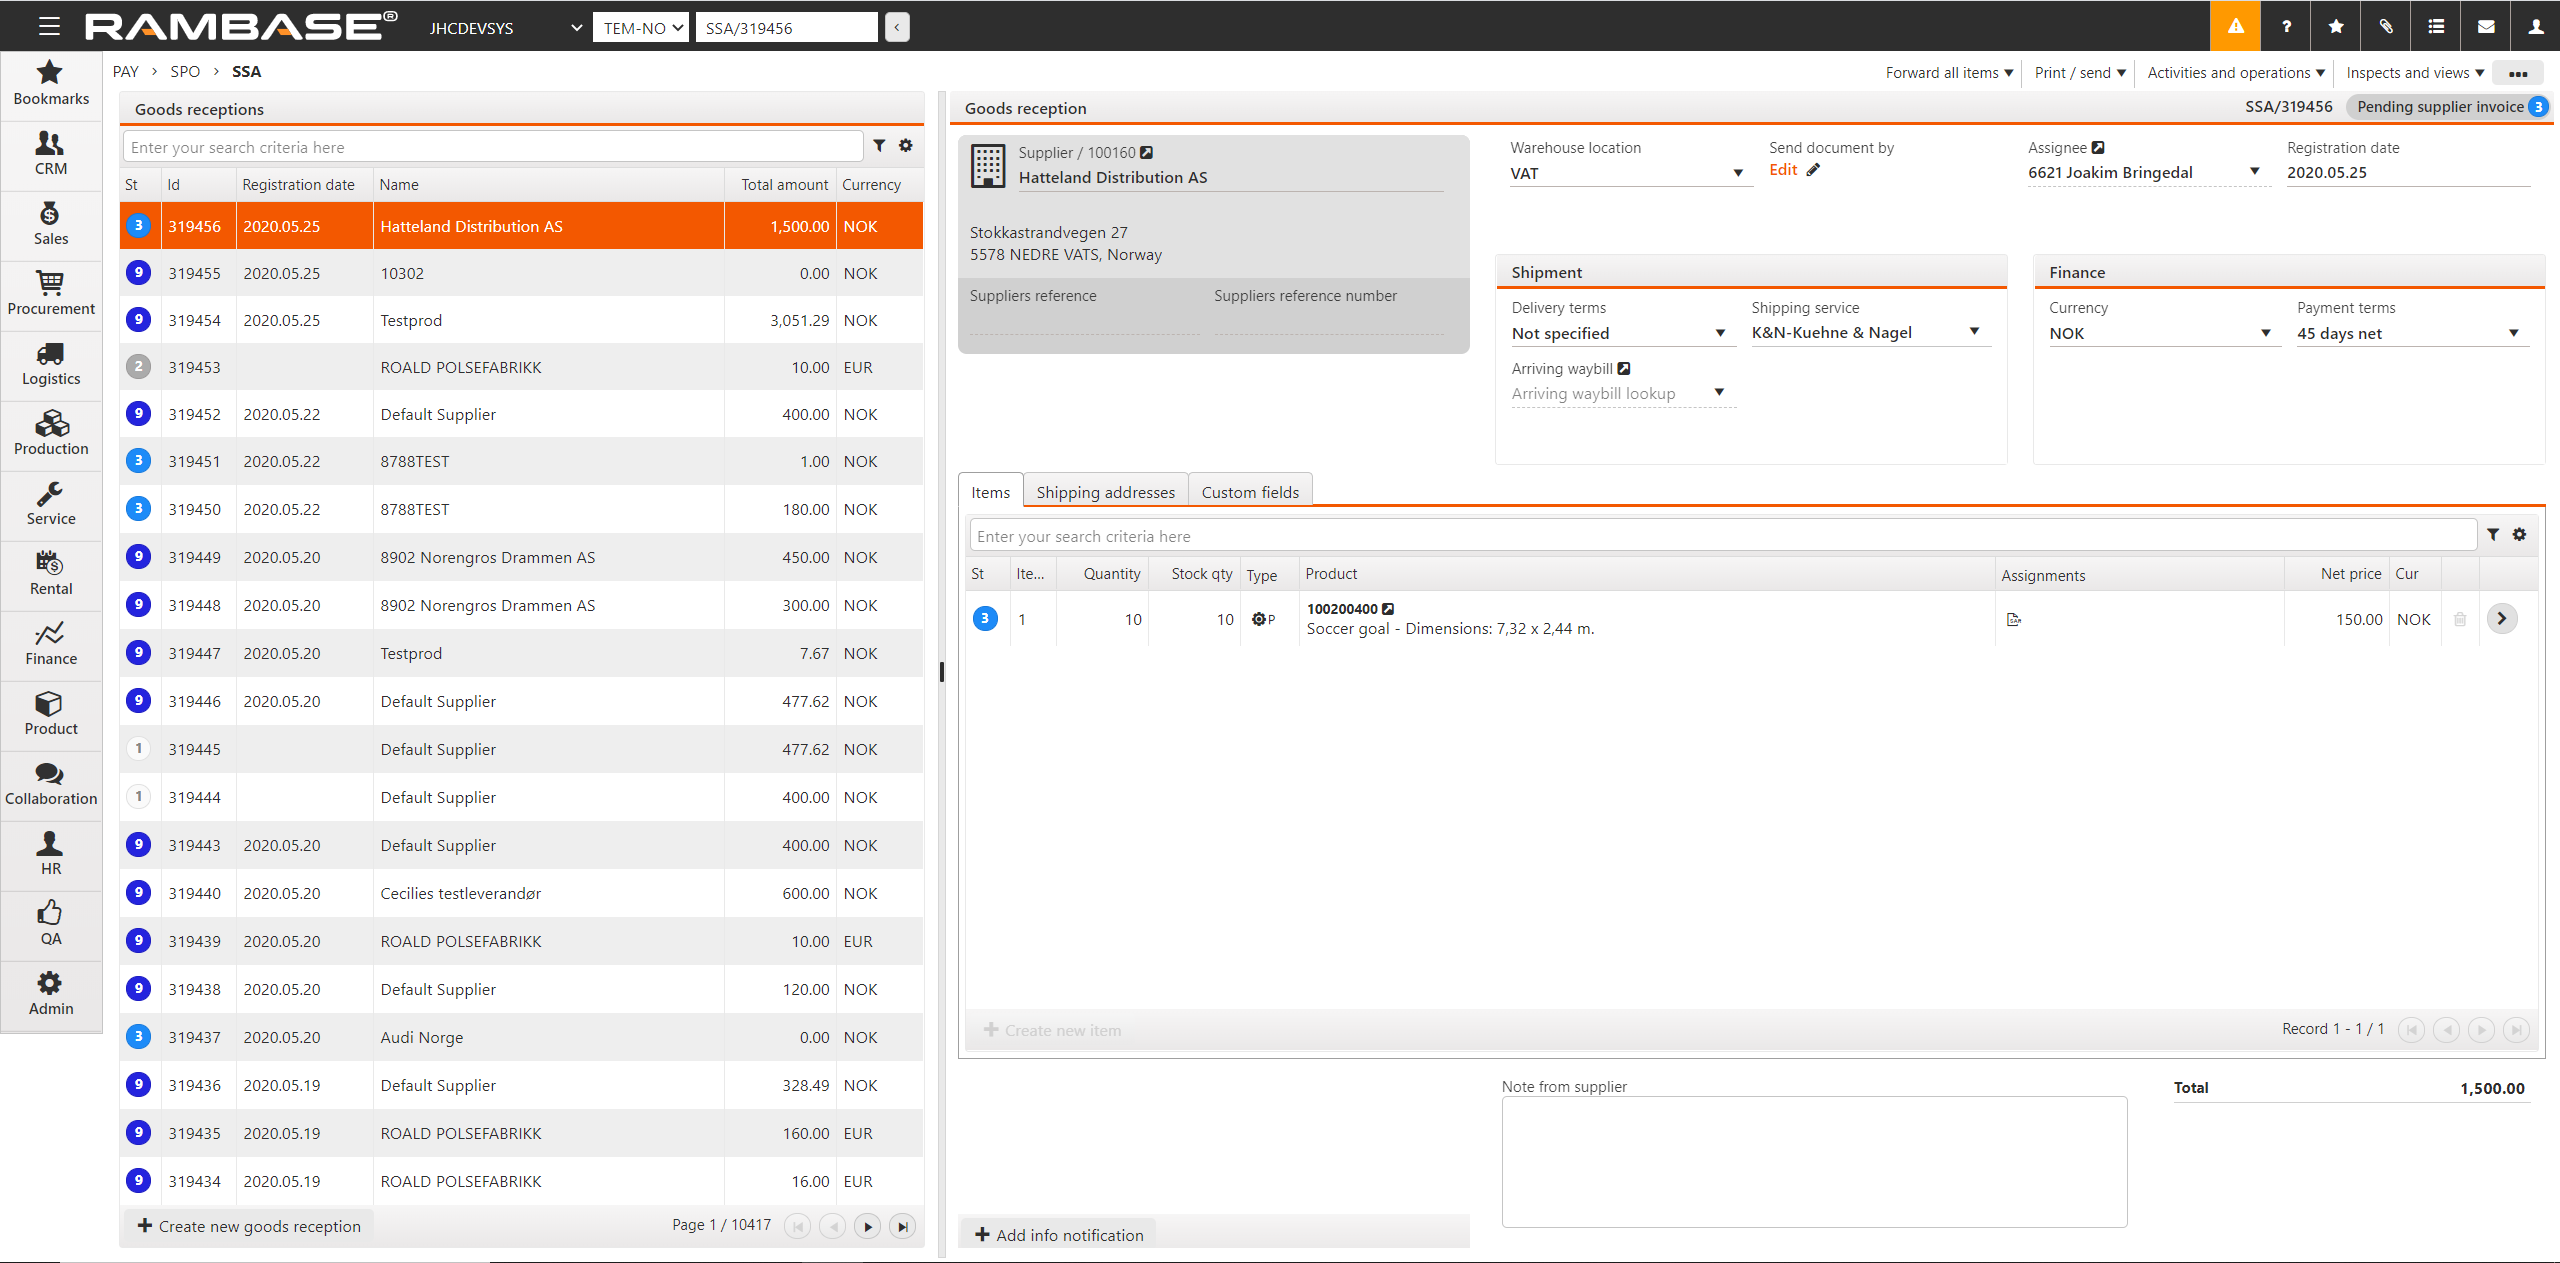
Forward the SPO to a Goods reception (SSA) when the goods arrive.
Use the Register as stock option in the context menu to register the SSA to stock.
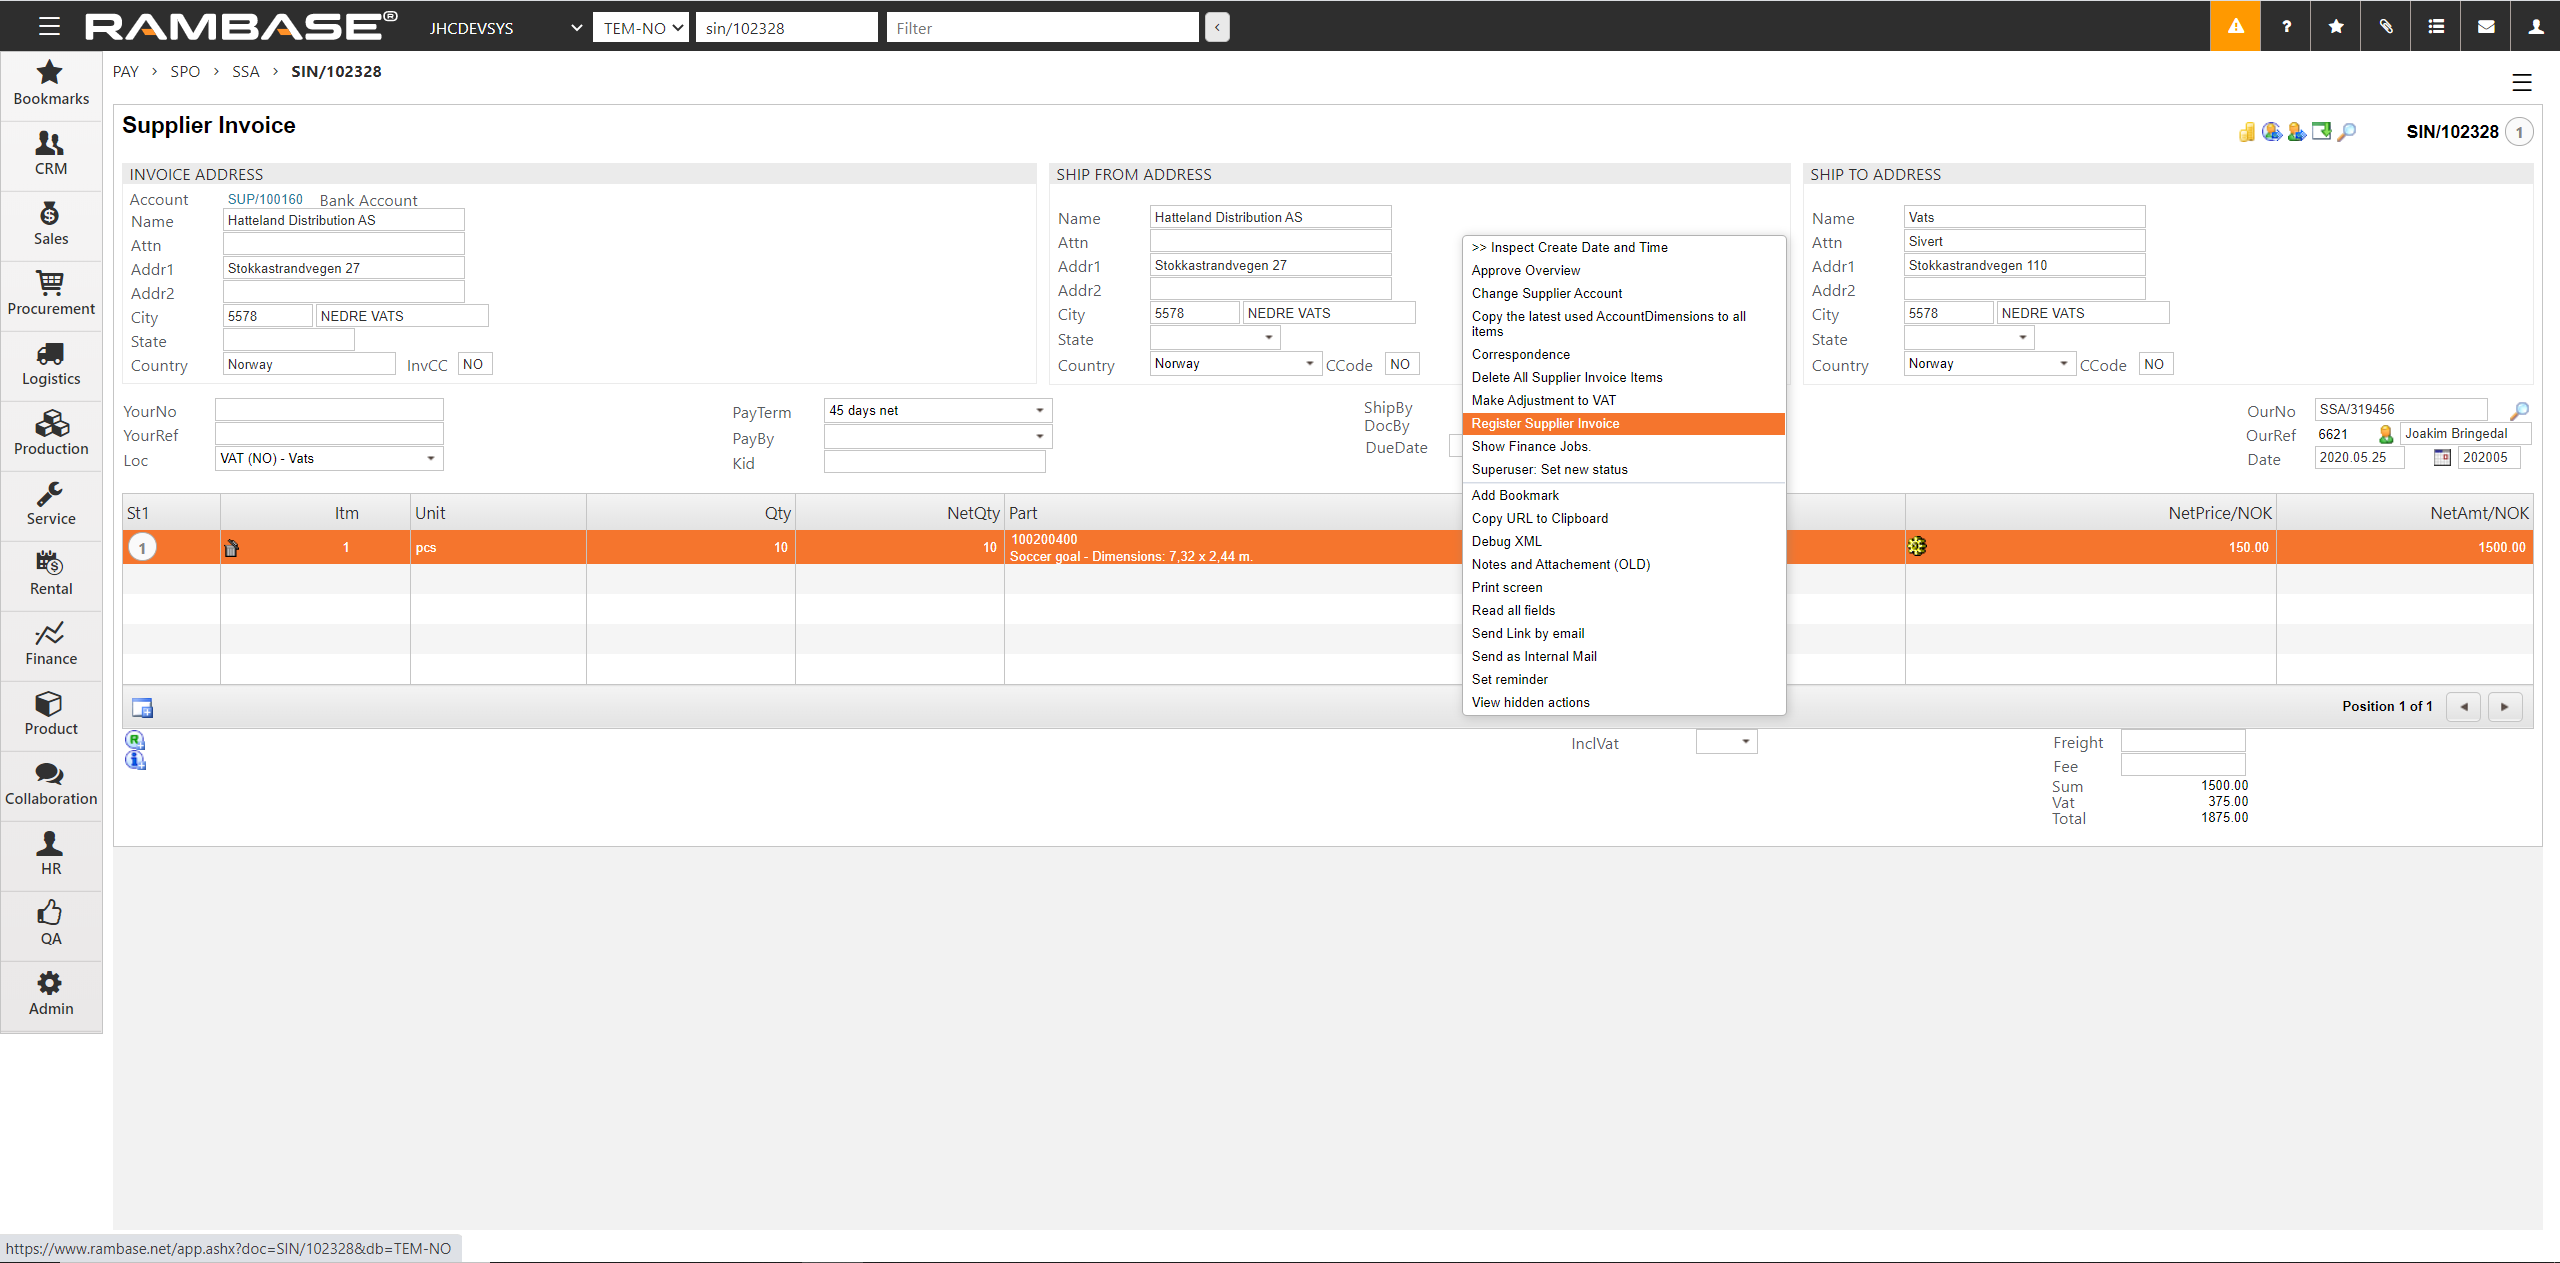
Forward the SSA to a Supplier Invoice (SIN). Choose the Forward all items to supplier invoice.. option in the context menu.
Press F12 to open the action menu and choose the Register Supplier Invoice option to set the SIN to status 4.
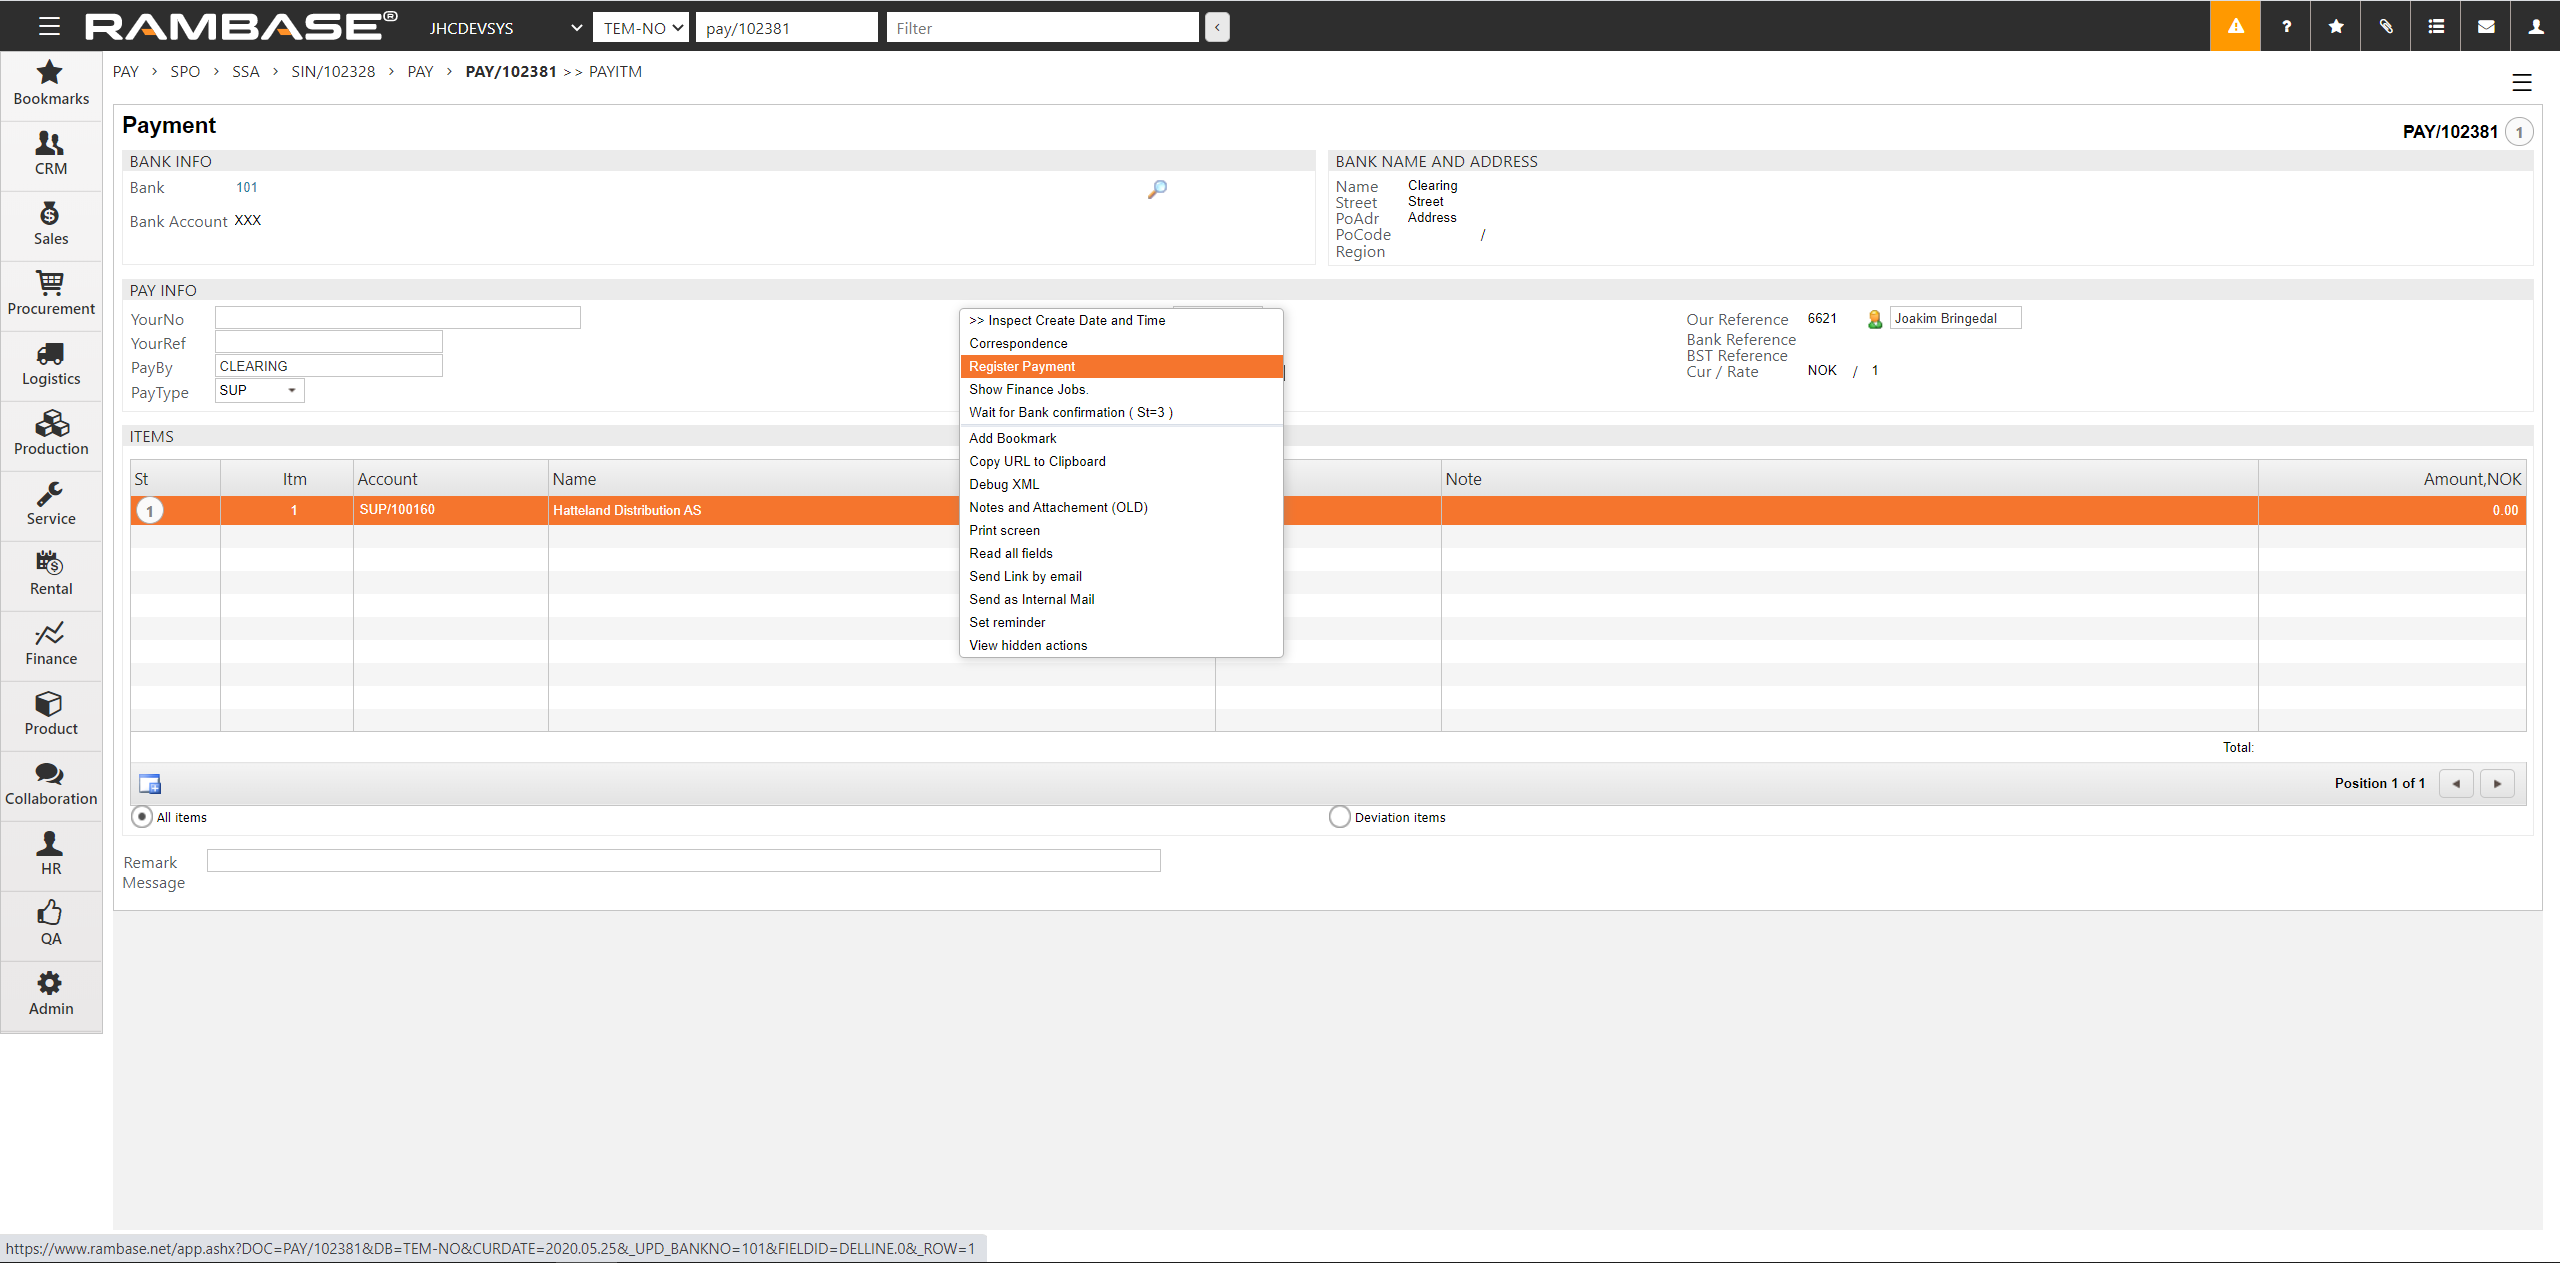
To offset the SIN and the open subsidiary ledger entries, create a manual PAY on the clearing bank.
Enter the Payment (PAY) application.
Click the Create PAY icon.
Select the Clearing bank and press ENTER.
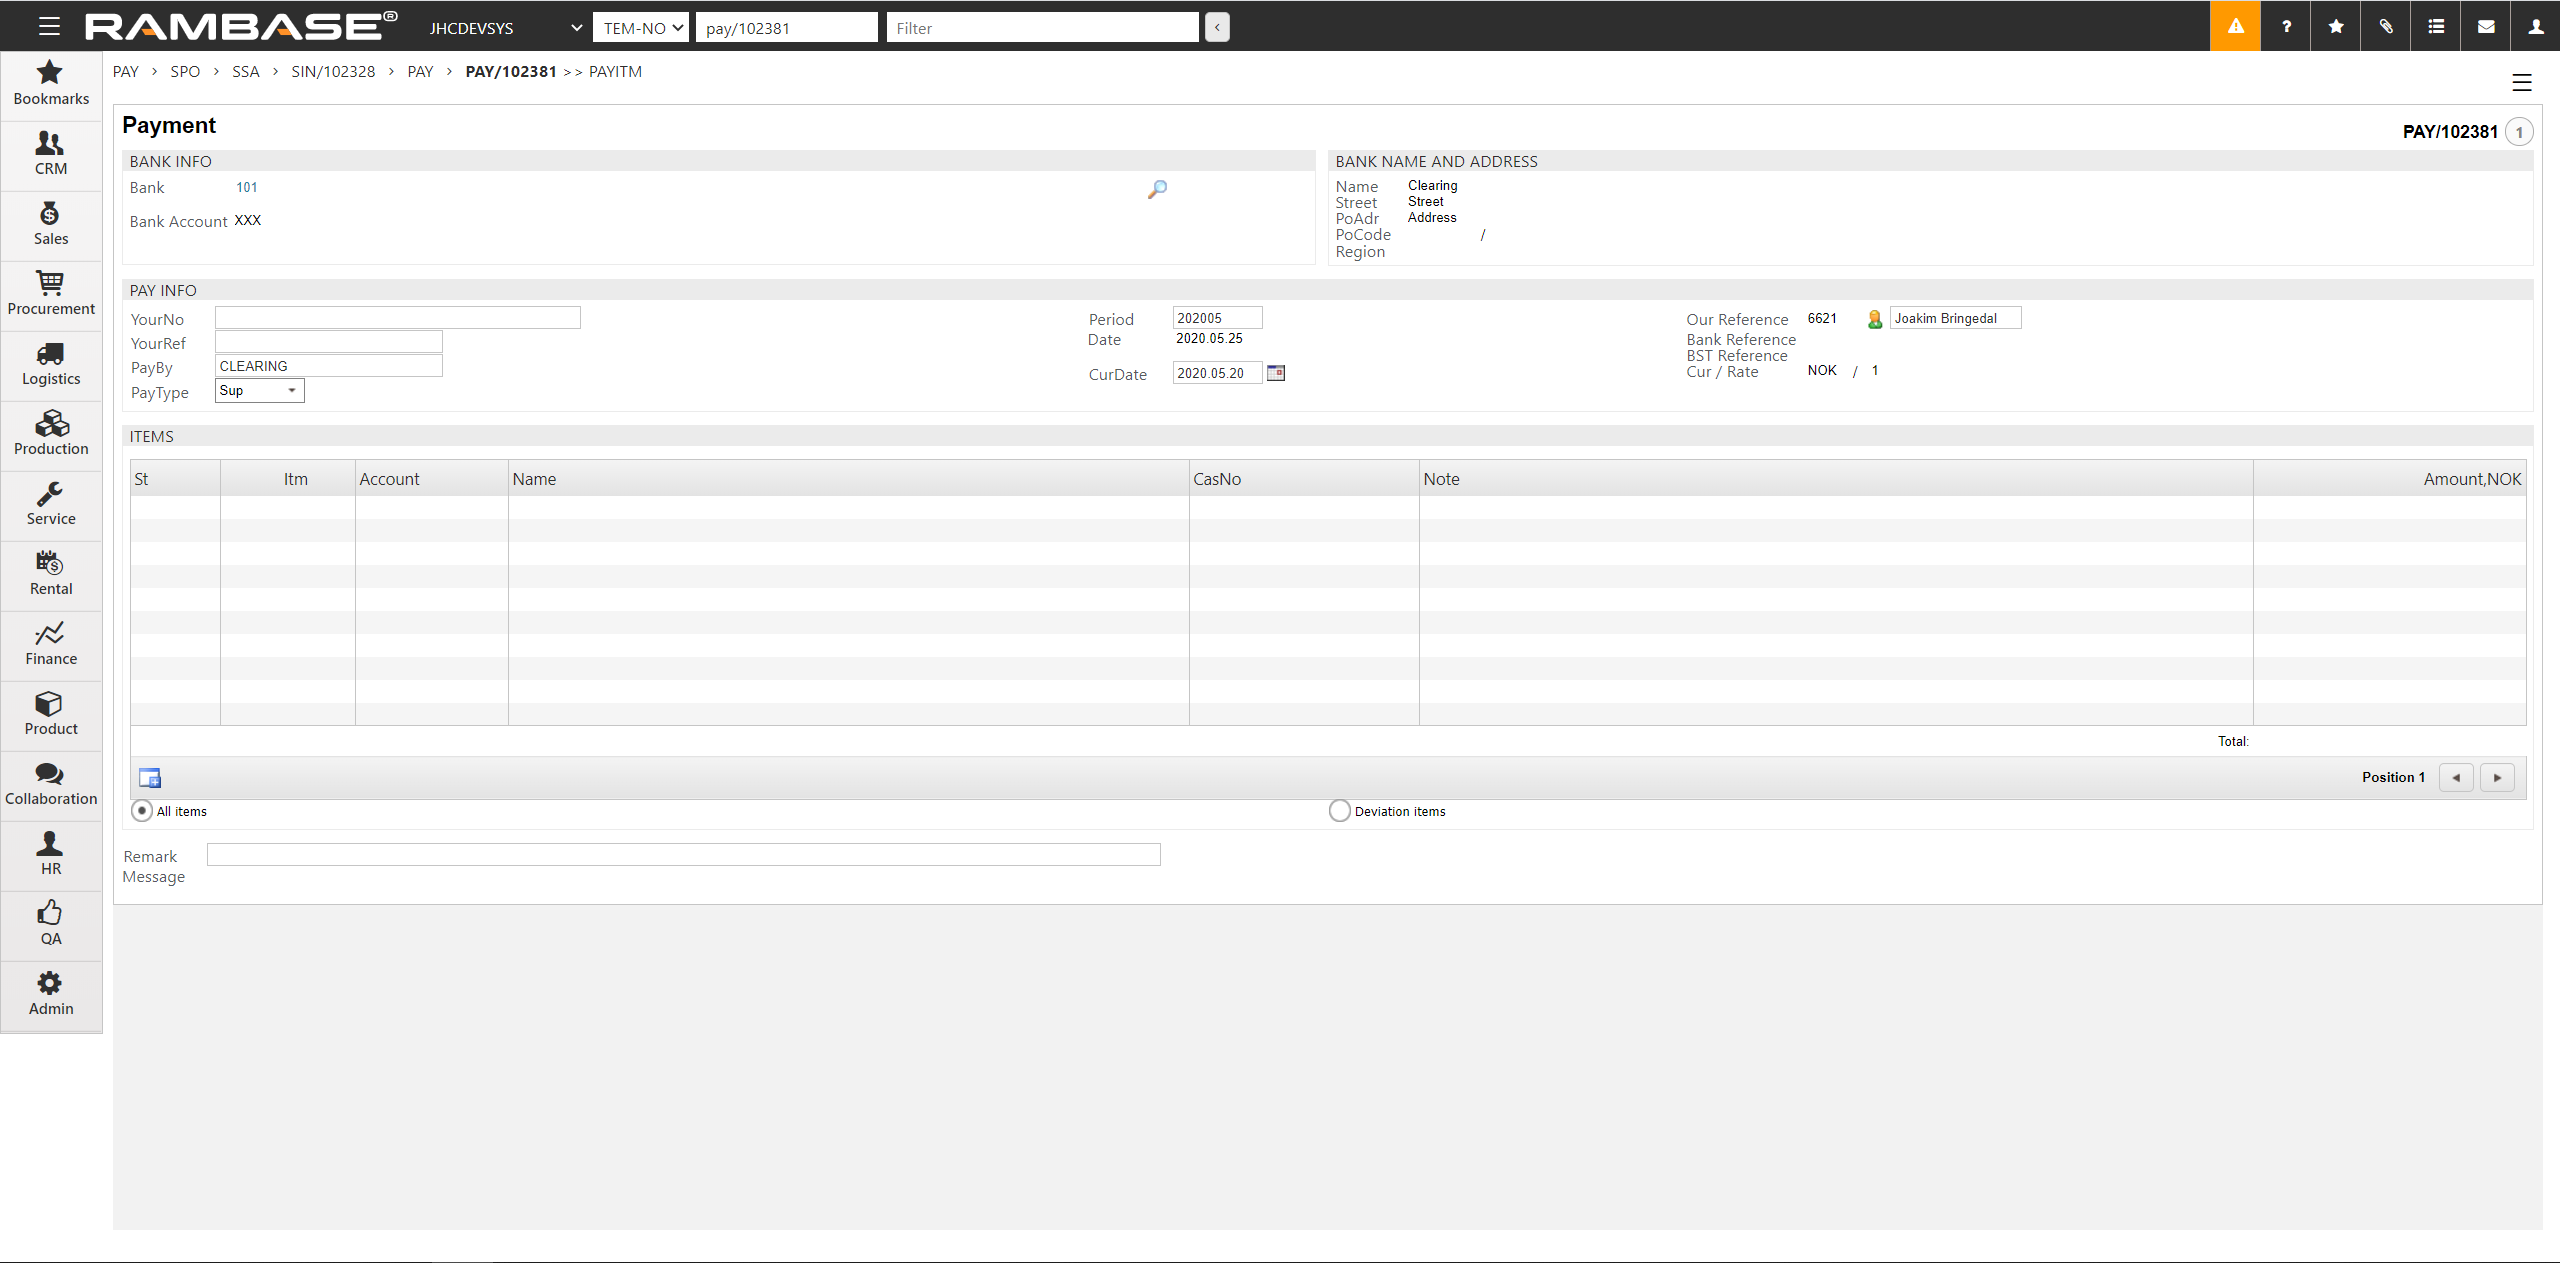
Select period in the Period field.
Select the currency date in the CurDate field.
Select Sup in the PayType field.
Click the New PAY Item icon.
In the Pay Item window, select the SUP in the Account field.
Click on the InvoiceRef field and press ENTER.
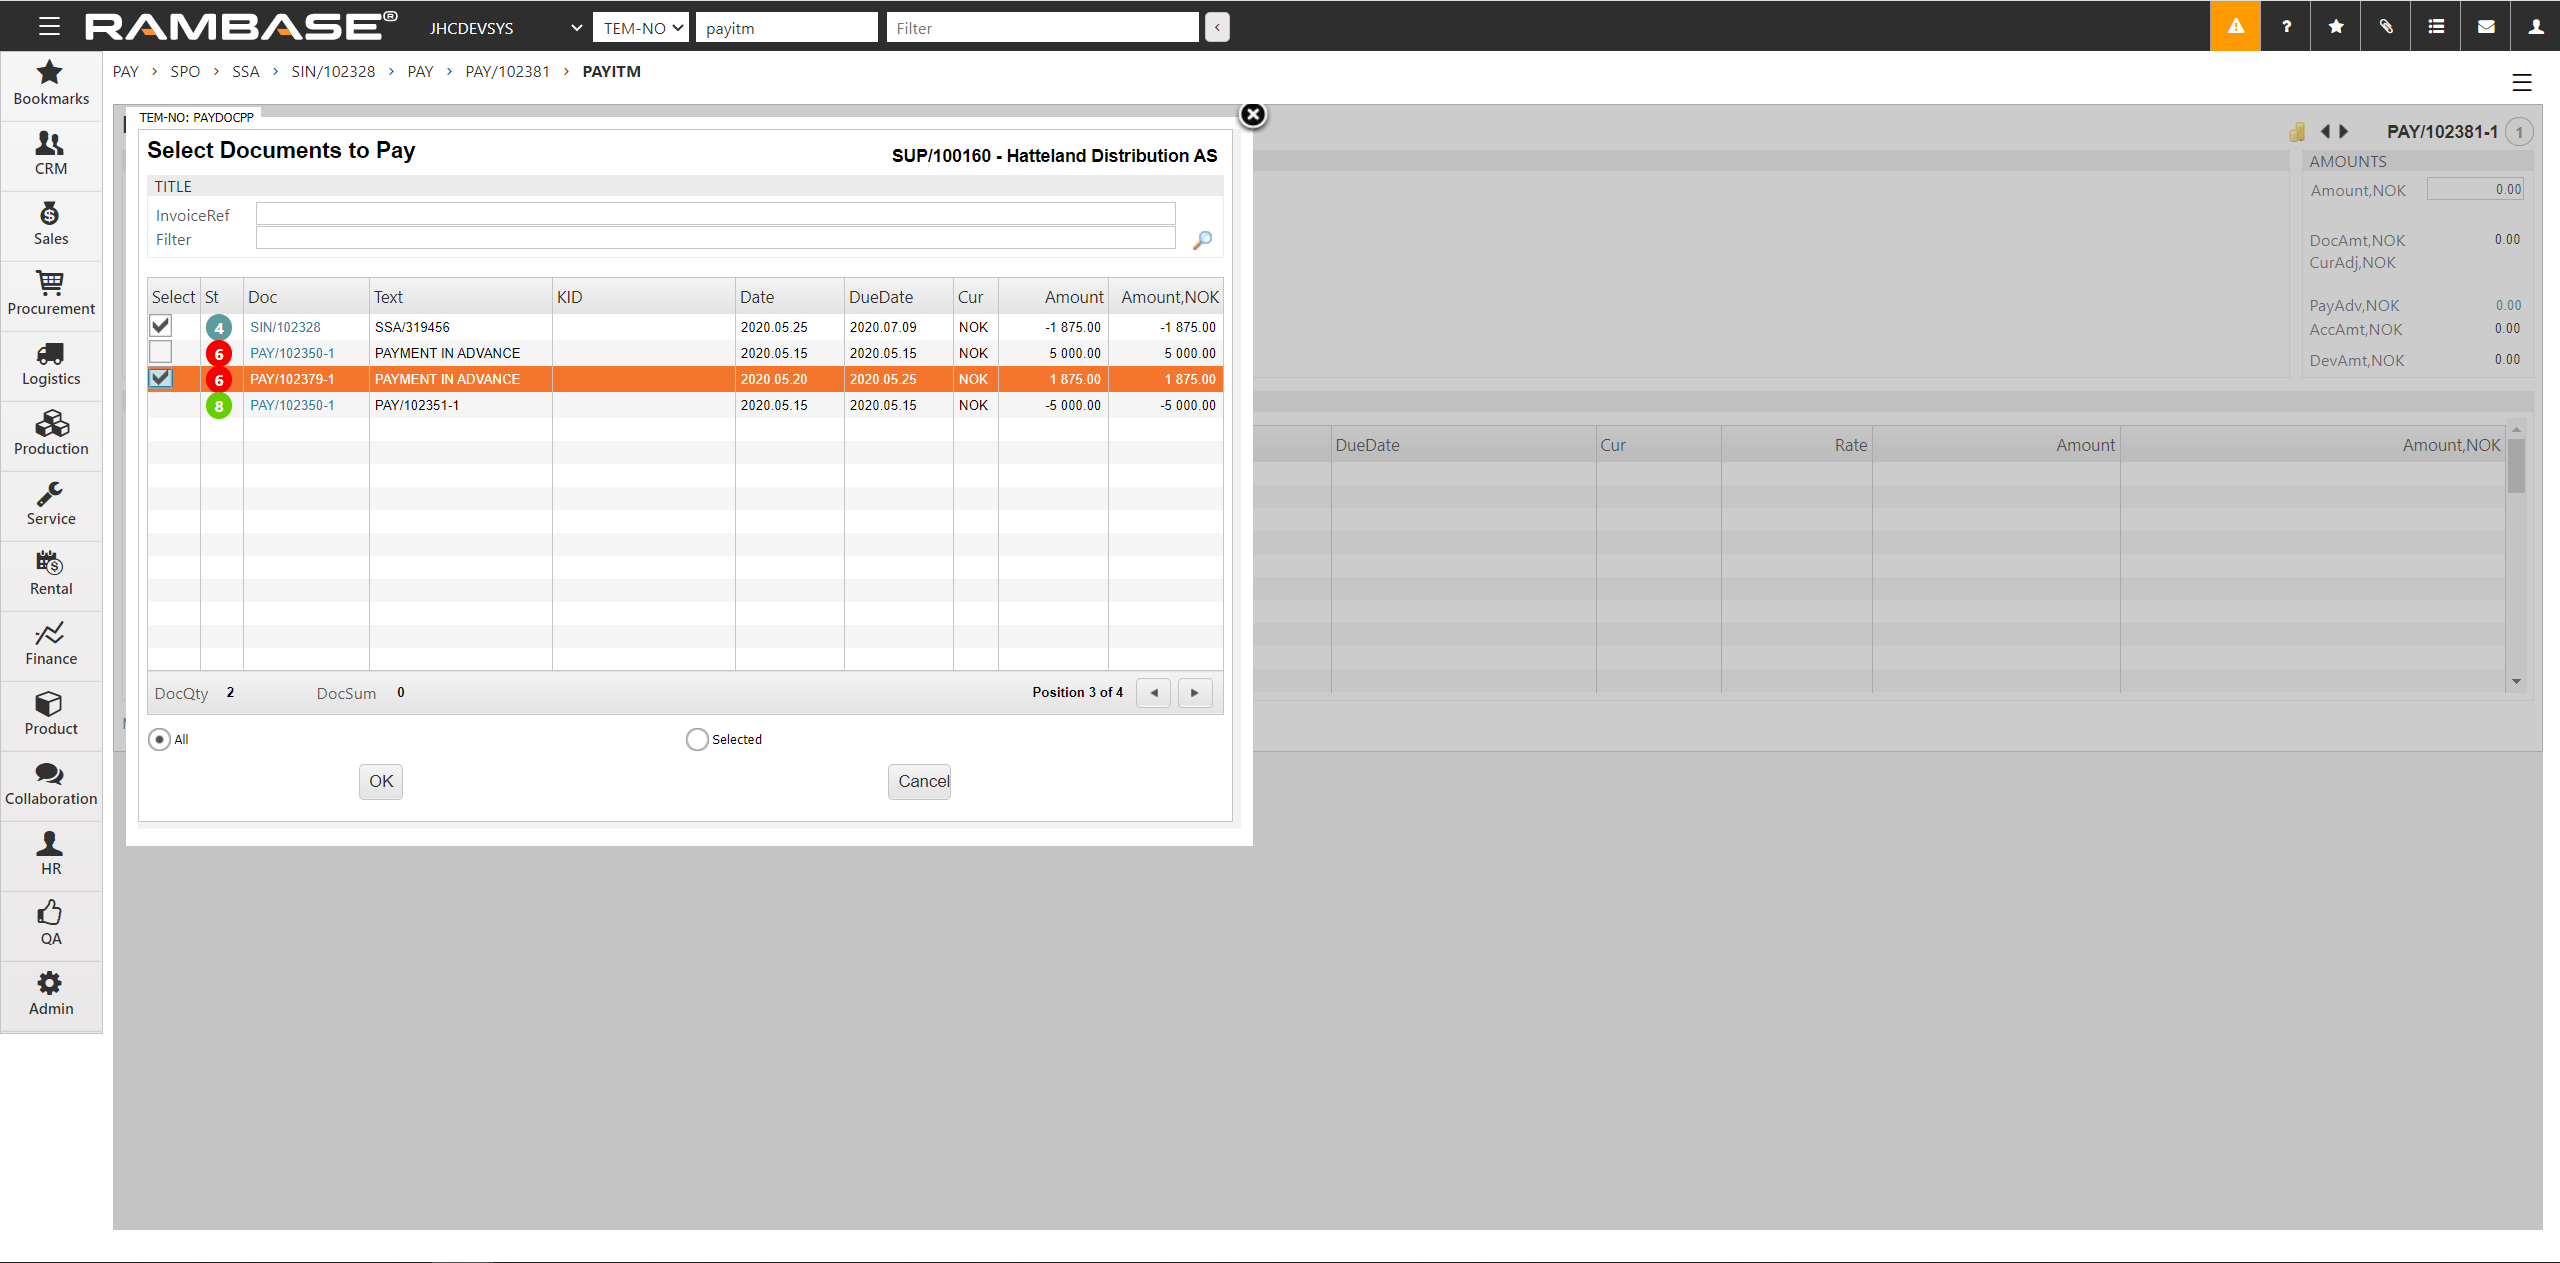
Select the SIN and PAY documents and click the OK button.
Press F12 to open the action menu and choose the Register Payment option to register the PAY.