Rambase Office Add-in - Microsoft Outlook
RamBase Office Add-in can be installed using this link: https://officeaddin.rambase.net/OfficeAddInWS/
When the Office Add-in Outlook plugin has been installed, you will see an icon called Archive Mail at the top. Click it to open the application. This is available from both the outlook application header and directly from a specific email.
There are three different possibilities from the RamBase Add-in:
The user can import the email and link it to a customer/supplier account. There you can also link email and attachments to RamBase documents.
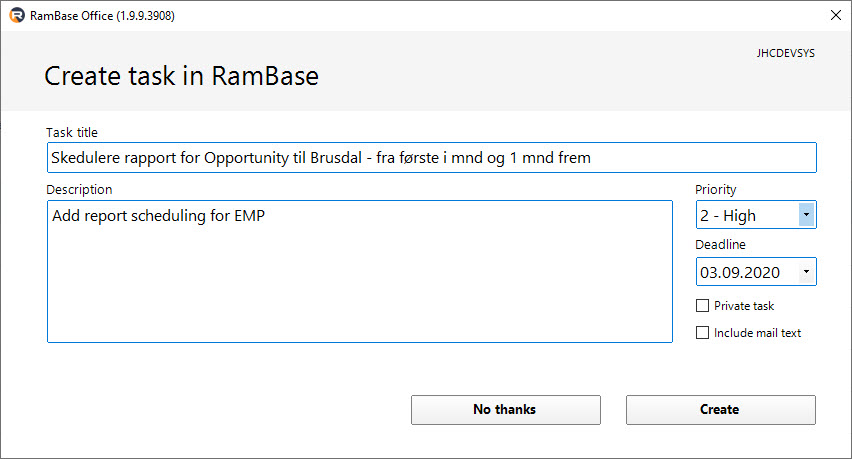
The user can create a Task in RamBase based on the email and information in the email, the email itself will be added as an attachment on the task.
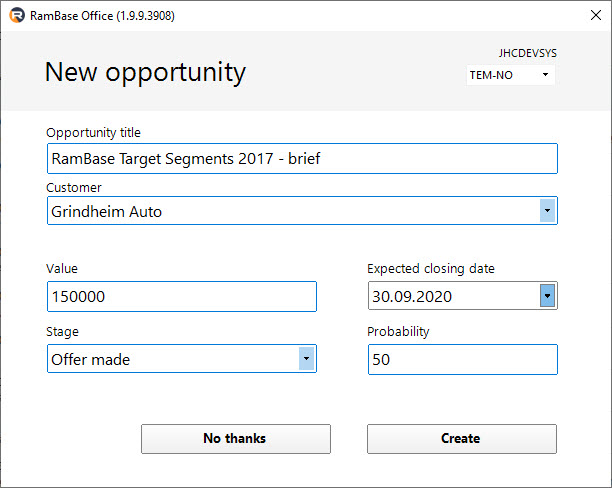
The user can create an Opportunity based on the email. Opportunity can be created with or without a contact-customer relation. If customer relation is added, it will show in the email/correspondence list on the customer as well.

Choose which system you want to use in the drop-down menu and click the Login button.
Choose which database you would like to use in the top right corner. Your standard company will be selected as default.

Choose which customer/supplier you want to link the email to and use the checkbox under Mail. The program will register the correspondence on a customer or supplier depending on what the contact is connected to in RamBase. If the email address is not connected to a contact in RamBase it is possible to create a new contact from the office plugin. This will also control which types of RamBase Documents will be visible.
You will see the customer/supplier added below. RamBase will check to see if there are duplicates of the files in the system, which is indicated by the yellow icon for existing versions in the system and blue for non-existing.
To link a RamBase Document to the mail, use the dropdown menu on the right side of the screen, and select the document type you want to link. Select the specific document in the list, and click the chain icon to link the document to the mail. You can see the expected action stated in the blue information box. This linking works the same for the attachments. The links are added below the mail/attachments.
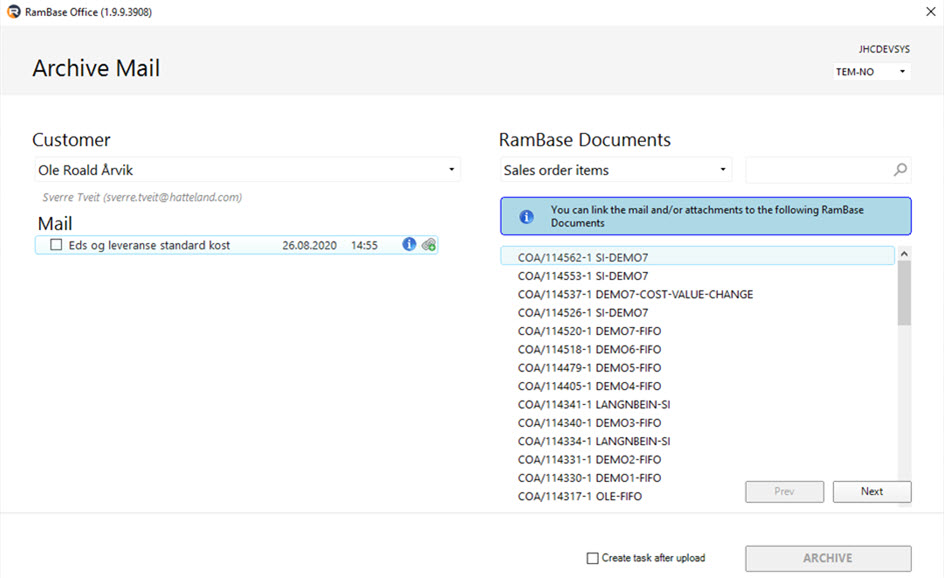
Click the ARCHIVE button when finished. If the Create task after upload is is checked, a task for this will also be created.
The mail and links will be available in RamBase in the Emails folder on the Customer (CUS). The links will also be available in the selected documents.
To create a Task from an email, use the Task button/choice. Task is created in your default company, meaning that attachment will be displayed for this company. Task title is collected from email subject, but can be edited. Further, the user can add description to the task and choose Priority and Deadline. If it is a private task, use the checkbox for this and if the user wants to add the email text to the task there is a checkbox for this as well. The task will then be created in RamBase and assigned to you. More information and details can be added in the Task application in RamBase.
If the user wants to create an opportunity, chose the Opportunity button/choice. Opportunity will be added to your default company, but if you have access to more than one company you can choose this in the dropdown. Opportunity title is collected from email subject, and if the sender of the email is an existing contact with a customer relation this will be added to the opportunity. Further you can add Value, Expected closing date, Stage and Probability. After creation the Opportunity can be edited and followed up as normal in RamBase. Email will be attached and if a customer is selected there will also be a record in the Emails folder on the specific customer.